In AAHC, you can create predefined search queries and use them as a template while scheduling a report if you have the Super Admin role.
You can create a scheduler for a particular care provider and its units. You can specify the reporting period, the start date, and the frequency of the report generation for the scheduler. You can also generate an ad hoc report.
You can add multiple queries to a search query.
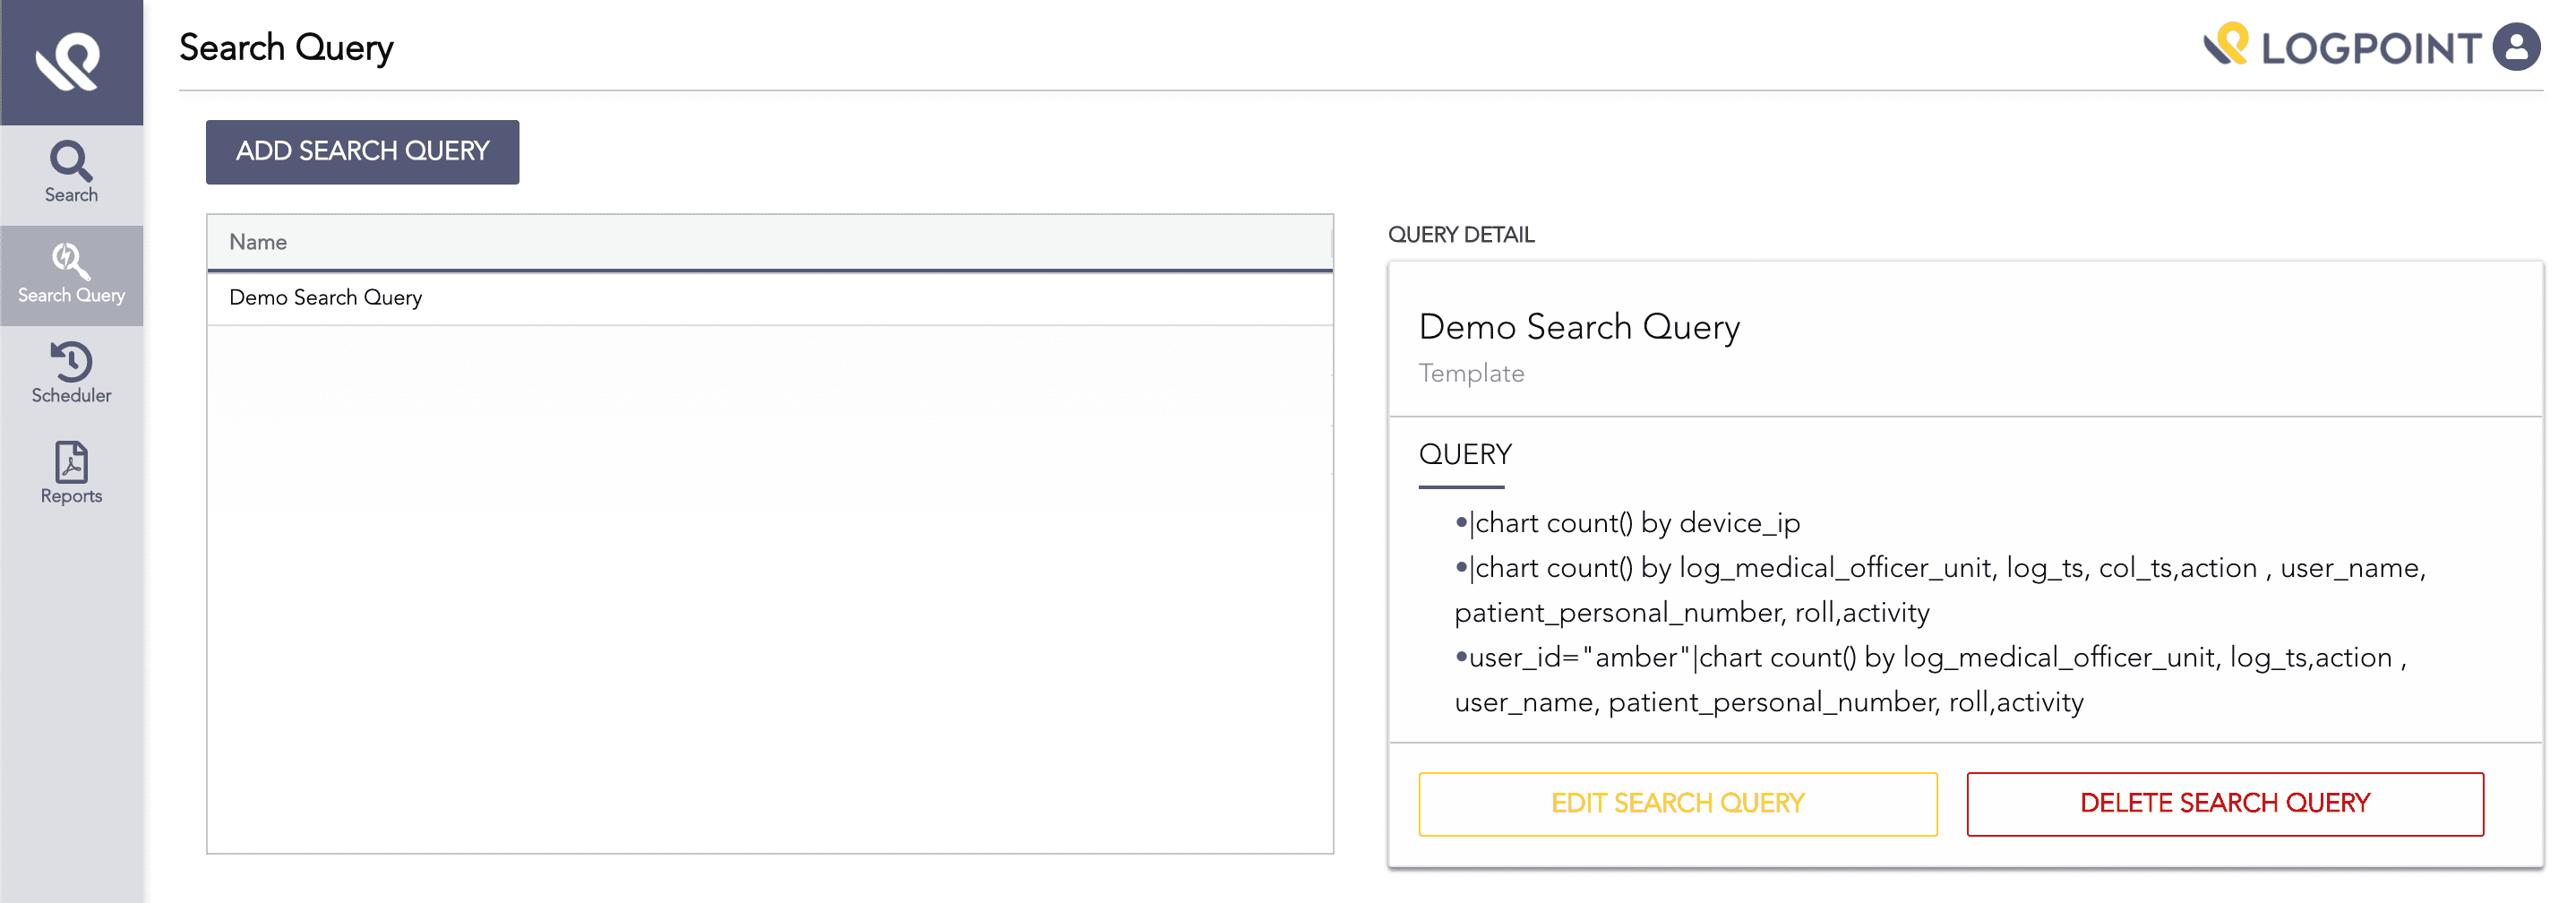
Select Search Query from the left navigation bar.
Click Add Search Query.
Add Search Query
On the Create Search Query panel:
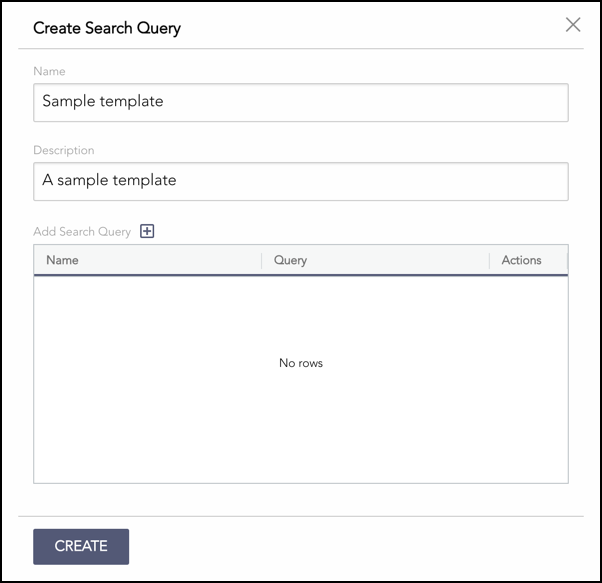
Create Search Query
3.1. Enter a Name for the search query.
3.2. Enter the Description of the search query.
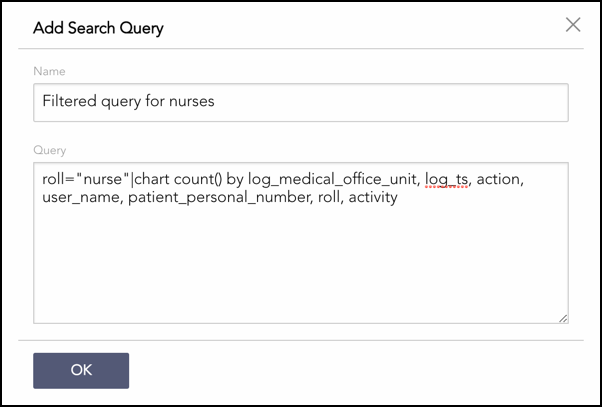
3.3. Next to Add Search Query, click the + symbol.
3.4. In Add Search Query, enter a valid search query to pull the relevant logs from Logpoint.
Adding a Query
3.5. Click OK.
The Create Search Query panel lists all the added queries. You can delete the queries from the table by clicking the Delete icon from the Actions column.
Note
You can add multiple queries in a search query.

Added Queries
Click Create.
You can edit a search query by clicking Edit Search Query and delete a search query by clicking Delete Search Query.
You can reorder the created search queries by dragging and dropping it. Select Scheduler from the side menu.
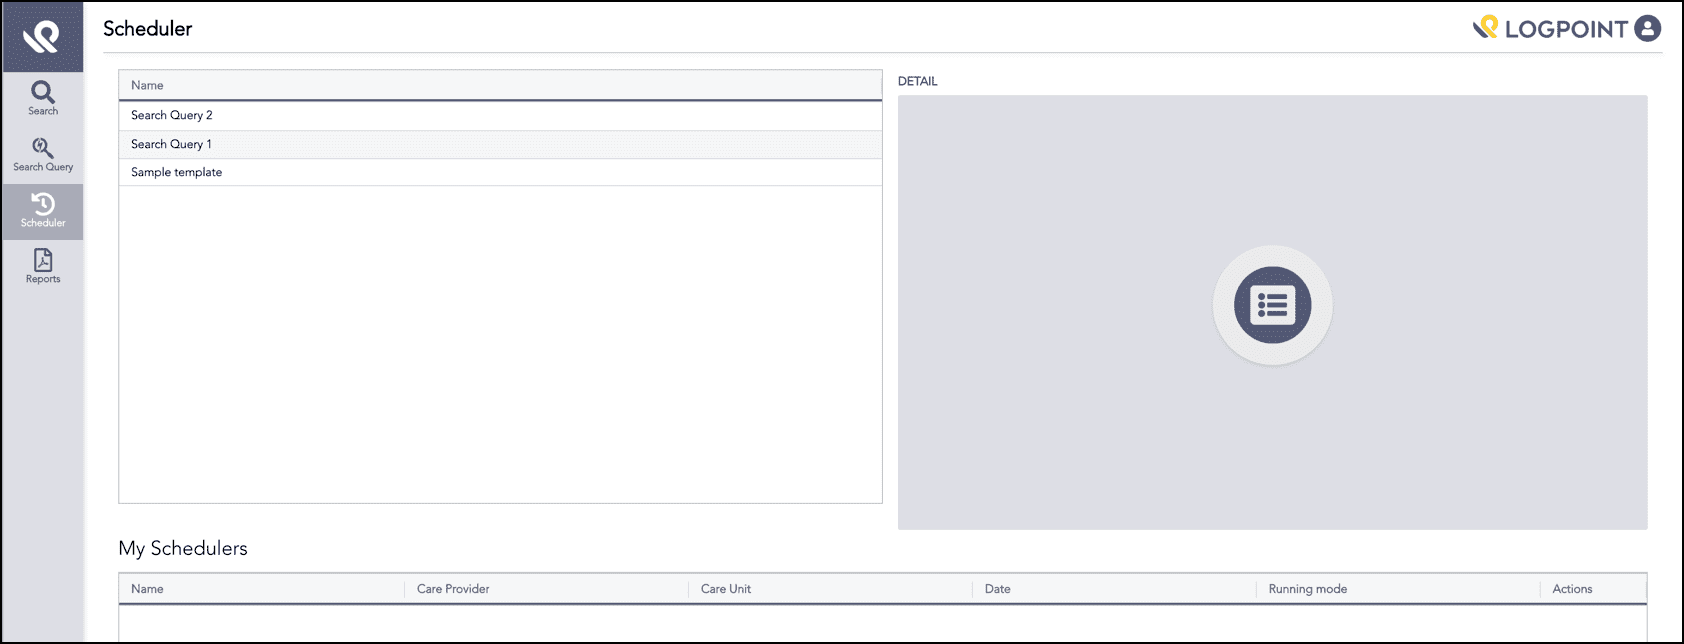
Select Scheduler from the navigation bar.
Scheduler
In Name, select which predefined search query you want to schedule. Detail displays the selected query.
Click Schedule on the Details section.
In Create Schedule:
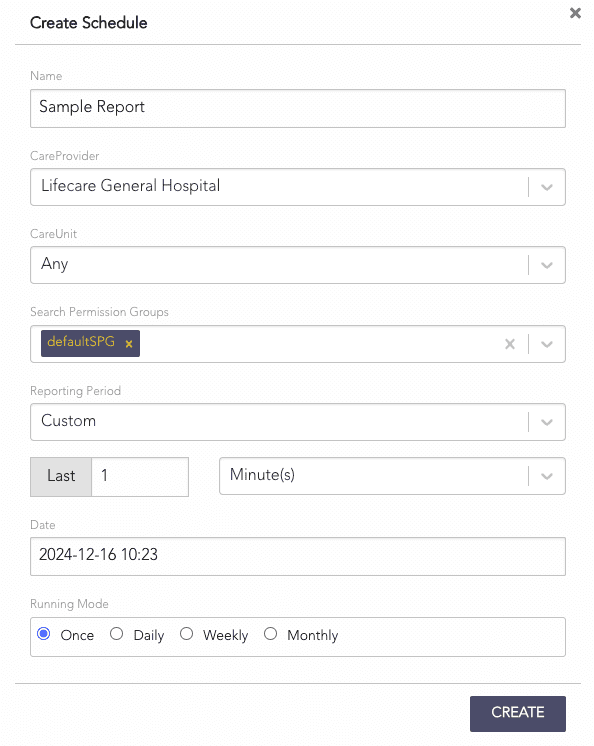
Create Schedule
4.1. Enter a Name for the scheduler.
4.2. Select the CareProvider and its CareUnit for which you want to create the report.
4.3. Select a Search Permission Group for the scheduler.
4.4. Enter the Reporting Period for the report.
4.5. Enter the starting Date to generate the report.
4.6. Select the Running Mode. You can select the corresponding running mode to generate the report once, daily, weekly, or monthly.
4.7. Click Create.
The My Schedulers table lists all the created schedulers. You can either edit or delete the schedulers from the Actions column of the table. You can also generate reports of the schedulers on an ad hoc basis.

Created Schedulers