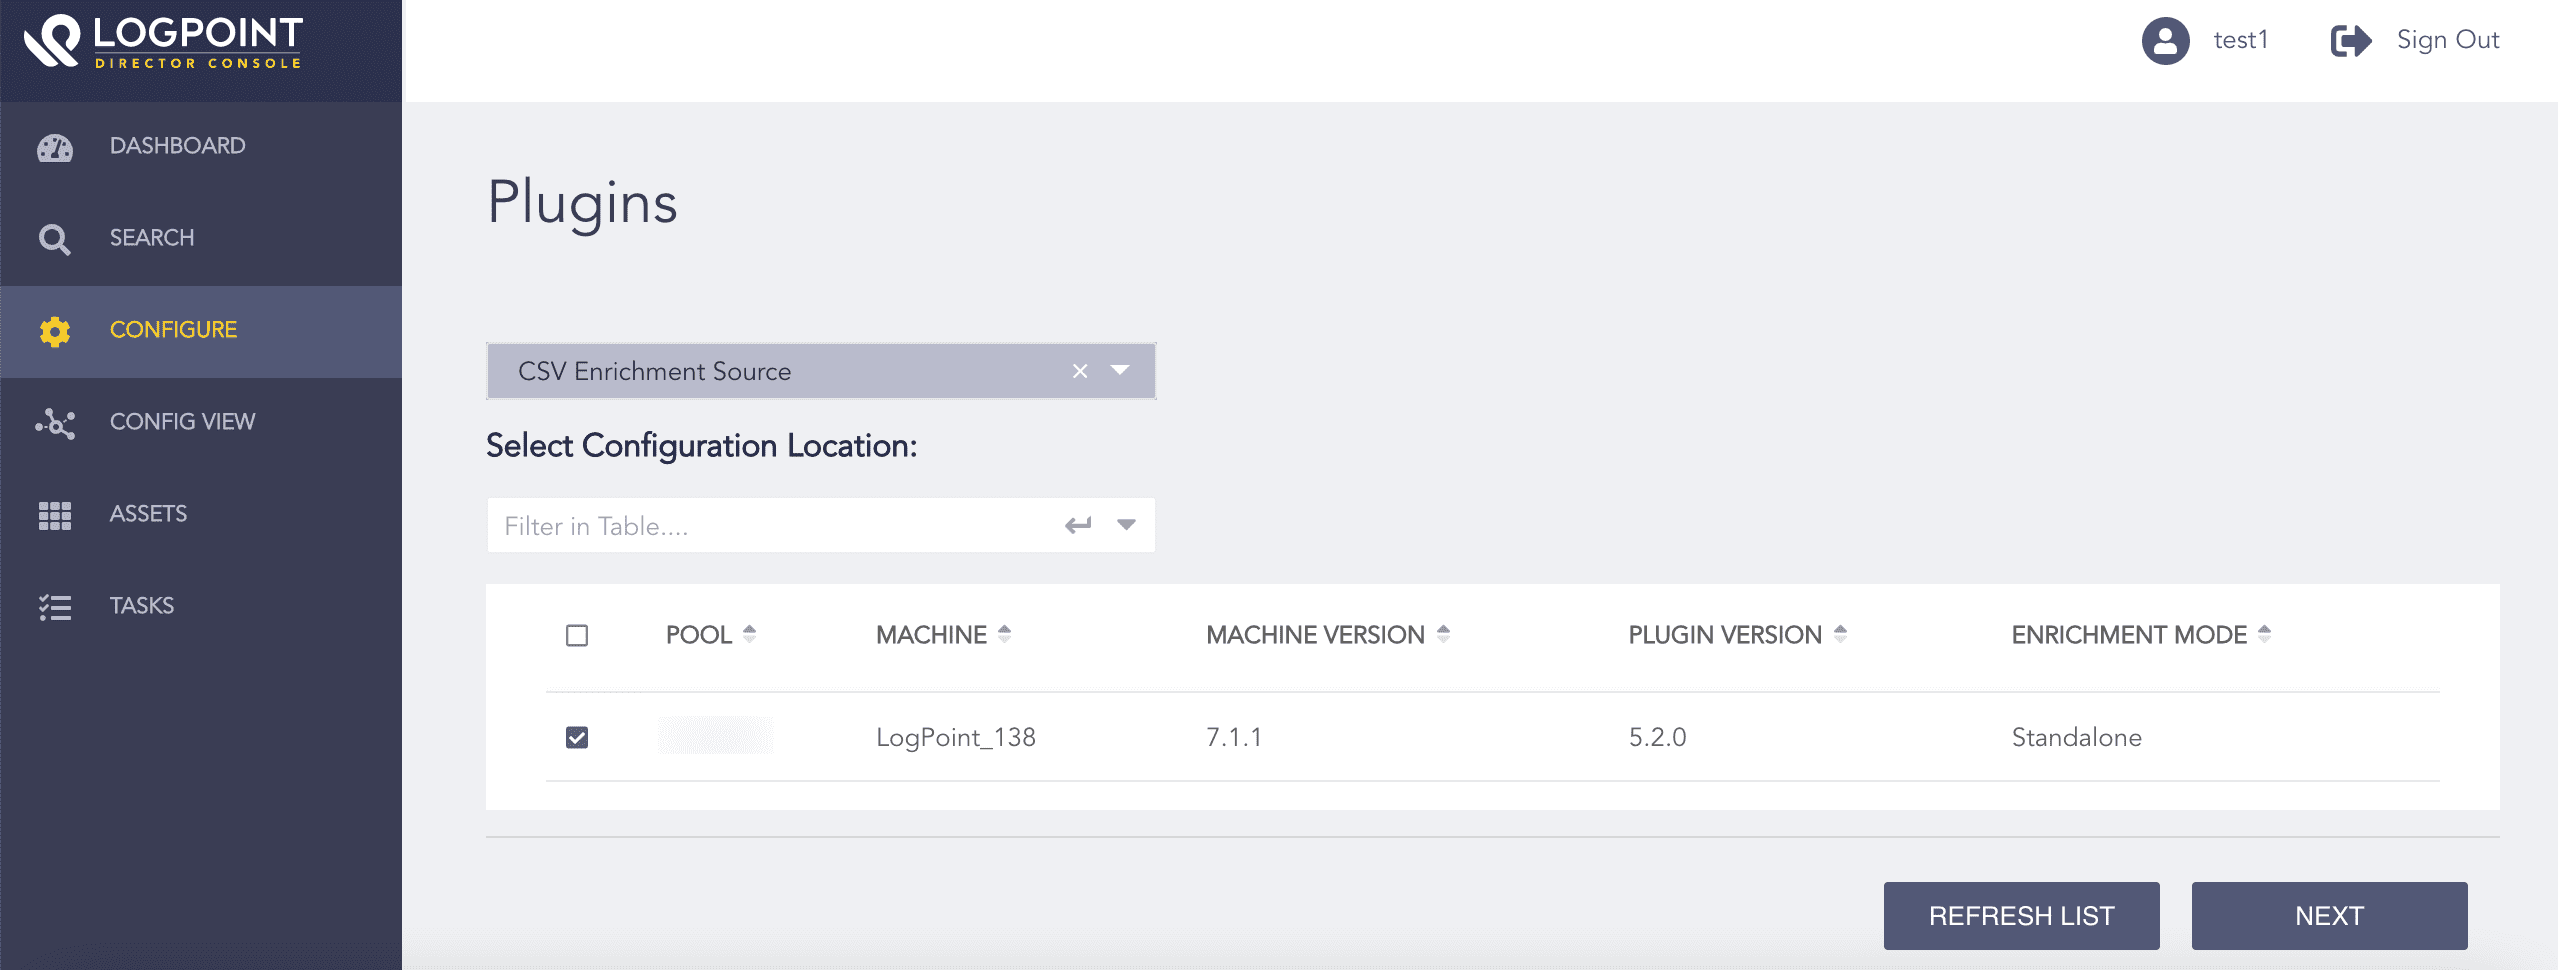
Click Configure from the navigation bar.
Click Plugins.
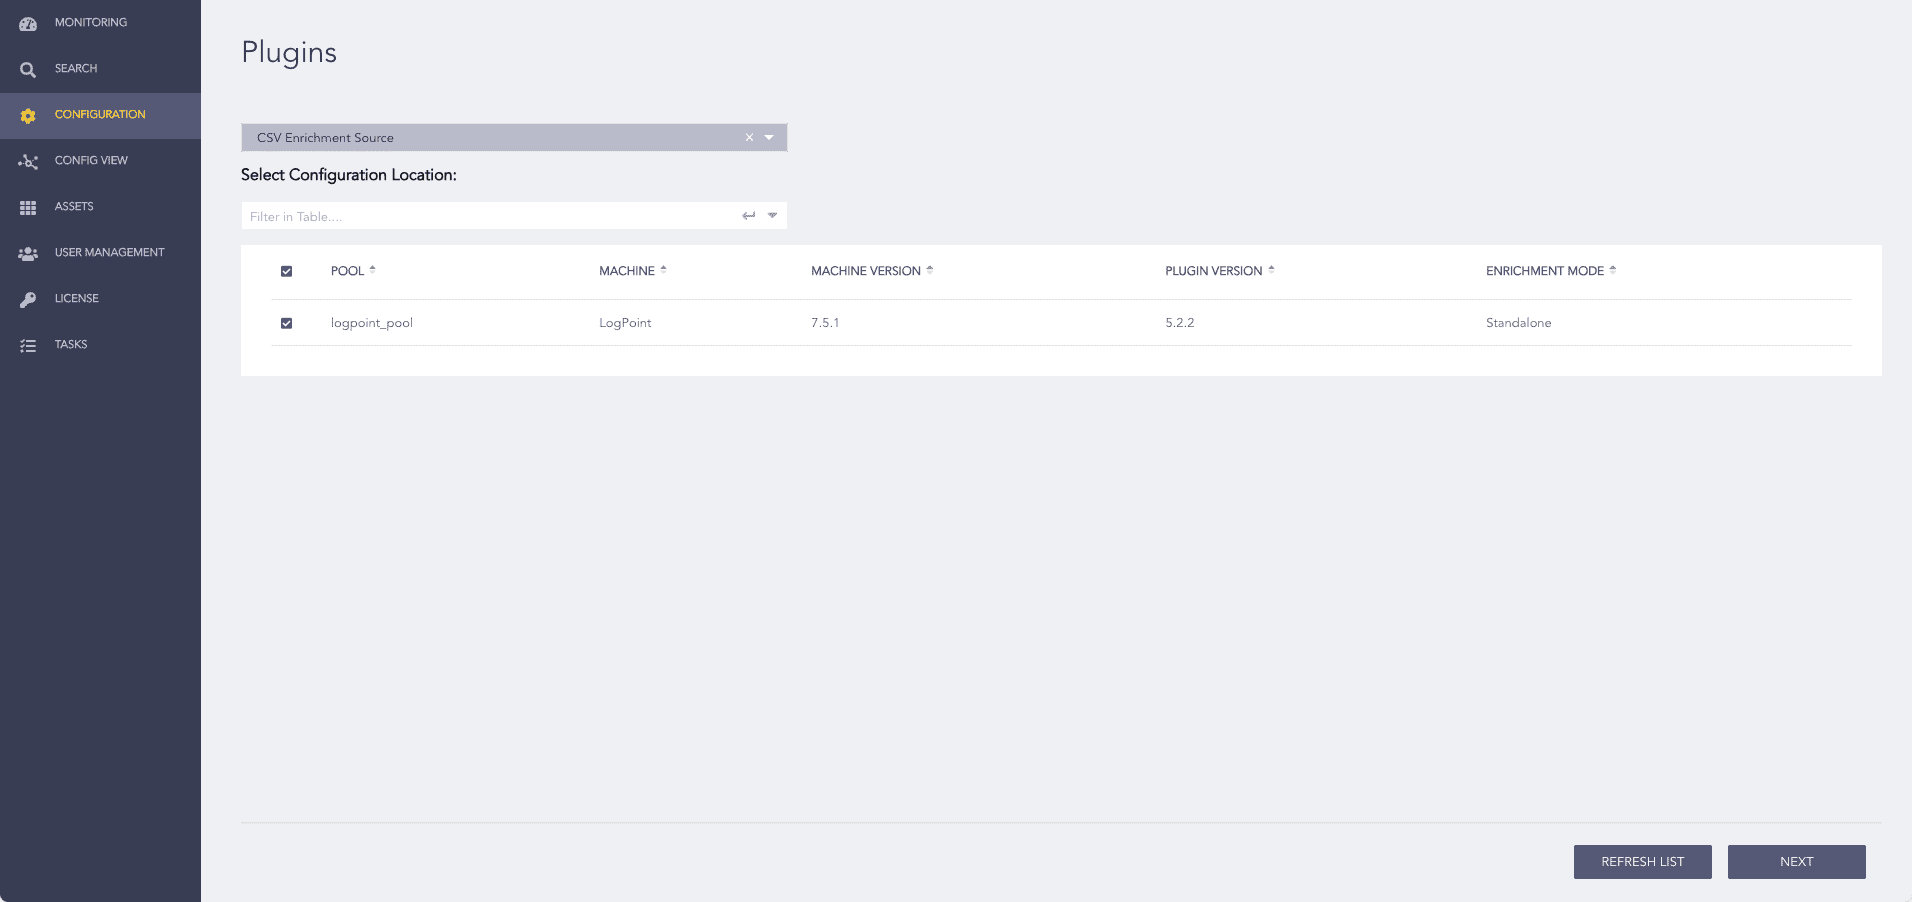
Select CSV Enrichment Source from the Select Plugin Type drop-down.
Select Logpoint machines to configure CSV enrichment source. You can select multiple machines from different pools.
Note
You cannot select a subscriber Logpoint to configure CSV enrichment source. The subscriber Logpoint receives these configurations from its provider Logpoint.
You can use the Refresh List to sync data between Logpoint and Director Fabric.
Click Next.
Selecting Logpoint Machines
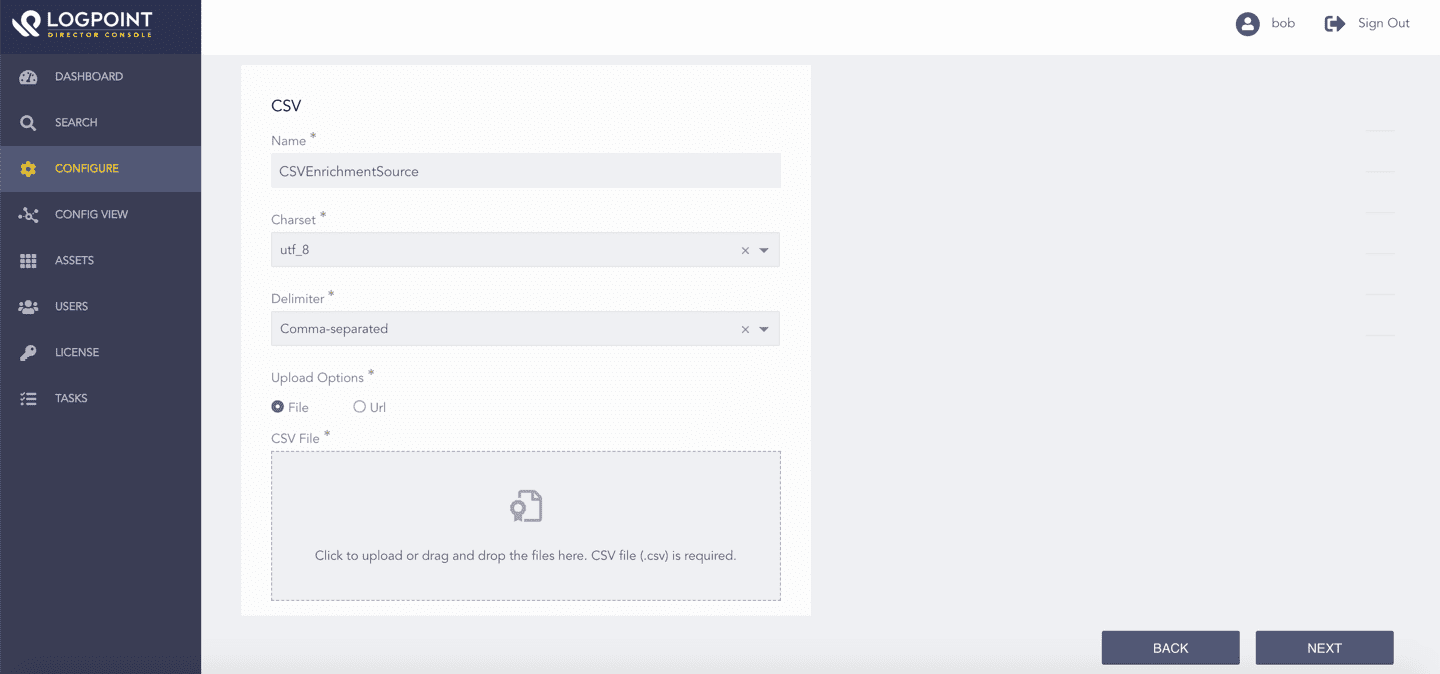
Enter a Name.
Select the Charset.
Select a Delimiter. It is the separator used in the CSV file.
Select Upload Options.
9.1. Select File to provide a CSV file. Click the upload area to browse, or drag and drop the CSV file.
CSVEnrichmentSource - File Upload
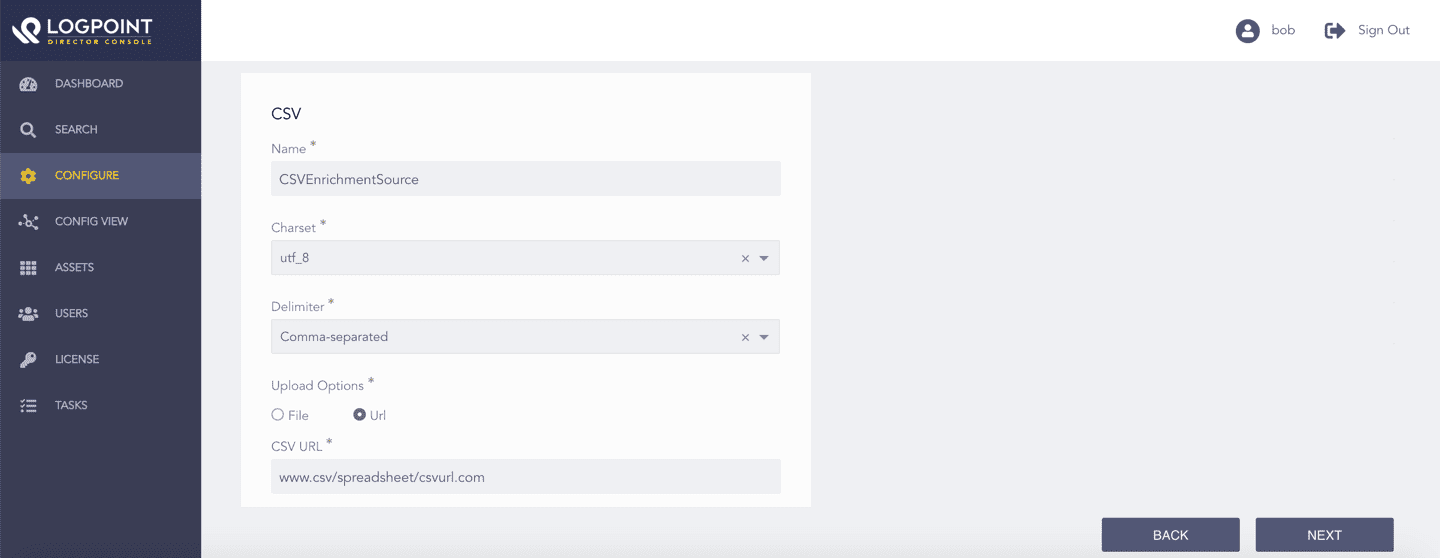
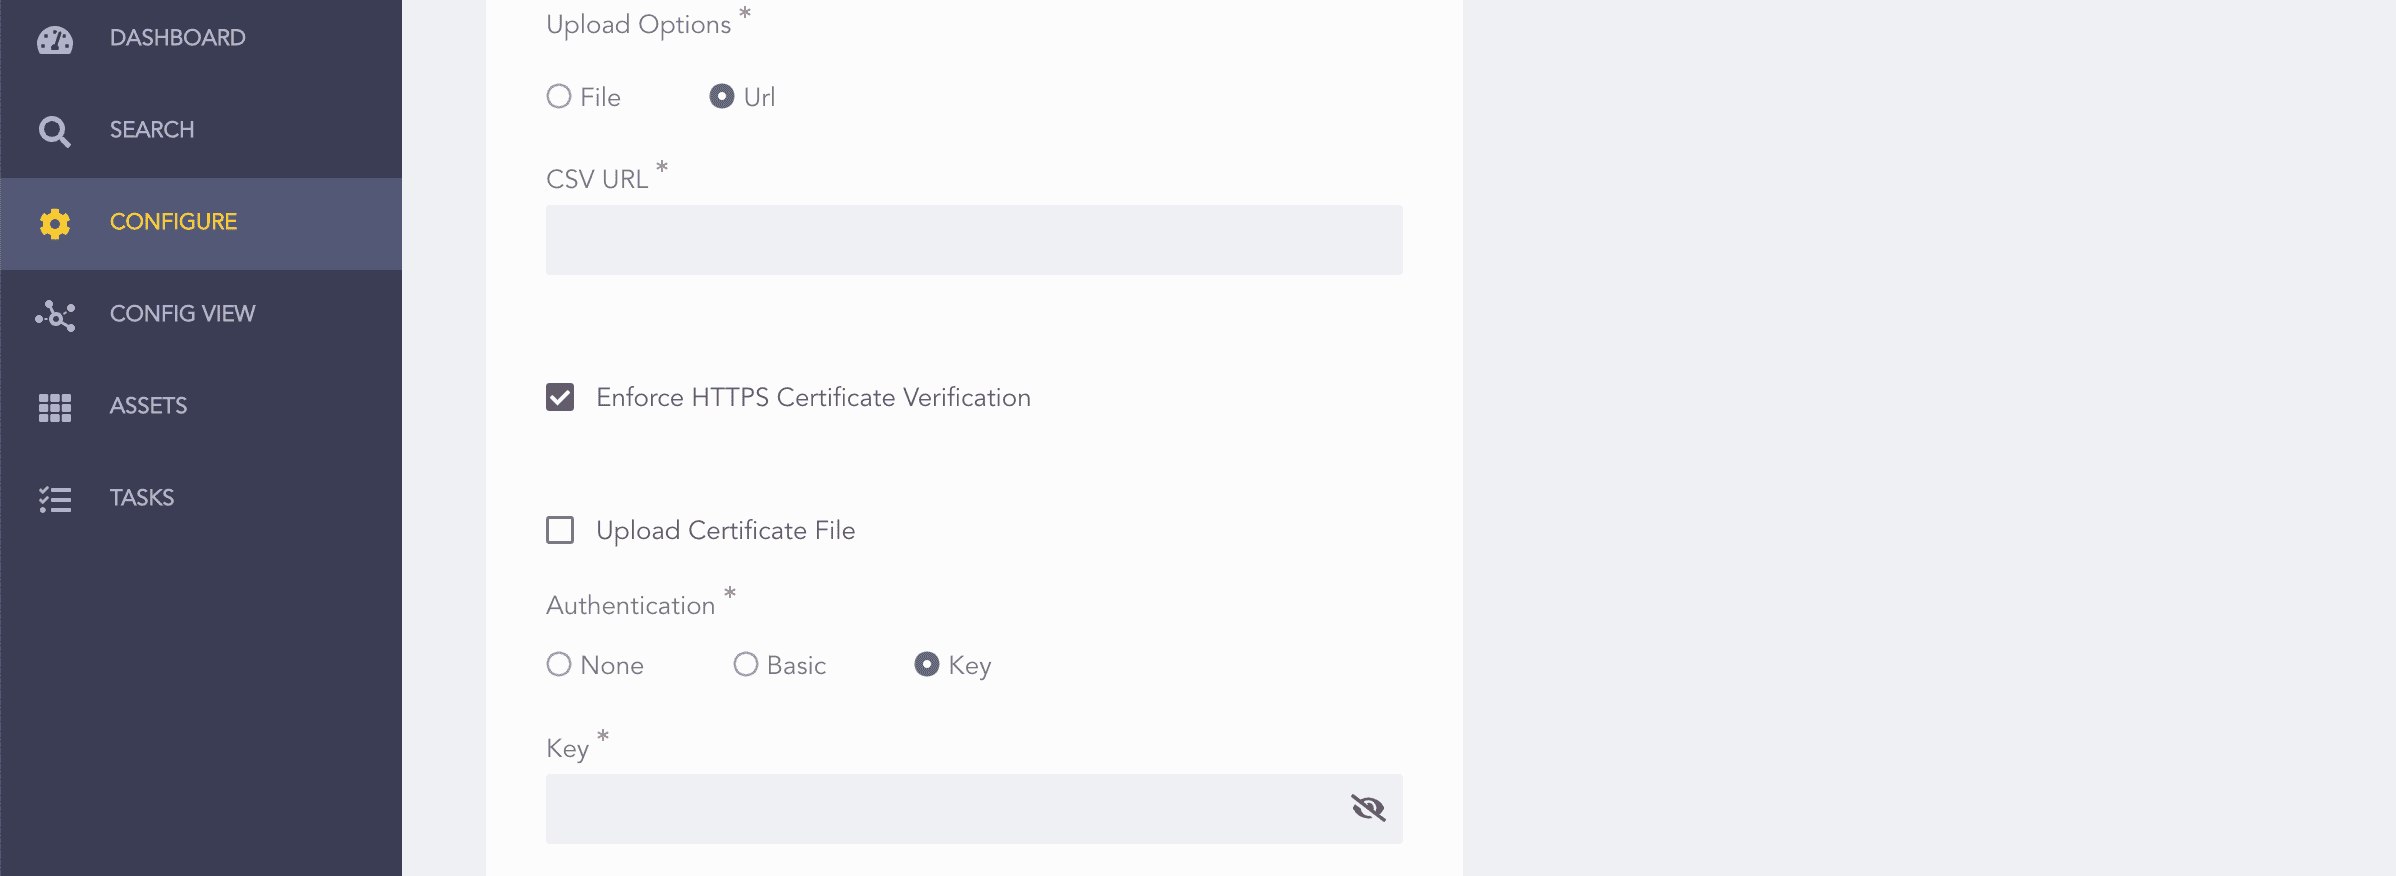
9.2. Select Url to upload a URL link to the CSV file.
9.2.1. Enter the CSV URL that links to the CSV File.
CSVEnrichmentSource - Fetch from URL
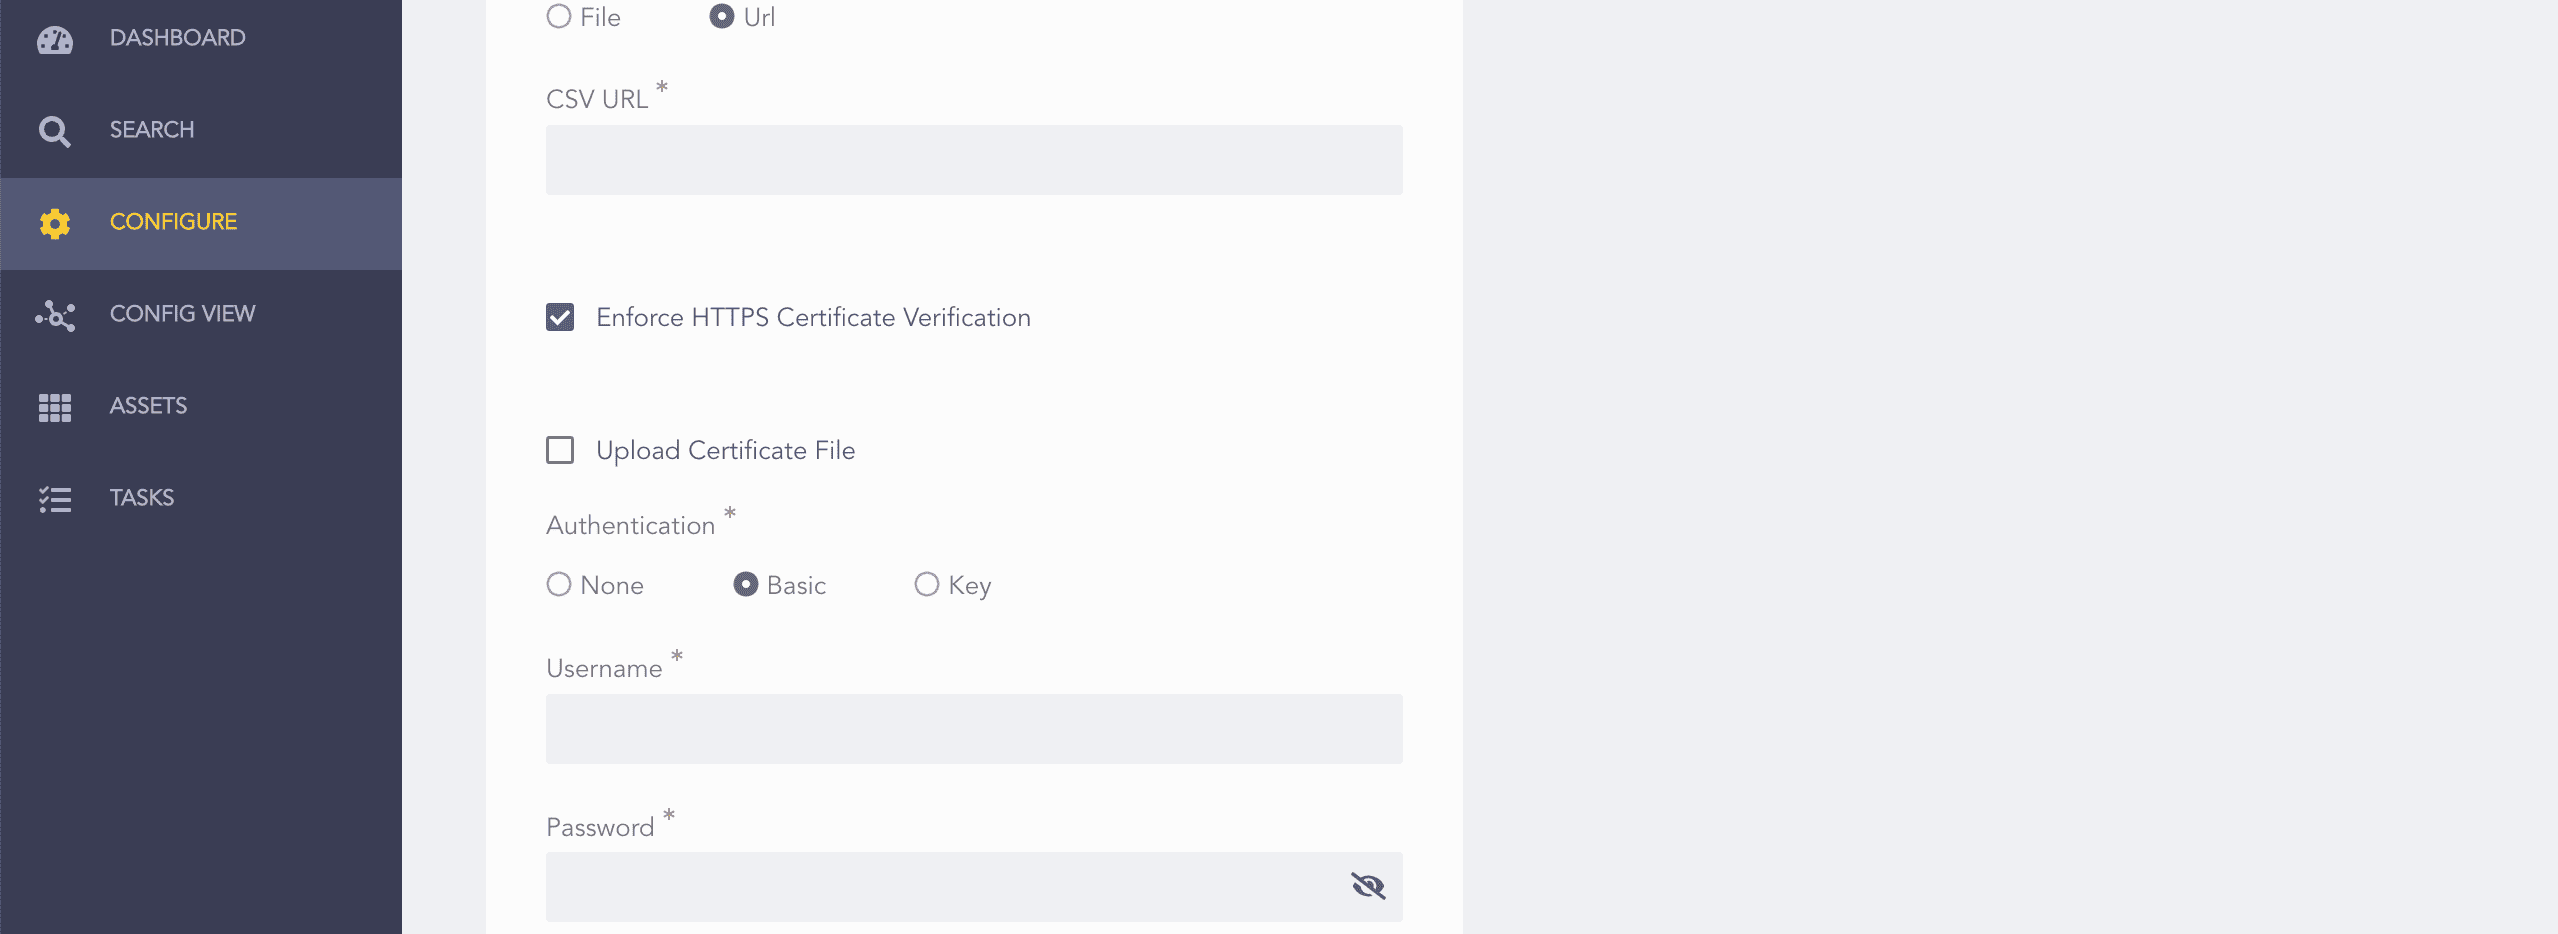
9.2.2. Select an Authentication method.
9.2.2.1. Select None if the provided CSV URL requires no authentication.
9.2.2.2. Select Basic if the provided CSV URL requires basic authentication. To access the URL, provide your Username and Password.
CSVEnrichmentSource - URL With Basic Authentication
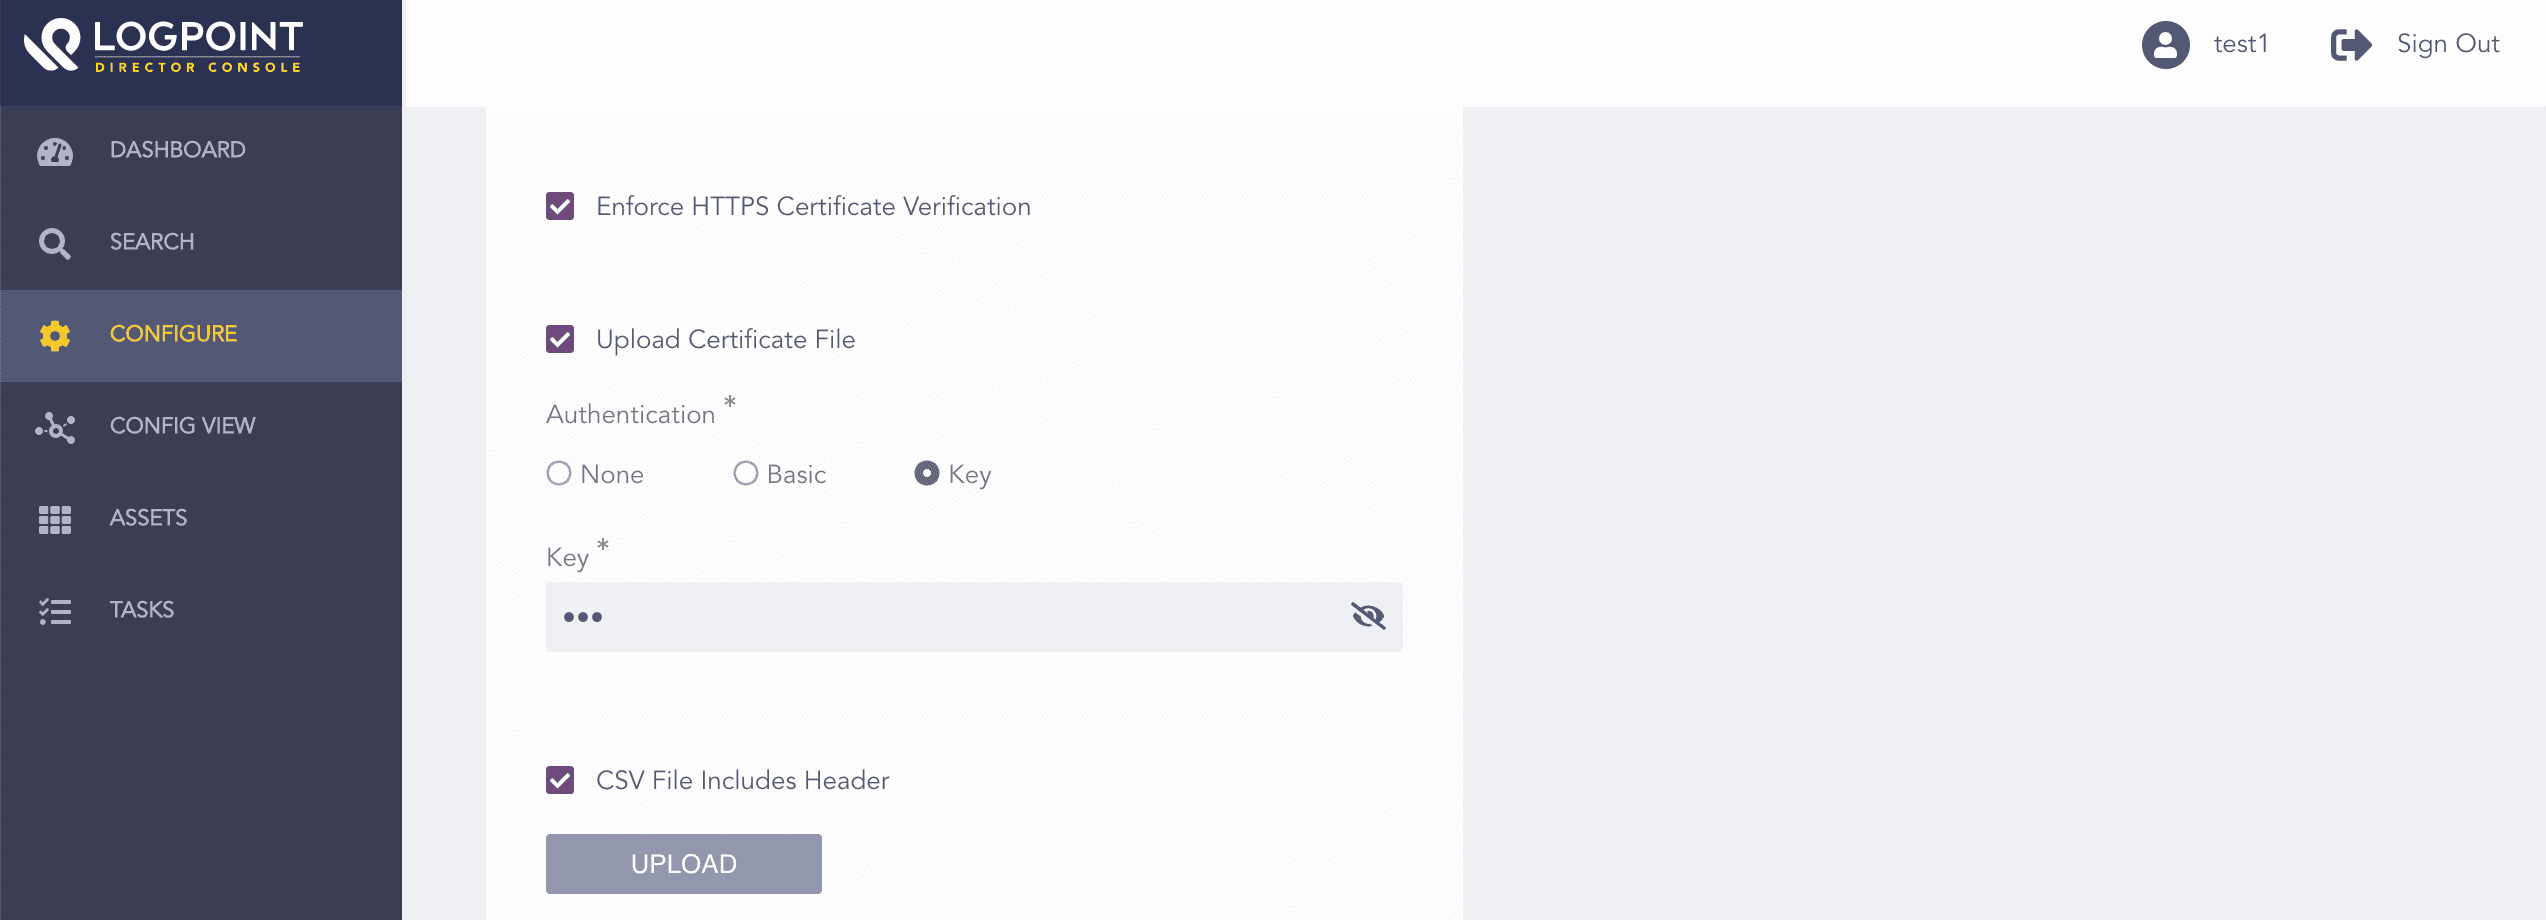
9.2.2.3. Select Key if the provided CSV URL requires key-based authentication. To access the CSV file, provide your API Key.
CSVEnrichmentSource - URL With Key Based Authentication
9.2.3. Select Enforce HTTPS Certificate Verification to ensure a secure connection.
9.2.4. Select Upload Certificate File if the provided CSV URL uses a self-signed SSL certificate.
9.2.5. Browse to the location of the certificate and click Open.
9.2.6. Click Upload.
CSVEnrichmentSource - Upload Certificate File
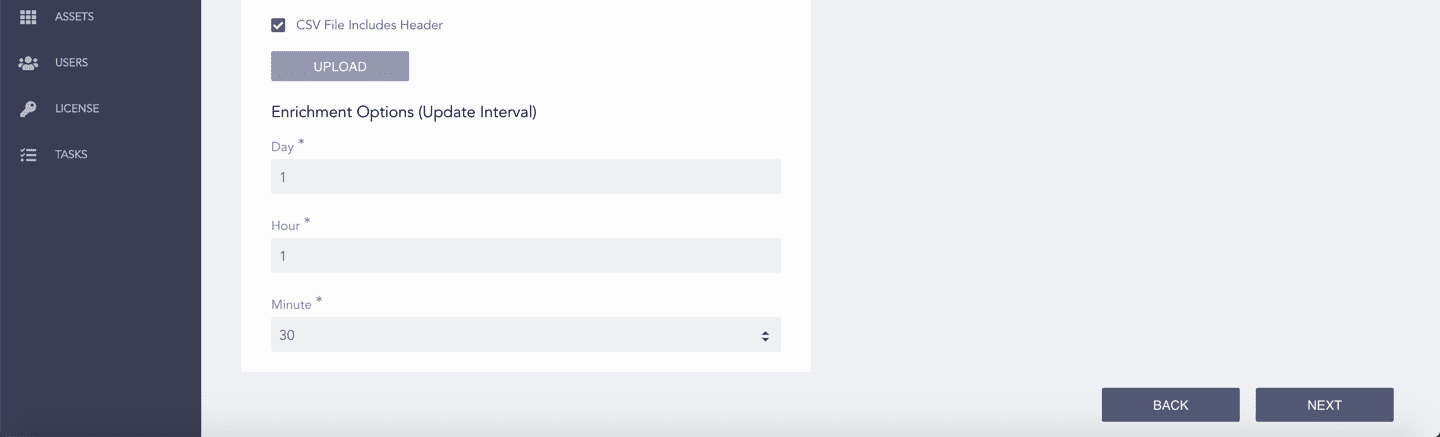
9.2.7. In Enrichment Options, enter the Update Interval in Day, Hour, and Minute.
CSVEnrichmentSource - Update Interval
Select CSV file includes header if the CSV file contains field headers. If the file does not contain field headers, CSV Enrichment Source assigns default header names as Column1, Column2, …, and ColumnN, where N is the number of columns in your CSV file.
Click Upload.
Click Next.
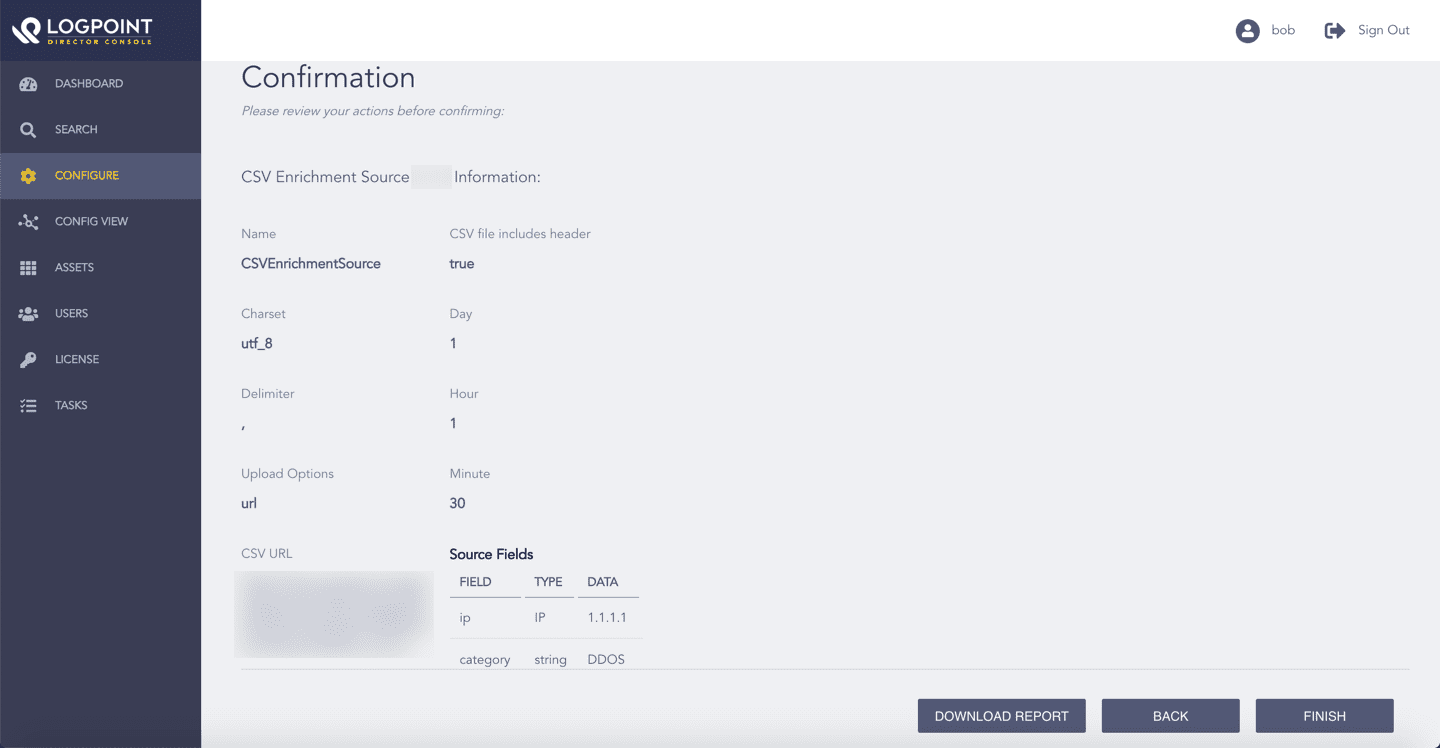
Review your changes. You can go Back to make any changes if necessary.
Click FINISH.
Click OK.
Confirming the Changes
Click CONFIGURATION from the left navigation bar.
Under Settings, click PLUGINS.
Select CSV Enrichment Source from the Select Plugin Type drop-down.
Select Logpoint to edit the CSV Enrichment Source configuration. Multiple Logpoint can be selected from different pools.
Click NEXT.
Selecting Logpoint
Select List. The page lists the configurations that are common to all the selected Logpoint.
Click the Edit icon under ACTION.
Make the changes and click EDIT.
The Action Status of the configuration changes to Changed. To undo changes, click the Undo icon from Action.
Click NEXT.
Review your changes. Click BACK to make more changes. Click DOWNLOAD REPORT to get a summary as a PDF.
Click FINISH and click OK to confirm.
You are redirected to TASKS, which displays the CSV Enrichment Source edit progress.