Go to All services >> Virtual machines.
Select the Fabric Server Virtual machine.
Note
If you deploy the Fabric Server virtual machines in cluster mode, you must enable IP Forwarding. To enable the IP Forwarding:
Select Virtual Machine.
Goto Networking >> Network Interface >> IP configuration
Enable IP forwarding.
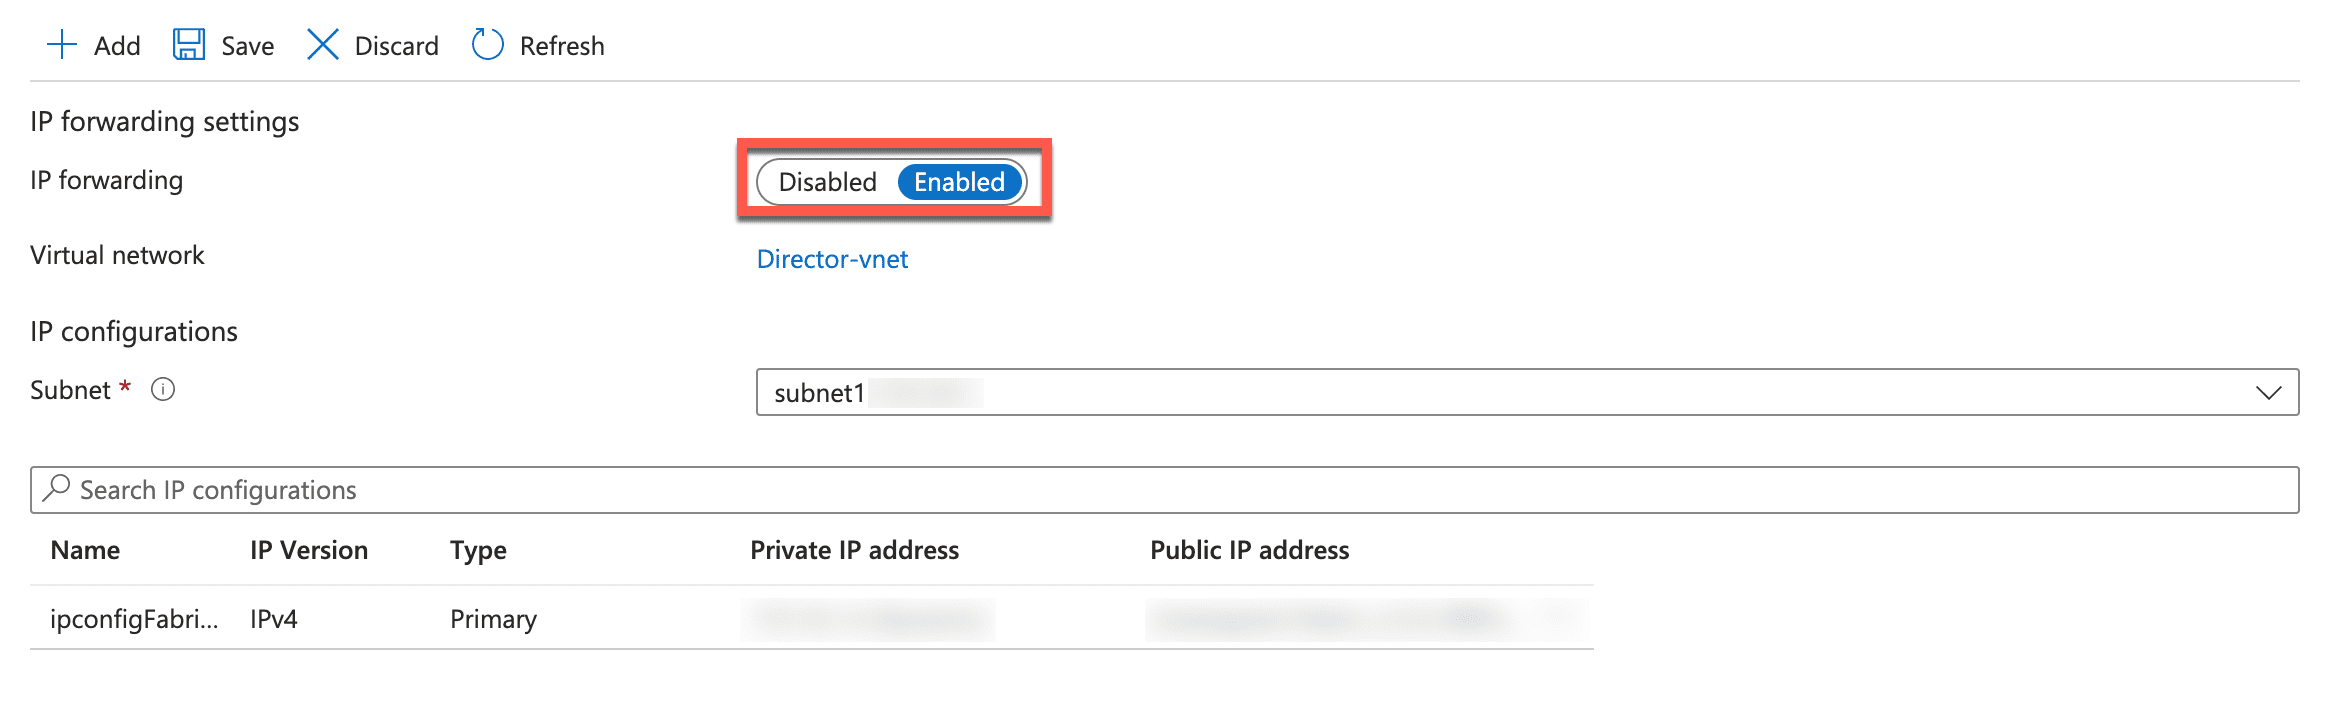
Enabling IP Forwarding
Select Networking from the sidebar.
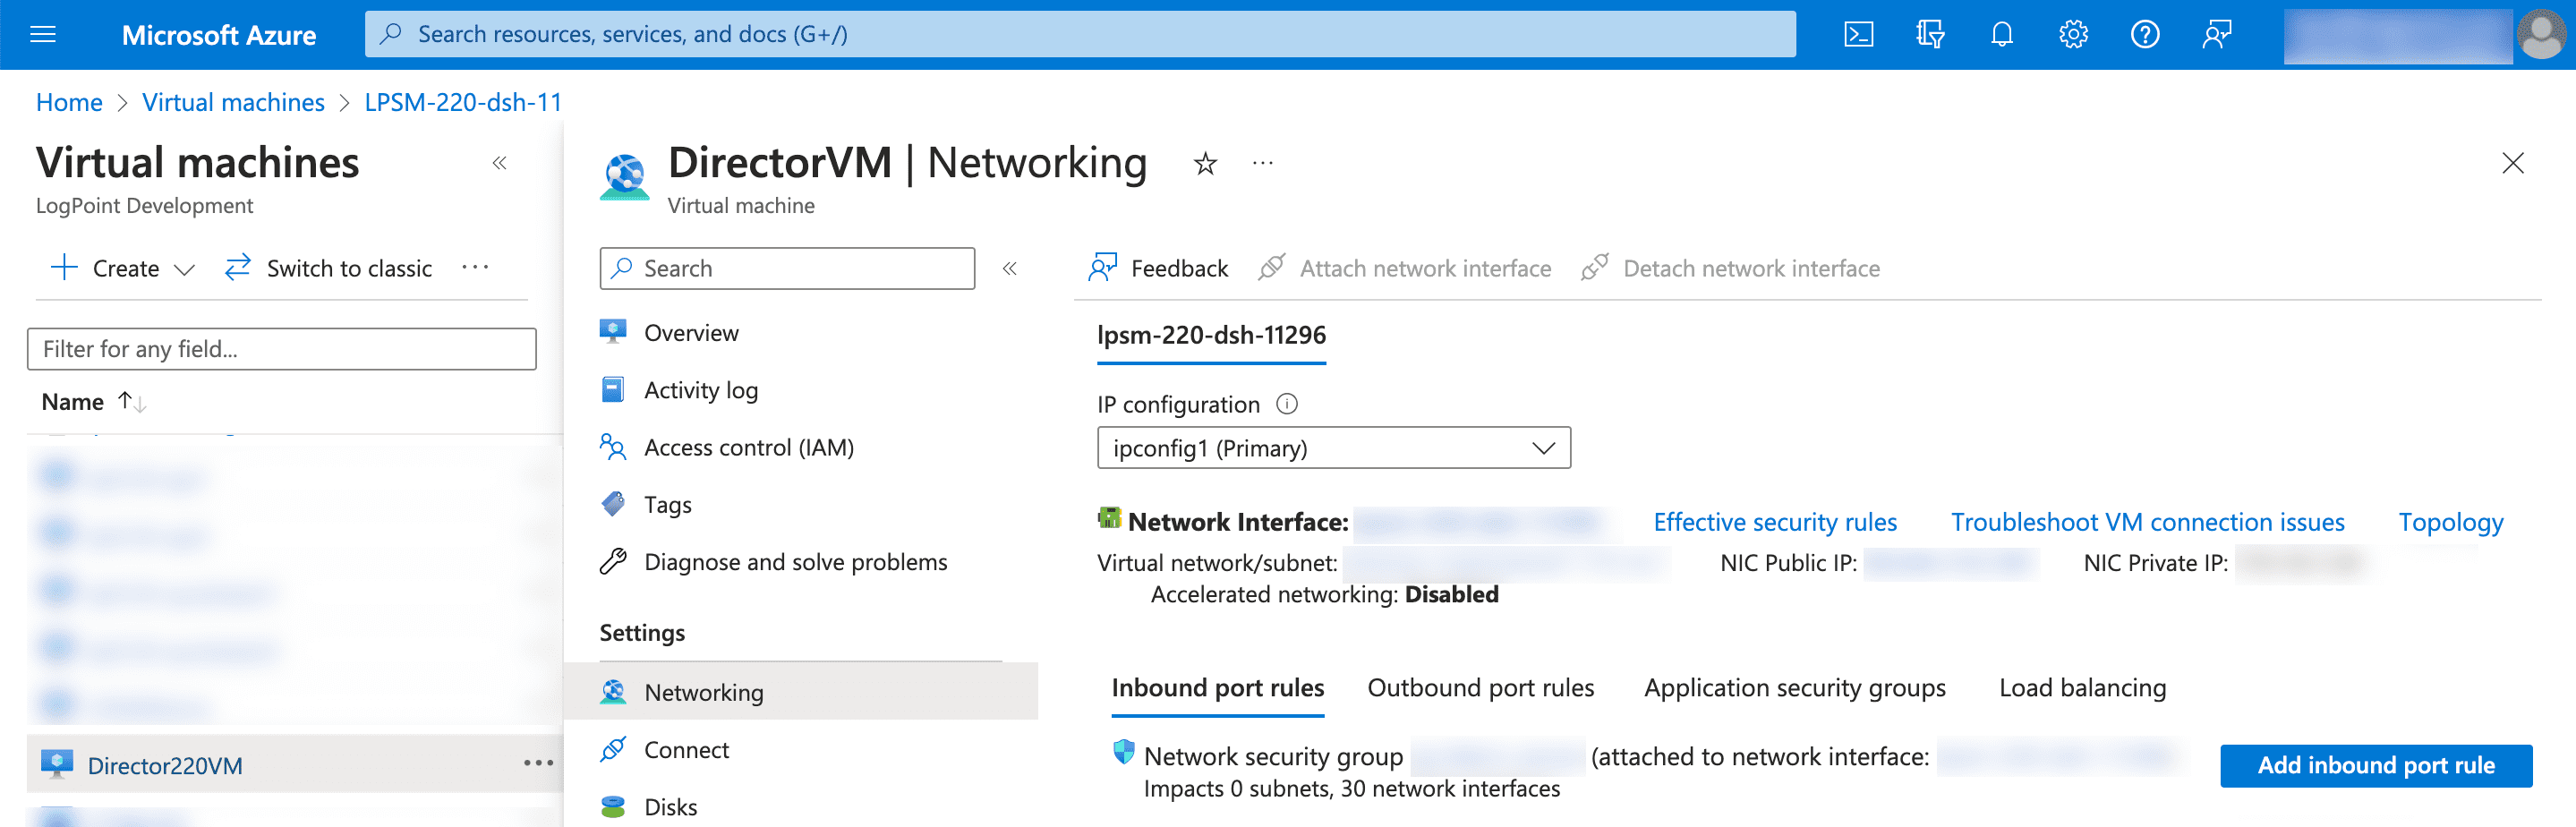
Obtaining the Private IP
Note down the NIC Private IP. The IP address is required to establish an SSH connection from remote devices.
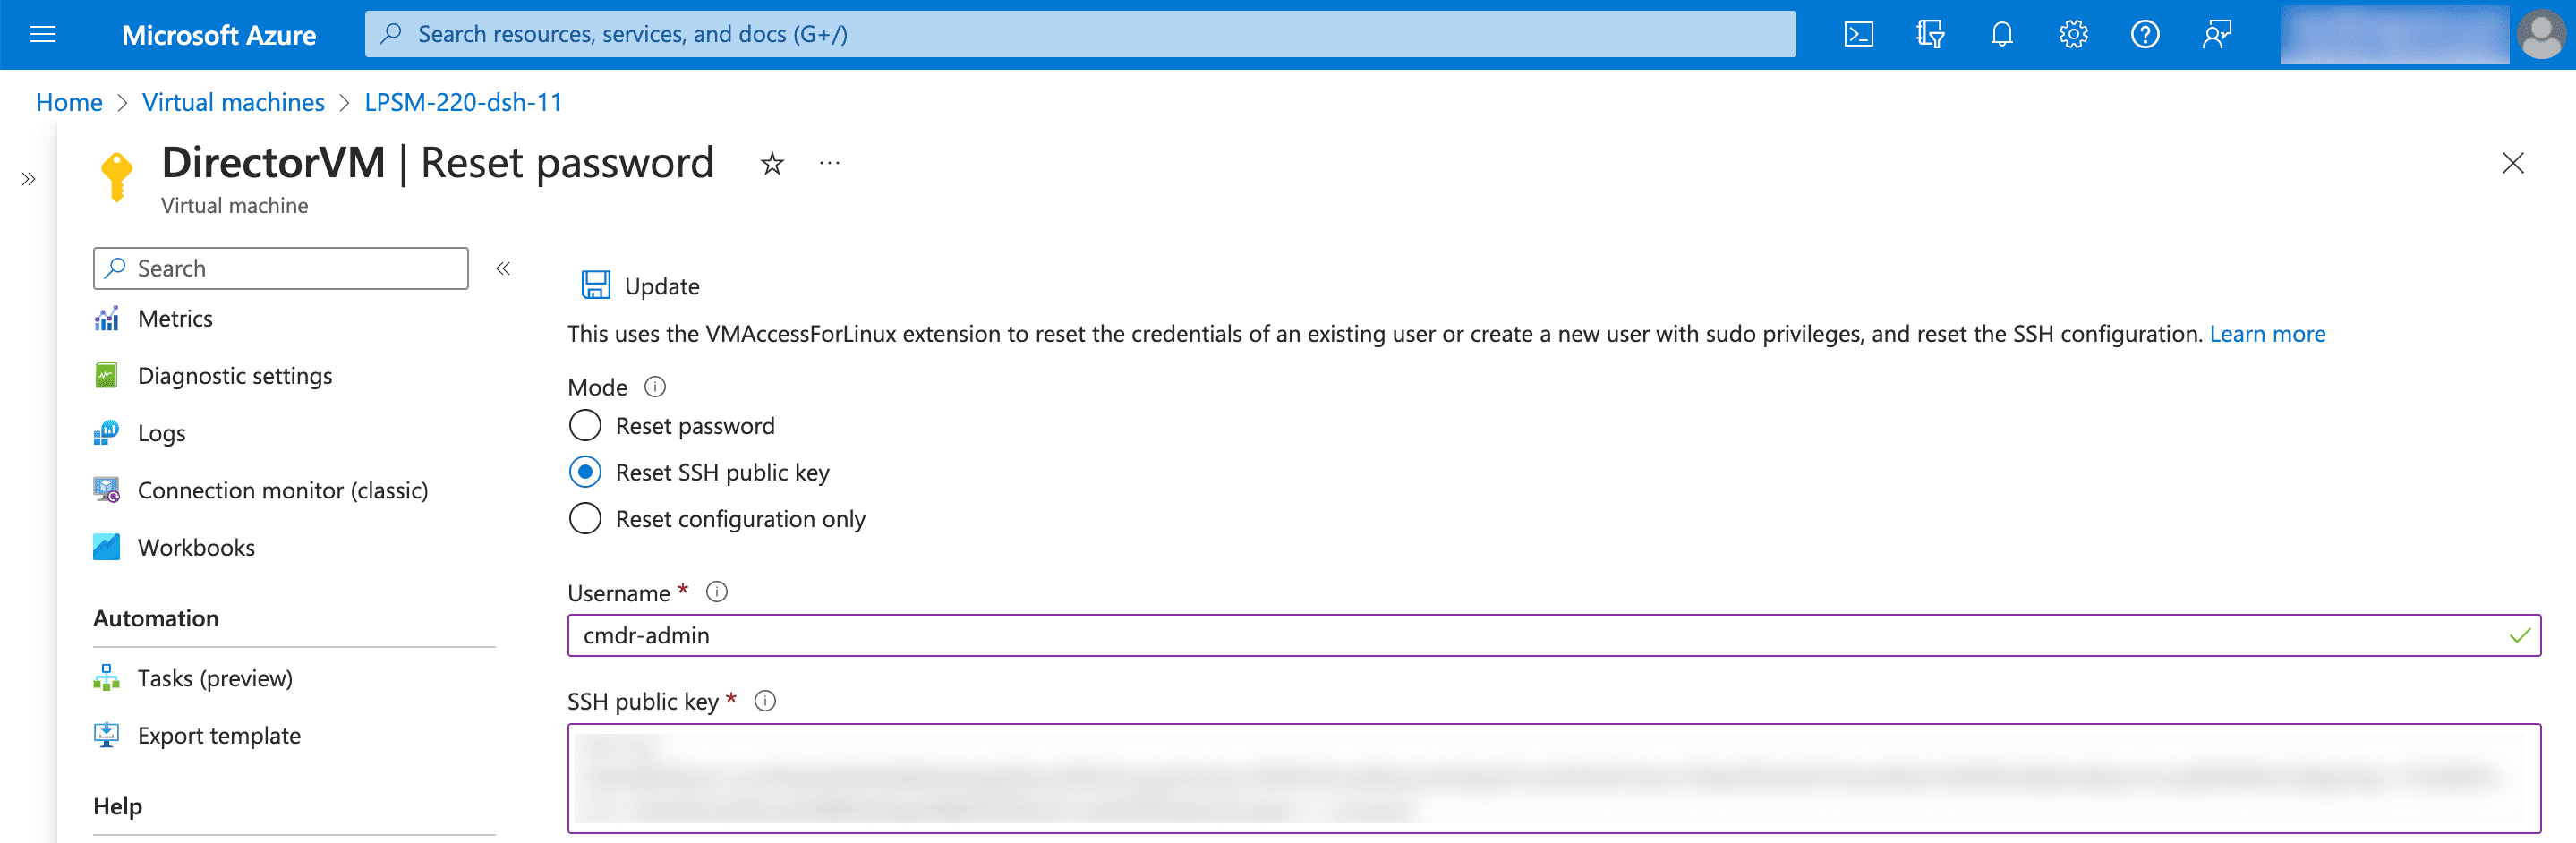
Select Reset Password from the sidebar.
Select Reset SSH public key.
Enter cmdr-admin as Username.
Enter the SSH public key generated on the local machine.
Resetting SSH public key
Note
You can generate public and private key pair on the local machine through the command ssh-keygen
Click Update.
Execute the following command on your local machine:
chmod 400 <private_key_filename>
Establish an SSH connection with the Fabric Server using the following command:
ssh -i "<private_key_filename>" cmdr-admin@<Fabric_Server_IP>
Note
If you are deploying the Fabric Server VHD in the cluster mode or scaling the Fabric Server virtual machines, you must create a route table. A route table ensures the network traffic is directed correctly. To learn how, go to Creating a Route Table.
To learn how to install the Fabric Server virtual machine in standalone or cluster modes, go to the Installation of Fabric Server section.
Note
You need to create the route table only if you deploy the Fabric Server virtual machines in the cluster mode.
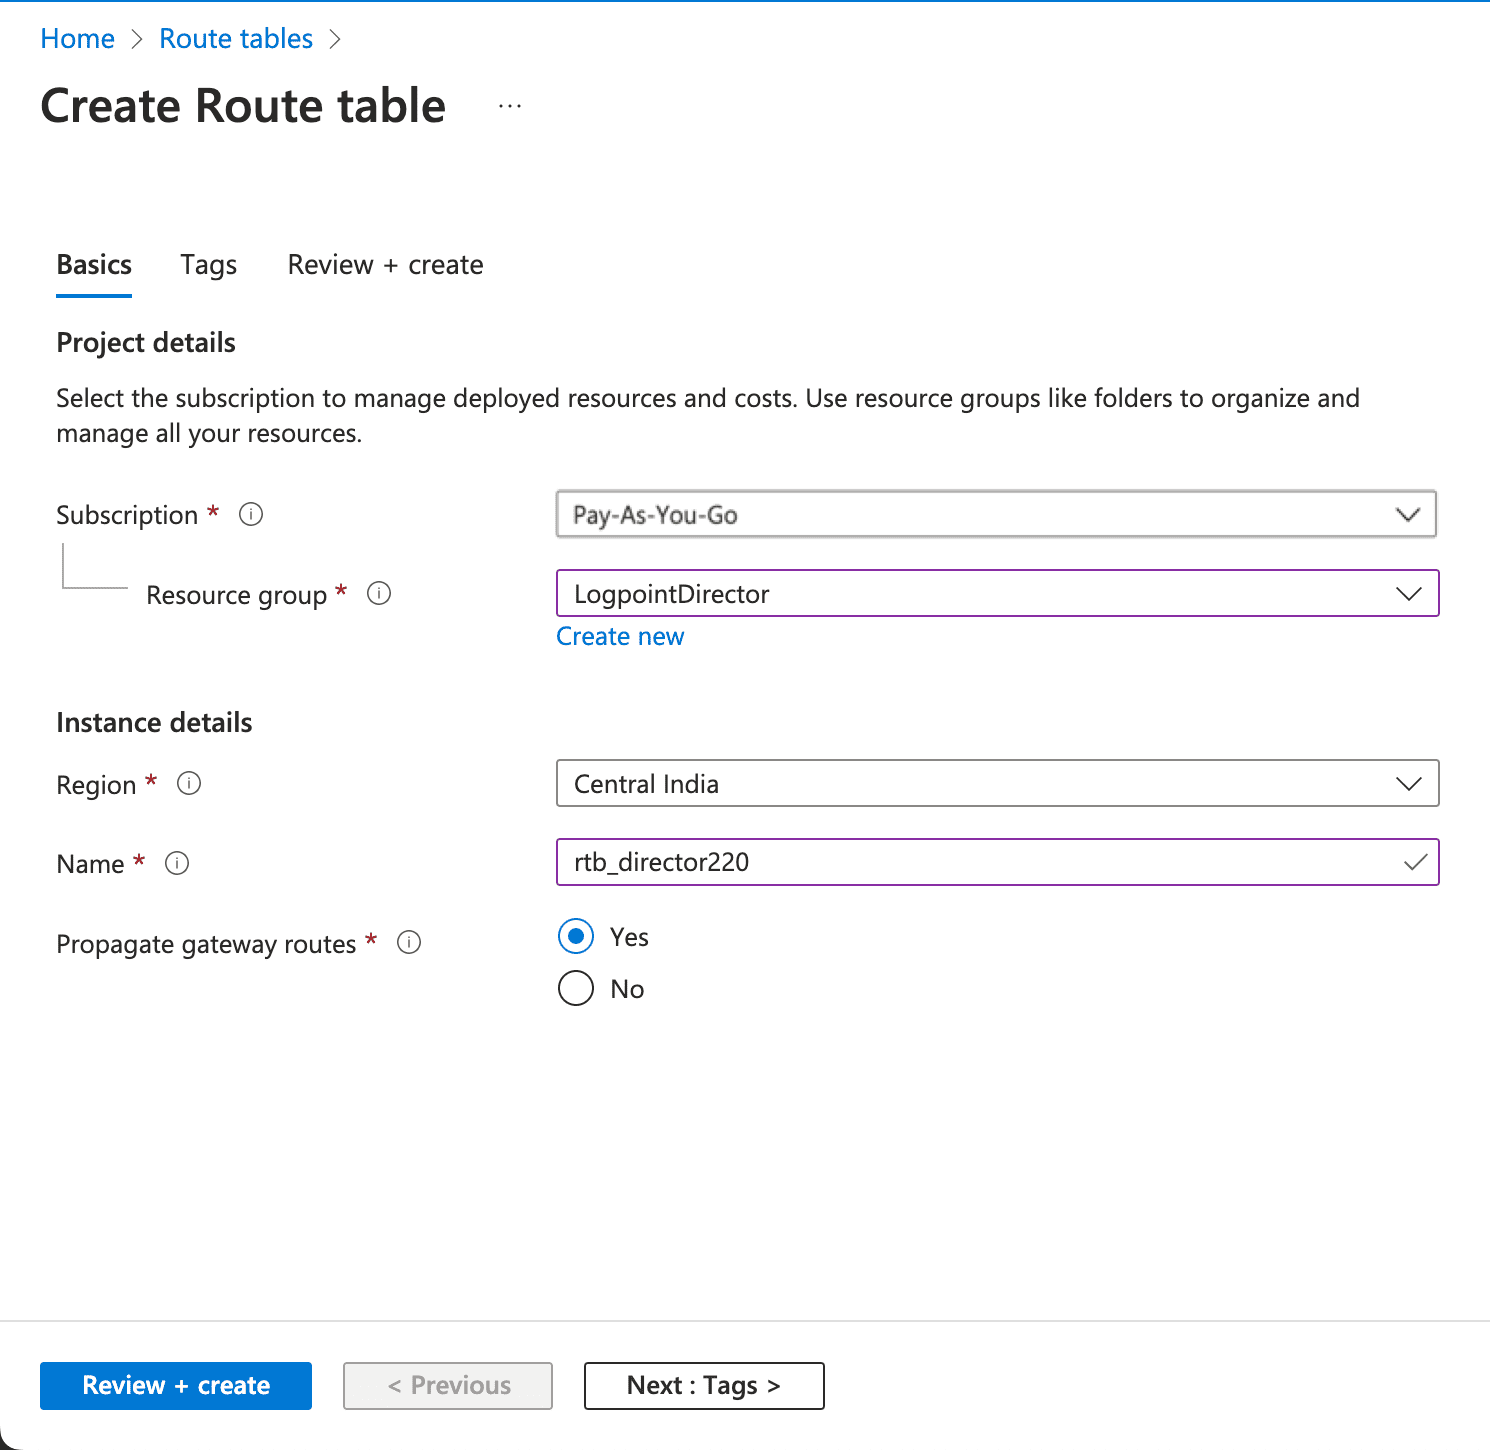
Search for Route tables service from the search bar.
Click Create to create a new route table.
Enter Resource Group, Region and Name for the route table.
Basic Configuration for Route Table
Click Next : Tags >.
Enter name/value pair.
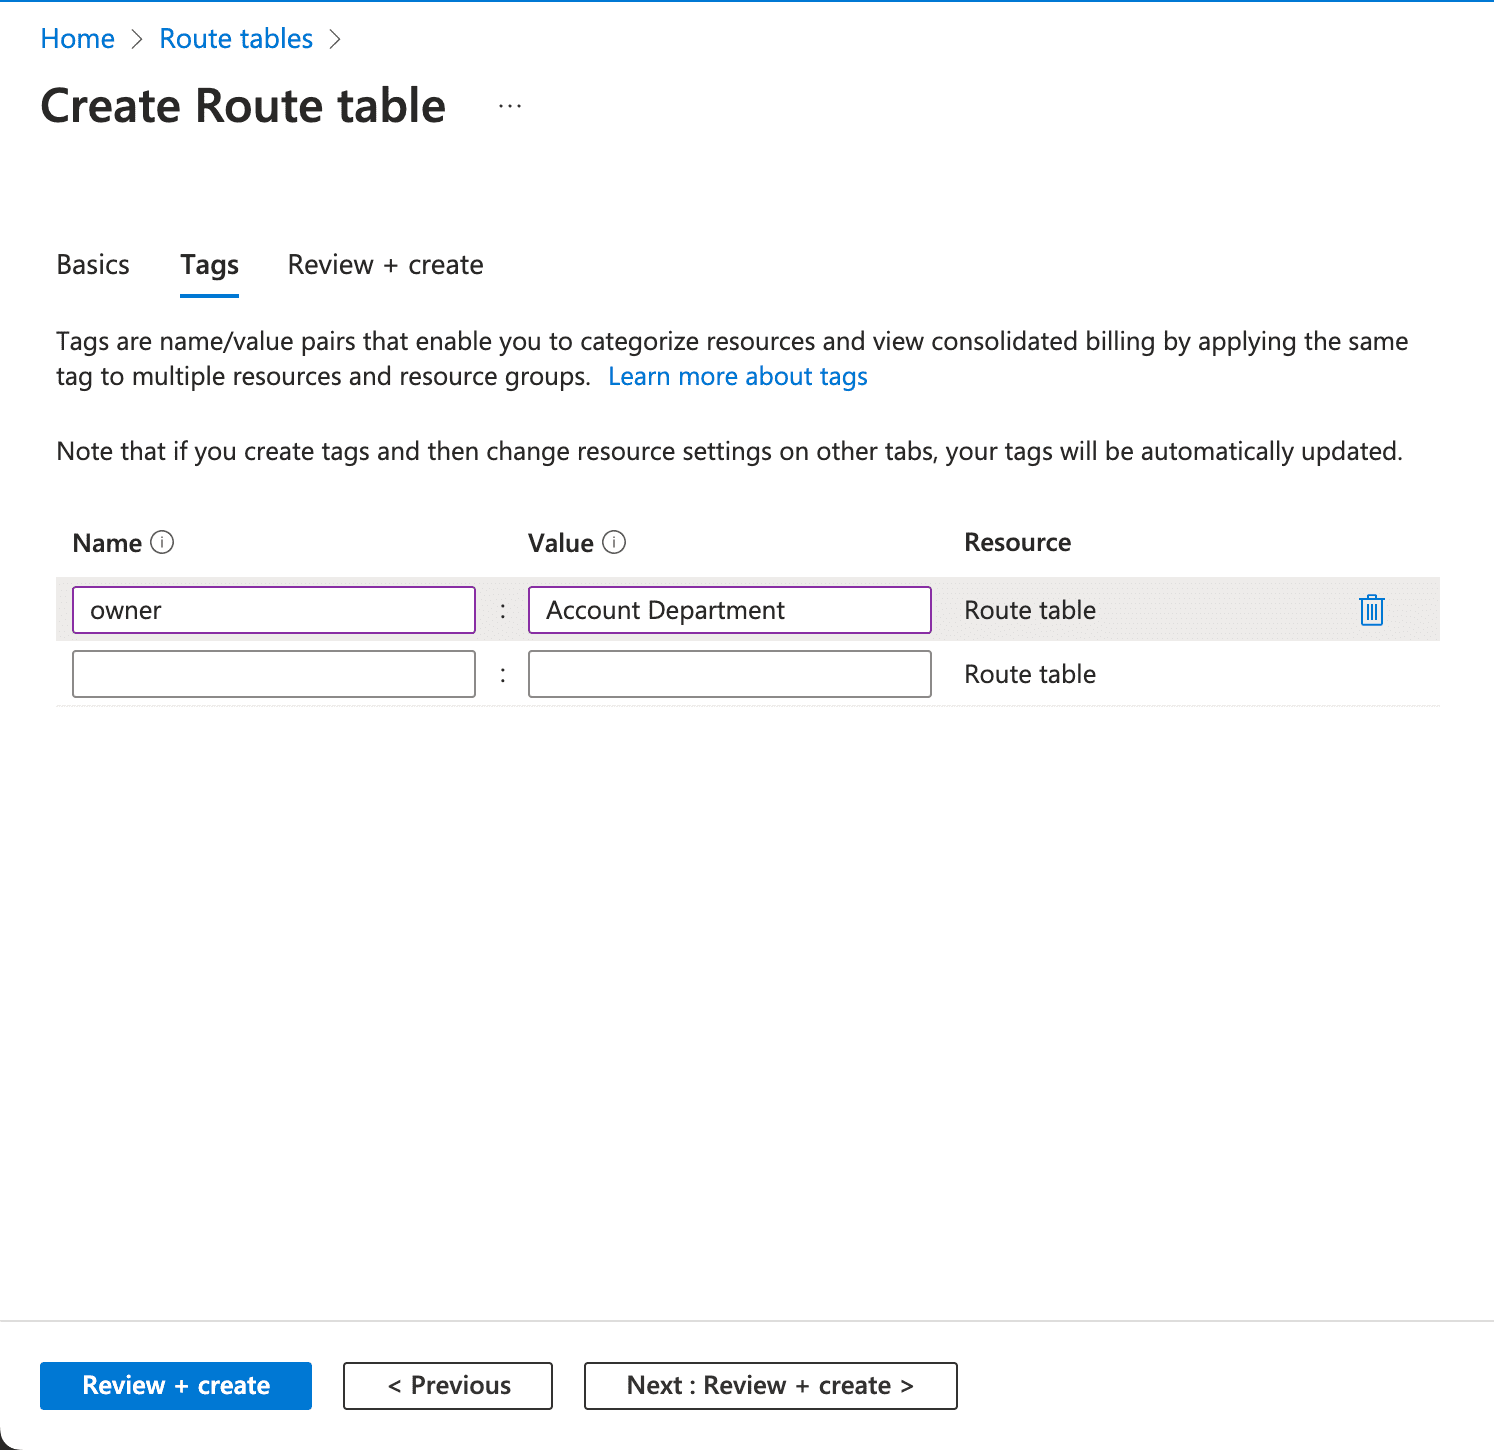
Adding Tags
Click Next : Review + create >.
Verify the details and click Create.
A route table is created with the details added as above. You can select the route table and add the routes as below:
Select the route table from the lists of route tables.
Select Routes from the sidebar and click Add.
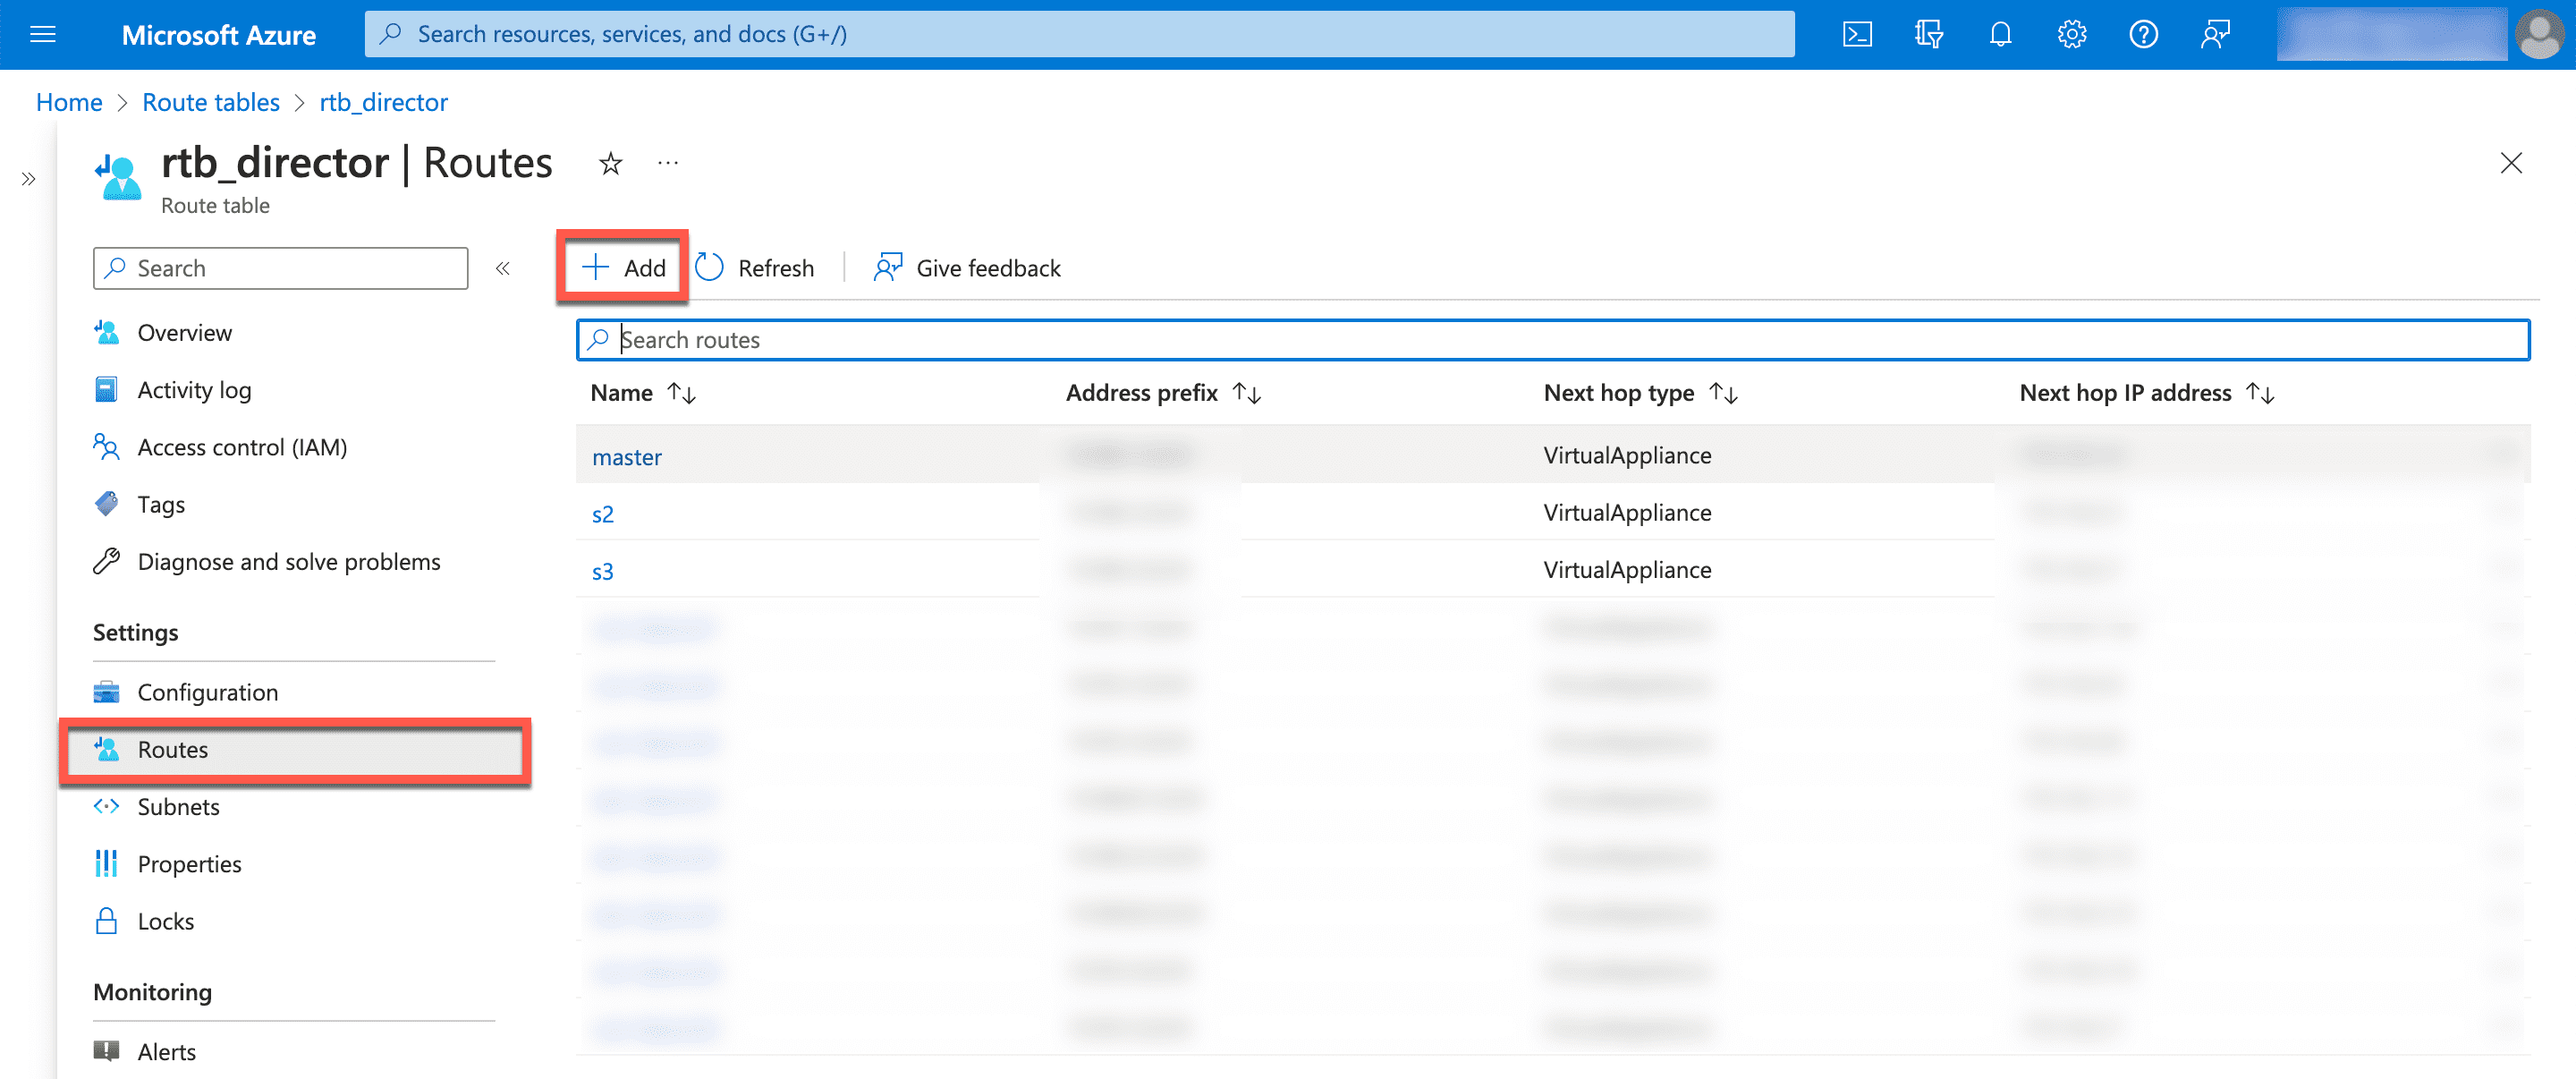
Routes
Enter Route name.
Select IP Addresses from the dropdown for Destination address prefix.
Enter the Tunnel IP on Destination IP addresses/CIDR ranges.
Select Virtual appliance from the dropdown for Next hop type.
Enter the Private IP of server on Next hop address.
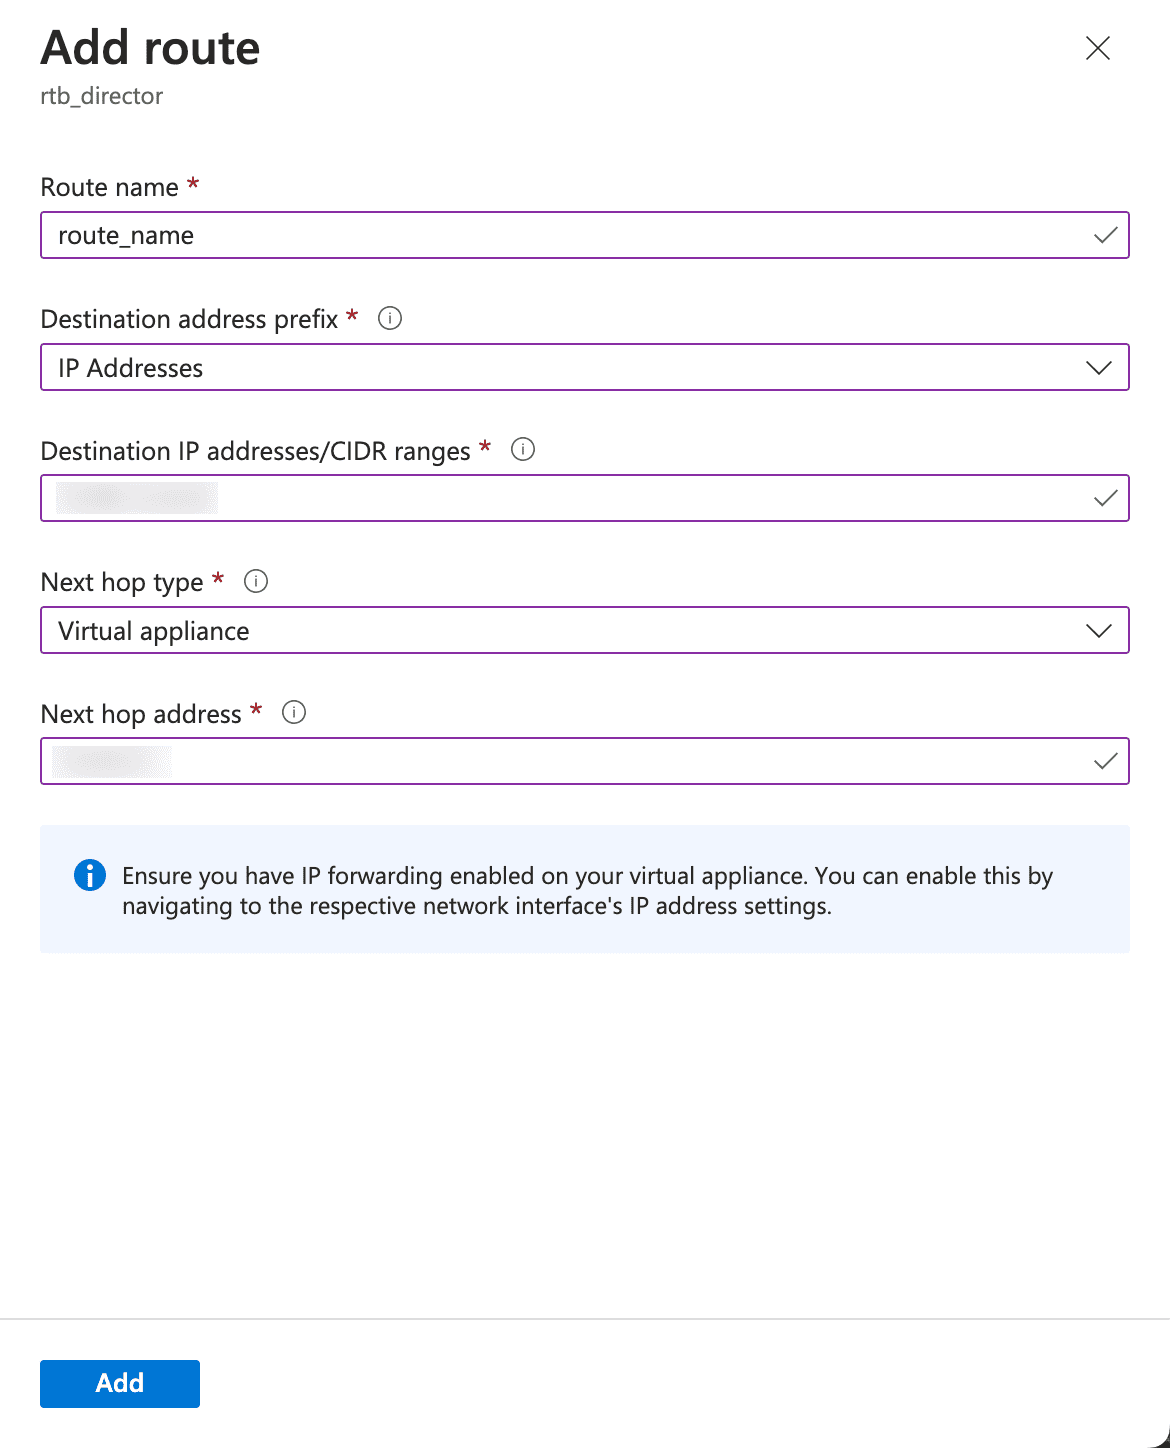
Adding Routes
Click Add.
Select the required Route table.
Click Subnets from the sidebar.
Click Associate.
Select respective Virtual Network and Subnet.
Click OK.
Deploy the Fabric Server virtual machine and install the Fabric applications before accessing the API Server virtual machine. To learn how, see the Installation of Fabric Server section.
Go to All services >> Virtual machines.
Select the API Server Virtual machine.
Select Networking from the sidebar.
Obtaining the Private IP
Note down the NIC Private IP. The IP address is required to establish an SSH connection from remote devices.
Select Reset Password from the sidebar.
Select Reset SSH public key.
Enter cmdr-admin as Username.
Enter the SSH public key generated on the local machine.
Note
You can generate public and private key pair on the local machine through the command ssh-keygen
Click Update.
Execute the following command on your local machine:
chmod 400 <private_key_filename>
Establish an SSH connection with the Fabric Server using the following command:
ssh -i "<private_key_filename>" cmdr-admin@<API_Server_IP>
Install the API Server before accessing Director Console. For details, go to the Installation of API Server section.
Go to All services >> Virtual machines.
Select the API Server Virtual machine.
In the Overview section, note down the Subscription ID. The Subscription ID is the password for the default user for accessing the Director Console user interface.
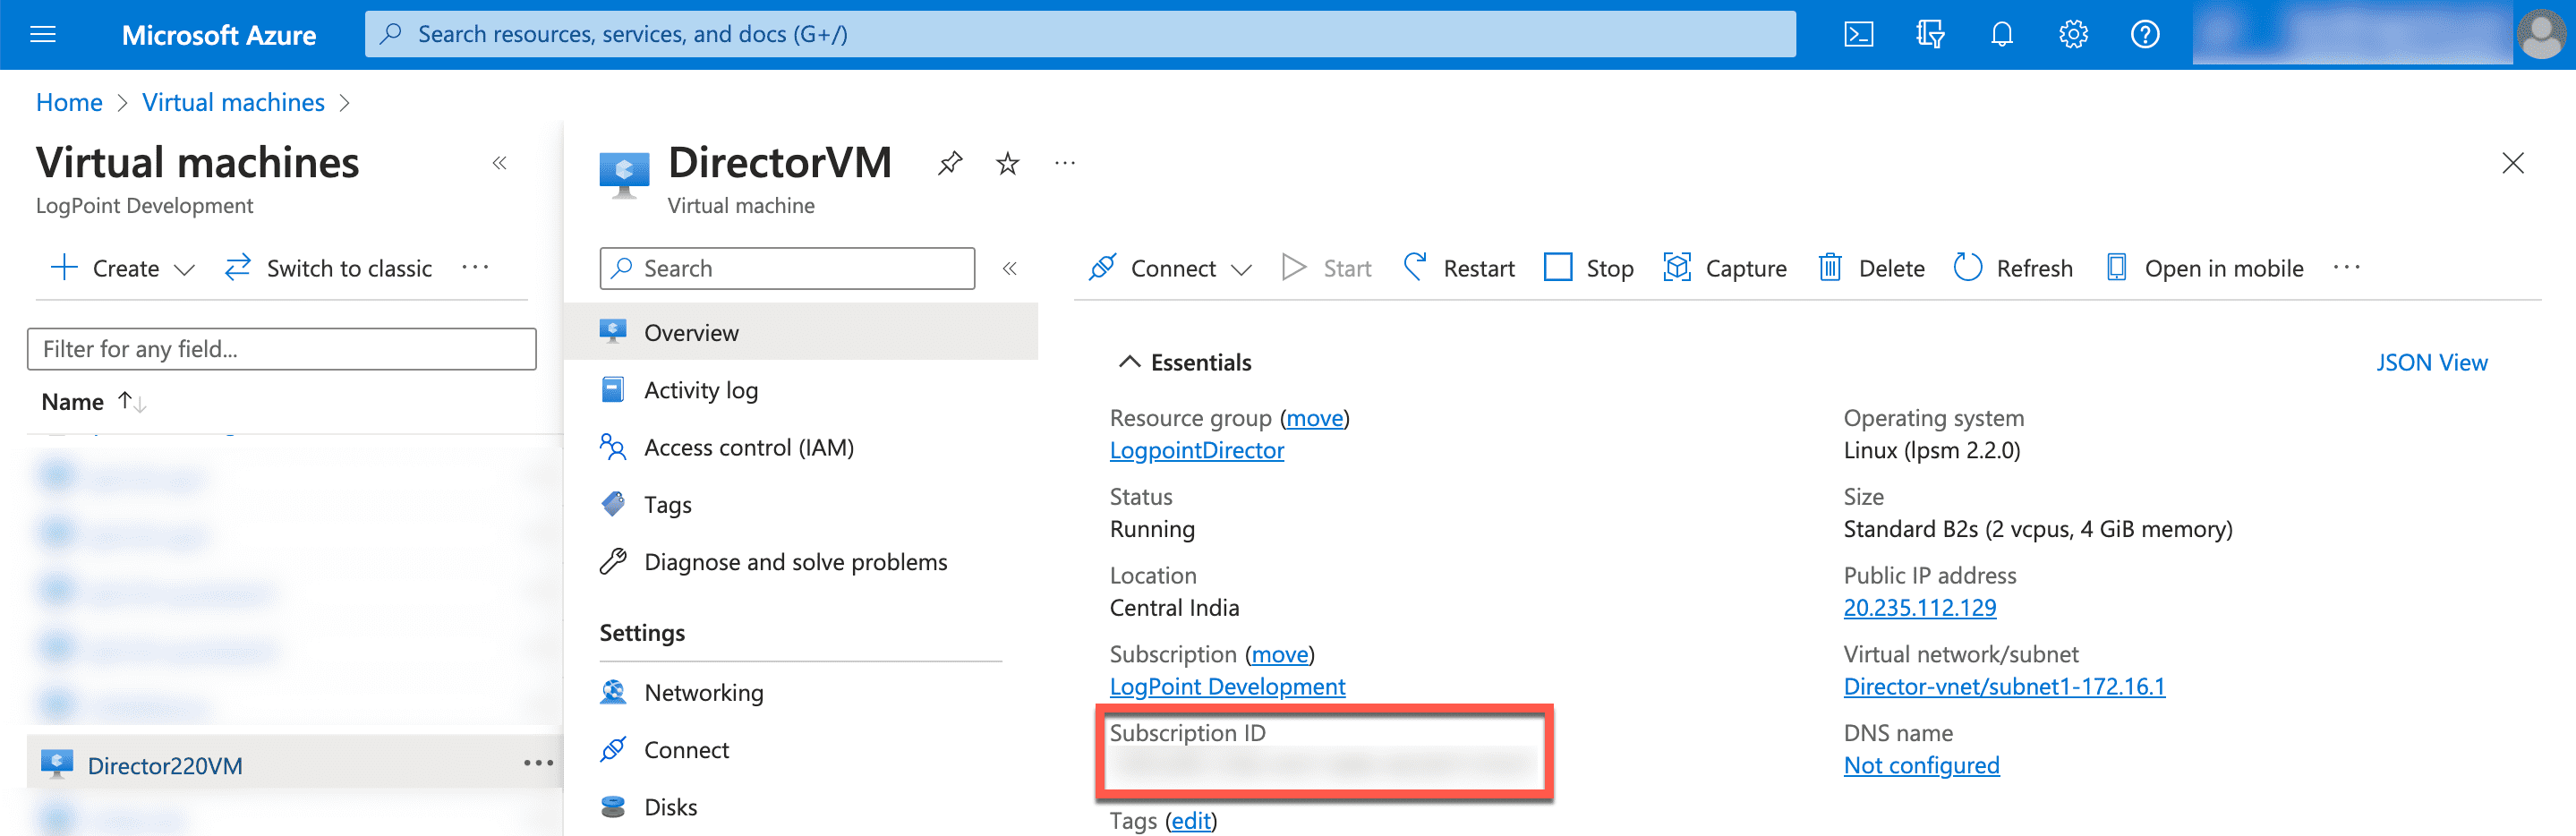
Obtaining the Subscription ID
Select Networking from the sidebar.
Obtaining the Private IP
Note down the NIC Private IP. The IP address works as the URL to access your Director Console user interface and to establish an SSH connection from remote devices.
Enter the NIC Private IP in a web browser.
Example: https://10.10.98.68
Log into the user interface using the following credentials.
Username: root
Password: <Subscription ID>
We recommend you change the password immediately after the first login.
Upload a Director license. For details, go to the Uploading a Director License section.
Go to All services >> Virtual machines.
Select the LPSM Virtual machine.
In the Overview section, note down the Subscription ID. The Subscription ID is the password for the default user for accessing the LPSM user interface.
Obtaining the Subscription ID
Select Networking from the sidebar.
Obtaining the Private IP
Note down the NIC Private IP. The IP address works as the URL to access your LPSM user interface and to establish an SSH connection from remote devices.
Enter the NIC Private IP in a web browser.
Example: https://10.10.98.68
Log into the user interface using the following credentials.
Username: admin
Password: <Subscription ID>
Change the password through My Preferences >> Change Password.
Once you access LPSM, you need to configure an SSH connection with the LPSM. To learn how, see Establish an SSH Connection.