To fetch Google Workspace logs in Logpoint, you will first need to create a service account in the Google Cloud console and give authorization to your project in Google Admin to get the Google Workspace service account’s private key JSON file. Then, upload it to Logpoint to establish a connection with the Google Cloud Console and fetch logs from Google Workspace. You’ll also need to configure how the logs should be managed, processed, and stored. This ensures effective log management by facilitating accurate log collection, proper formatting, and timely analysis, which are crucial for identifying security incidents and maintaining compliance. All these are done in Configuring Gsuite.
Note
While we provide GSuite specific instructions in this guide, it’s important to be aware that the Gsuite interface may change over time. To ensure you have the most up-to-date information and to navigate any potential changes in the Gsuite interface, we recommend referring to the official GSuite documentation.
Go to the Cloud Console page and enter your credentials.
Click IAM & Admin > Manage Resources.
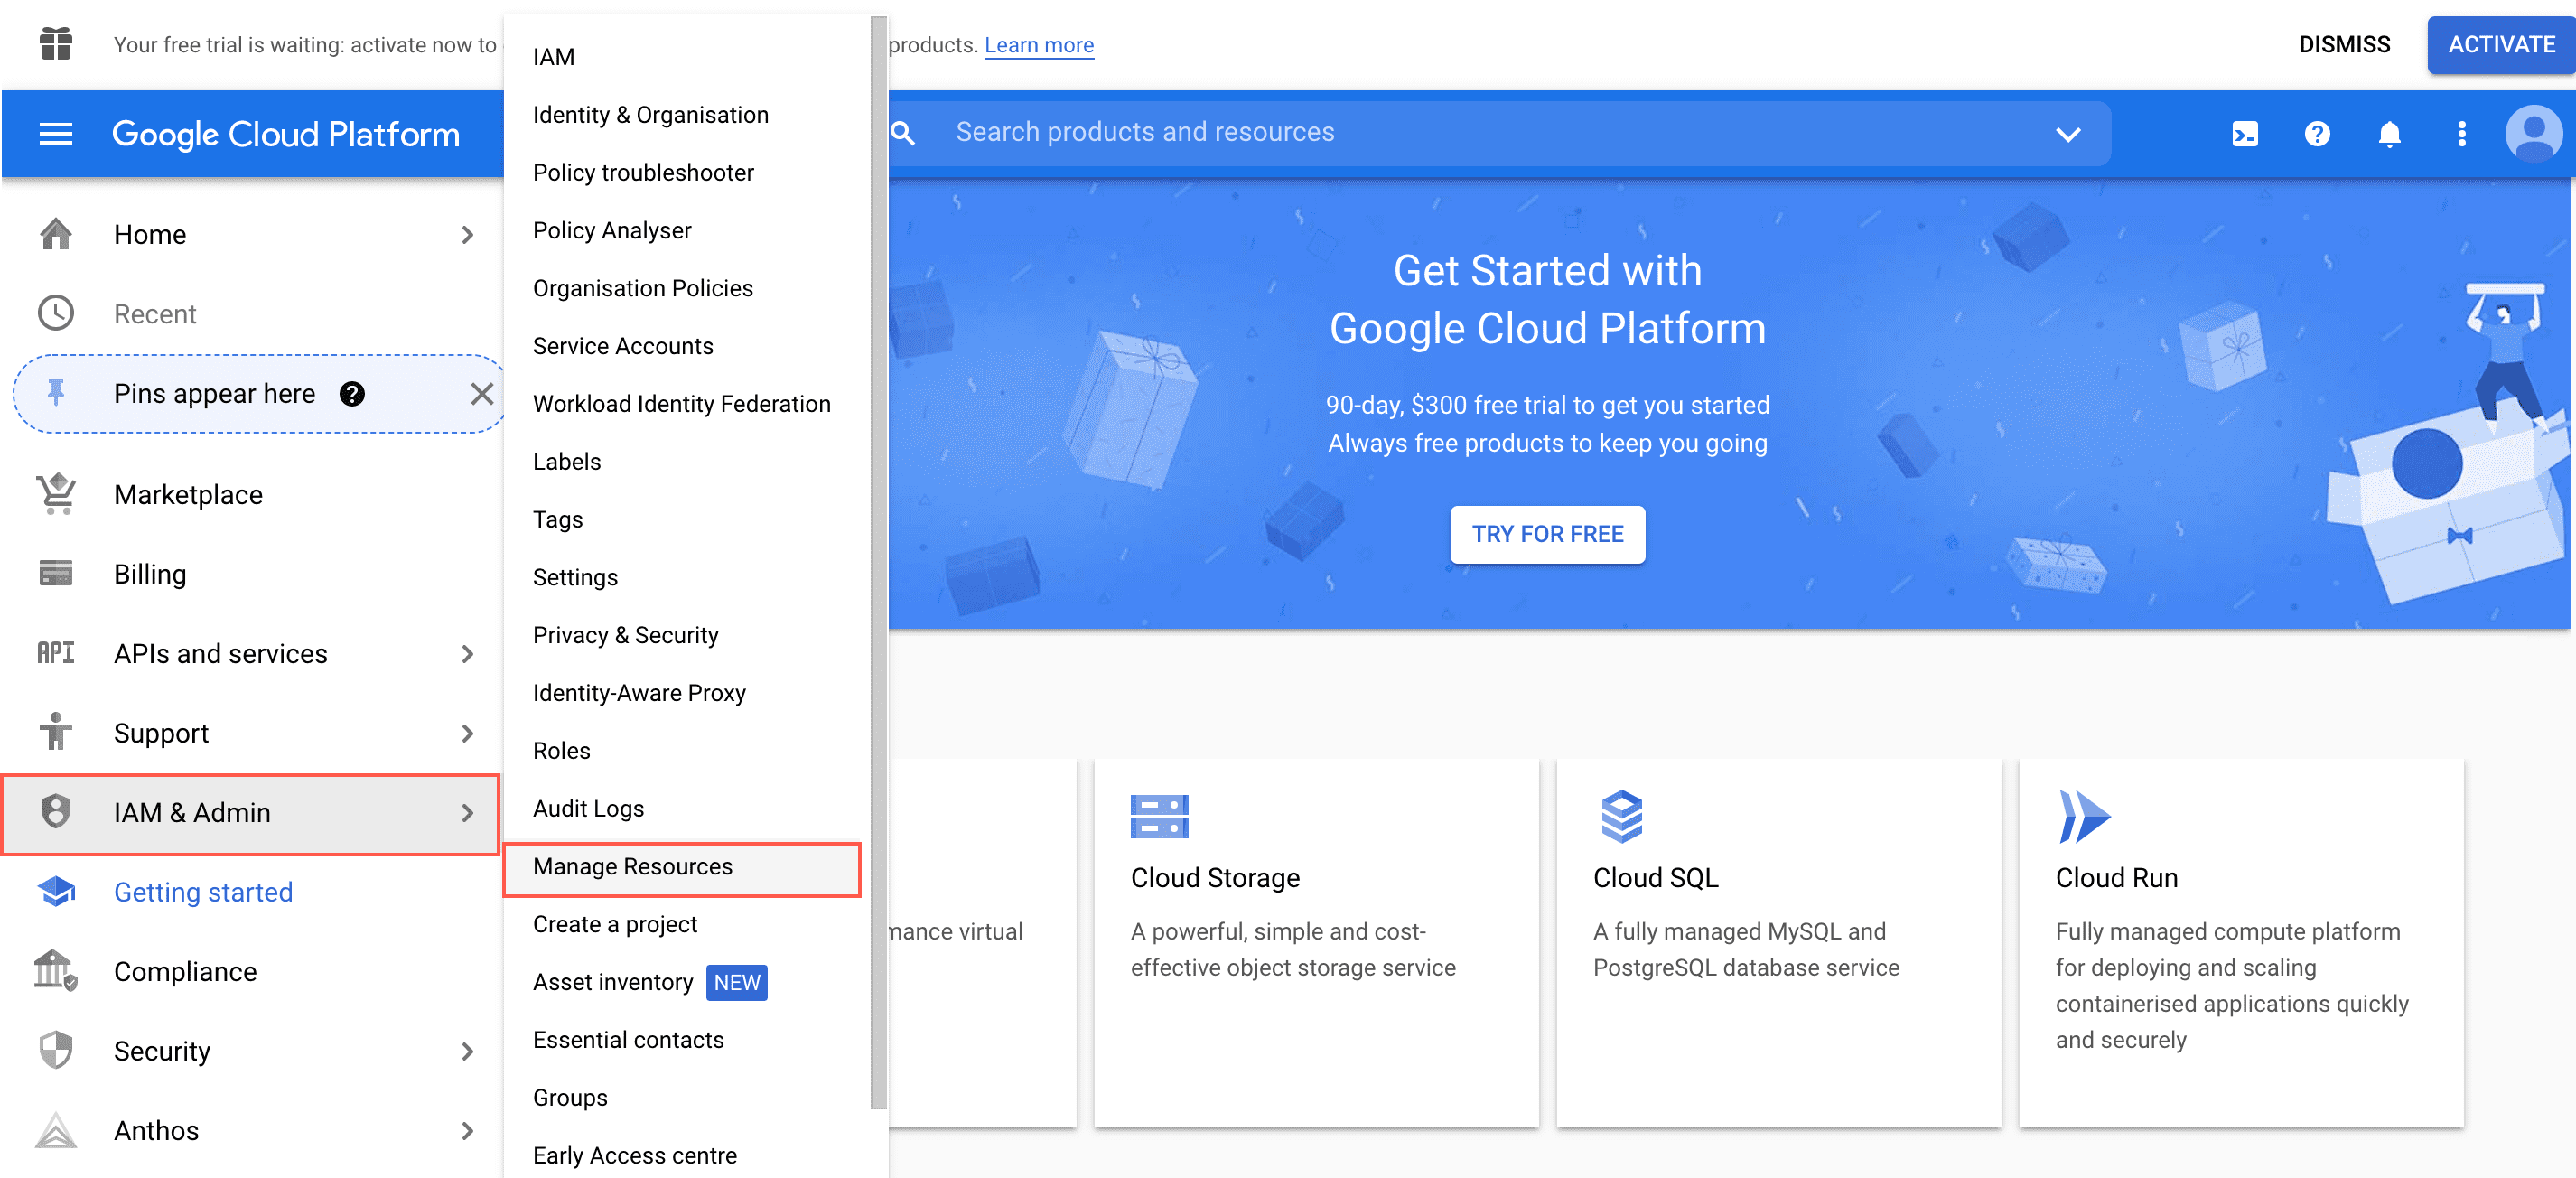
Manage Resources
Click Create Project.
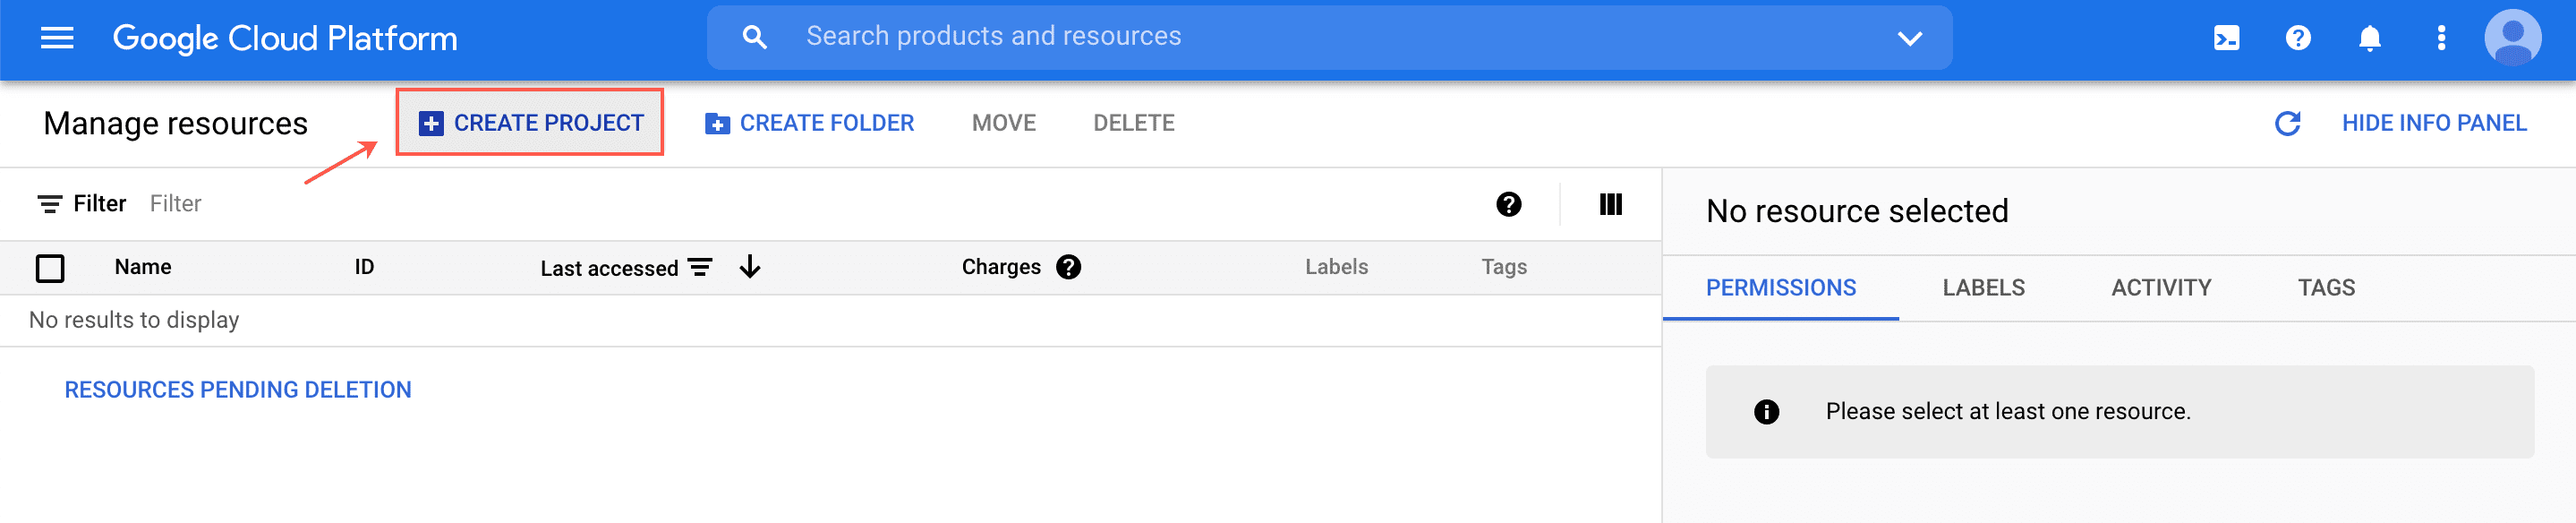
Create Project
Enter a project name.
Click Create.
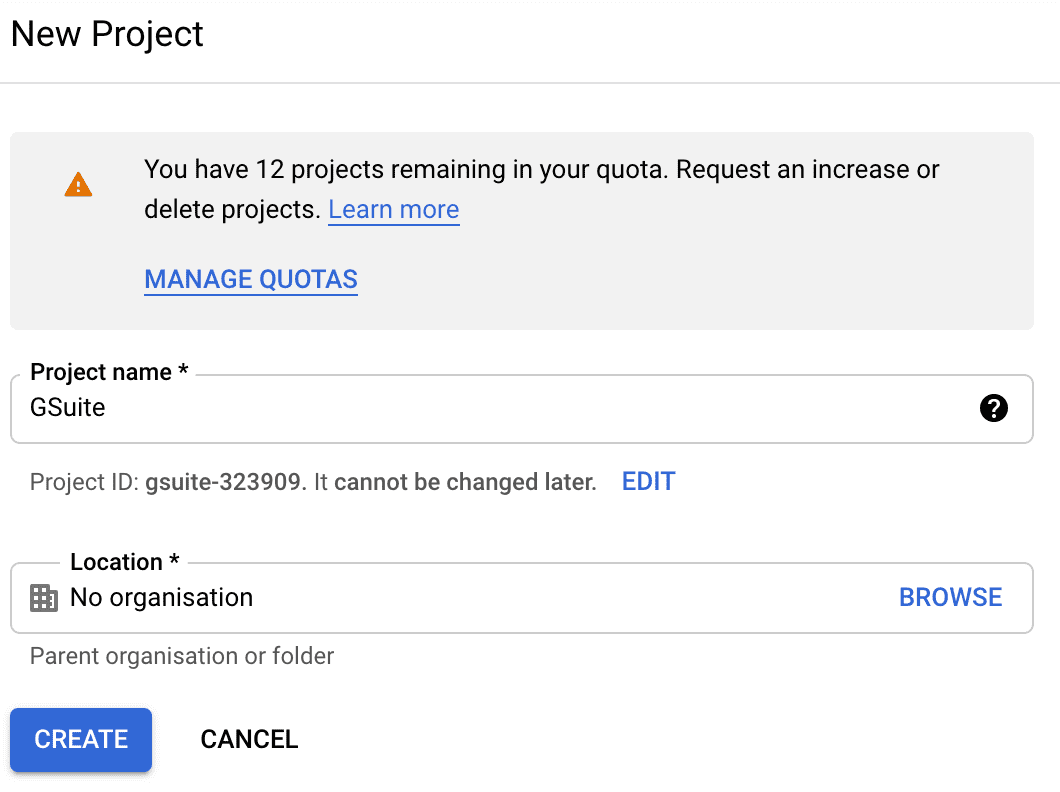
New Project
Click Select Project.
Click APIs and services > Library.
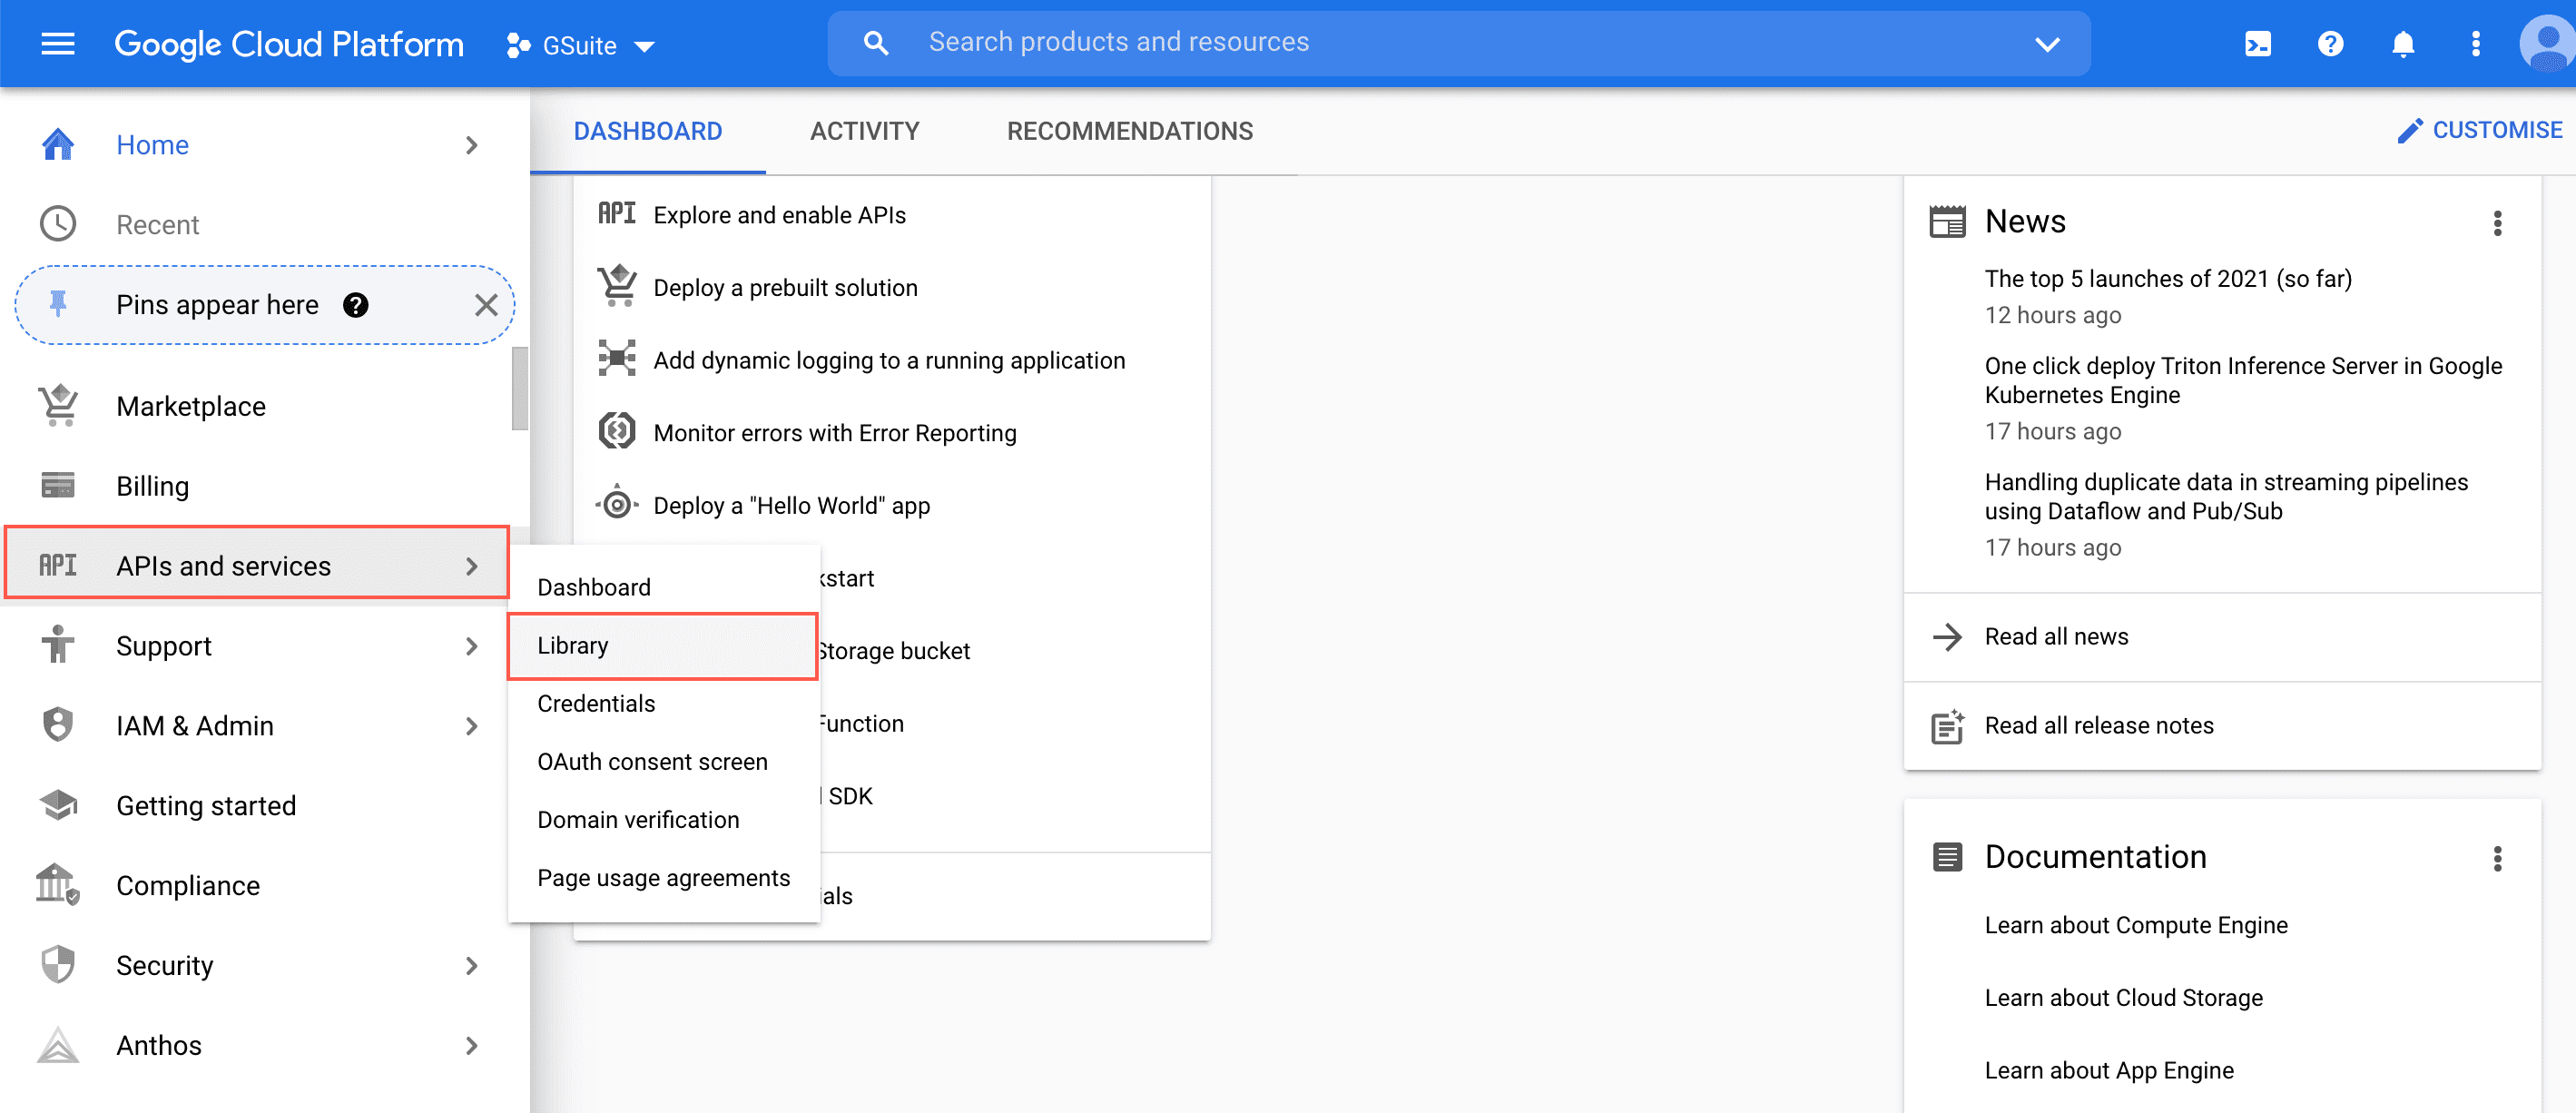
APIs and Services
Search for Admin SDK API and Gmail API in the search bar and enable them both.
Click APIs and services > Credentials from the navigation bar.
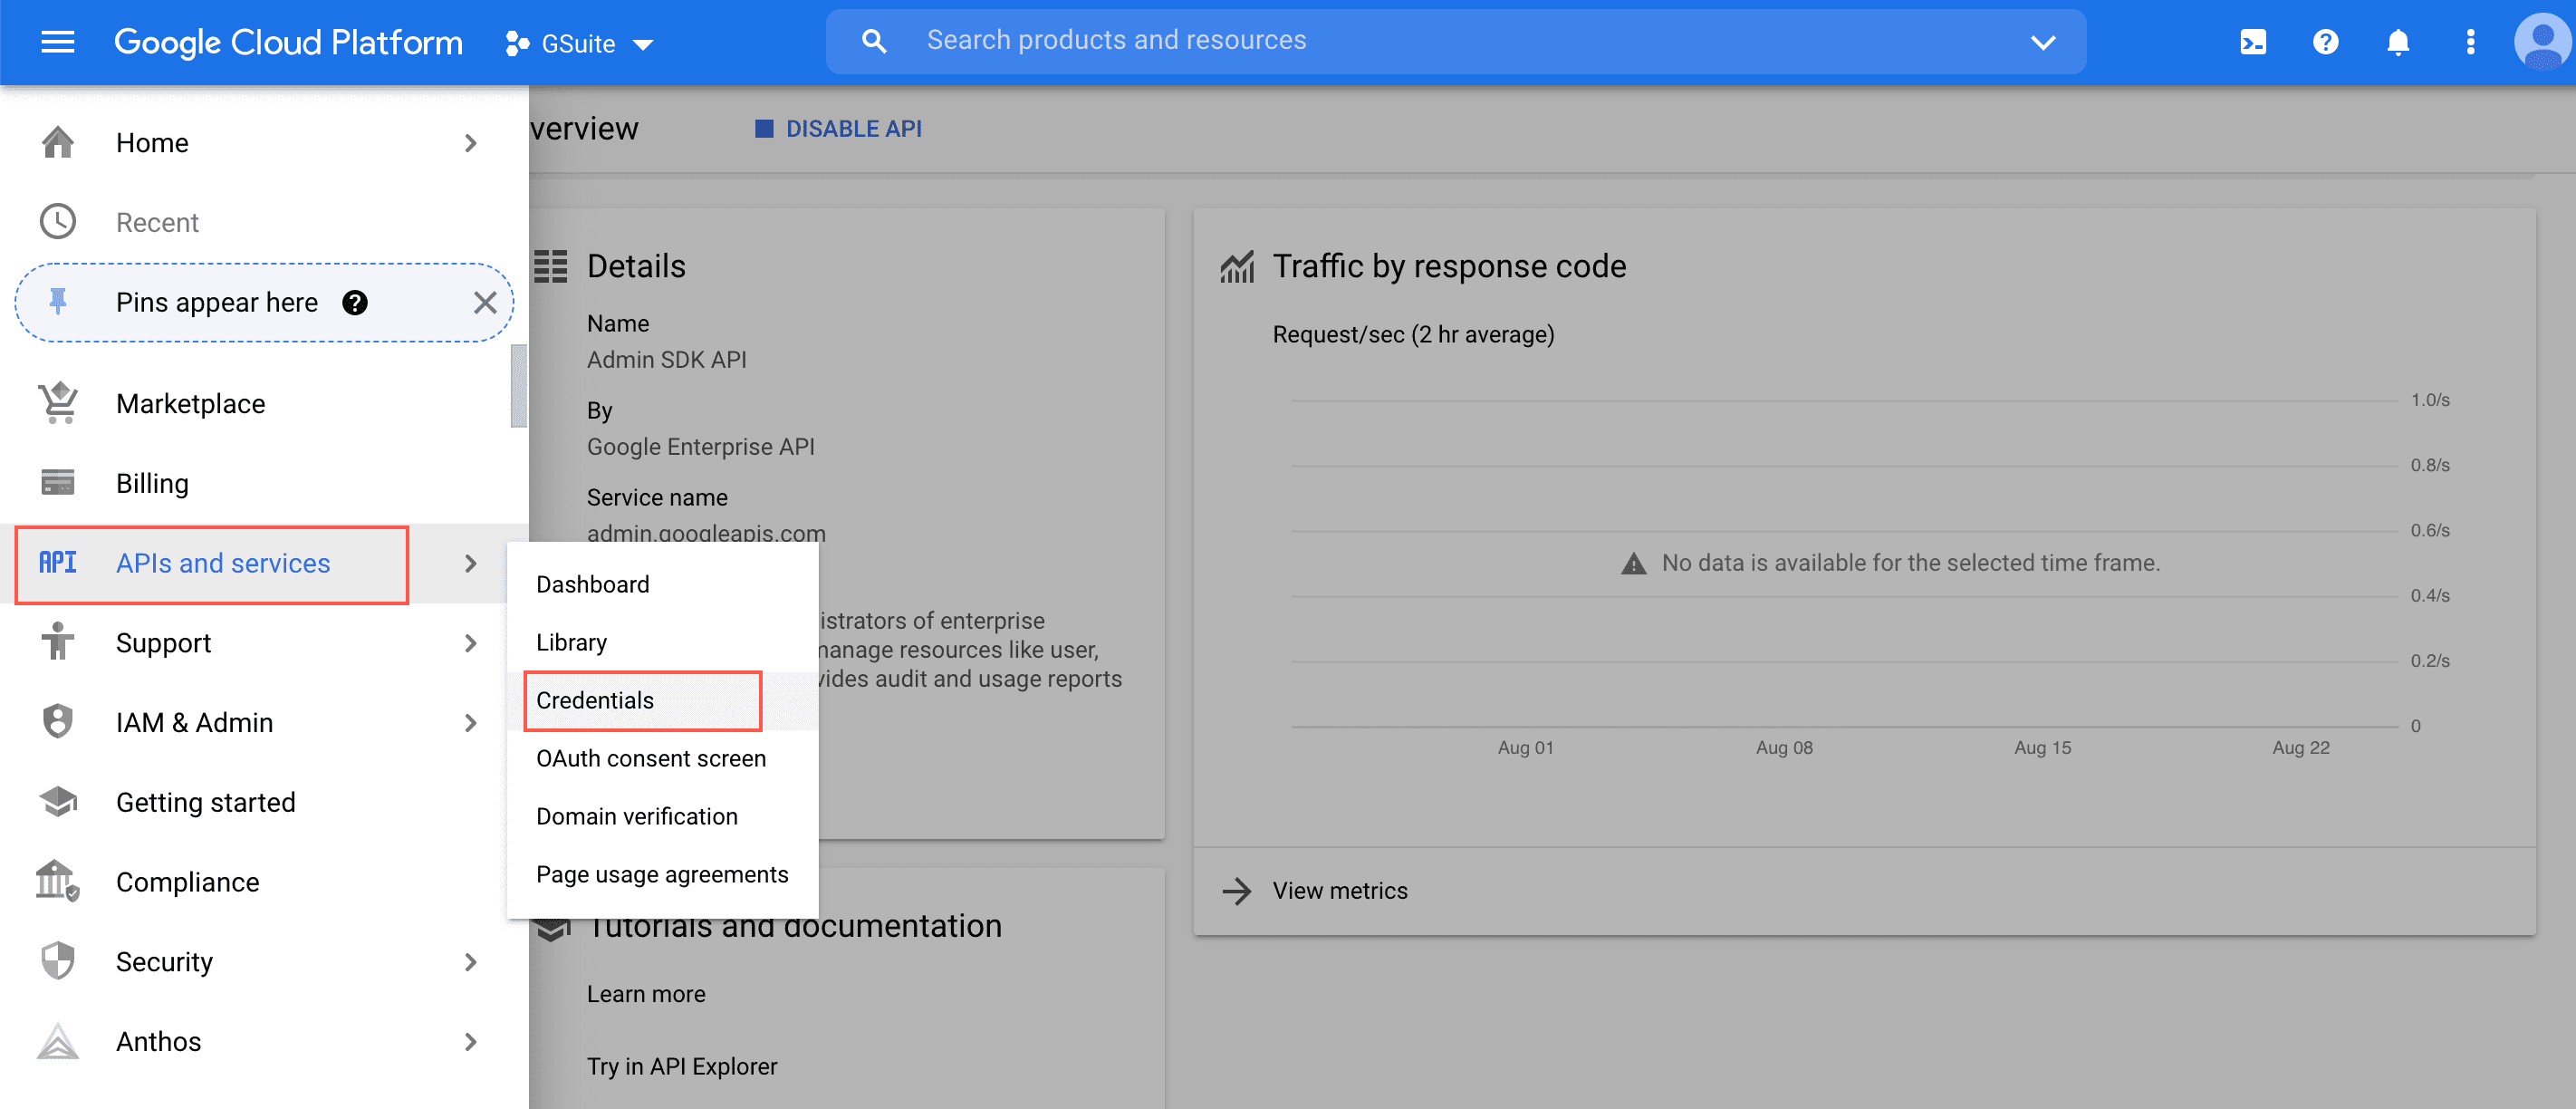
APIs and Services
Click Create Credentials and select Service account.
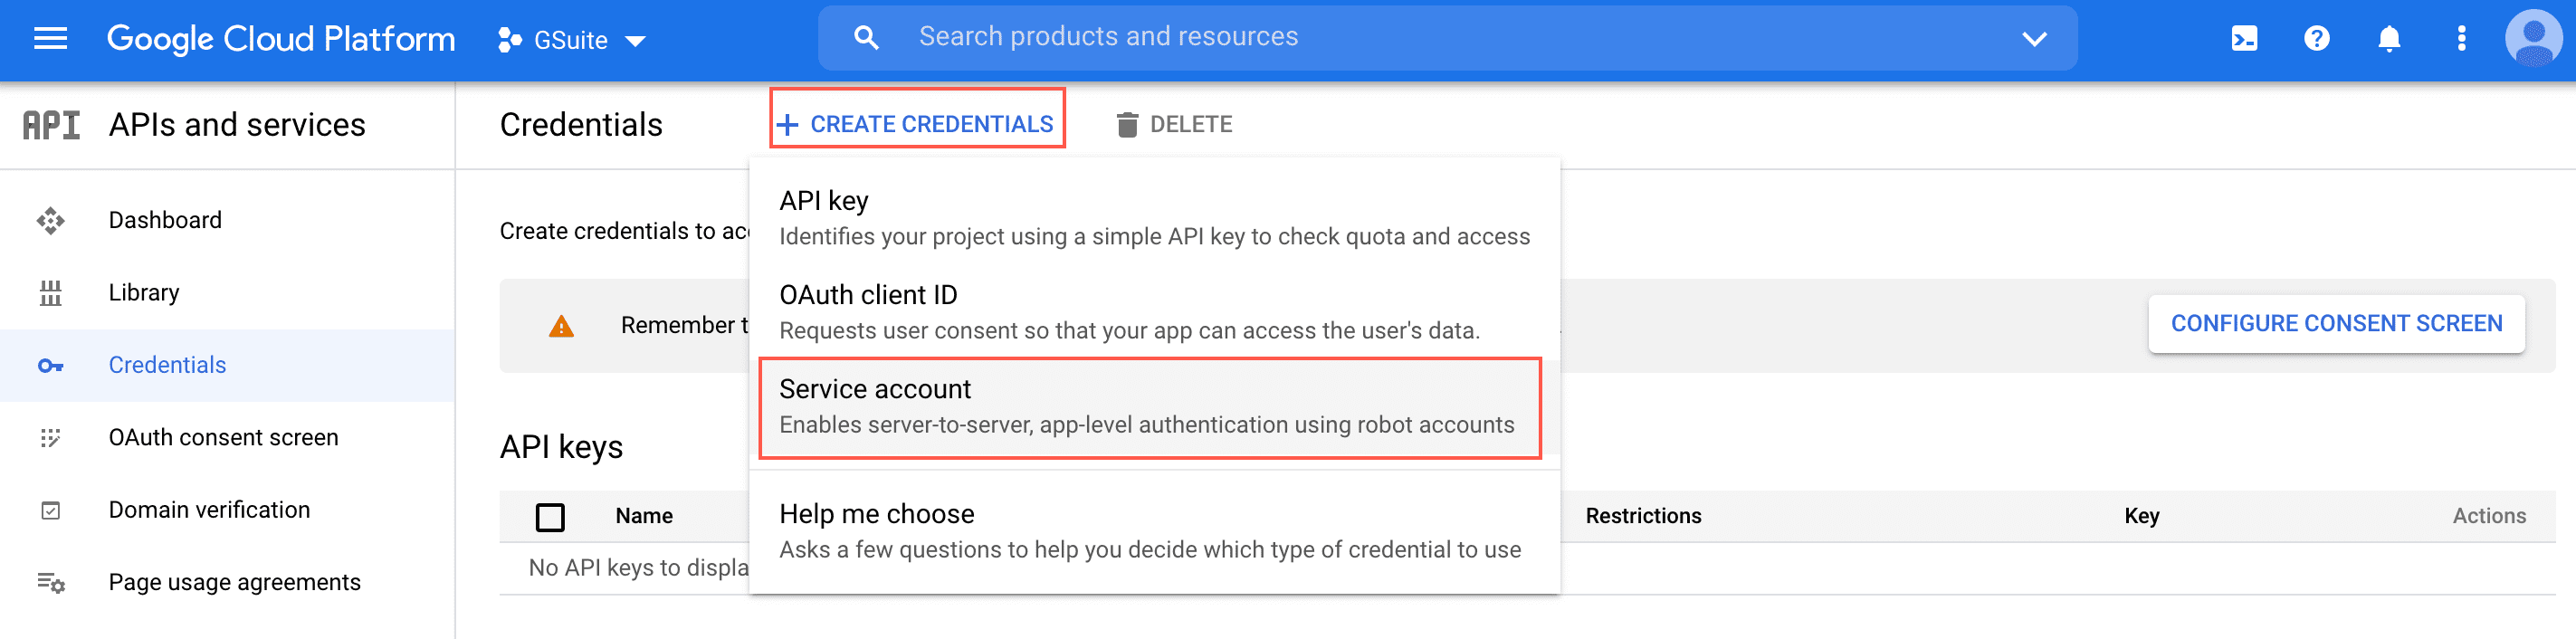
Service Account
Enter a Service account name and click Create and Continue.

Service Account Name
Select a role and click Continue.
Click Done.
Go back to APIs and services > Credentials and select the created Service Account.
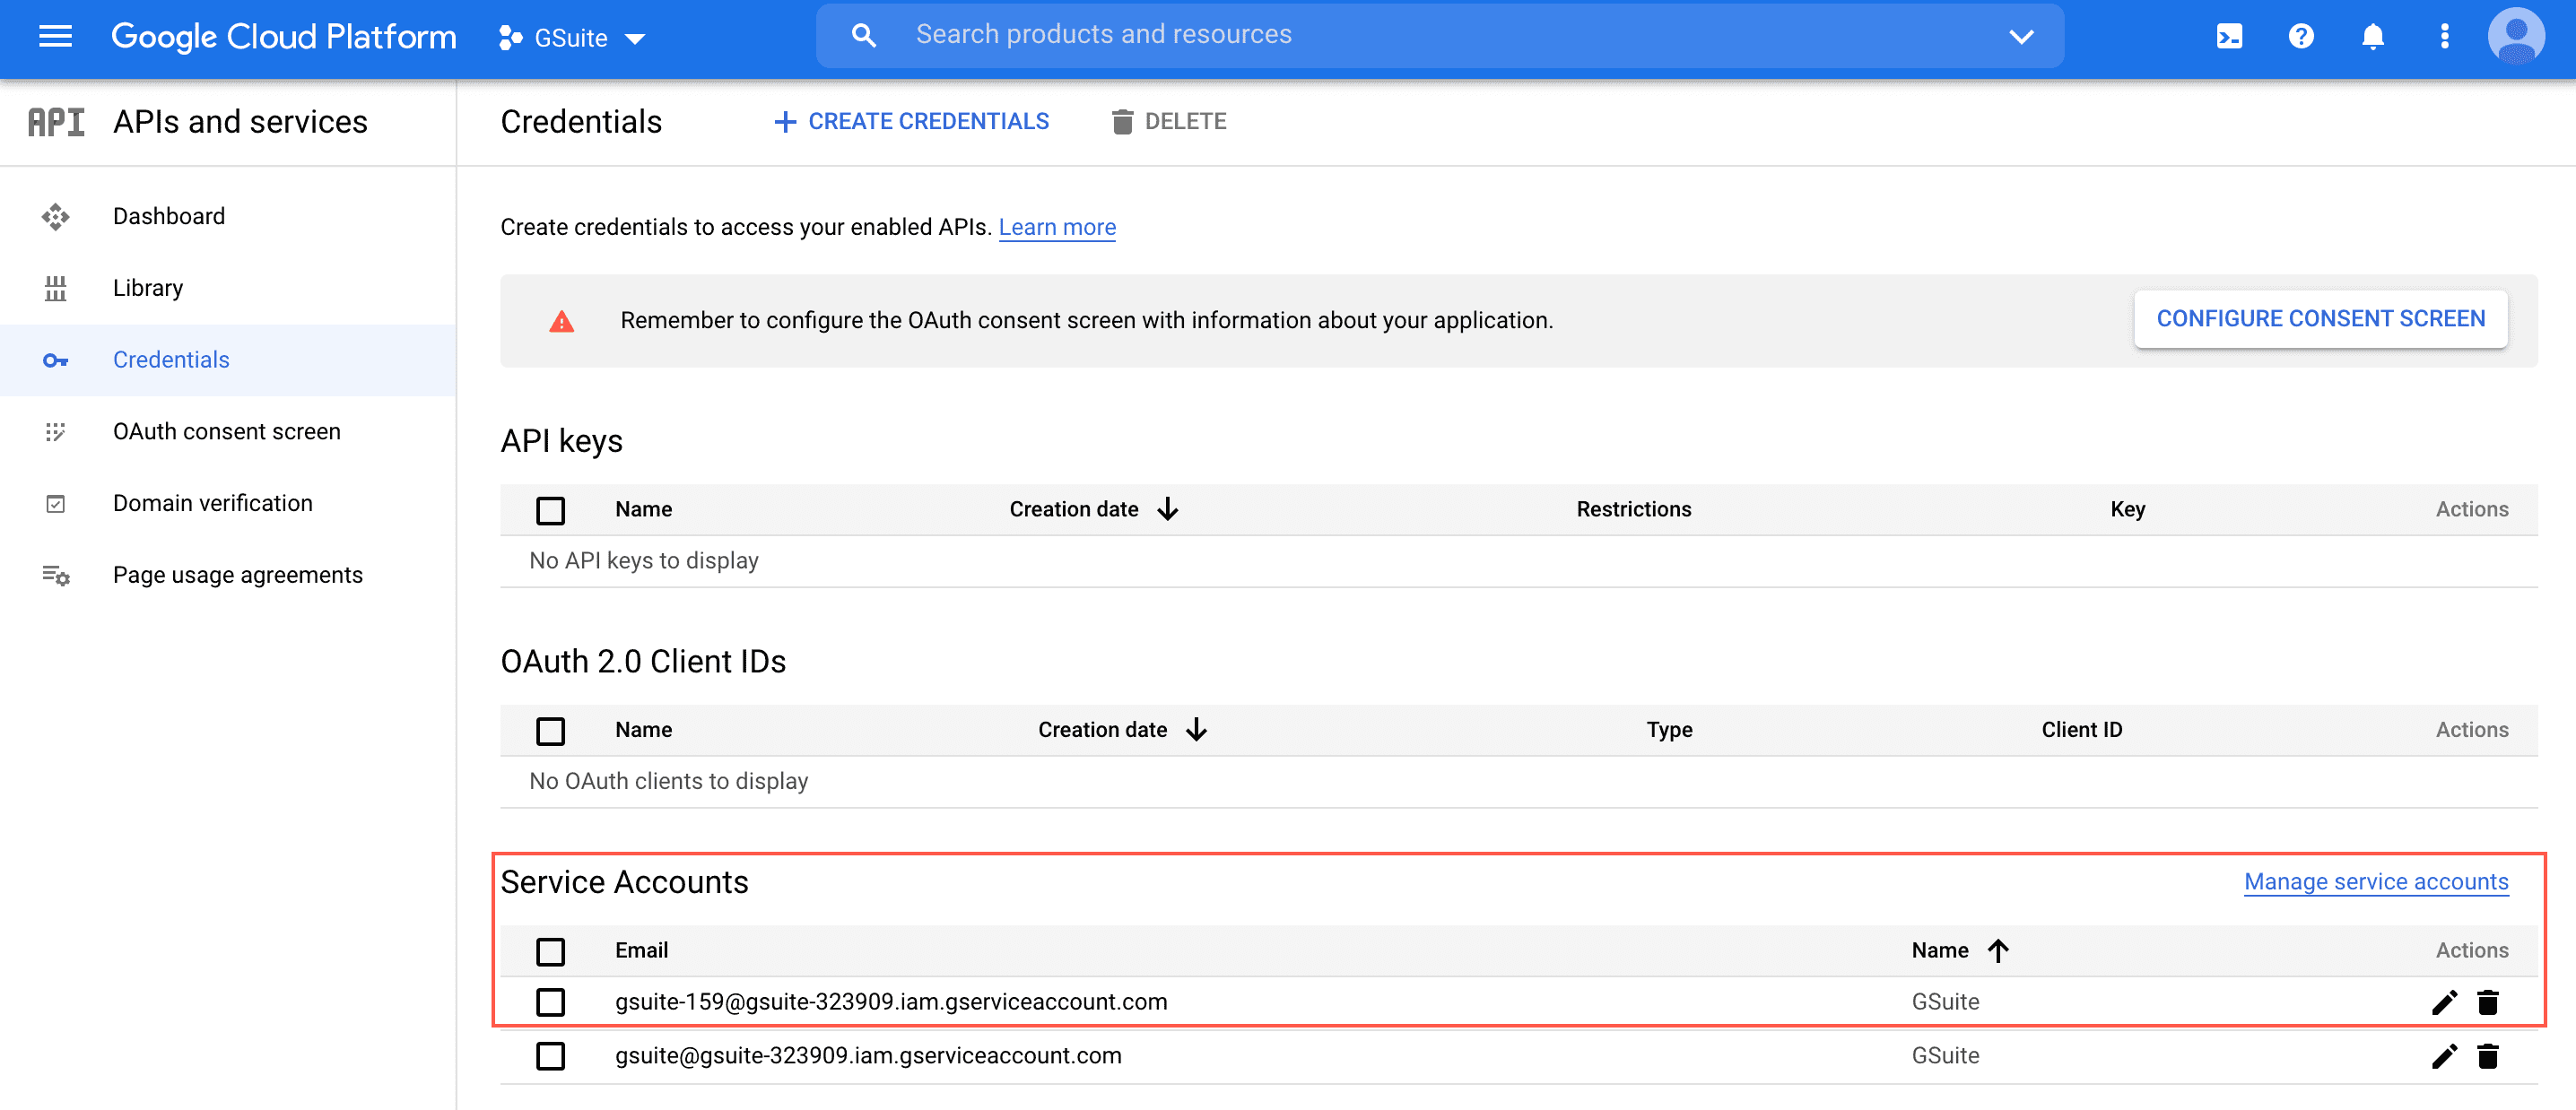
Service Account
Click Keys > Add Key > Create new key.
Select JSON as Key type and click Create.
The G Suite service account’s private key JSON file is downloaded to your computer.
Go to the Google Admin page and enter your credentials.
Click Security > API Controls.
Click Manage Domain Wide Delegation.
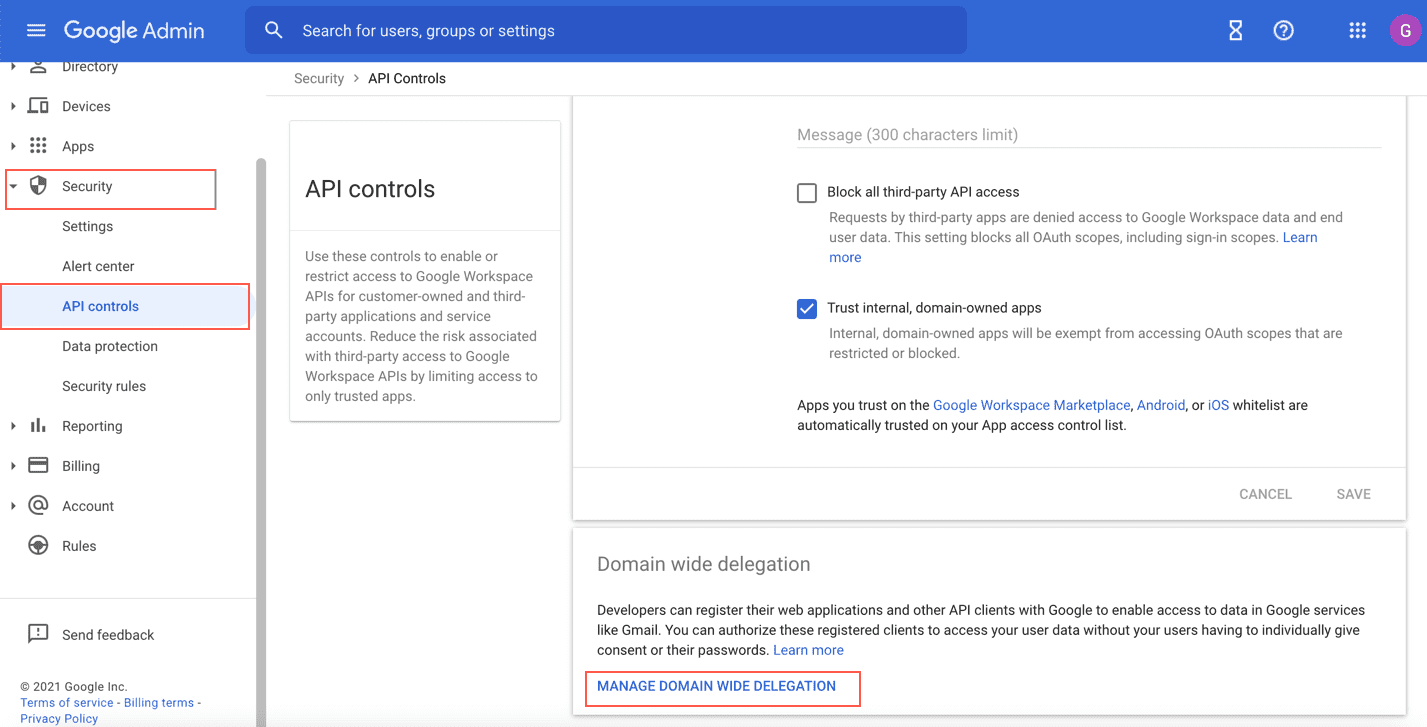
Manage Domain Wide Delegation
Click Add new.
Enter the Client ID from the previously downloaded JSON file.
In One or More API Scopes, enter:
https://www.googleapis.com/auth/admin.reports.audit.readonly
https://www.googleapis.com/auth/admin.reports.usage.readonly
https://www.googleapis.com/auth/gmail.readonly
Click Authorize.
Normalization policies normalize and standardize logs for efficient storage, analysis, and retrieval. It can also be used in the processing policy to process GSuite logs.
Click Configure in the navigation bar.
Under Entities, click Normalization Policies.
Select a Logpoint to create the normalization policy. You can select multiple Logpoint of different pools.
Click Next.
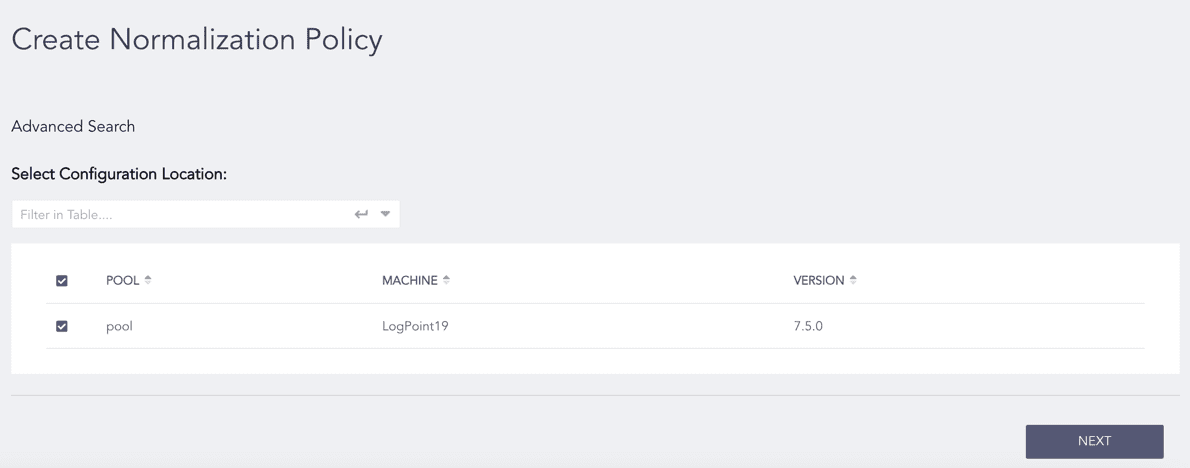
Selecting Logpoint
Enter a Name.
Select GSuiteCompiledNormalizer from the list of compiled normalizers, and click Add to List.
Click Next.
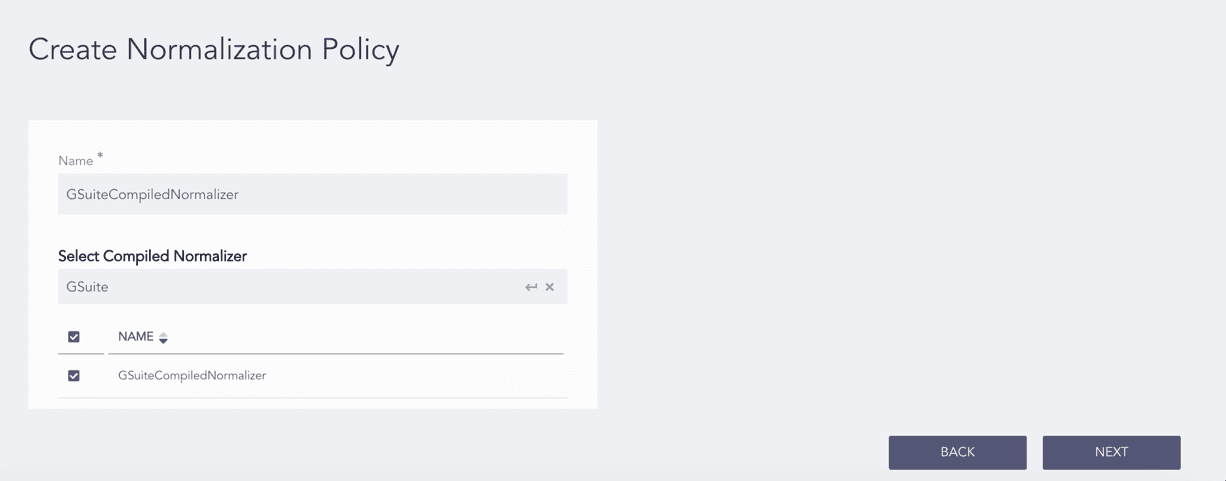
Adding a Normalization Policy
Review your changes. You can go Back to make changes.
Click Finish and click OK to confirm. Click Download Report to get the summary as a PDF.
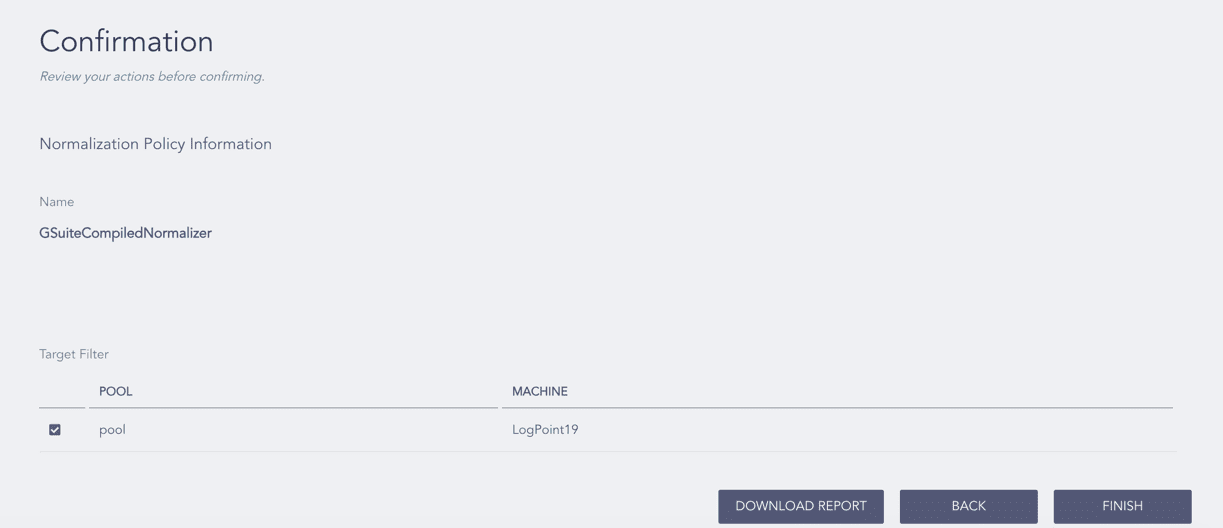
Confirming the Changes
Processing policy manages how GSuite logs are handled, processed, and stored to enhance their usability and accessibility for monitoring, reporting, and alerting purposes.
Click Configure in the navigation bar.
Under Entities, click Processing Policies.
Select a Logpoint to create the processing policy. You can select multiple Logpoint of different pools.
Click Next.
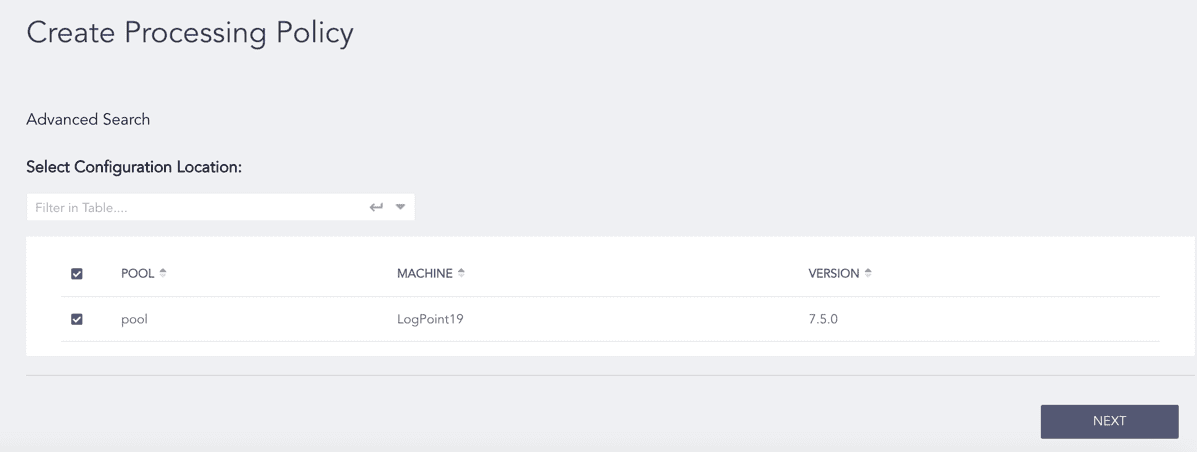
Selecting Logpoint
Enter a Name.
Select the Enrichment Policy and Routing Policy.
Select the previously created Normalization Policy.
Click Next.
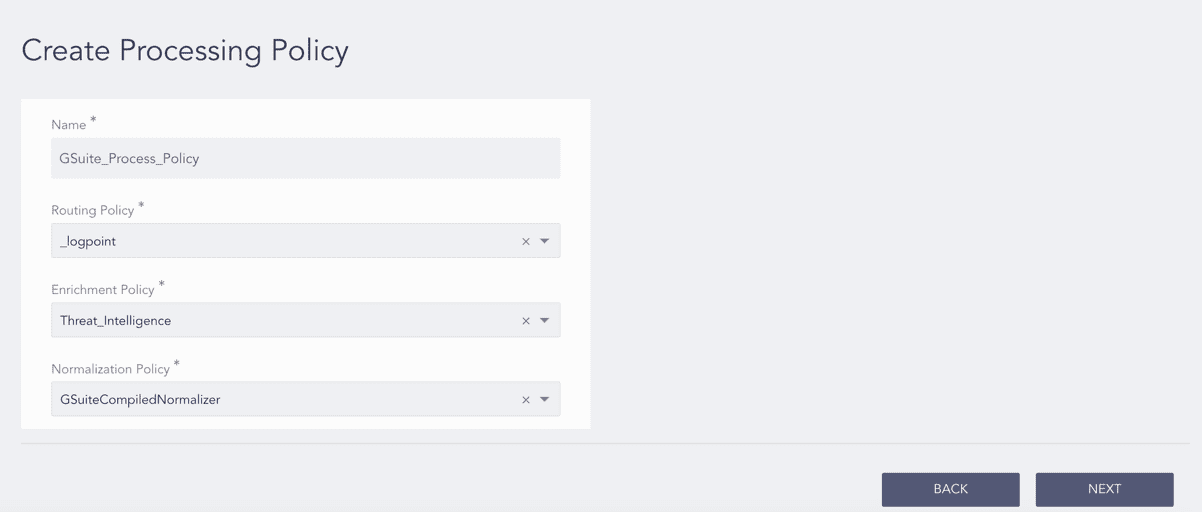
Adding a Processing Policy
Review your changes. You can go Back to make changes.
Click Finish and click OK to confirm. Click Download Report to get the summary as a PDF.
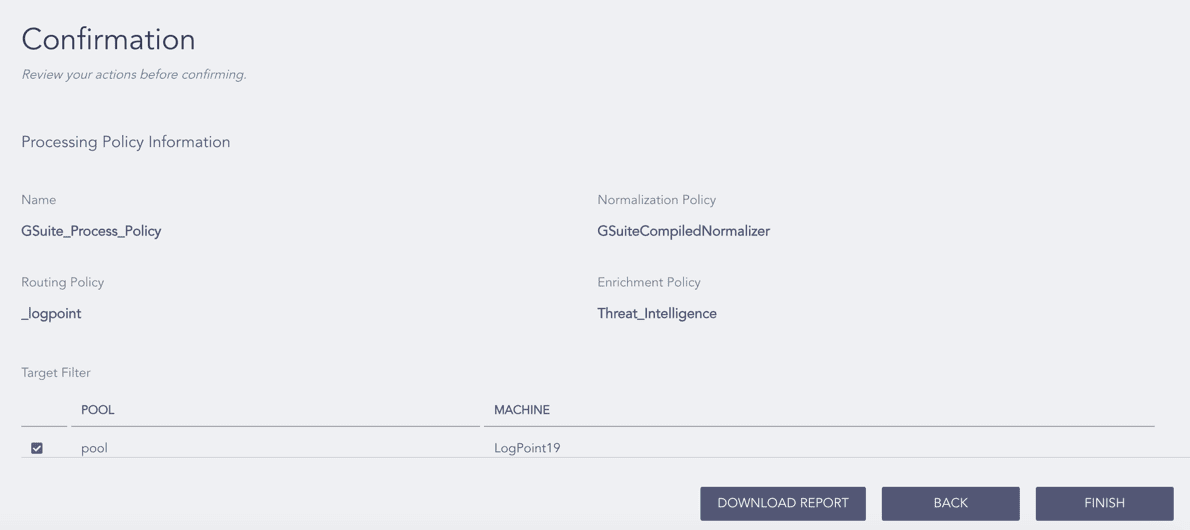
Confirming the Changes
Click Configure in the navigation bar of the Director Console.
Under Settings, click Plugins.
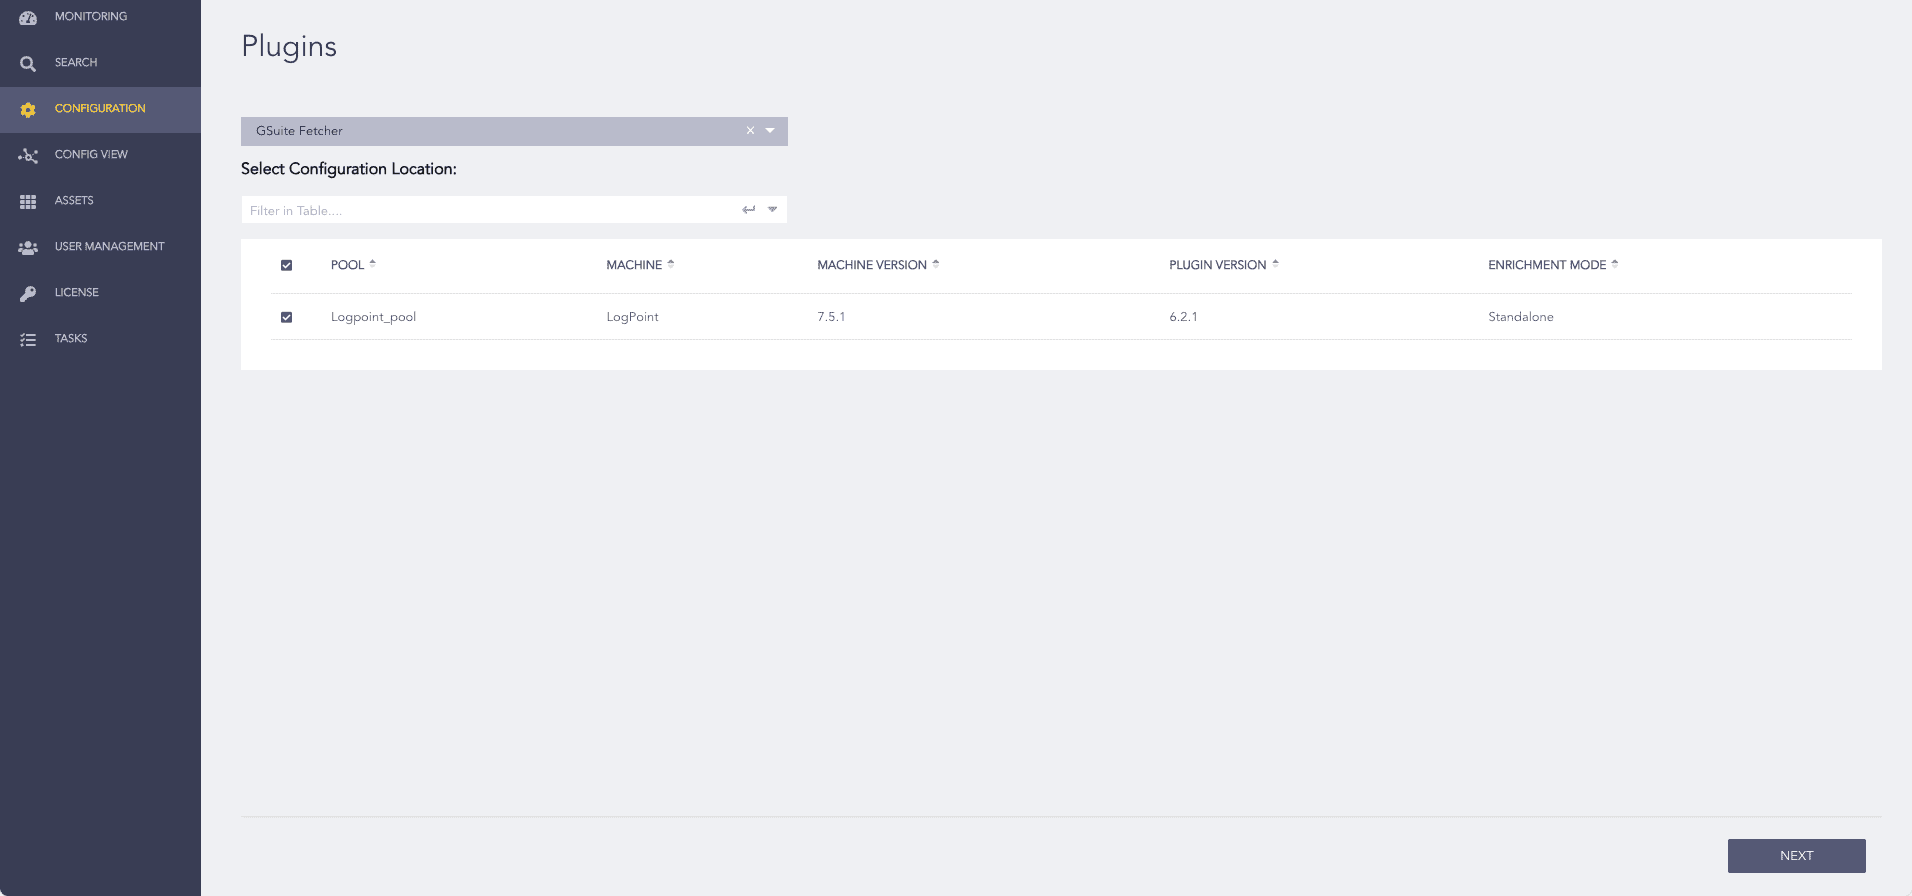
Select GSuite Fetcher from the Select Plugin Type drop-down.
Select Logpoint to configure the GSuite Fetcher. You can select multiple Logpoint of different pools.
Click Next.

Selecting Logpoint
Select Create.
Upload the Google Workspace service account’s private key JSON file in Key File.
The Project ID, Private Key ID, Private Key, Client Email, and Client ID fields are auto-filled after you upload the credential file.
Enter the Google Workspace admin users’ email ID in User Email.
Select the frequency at which logs are retrieved in Fetch Interval (minutes).
Select the Charset.
Select the previously created Processing Policy.
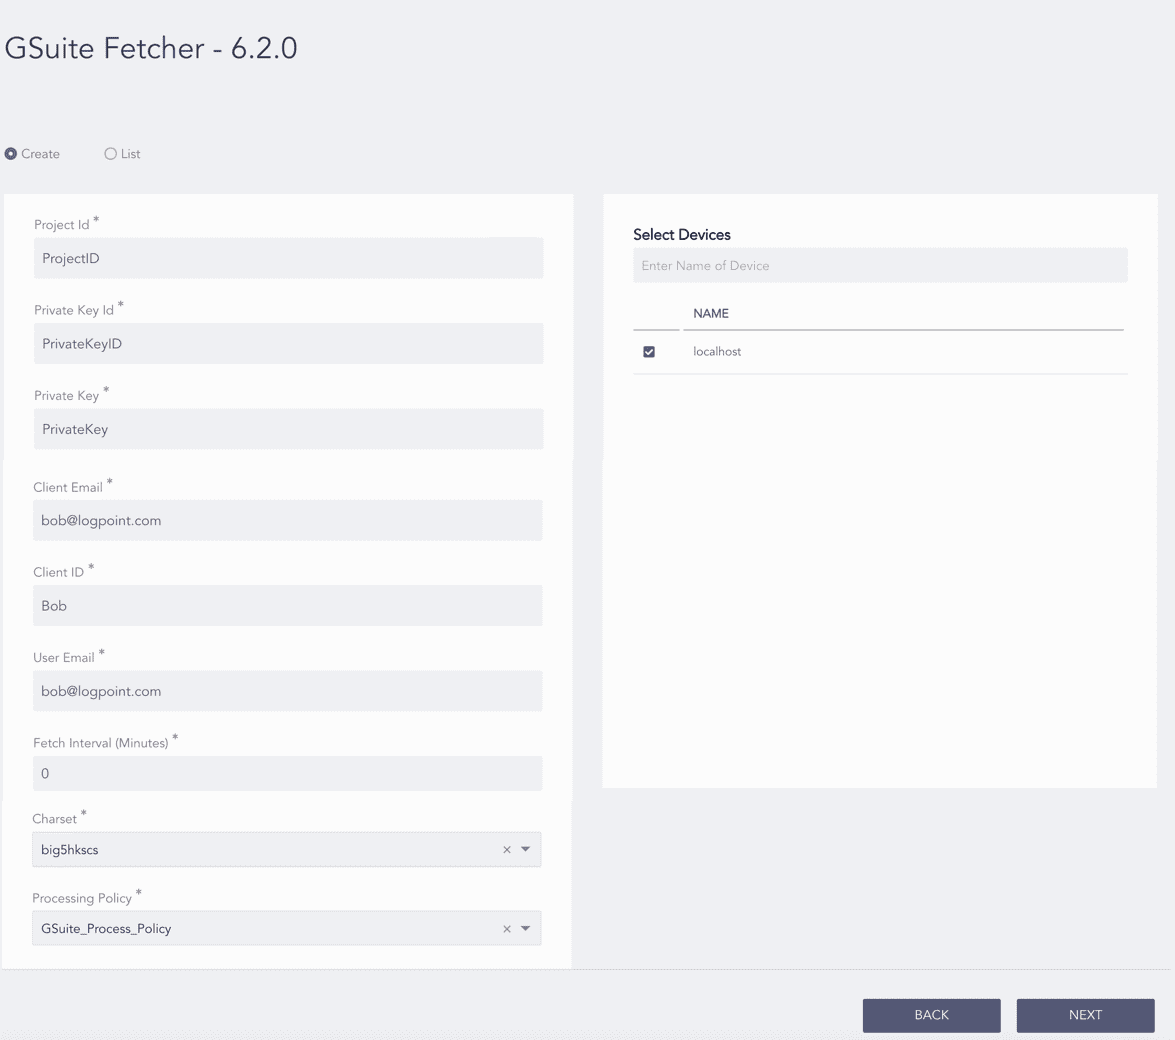
Configuring the GSuite Fetcher
Select Enable Proxy to use a proxy server.
In Proxy Configuration:
13.1. Enter the proxy server IP address and Port number.
13.2. Select HTTP or HTTPS protocol as required.
Click Next.
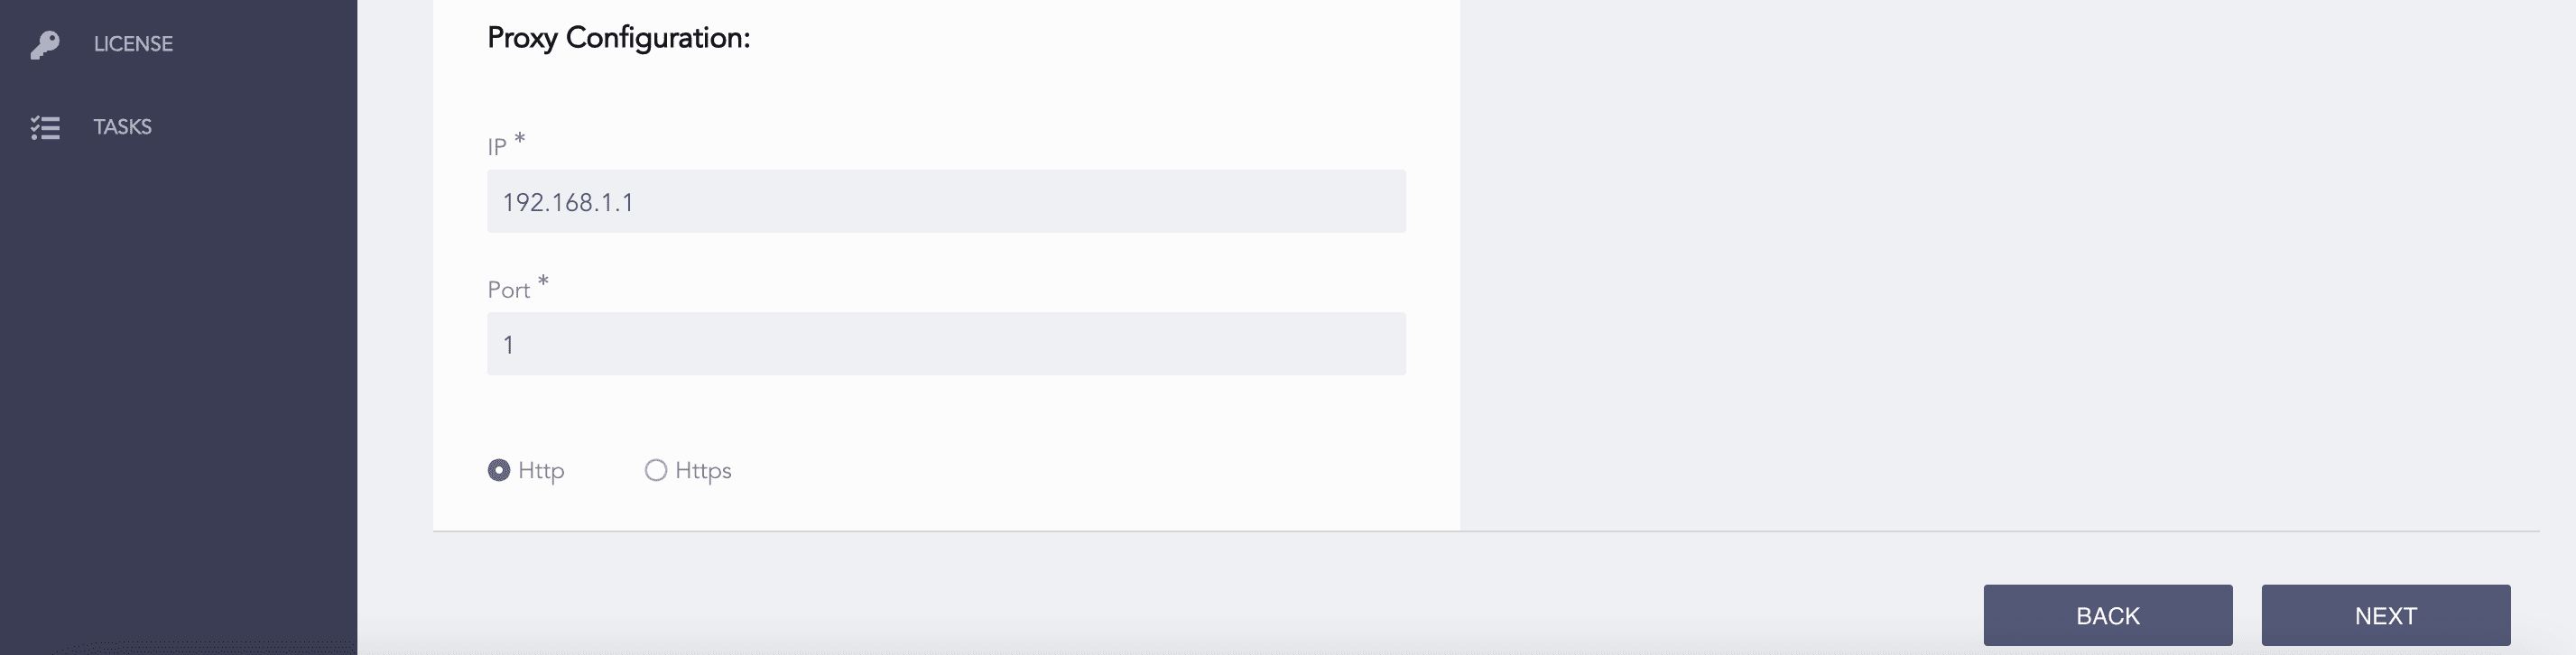
Enabling Proxy
Review your changes. You can go Back to make changes.
Click Finish and click OK to confirm. Click Download Report to get the summary as a PDF.
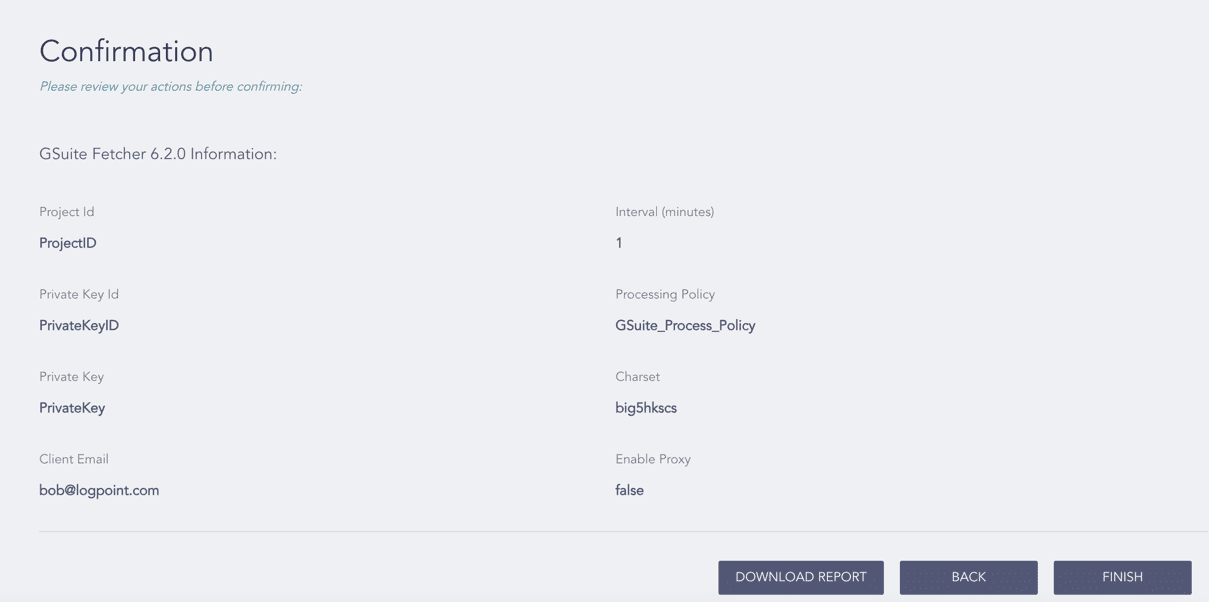
Confirming the Changes
Click Configure in the navigation bar of the Director Console..
Under Settings, click Plugins.
Select GSuite Fetcher from the Select Plugin Type drop-down.
Select the Logpoint where GSuite Fetcher is configured. You can select multiple Logpoint of different pools.
Click Next.
Selecting Logpoint
Select List. You can find the configurations that are common to all the selected Logpoint.
Click the Edit icon from Action.
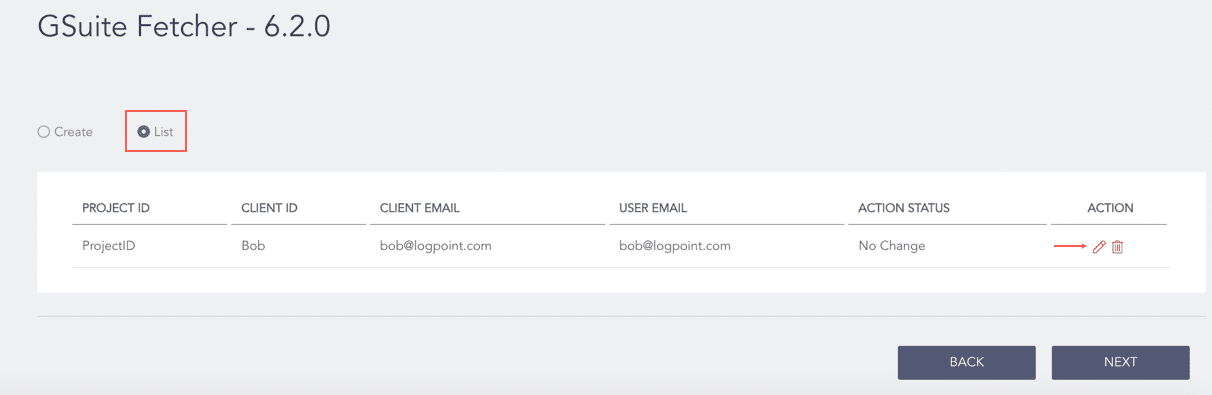
Editing the GSuite Fetcher Configuration
Make the changes and click Edit.
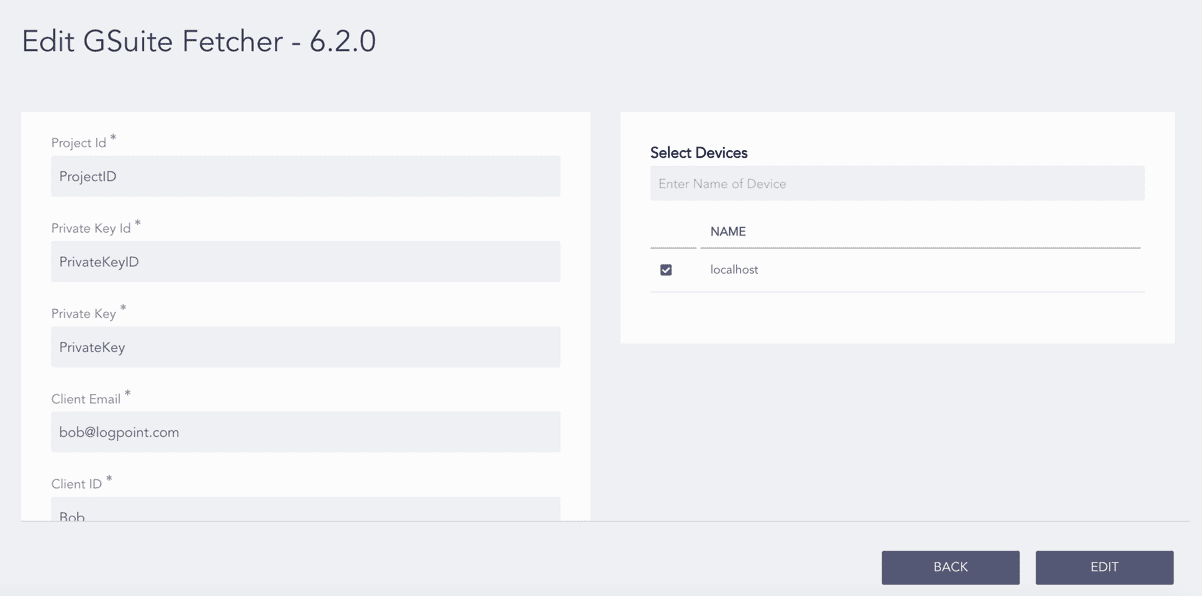
Editing a GSuite Fetcher Configuration
The Action Status of the configuration changes to Changed. You can click the Undo icon from Action to undo the changes.
Click Next.
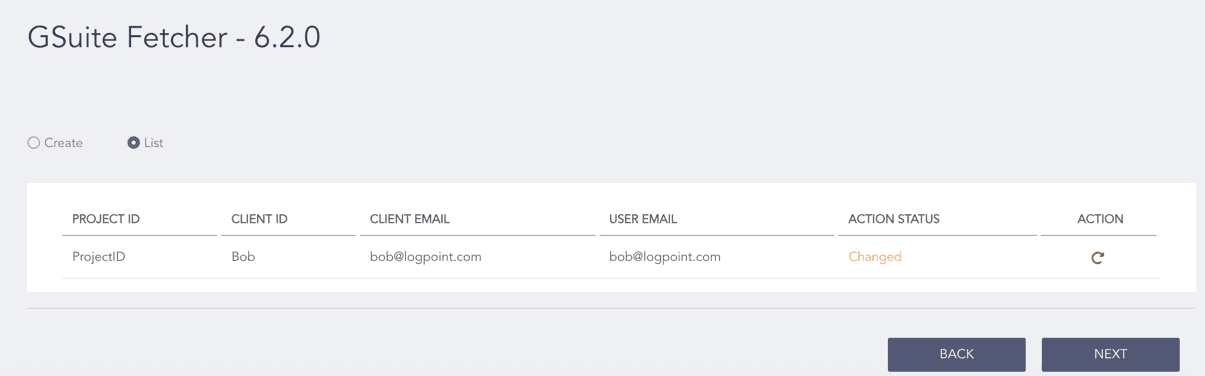
Verifying the Action Status
Review your changes. You can go Back to make changes.
Click Finish and click OK to confirm. Click Download Report to get the summary as a PDF.
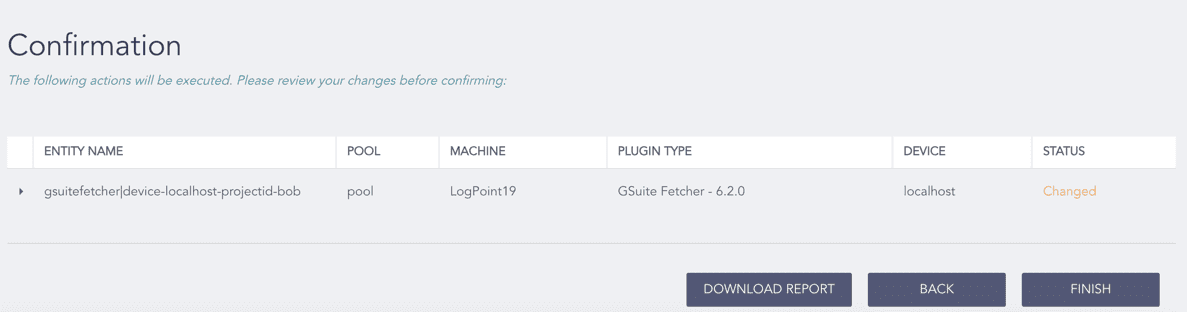
Confirming the Changes
Click Configure in the navigation bar of the Director Console..
Under Settings, click Plugins.
Select GSuite Fetcher from the Select Plugin Type drop-down.
Select the Logpoint where GSuite Fetcher is configured. You can select multiple Logpoint of different pools.
Click Next.
Selecting Logpoint
Select List. You can find the configurations that are common to all the selected Logpoint.
Click the Delete icon from Action.
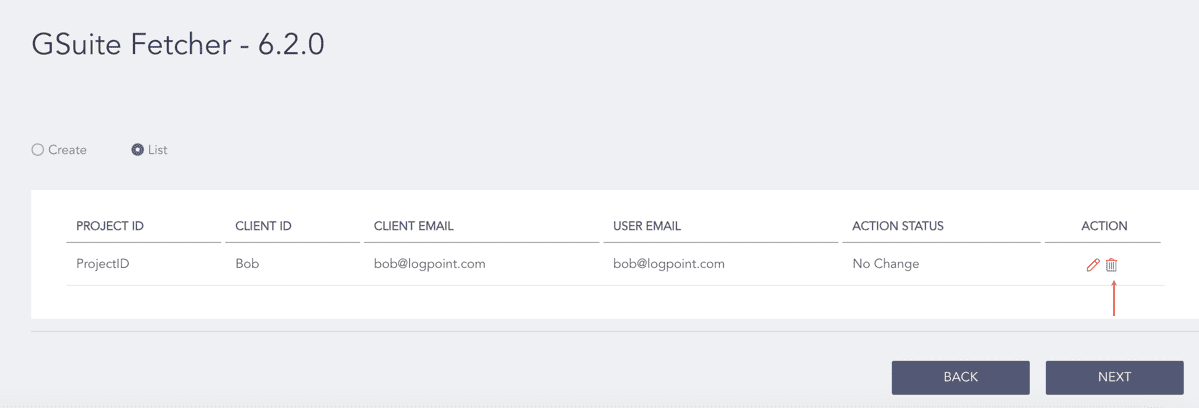
Deleting the GSuite Fetcher Configurations
The Action Status of the configuration changes to Delete. You can click the Undo icon from Action to undo the deletion.
Click Next.
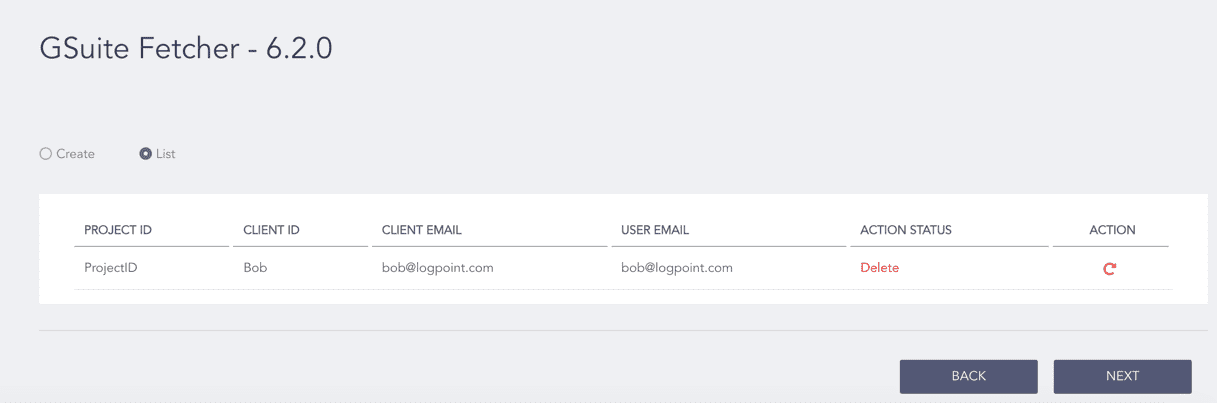
Verifying the Action Status
Review your changes. You can go Back to make changes.
Click Finish and click OK to confirm. Click Download Report to get the summary as a PDF.
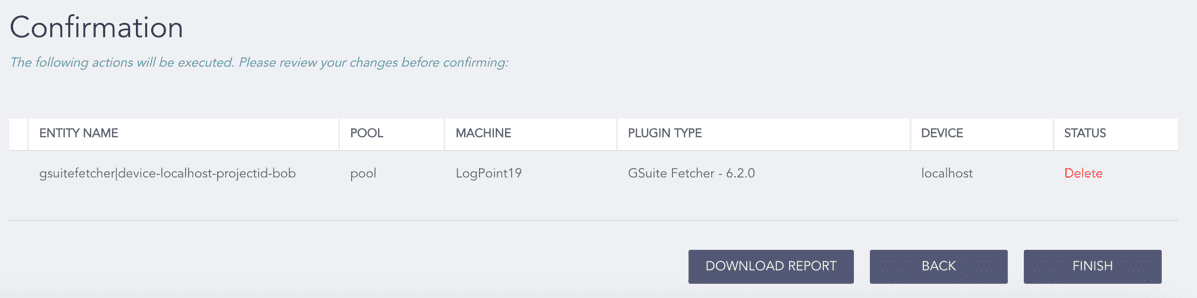
Confirming the Changes
You can configure Gsuite using the Gsuite log source template, which has predefined settings and configurations to fetch Gsuite logs. However, some fields must be entered manually.
Click Configure in the navigation bar.
Under Entities, click LOG SOURCES.
Click Create Log Source.
Select Gsuite Fetcher.
Select a Pool and Logpoint to configure the fetcher.
Click Next.
In source, you can add details about the Google Workspace from where Gsuite fetches logs.
Click Source.
Enter the Log Source’s Name.
Select the frequency at which logs are retrieved in Fetch Interval (minutes).
Select Charset and Time Zone.
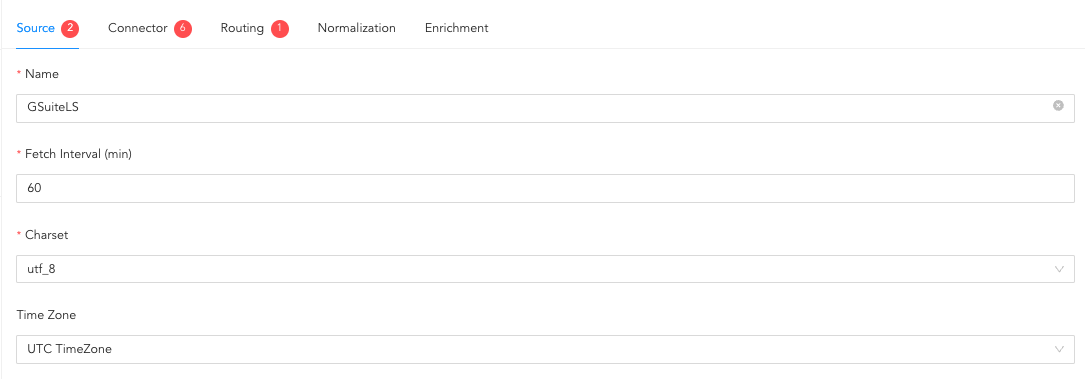
Configuring Source
In connector, you can configure how Gsuite and the Gsuite Workspace communicate with each other.
Upload the Google Workspace service account’s private key JSON file in Key File.
The Project ID, Private Key ID, Private Key, Client Email, and Client ID fields are auto-filled after you upload the credential file.
Enter the Google Workspace admin users email ID in User Email.
If you use a Distributed Logpoint, select a collector from the Distributed Collector drop-down.
4.1. Select either HTTP or HTTPS protocol.
4.2. Enter the proxy server IP address and the PORT number.
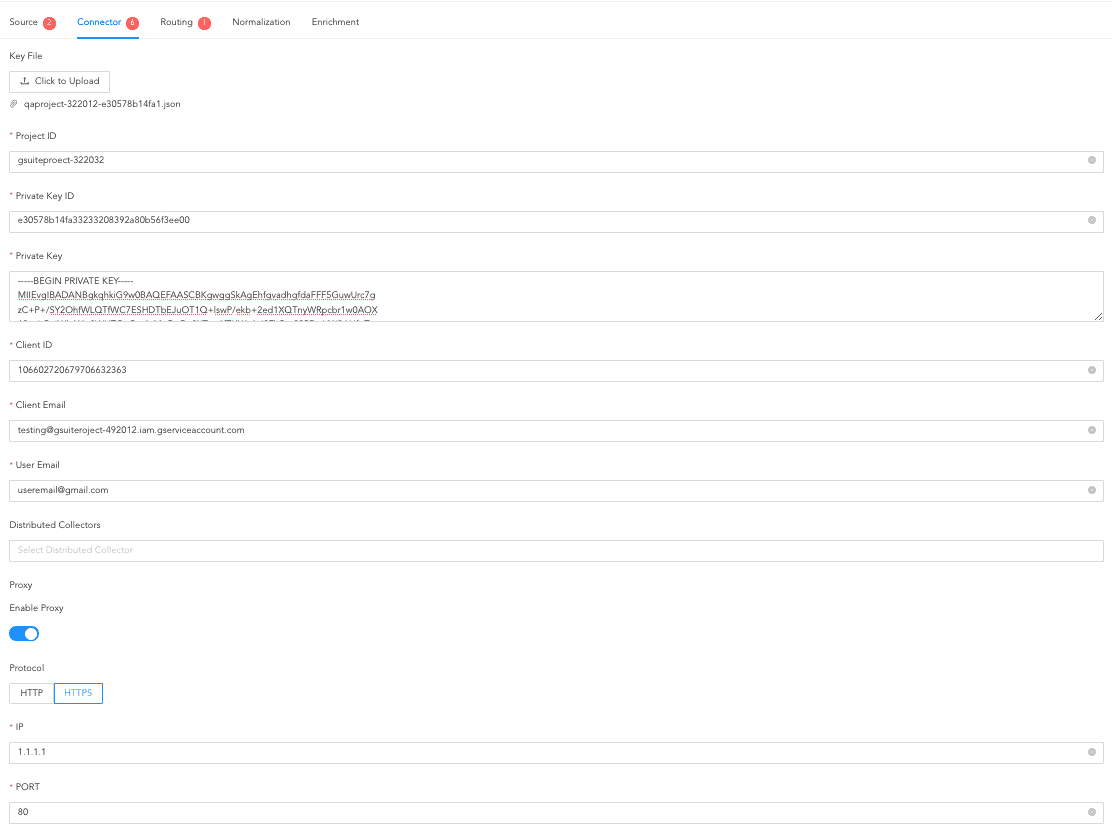
Configuring Connector
In routing, you define repositories (repos) and set routing criteria for the Gsuite fetcher. Repos store the incoming logs, and the routing criteria determine the conditions for forwarding logs to specific repositories.
To create a repo:
Click Routing and + Create Repo.
Enter a Repo name.
In Path, enter the location to store the incoming logs.
In Retention (Days), enter the number of days logs are kept in a repository before they are automatically deleted.
In Availability, select the Remote logpoint and Retention (Days).
Click Create Repo.

Creating a Repo
In Repo, select the created repo to store logs.
To create Routing Criteria:
Click + Add row.
Enter a Key and Value. The routing criteria is only applied to those logs which have this key-value pair.
Select an Operation for logs that have this key-value pair.
3.1. Select Store raw message to store both the incoming and the normalized logs in the selected repo.
3.2. Select Discard raw message to discard the incoming logs and store the normalized ones.
3.3. Select Discard entire event to discard both the incoming and the normalized logs.
In Repository, select a repo to store logs.
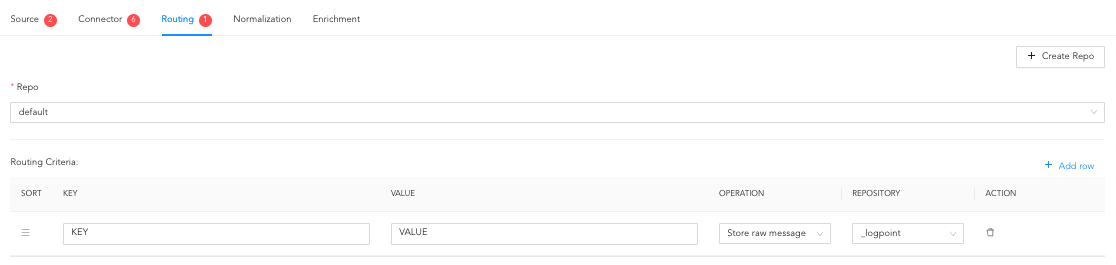
Creating a Routing Criteria
Click the ( ) icon under Action to delete the created routing criteria.
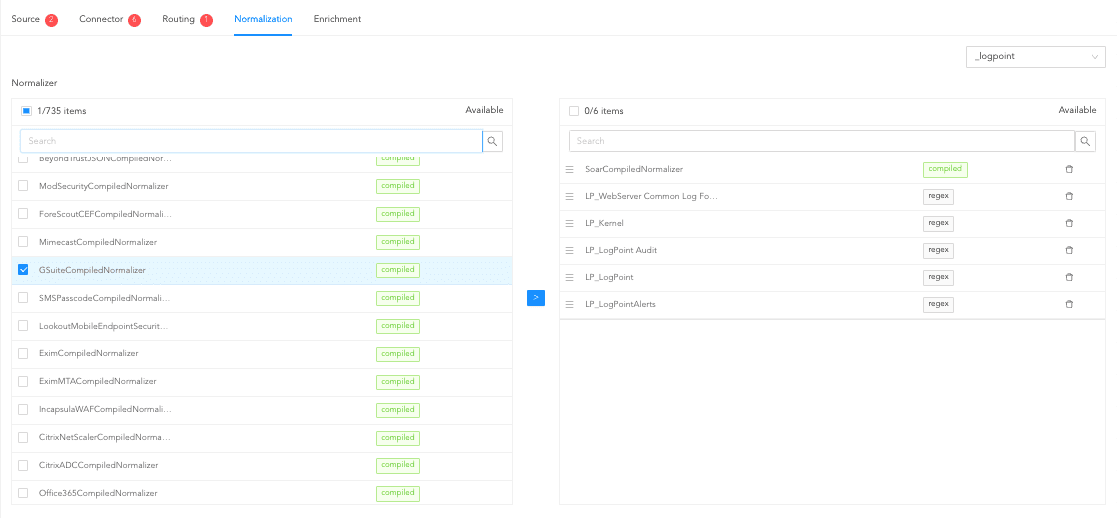
In normalization, you can select normalizers for the incoming logs. Normalizers transform incoming logs into a standardized format for consistent and efficient analysis.
Click Normalization.
Select a Normalizer from the list and click the swap( ) icon or a select a Normalization Policy from the dropdown.
Adding Normalizers
In enrichment, you can select an enrichment policy for the incoming logs. Enrichment policies are used to add additional information to a log, such as user information, device type or geolocation.
Click Enrichment.
Select an Enrichment Policy.
Click Create Log Source to save the configurations of Source, Connector, Routing, Normalization, and Enrichment.
You are redirected to Tasks, which displays the log source setup progress.
Click CONFIGURATION from the left navigation bar.
Under Settings, click PLUGINS.
Select GSuite Fetcher from the Select Plugin Type drop-down.
Select Logpoint to edit the GSuite Fetcher configuration. Multiple Logpoint can be selected from different pools.
Selecting Logpoint
Click NEXT.
Select List. The page lists the configurations that are common to all the selected Logpoint.
Click the Edit icon under ACTION.
Make the changes and click EDIT.
The Action Status of the configuration changes to Changed. To undo changes, click the Undo icon from Action.
Click NEXT.
Review your changes. Click BACK to make more changes. Click DOWNLOAD REPORT to get a summary as a PDF.
Click FINISH and click OK to confirm.
You are redirected to TASKS, which displays the GSuite Fetcher edit progress.