To install Logpoint:
Boot your system with the Logpoint v7.8.0 ISO. Multiple warning messages may appear during the first boot. They are not related to the ISO and can be ignored.
On Network connections, you can manually configure the network interfaces or proceed with the default configurations. By default, Logpoint uses the IPv4 protocol with Automatic (DHCP) configurations for the first network interface.
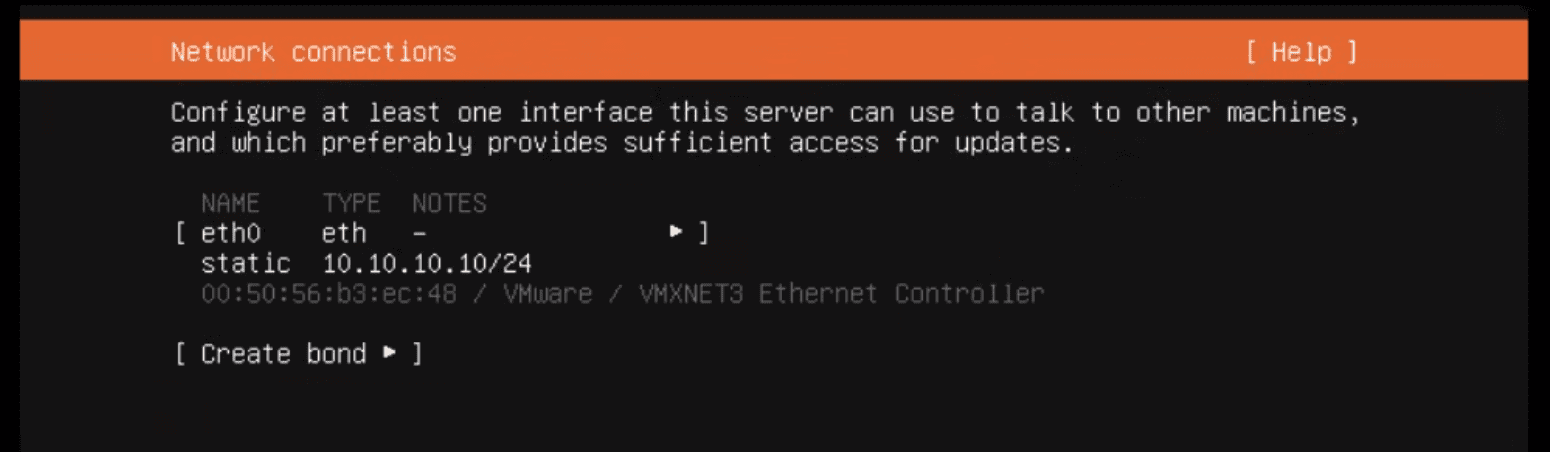
Network connections screen
If you have multiple network interfaces, you must manually enable and configure each successive interface. Go to Configuring network interfaces for information on how to configure network interfaces.
Click Done.
The Logpoint ISO automatically partitions your storage devices for the installation using the following sizes:
Partition |
Mount Point |
Size |
|---|---|---|
boot |
/boot |
1GB |
swap |
8GB |
The remaining space is used for the following volumes:
Volume |
Mount Point |
Size |
|---|---|---|
root |
/ |
40GB |
application |
/opt |
25GB |
app_store |
/opt/immune/app_store |
20GB |
storage |
/opt/immune/storage |
All the remaining space |
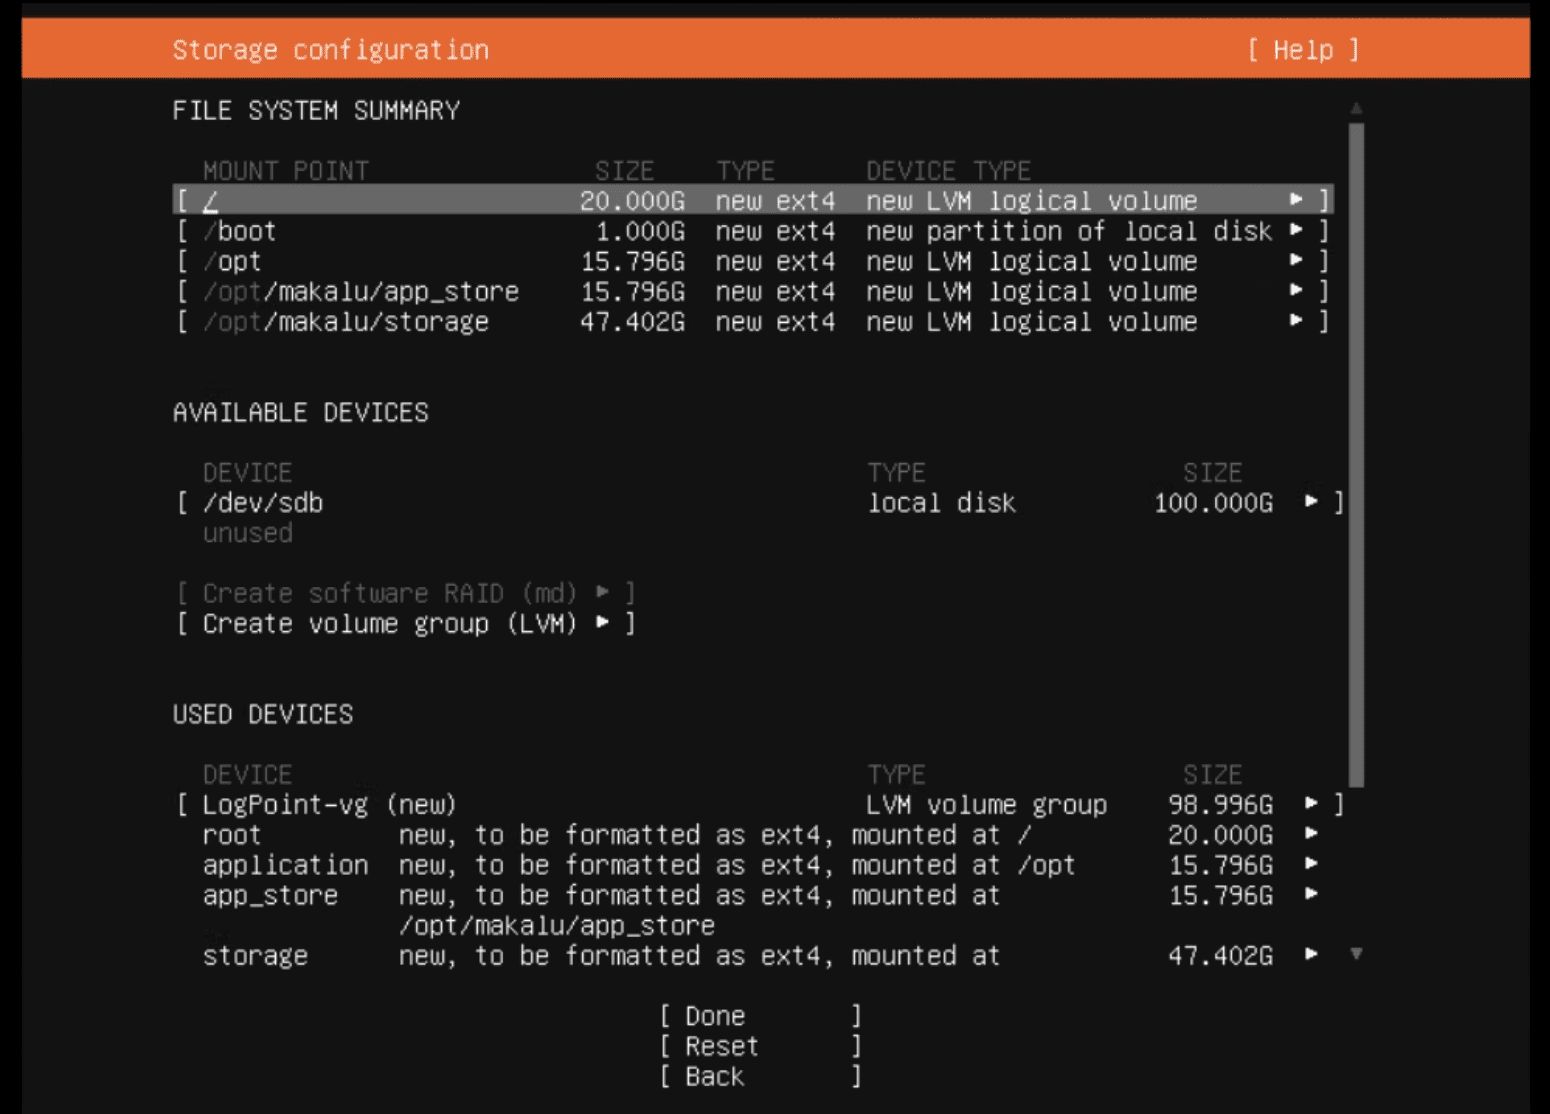
Automatic partitioning of storage devices
You can manually customize the storage devices by selecting Reset. Go to Customizing storage partitions during installation for more information.
Select Done.
Warning
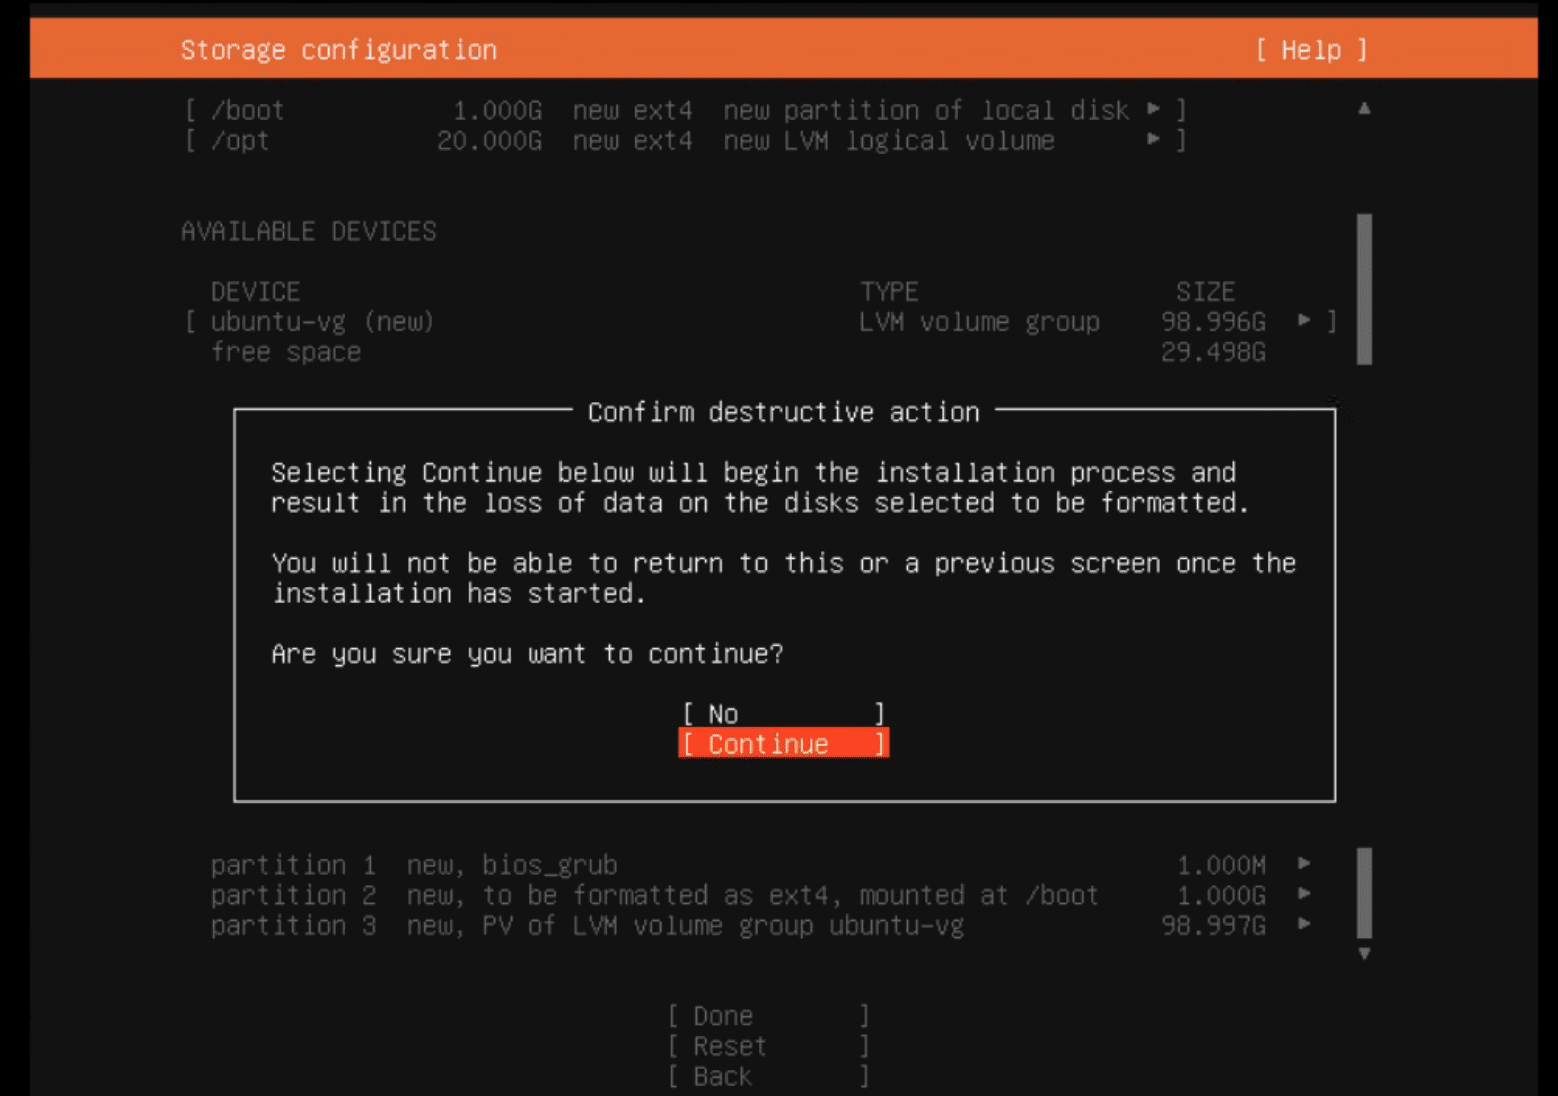
The installation process cleans the disk entirely. Make sure you backup your files before installing Logpoint.
Select Continue to start the installation process.
Starting the installation process
Select Reboot Now. Logpoint reboots once more to complete the installation. If the installation process fails, you must erase all the data in the disk before reinstalling Logpoint.
After installation, you must either manually eject the boot disk or select to boot from the hard drive from the Boot Manager. If the process is not completed, the entire process will repeat.
Log in using the following credentials:
Username: li-admin
Password: changeme
Change the password immediately using the passwd command. The password should have a minimum length of 15 characters and should include a lowercase character, an uppercase character, a digit and a special character. Atleast 4 characters on your password should be different from the old password.
The README.txt file in the home directory of the li-admin user gives you an overview of the actions that can be carried out.
Use ifconfig command to view the IP address of the installed Logpoint.
Enter the IP address in your browser to access the Logpoint User Interface. Log in with the following credentials:
Username: admin
Password: changeme
Change the password immediately.
During the first login, you can choose between a Standard Configuration, Custom Configuration, Collector, or Syslog Forwarder.
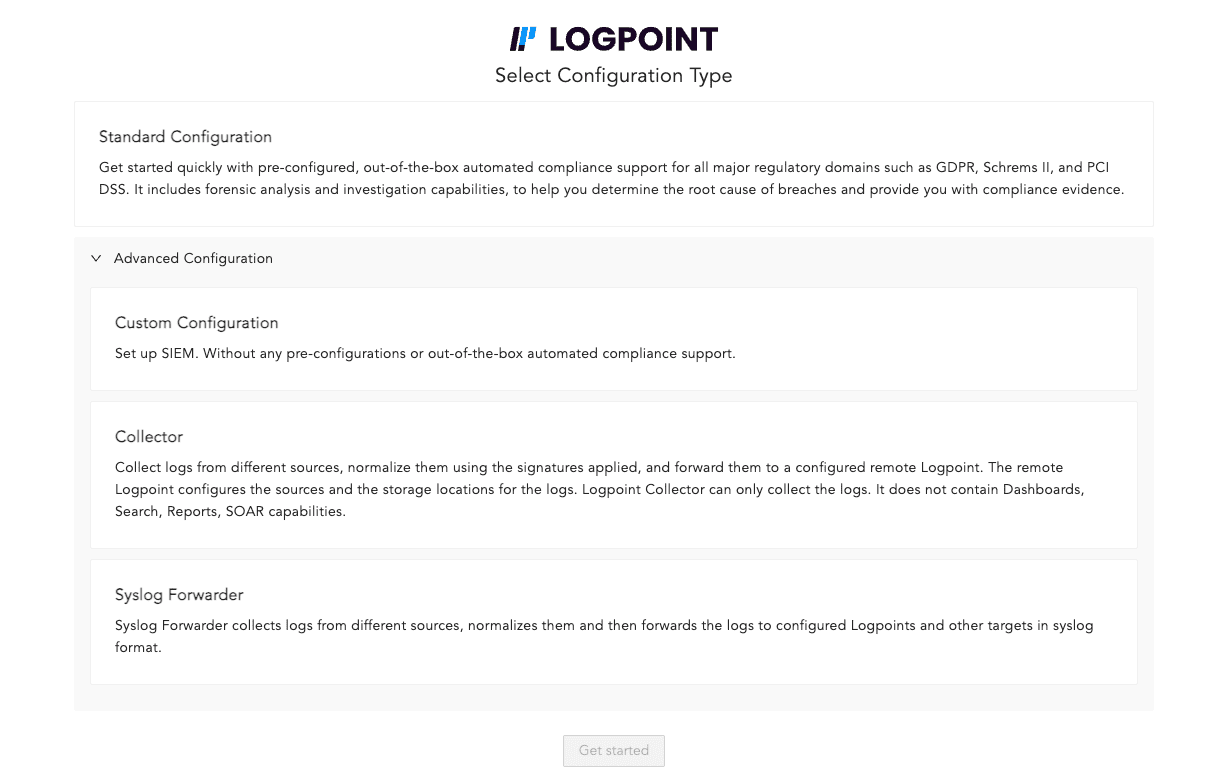
Select Configuration Type
Standard Configuration enables a quick start with preconfigured dashboards and repositories for access management, incident management, and perimeter security monitoring. Dashboards come with ready-to-use widgets for compliance, and the repositories are mapped to specific source types, such as firewalls and servers, which you can use when creating a log source.
To select standard configuration:
Log into Logpoint.
Select Standard Configuration.
Click Get started.

Select Pre-Configured Dashboards
Click Yes if you want pre-configured dashboards and No if you want to proceed without pre-configured dashboards.
If you select No, only repos will be created.
If you select Yes, select the repositories to be used for each widget in the pre-configured dashboard and click OK.
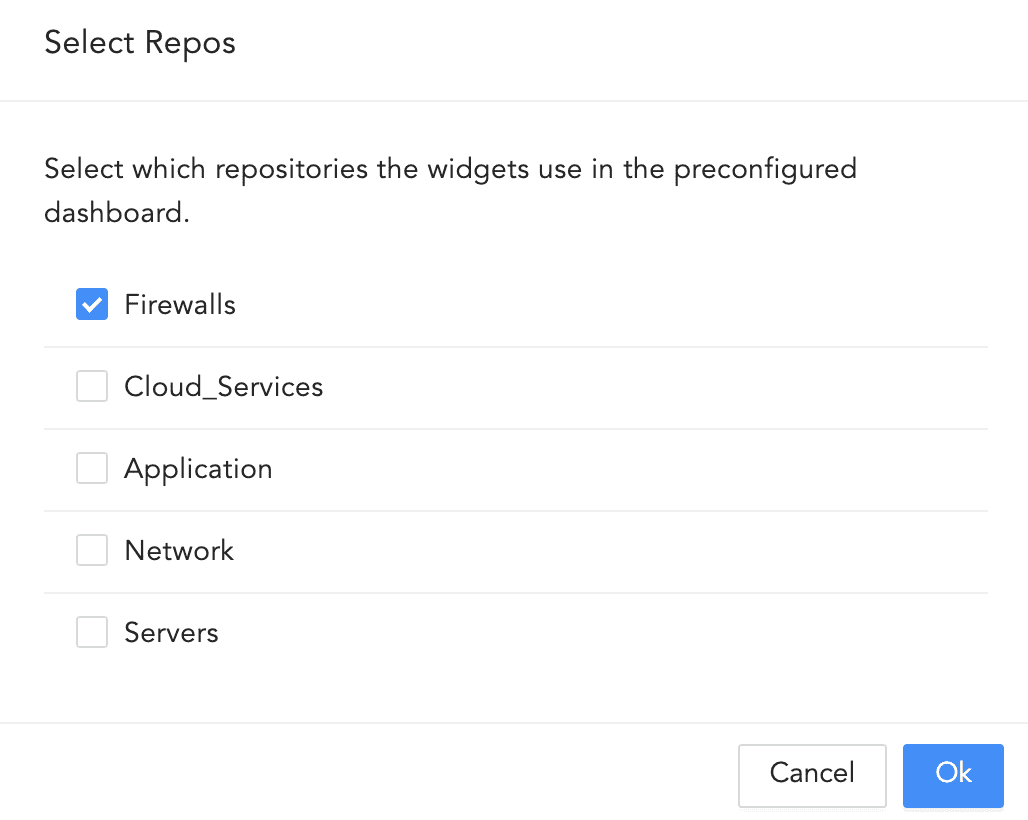
Select Repositories
You will be redirected to the Log Sources page. Here, you can create log sources and store their logs in the repositories. To learn how to configure log sources, Log Sources.
Use Advanced Configuration to apply Custom Configuration to Logpoint or configure a Collector or a Syslog Forwarder.
Custom Configuration has complete features without any preconfigured dashboards or repositories. You can configure it according to your specific needs and preferences.
To select custom configuration:
Log into Logpoint.
Click Advanced Configuration dropdown.
Select Custom Configuration.
Click Get started.
Click Confirm.
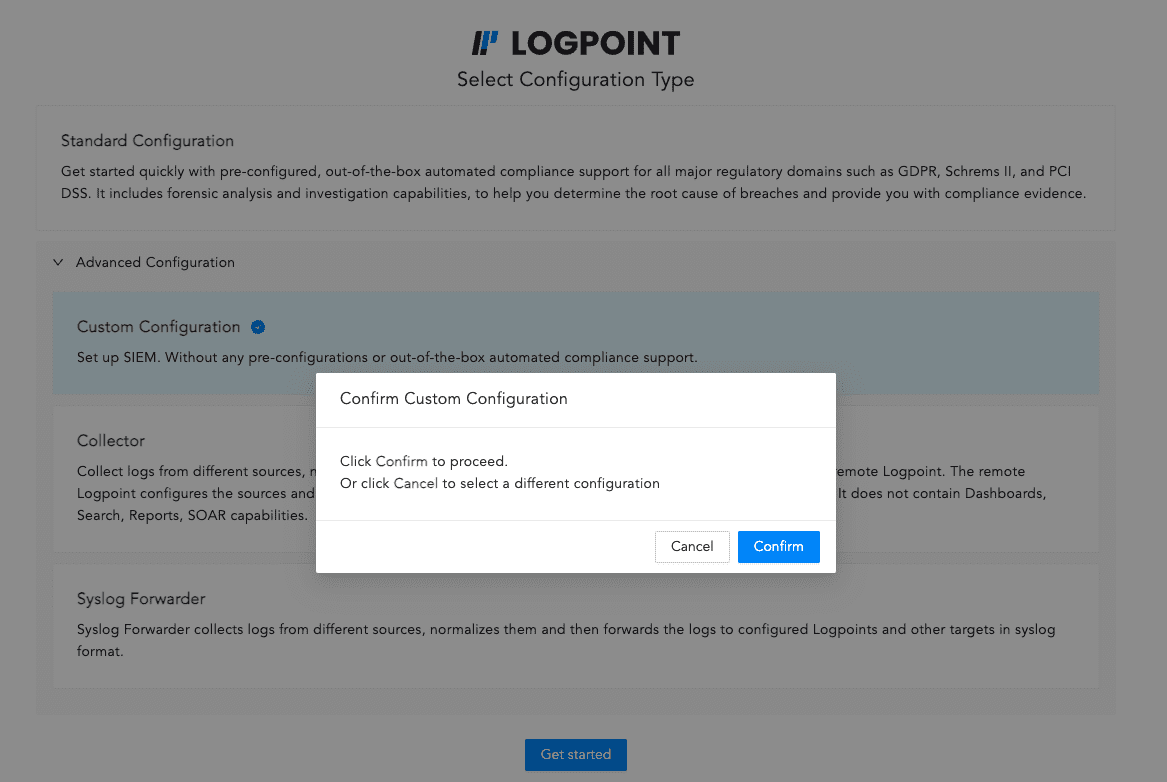
Select Custom Configuration
Collector collects logs from different sources, normalizes them using the signatures applied, and forwards them to a configured remote Logpoint. You can convert Logpoint to Logpoint Collector during login or configure later from Settings >> System Settings. For more information, go to Logpoint Collector.
To select collector:
Log into Logpoint.
Click Advanced Configuration dropdown.
Select Collector.
Click Get started.
Select Enable buffering to store the data in local persistence during a network outage.
Click Confirm.
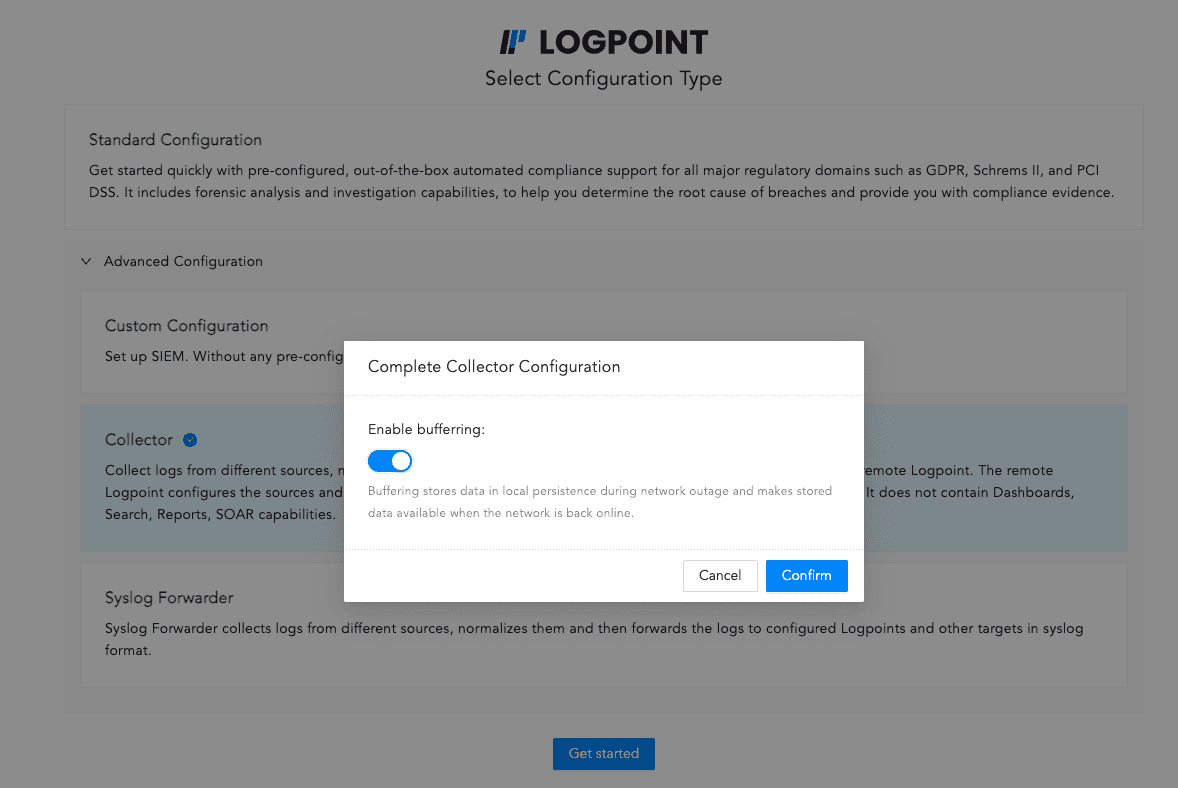
Select Collector
Syslog Forwarder collects logs from different sources, normalizes them using the signatures applied, and forwards them to a configured Logpoints and a target storage. You can convert Logpoint to a syslog forwarder during login or configure later from Settings >> System Settings. For more information, go to Syslog Forwarder.
To select syslog forwarder:
Log into Logpoint.
Click Advanced Configuration dropdown.
Select Syslog Forwarder.
Click Get started.
Click Confirm.
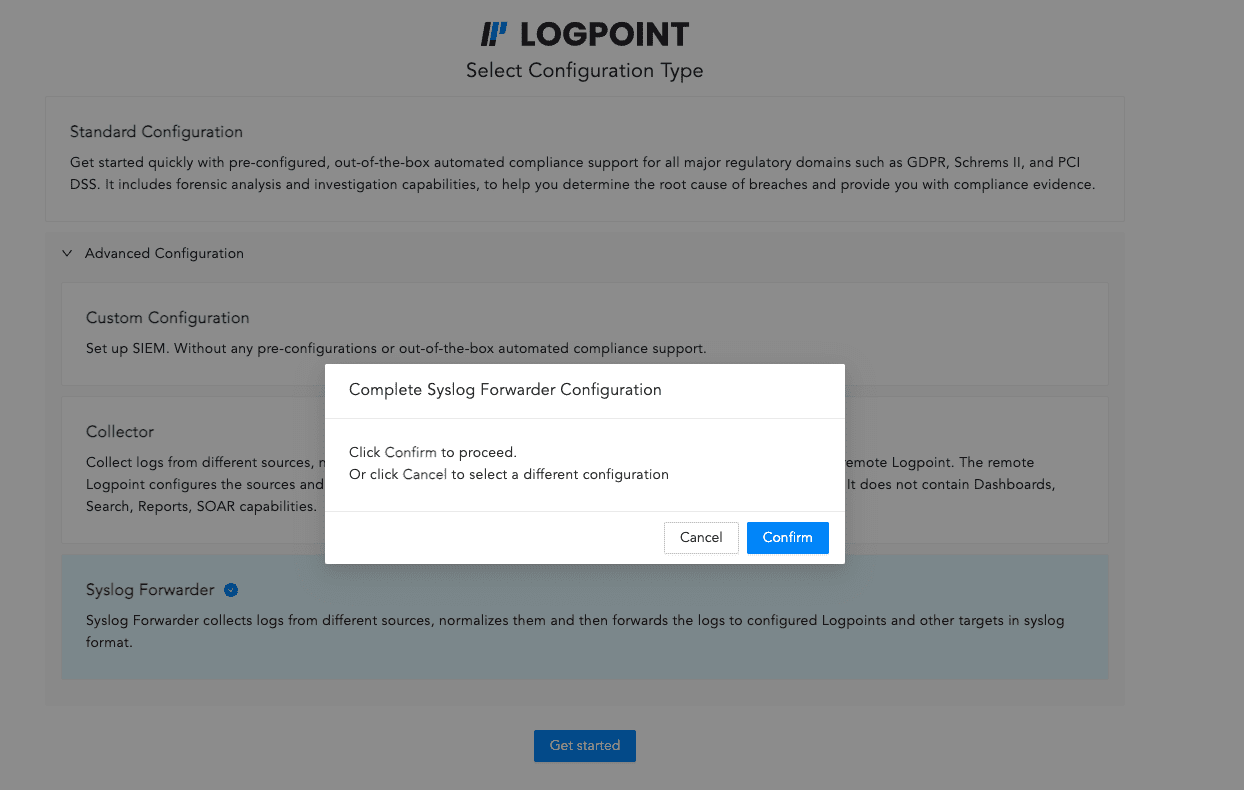
Select Syslog Forwarder
To configure a network interface, select the relevant interface.
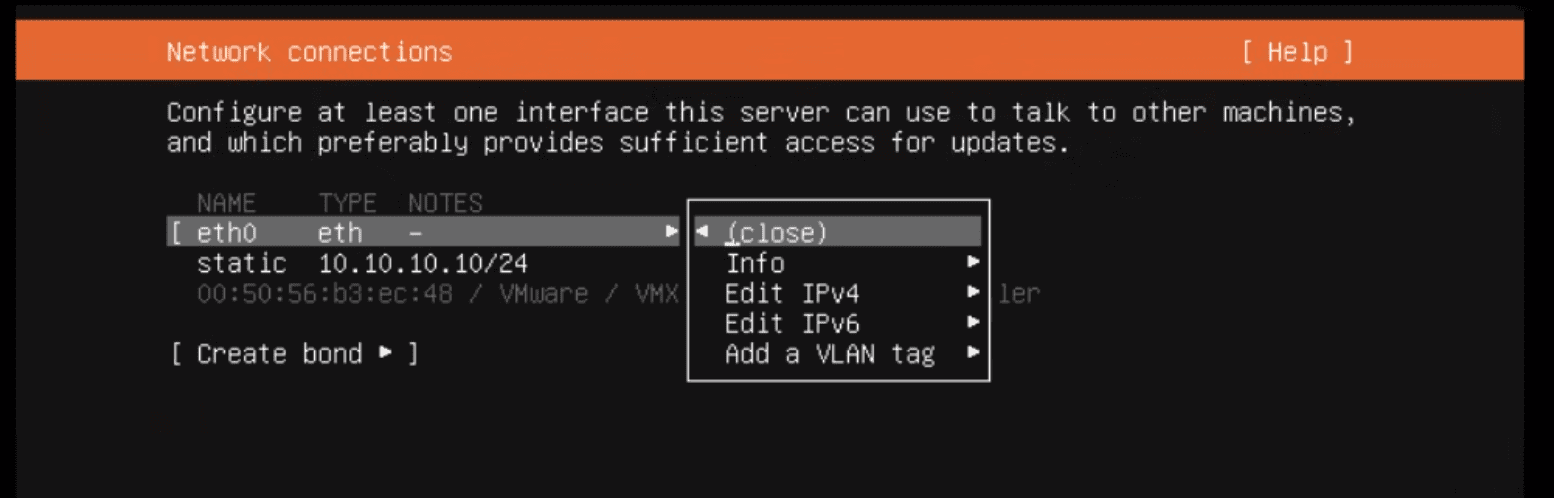
Configuring eth0 interface
Select Edit IPv4.
Select a Method.
If you choose Automatic (DHCP), the network interface settings are automatically set.
If you choose Manual, enter a Subnet, Address, Gateway, Name servers, and Search domains.
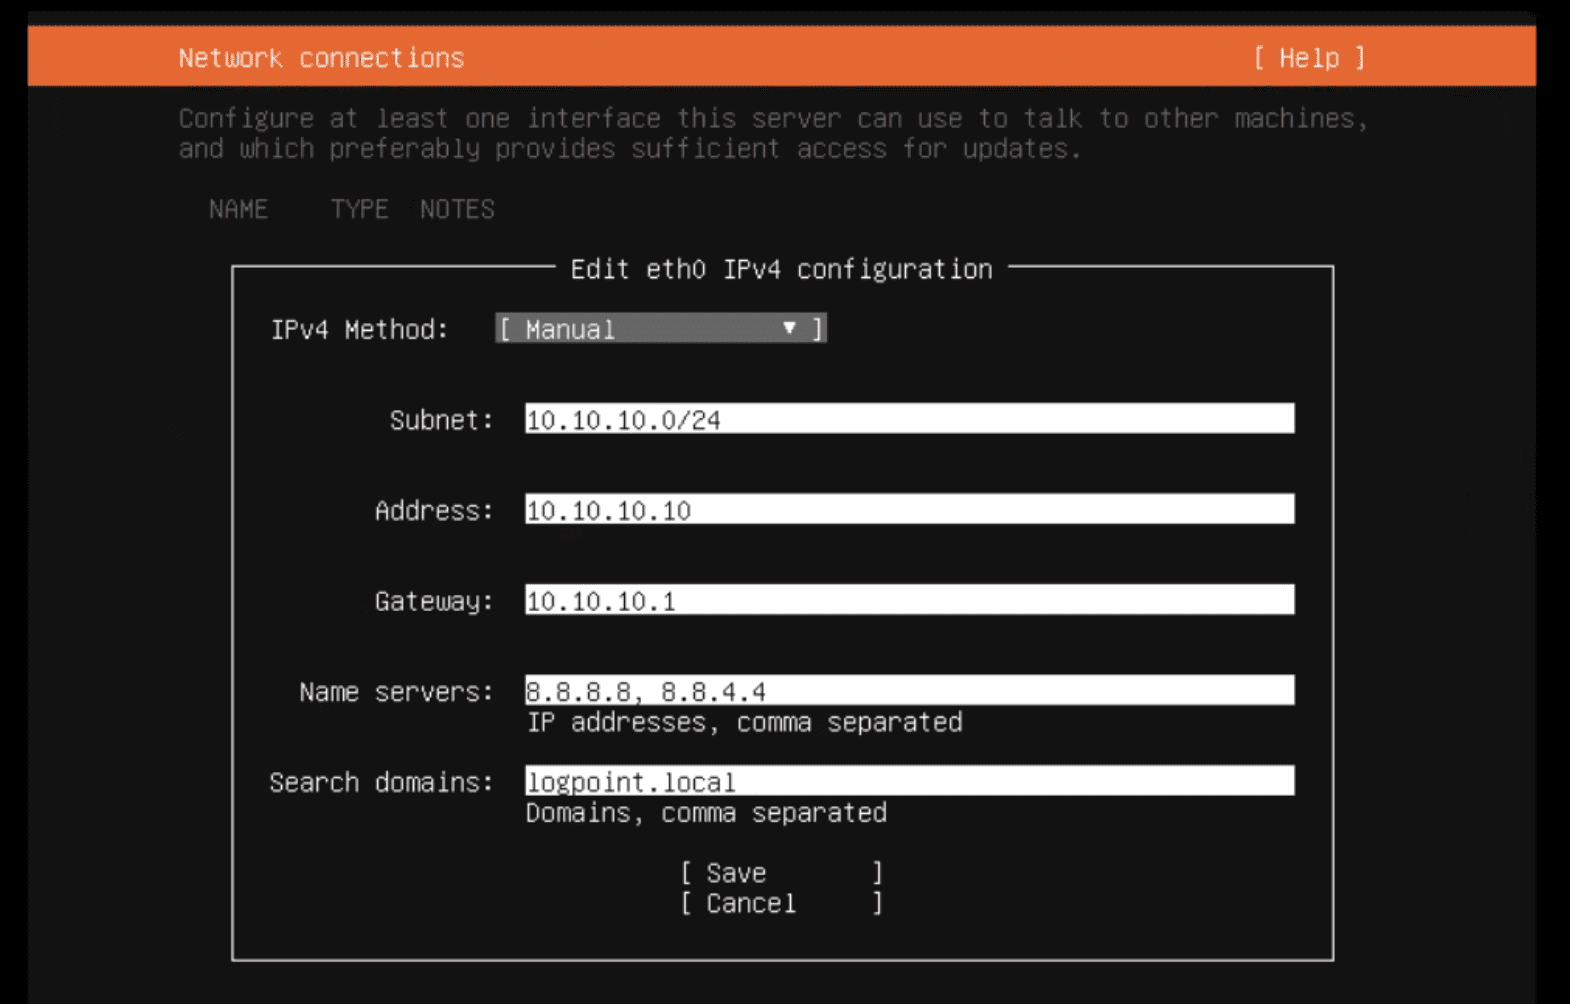
Configuring network connection
Select Save.
In Storage Configuration, select Reset.
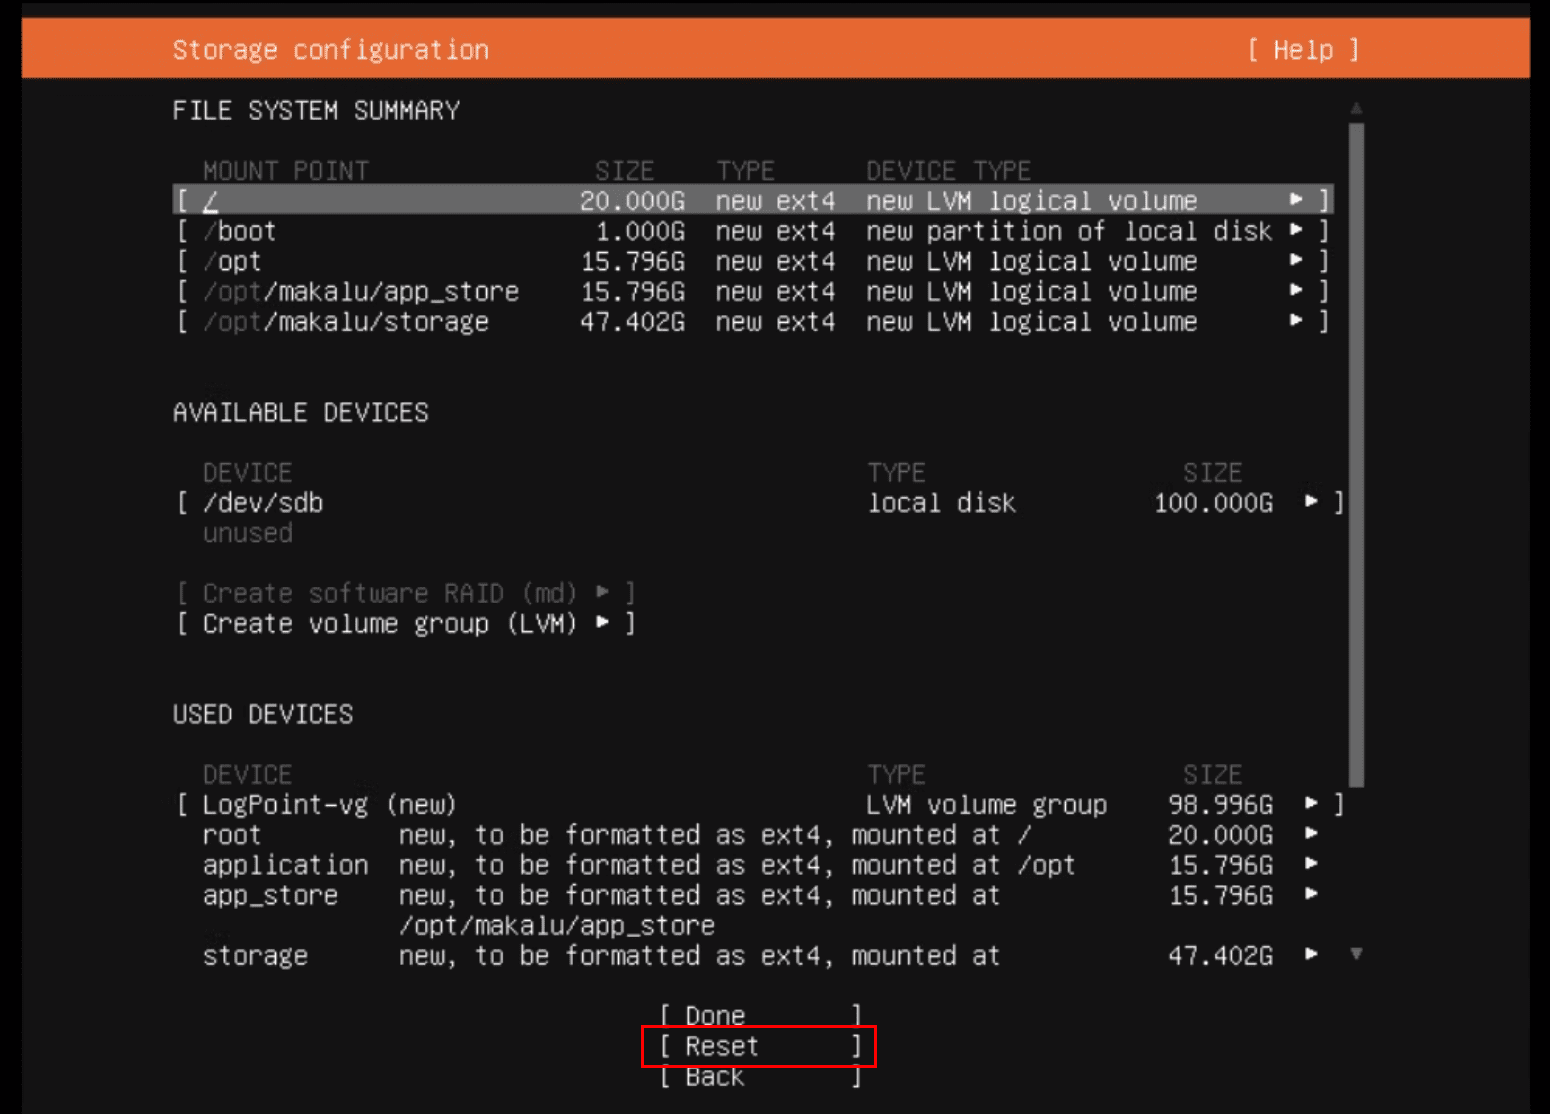
Automatic partitioning of storage devices
Select Use As Boot Device for the device you want to boot Logpoint on.
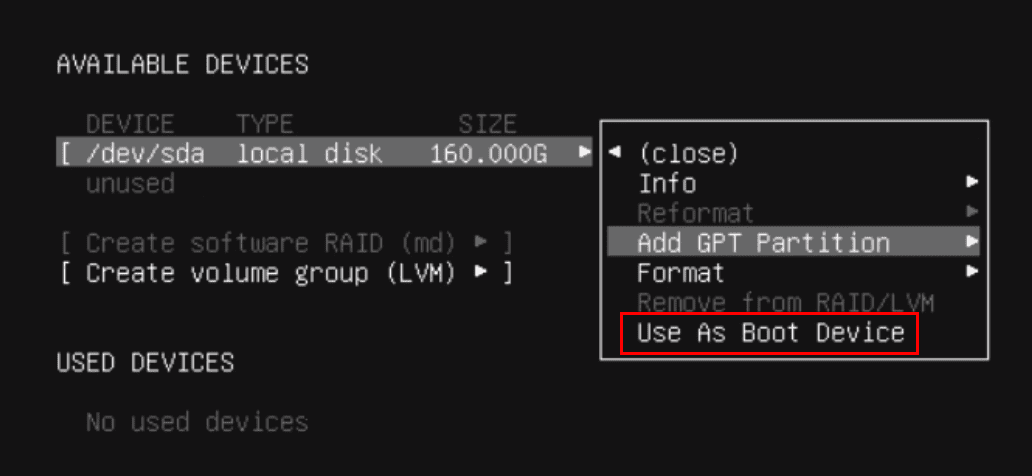
Use As Boot Device
Select Add GPT Partition for an available device.
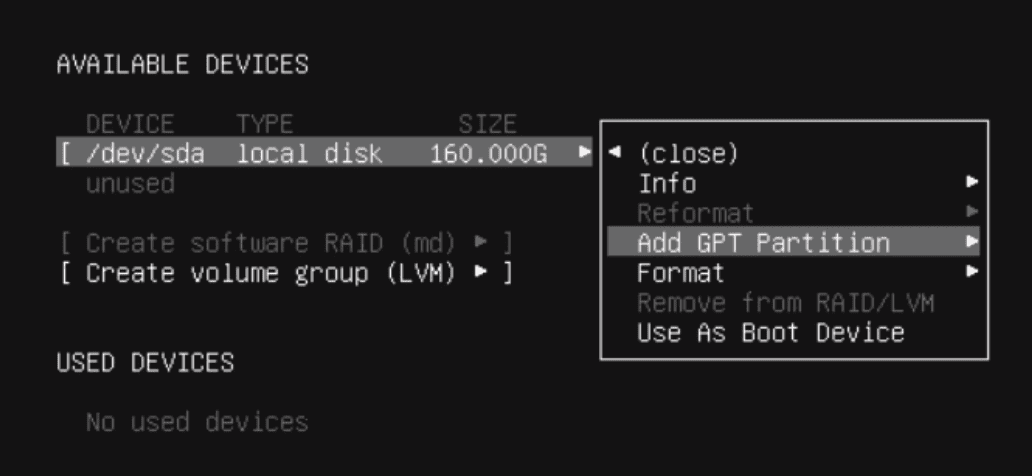
Adding GPT partition
Enter Size. The recommended size is at least 8GB for a new partition.
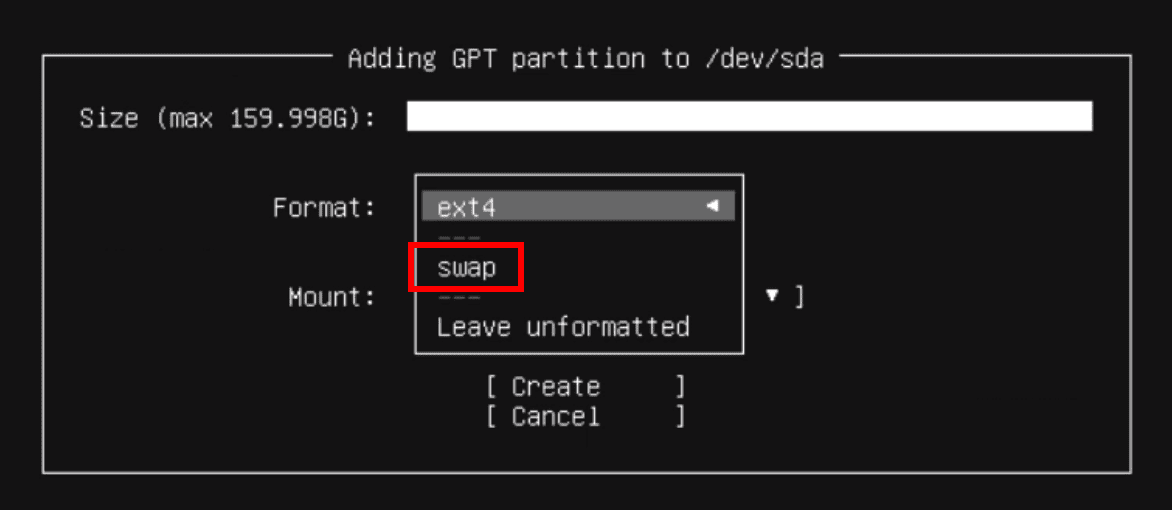
Selecting swap format
Select swap in Format and select Create.
Select Add GPT Partition again for the remaining size.
Select Leave unformatted in Format and select Create. This unformatted partition can be used to hold the logical volume group.
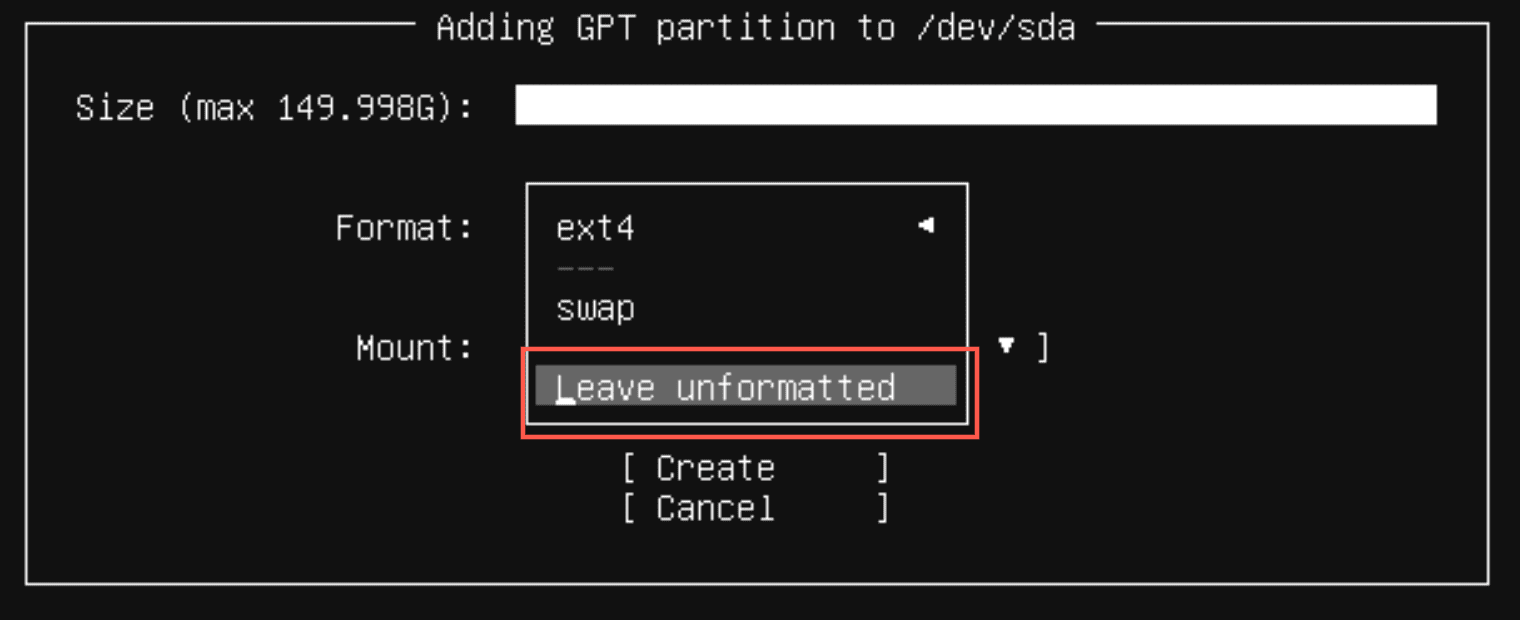
Selecting Leave unformatted format
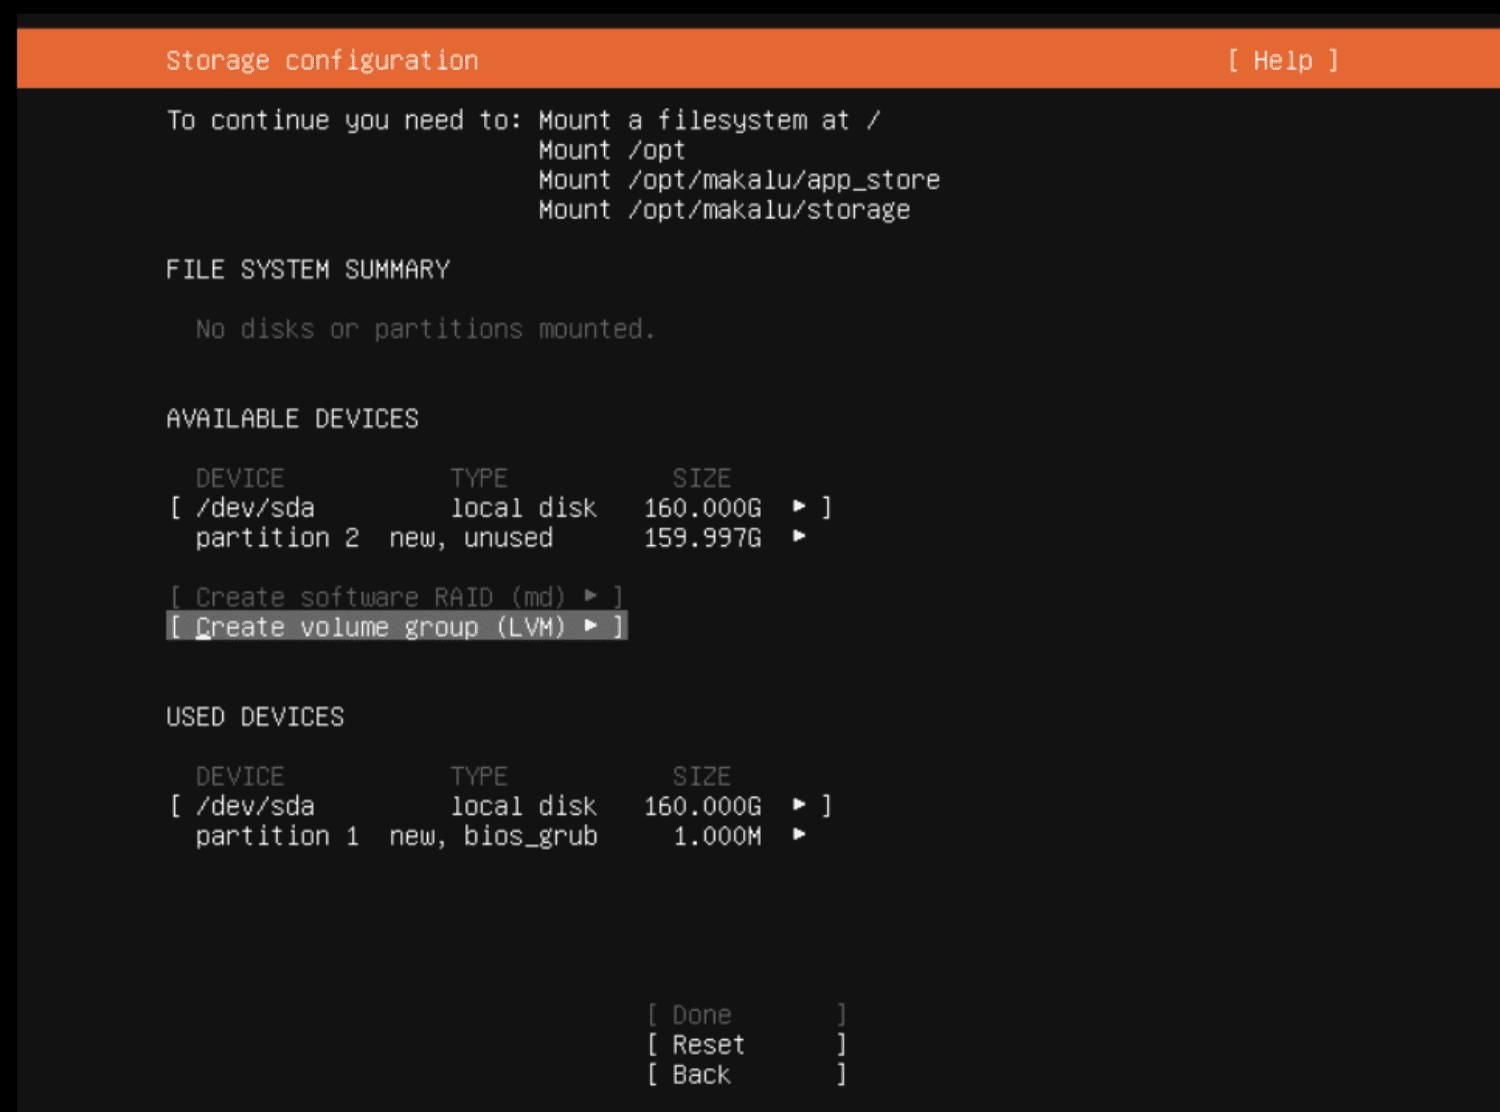
Select Create Volume Group (LVM) to create a new volume group. You can create multiple volume groups. You can also create software RAID (md) disks.
Selecting Create LVM
Enter a name for the volume group and select Create.
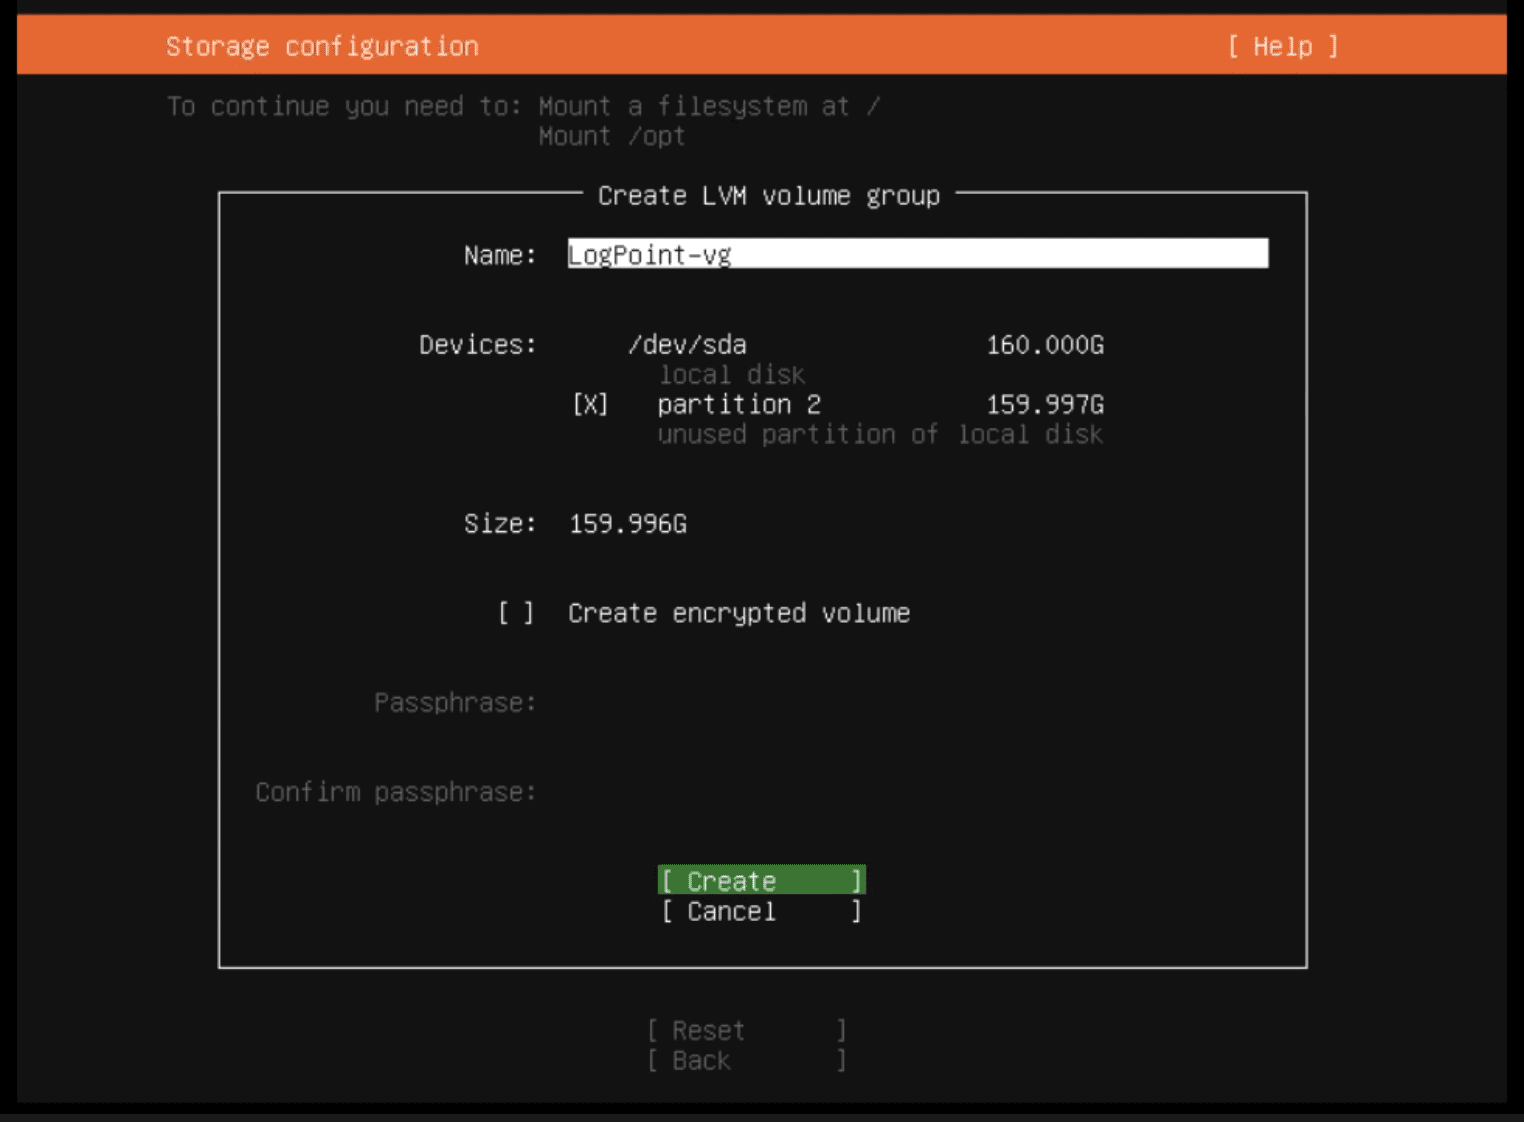
Creating LVM
In the new volume group, select Create Logical Volume.

Selecting Create Logical Volume
Enter a Name, Size, Format, and Mount point for the new logical volume.
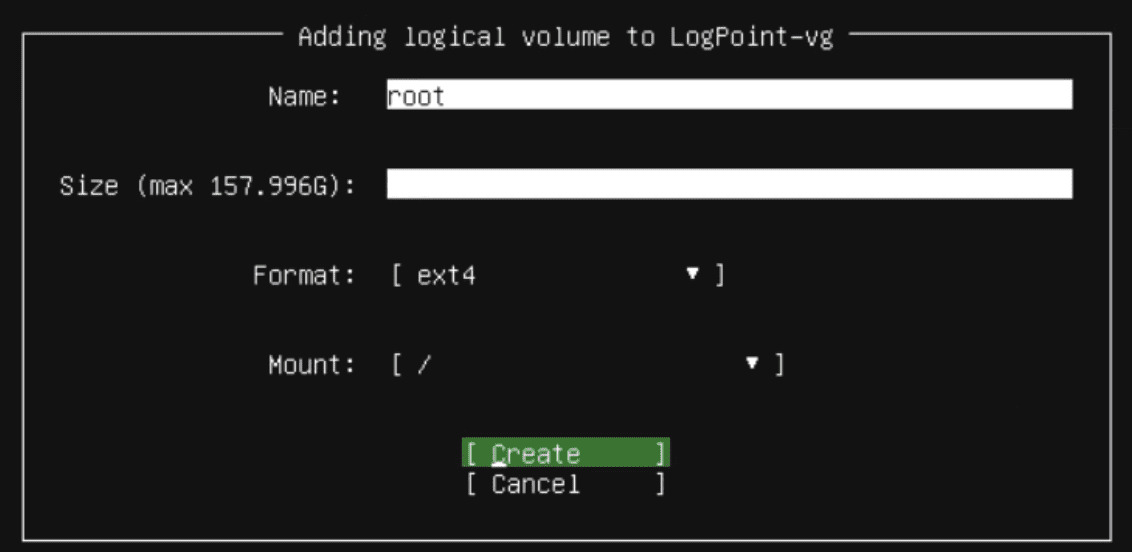
Creating Logical Volume
You must configure at least the following logical volumes before you can proceed with the installation:
Name |
Mount point |
Minimum size |
|---|---|---|
boot |
/boot |
1GB |
root |
/ |
40GB |
application |
/opt |
25GB |
app_store |
/opt/immune/app_store |
20GB |
storage |
/opt/immune/storage |
60GB |
The installer automatically provides the names and mount points for the next default volume group every time you select Create Logical Volume.
Select Done after finalizing your storage configurations.