You can use a Syslog Collector to collect data from sources that follow the syslog protocol.
The log sources created using Syslog Collecter are not listed under Settings >> Configuration >> Devices.
To create Log Source:
Go to Settings >> Log Sources from the navigation bar.
Click Add Log Source.
Click Create New and select Syslog Collector.
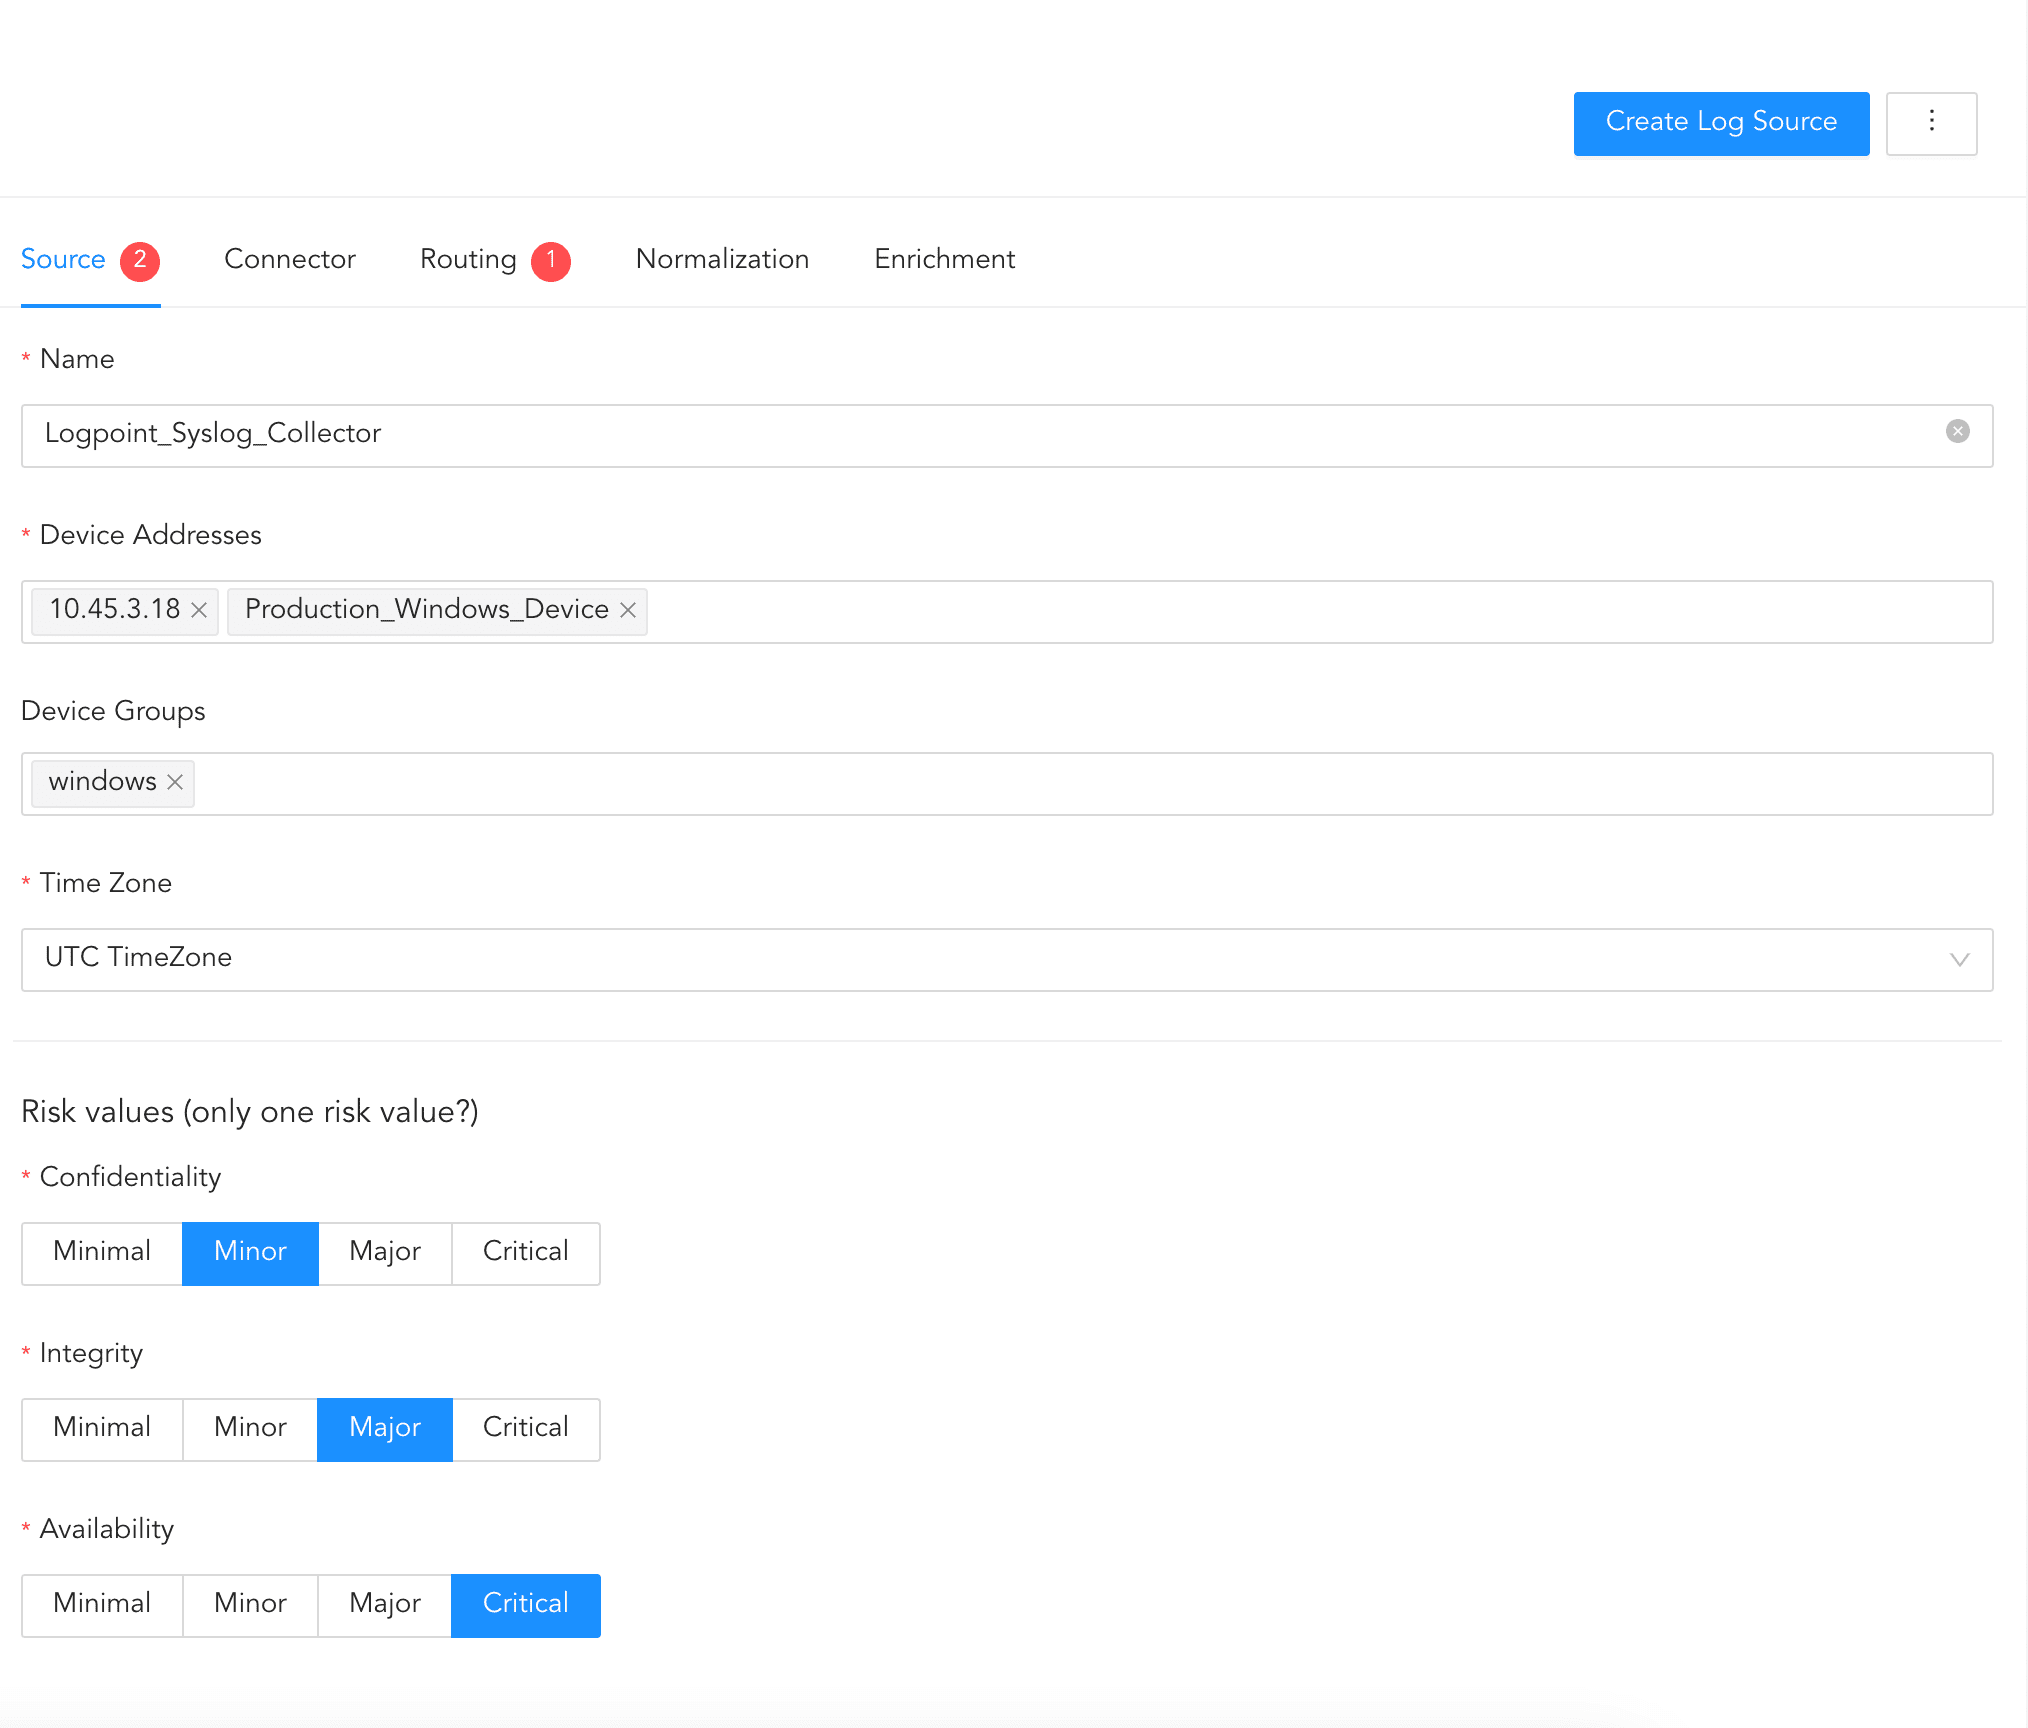
In source, you can add details about the log source from where the Syslog Collector fetches logs.
Click Source.
Enter Name of Log Source.
Enter Device Addresses. Device addresses are IP addresses or hostnames of the device whose logs to monitor.
Choose the relevant Device Groups.
Select Time Zone.
Select the Risk values for Confidentiality, Integrity, and Availability.
Configuring Source
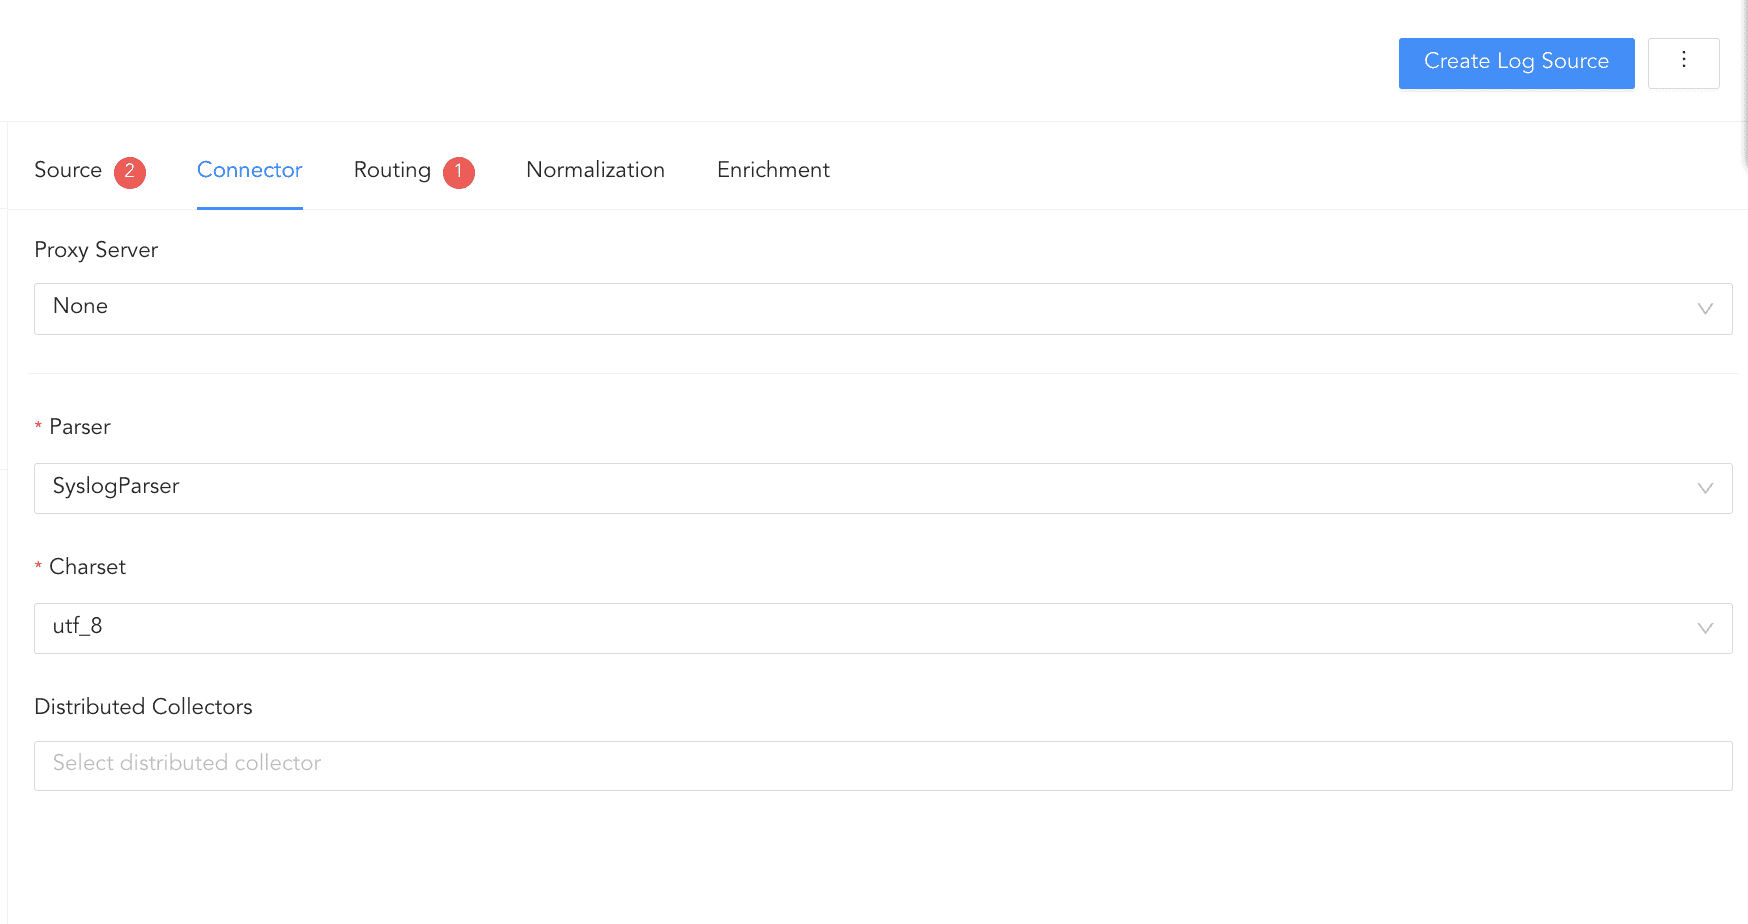
Connector is a pathway for transmitting logs from various sources to Logpoint. In connector, you can configure how the Syslog Collector and the log source communicate with each other.
Click Connector.
In Proxy Server, choose None, Use as Proxy or Uses proxy, depending on your setup. If you select:
2.1. None, the device works as a Syslog Collector.
2.1.1 Select Parser and Charset.
2.1.2 Select a collector/forwarder from the Distributed Collector dropdown, if relevant. It lists all the distributed collectors and syslog forwarders configured in the Distributed Logpoints.
2.2. Use as Proxy, the device is used as a proxy.
2.2.1 Select Parser and Charset.
2.2.2 Select a collector/forwarder from the Distributed Collector dropdown, if relevant. It lists all the distributed collectors and syslog forwarders configured in the Distributed Logpoints.
2.3. Uses Proxy, a proxy device is used to collect the logs.
2.3.1 Select a collector/forwarder from the Distributed Collector dropdown, if relevant. It lists all the distributed collectors and syslog forwarders configured in the Distributed Logpoints.
2.3.2 Select a Proxy IP of the device and enter its Hostname.
Configuring Connector
In Routing, you can create repos and routing criteria. Repos are locations where incoming logs are stored and routing criteria is created to determine the conditions under which these logs are sent to repos.
Click Routing and + Create Repo.
Enter a Repo name.
Enter the location in Path to store incoming logs.
In Retention (Days), enter the number of days logs are kept in a repository before they are automatically deleted. The retention days must be at least 2 days.
In Availability, select the Remote logpoint and Retention (Days).
Click Create Repo.

Creating a Repo
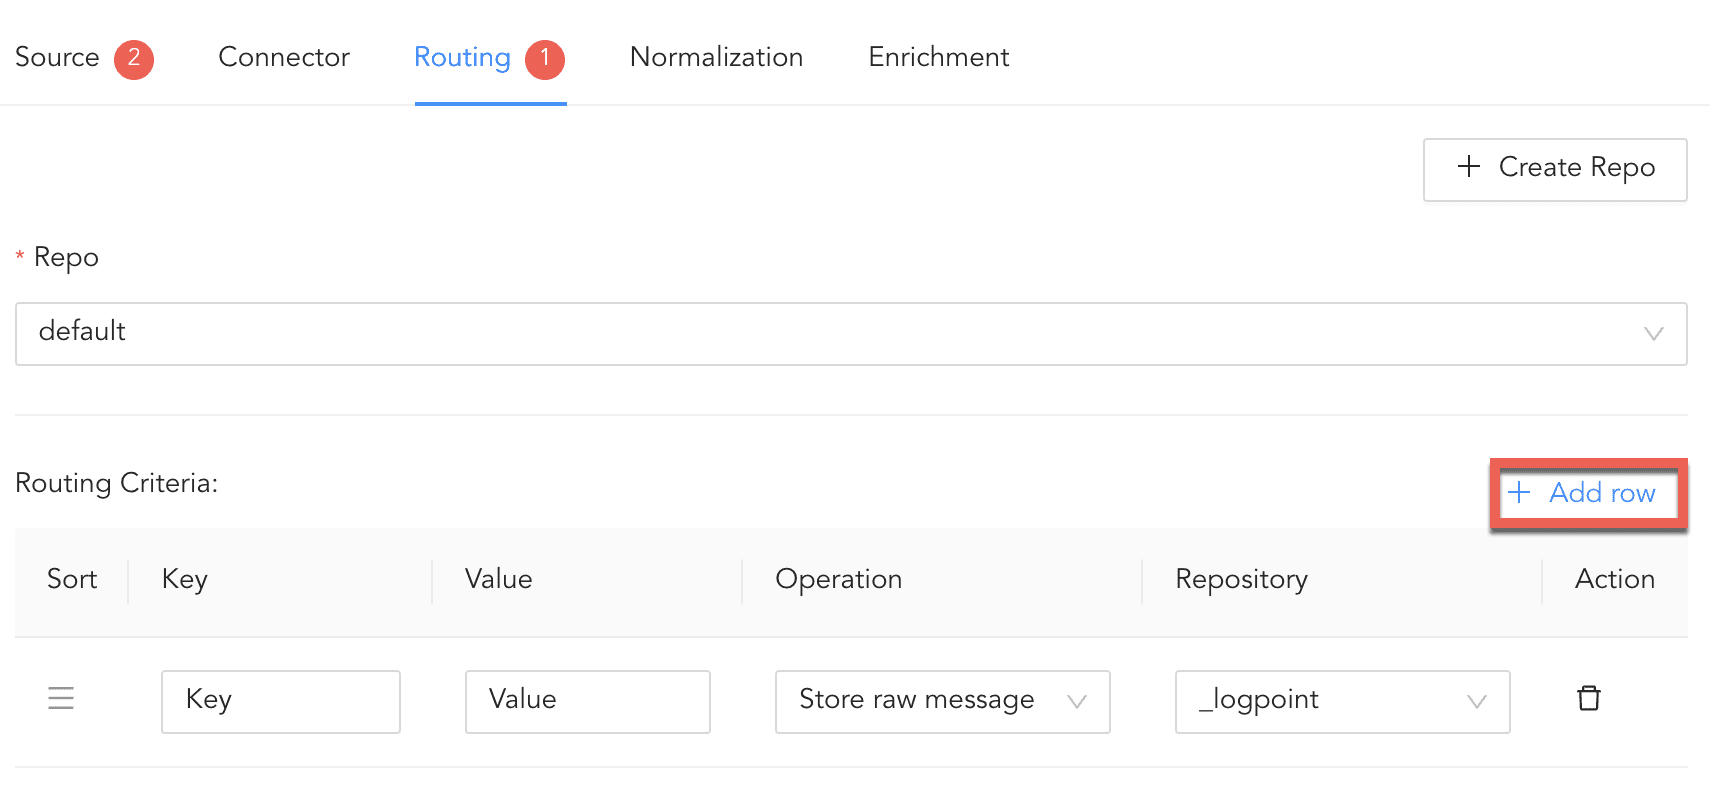
In Repo, select the created repo to store logs.
To create Routing Criteria:
Click + Add row.
Enter a Key and Value. The routing criteria is only applied to those logs which have this key value pair.
Select an Operation for logs that have this key value pair.
3.1. Select Store raw message to store both the incoming and the normalized logs in the selected repo.
3.2. Select Discard raw message to discard the incoming logs and store the normalized ones.
3.3. Select Discard entire event to discard both the incoming and the normalized logs.
In Repository, select a repo to store logs.
Creating a Routing Criteria
Click the ( ) icon under Action to delete the created routing criteria.
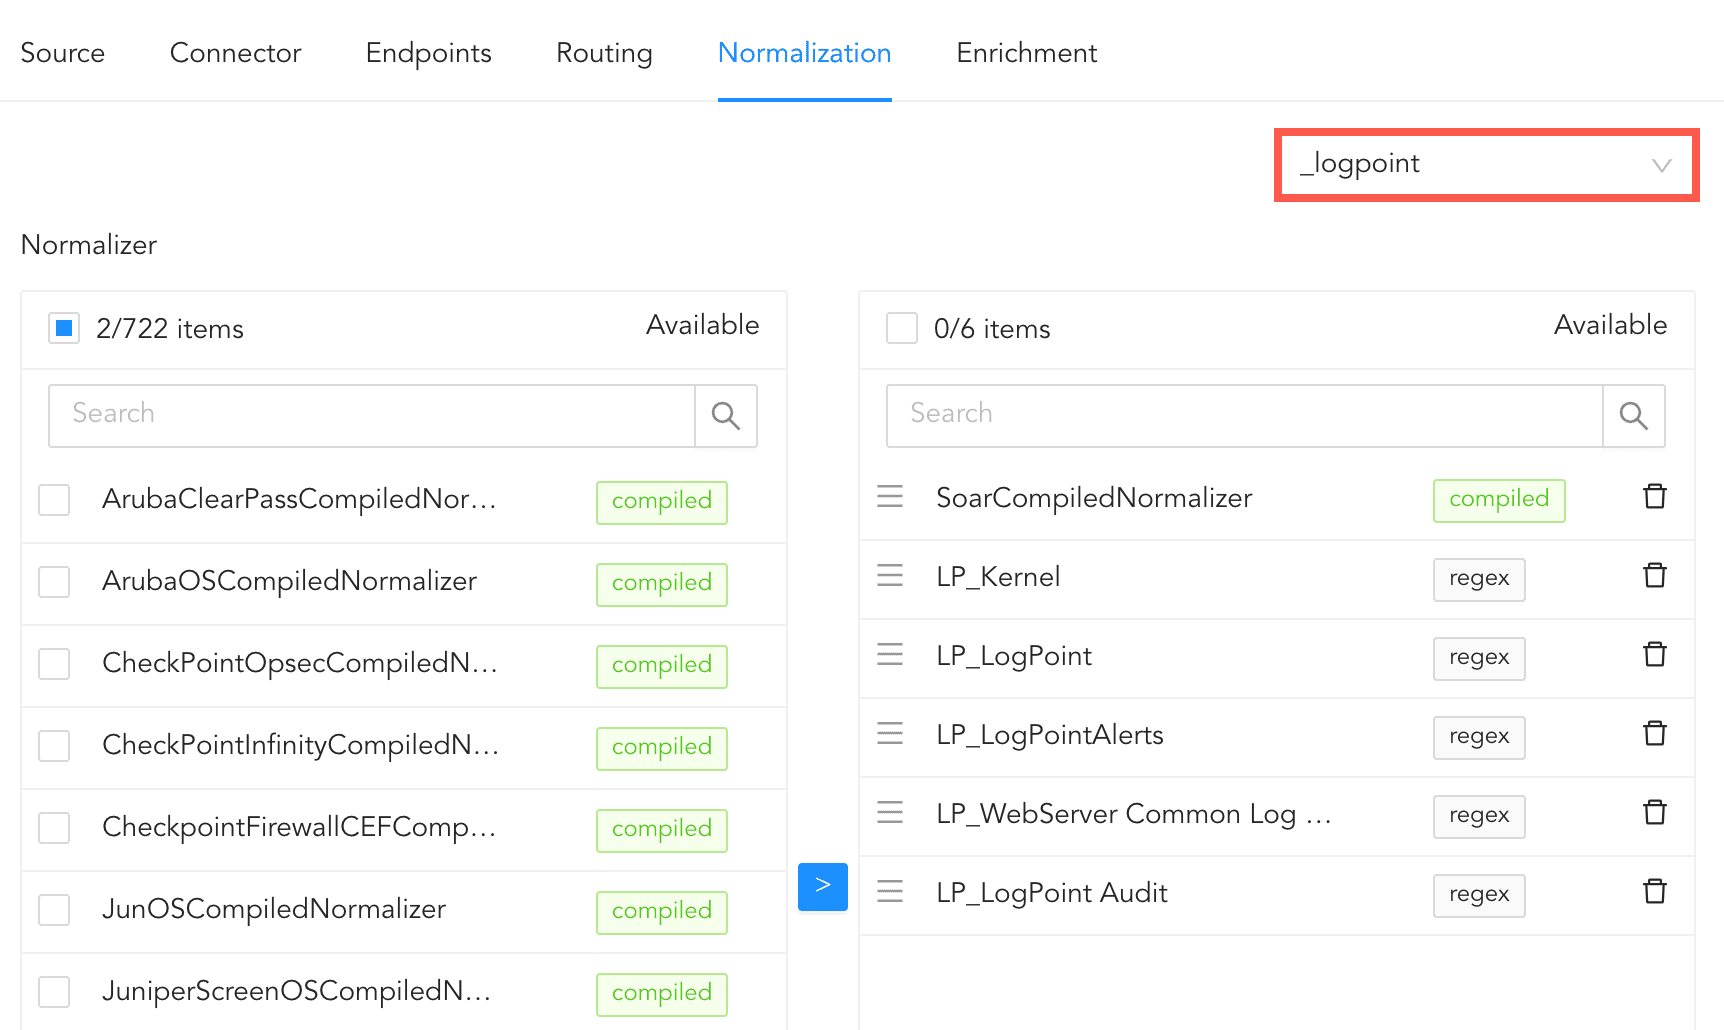
In normalization, you can select normalizers for the incoming logs. Normalizers transform incoming logs into a standardized format for consistent and efficient analysis.
Click Normalization.
You can either select a previously created normalization policy from the Select Normalization Policy dropdown or select a Normalizer from the list and click the swap( ) icon.
Adding Normalizers
In enrichment, you can select an enrichment policy for the incoming logs. Enrichment policies are used to add additional information to a log, such as user information, device type or geolocation, before analyzing it. For more information on enrichment, go to Enrichment Policies.
Click Enrichment.
Select an Enrichment Policy.
Click Create Log Source to save the configurations of Source, Connector, Routing, Normalization, and Enrichment.