To launch the Logpoint instances securely in the AWS environment, we recommend you enable EBS encryption and launch all instances from the EBS-encrypted AMI, including the root volume.
For enhanced security, we recommend you implement IMDSv2. To transition from IMDSv1 to IMDSv2, follow the AWS Documentation.
We recommend you enable EBS encryption and launch all instances from the EBS-encrypted AMI, including the root volume.
Log into the AWS management console.
Go to Services >> EC2.
Select AMIs under Images.
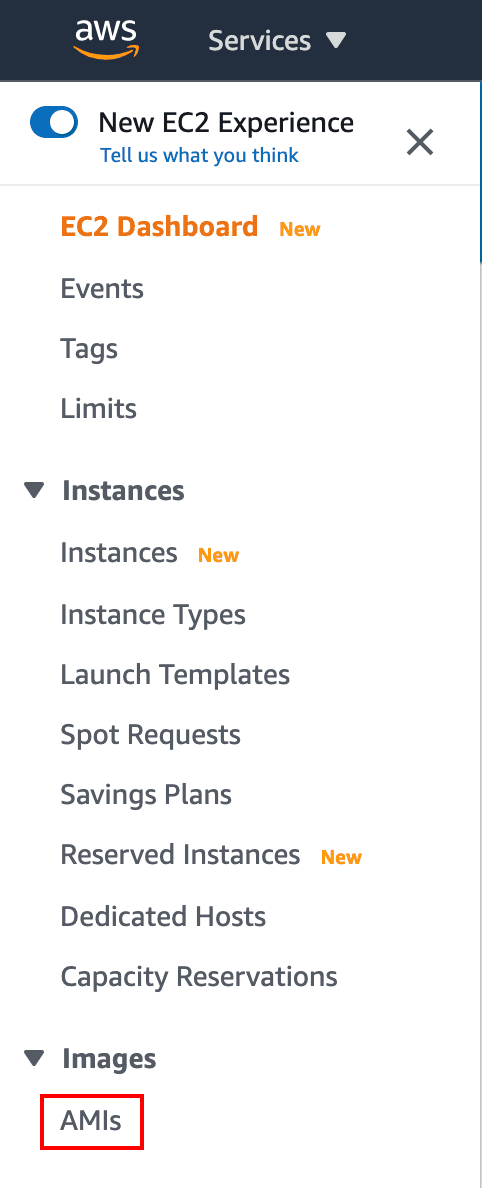
Selecting AMIs
Select Private Images from the drop-down.
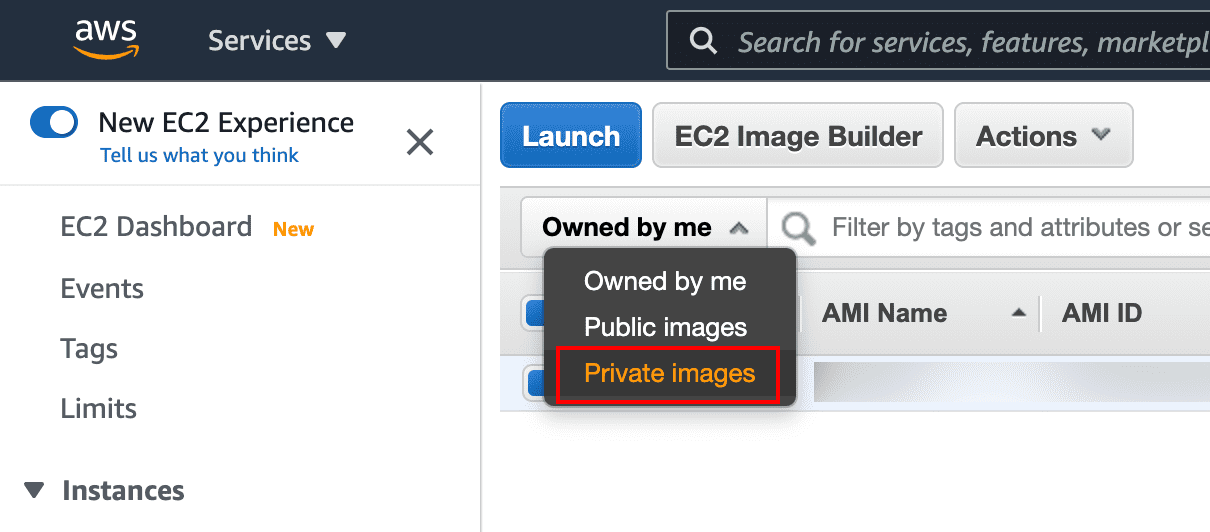
Selecting Private Images
Select the Logpoint AMI and click Copy AMI from the Actions drop-down.
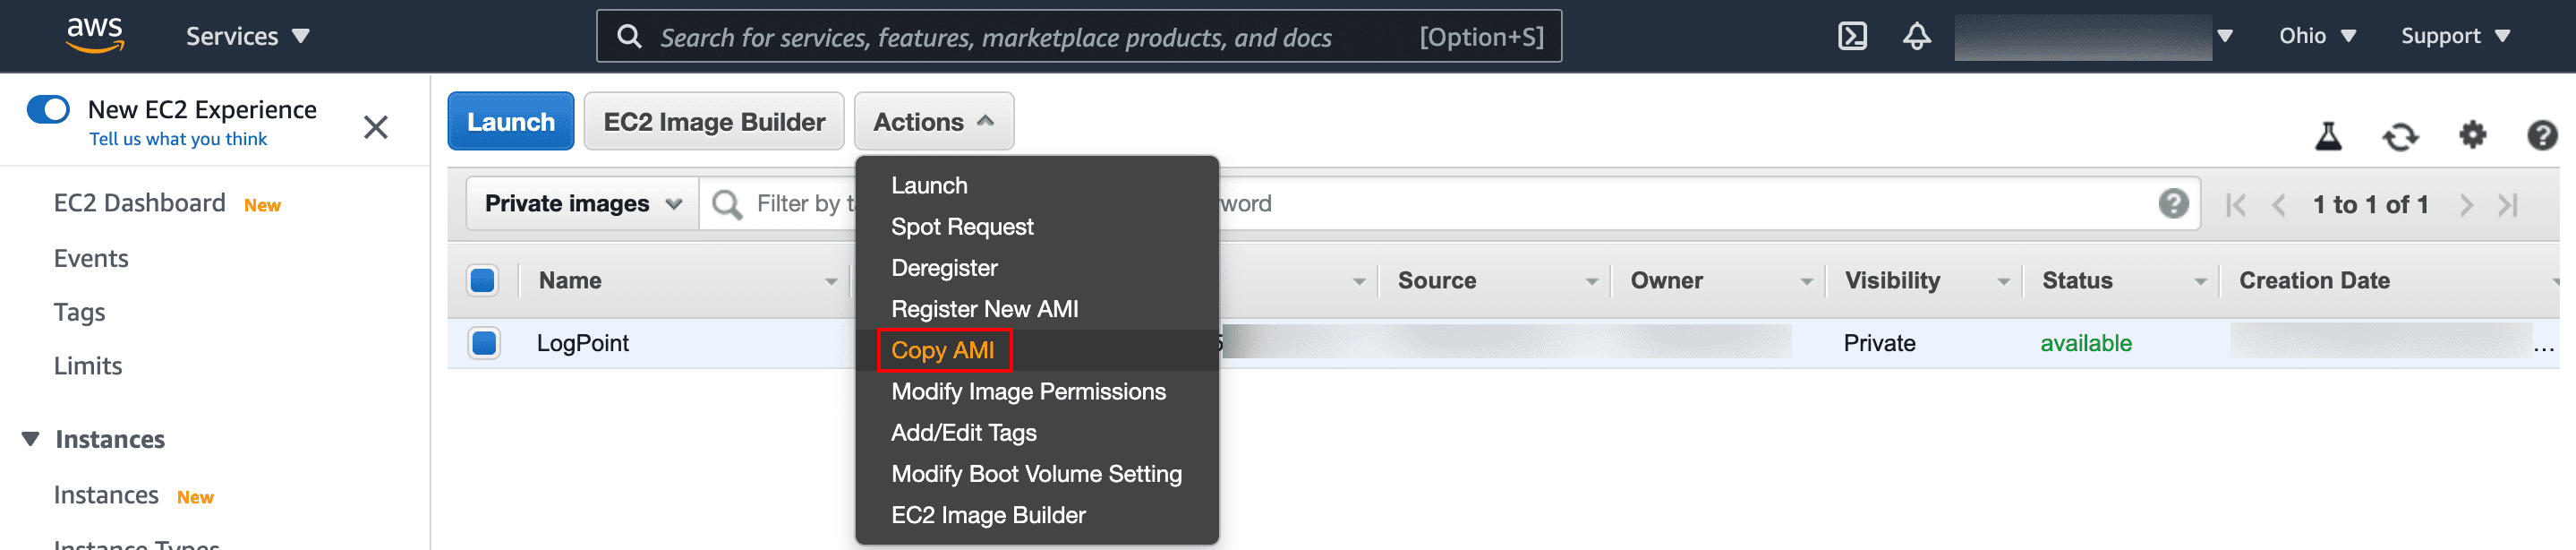
Copying AMI for encryption
Select the Destination Region.

Applying EBS encryption
Enter the Name and Description for the encrypted AMI.
Select Encryption and select the Master Key for encryption.
Once you are redirected to the AMIs page, select the Owned by me from the drop-down.
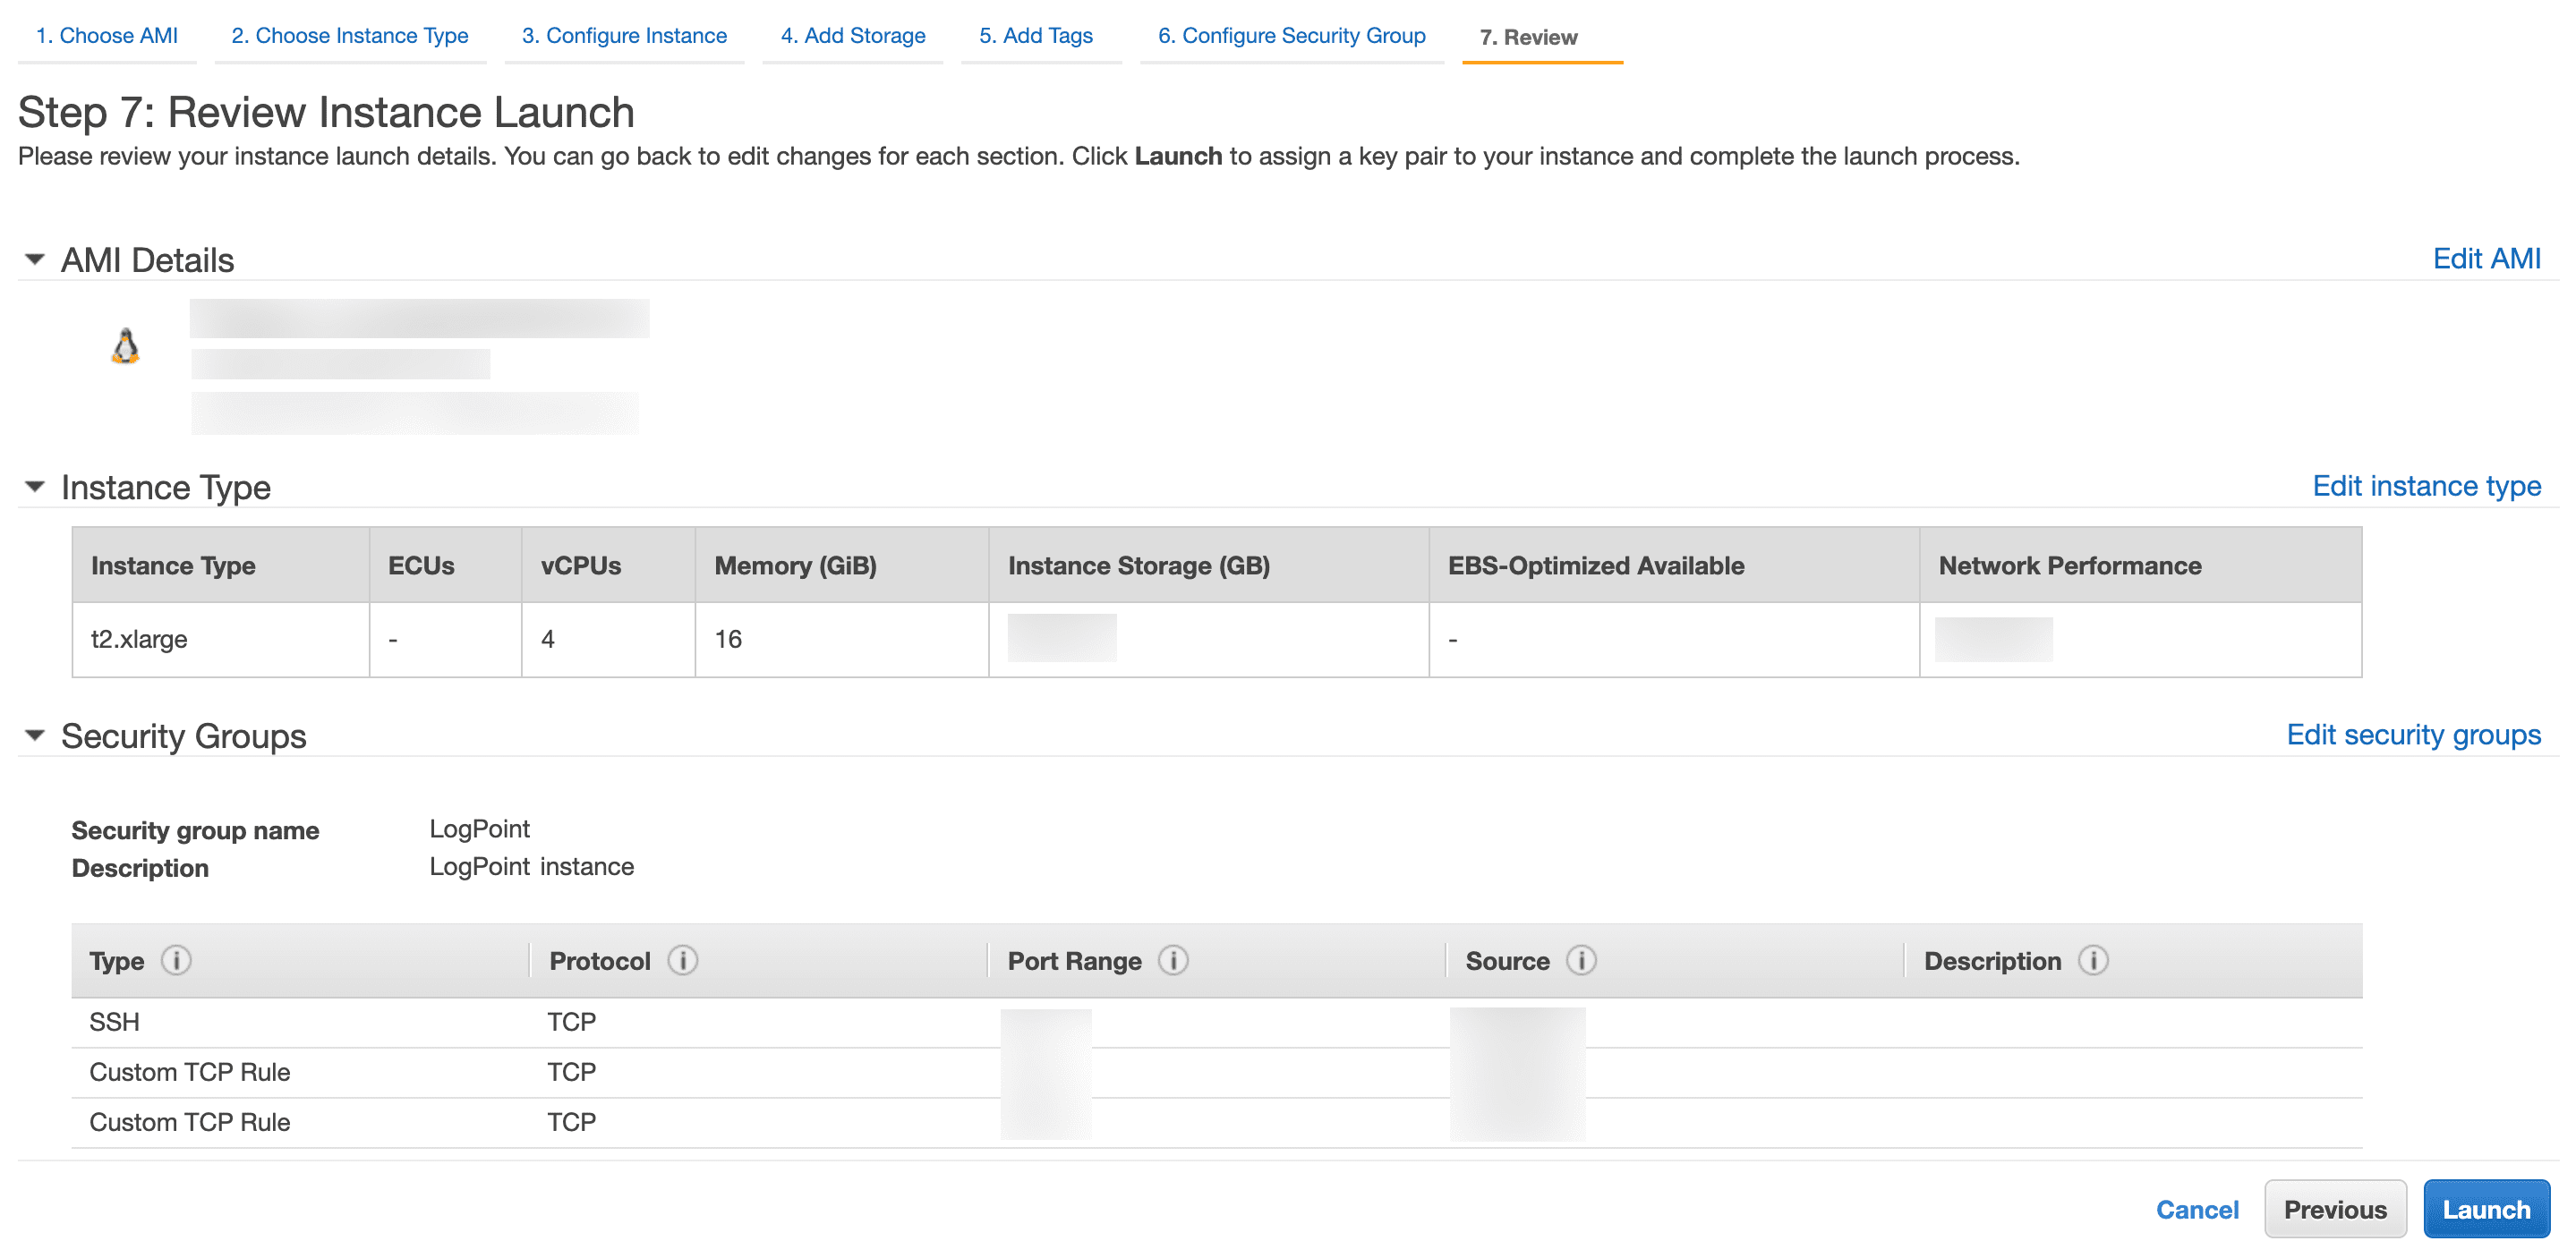
Select the copied AMI and click Launch.
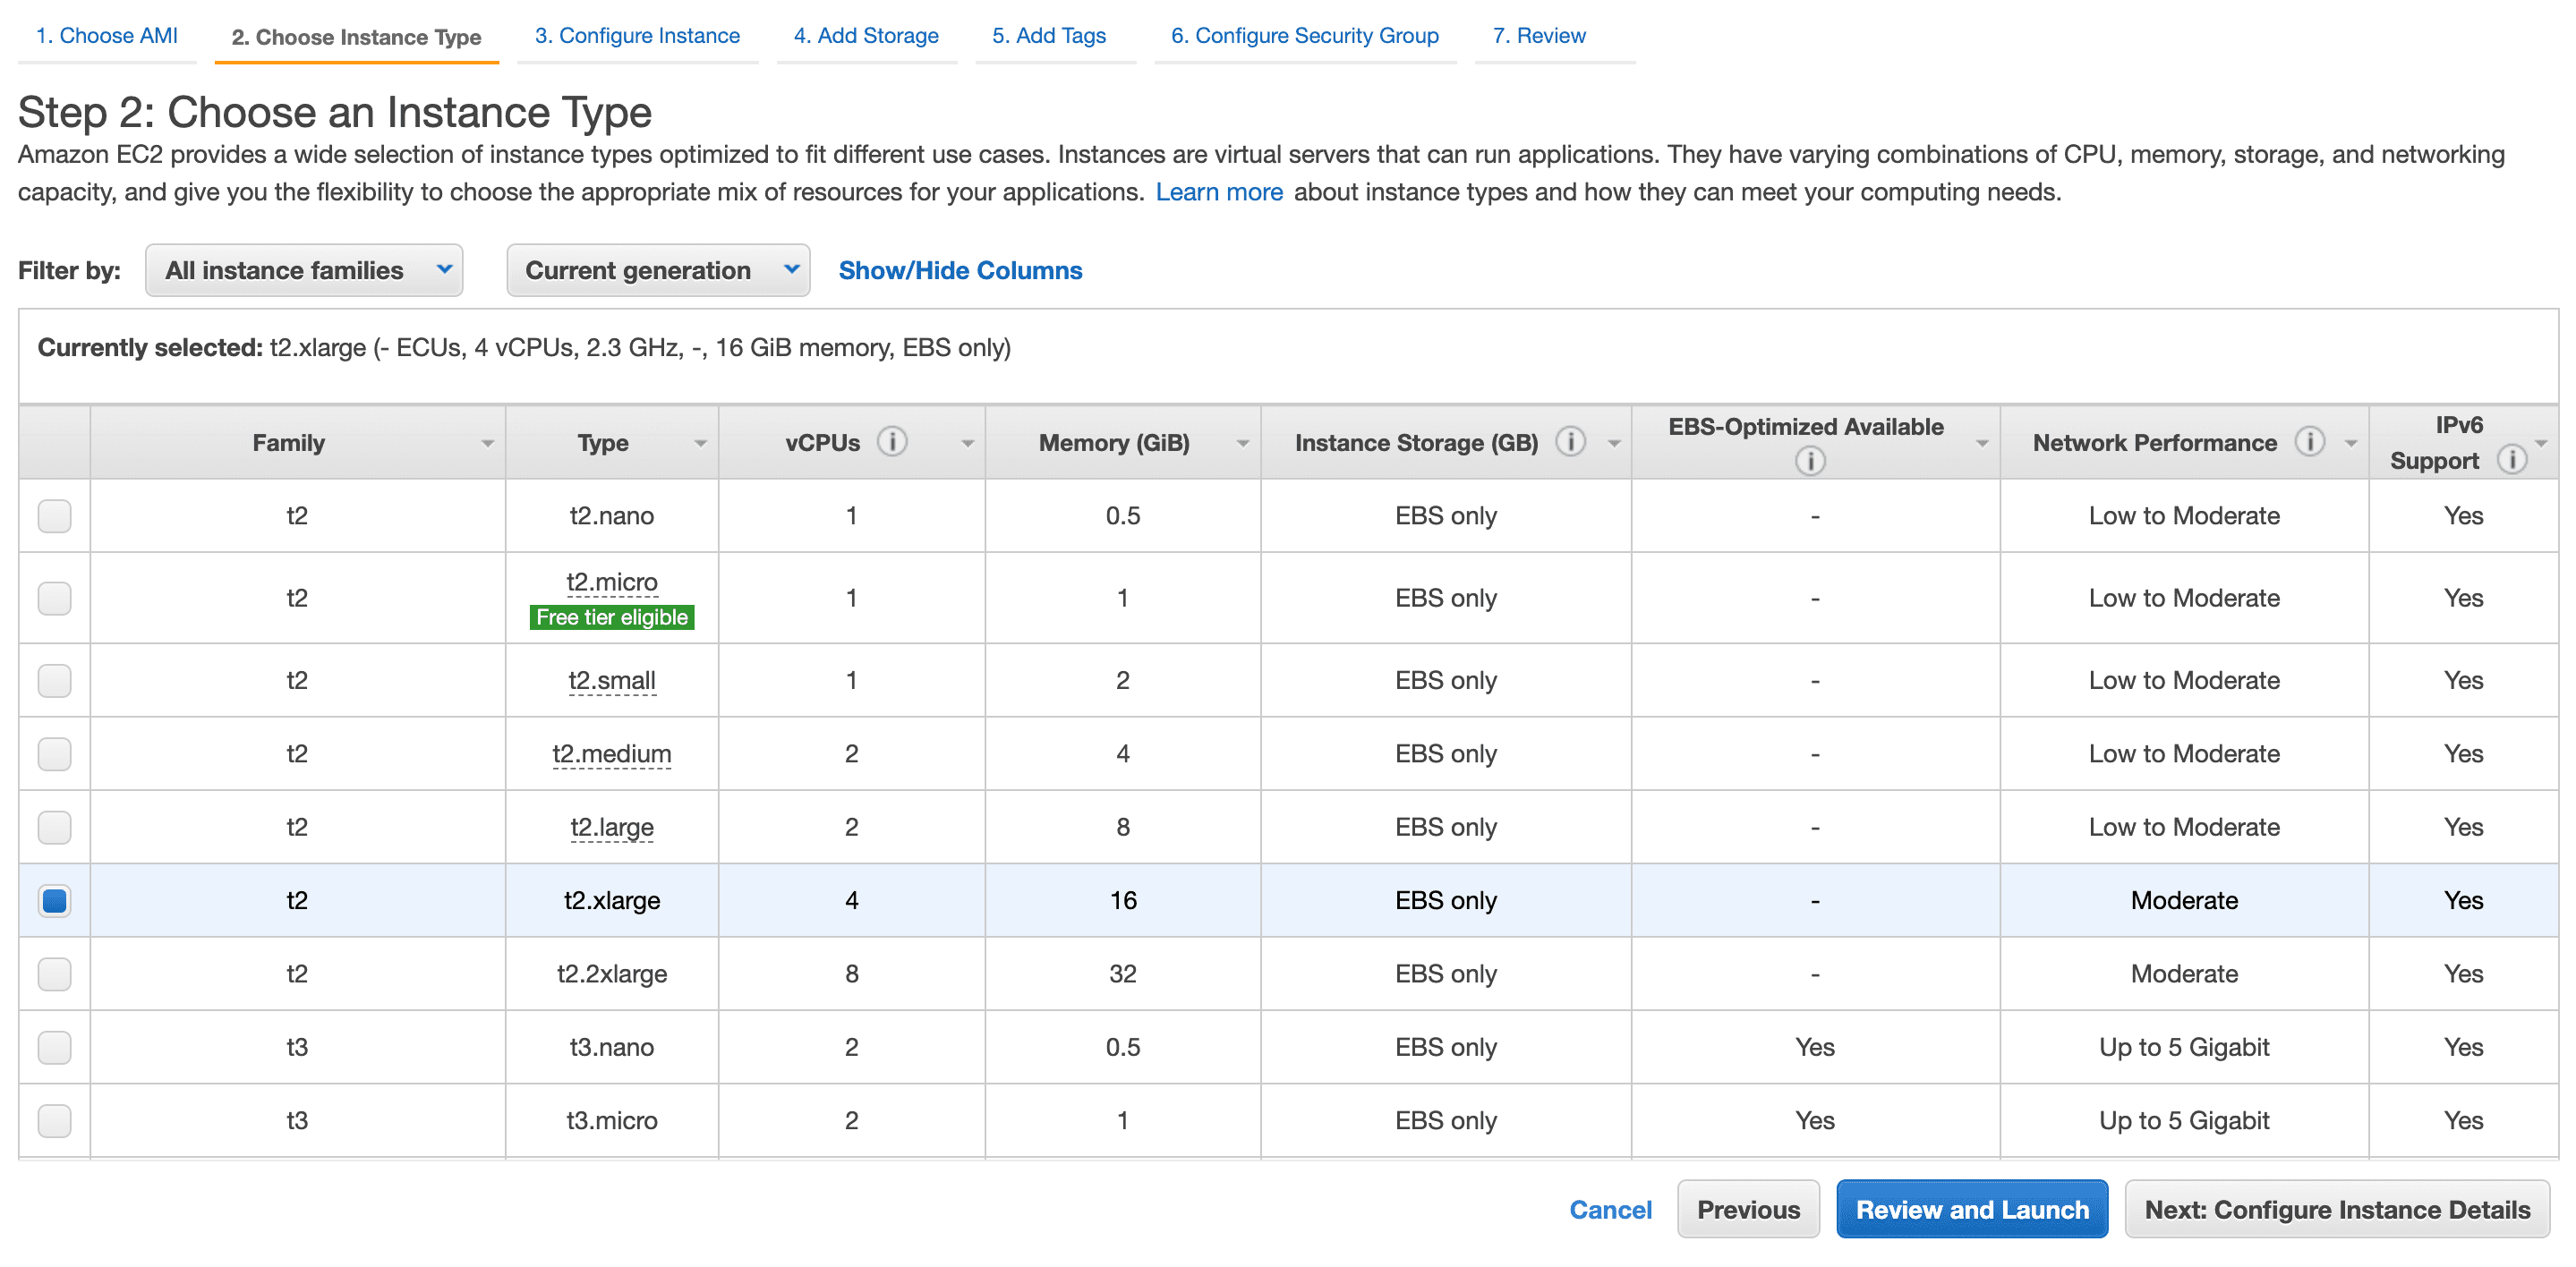
Selecting an Instance Type
Choose an Instance Type from the list. The minimum configuration is t2.xlarge type with 4 CPUs and 16 GiB memory.
Click Next: Configure Instance Details.
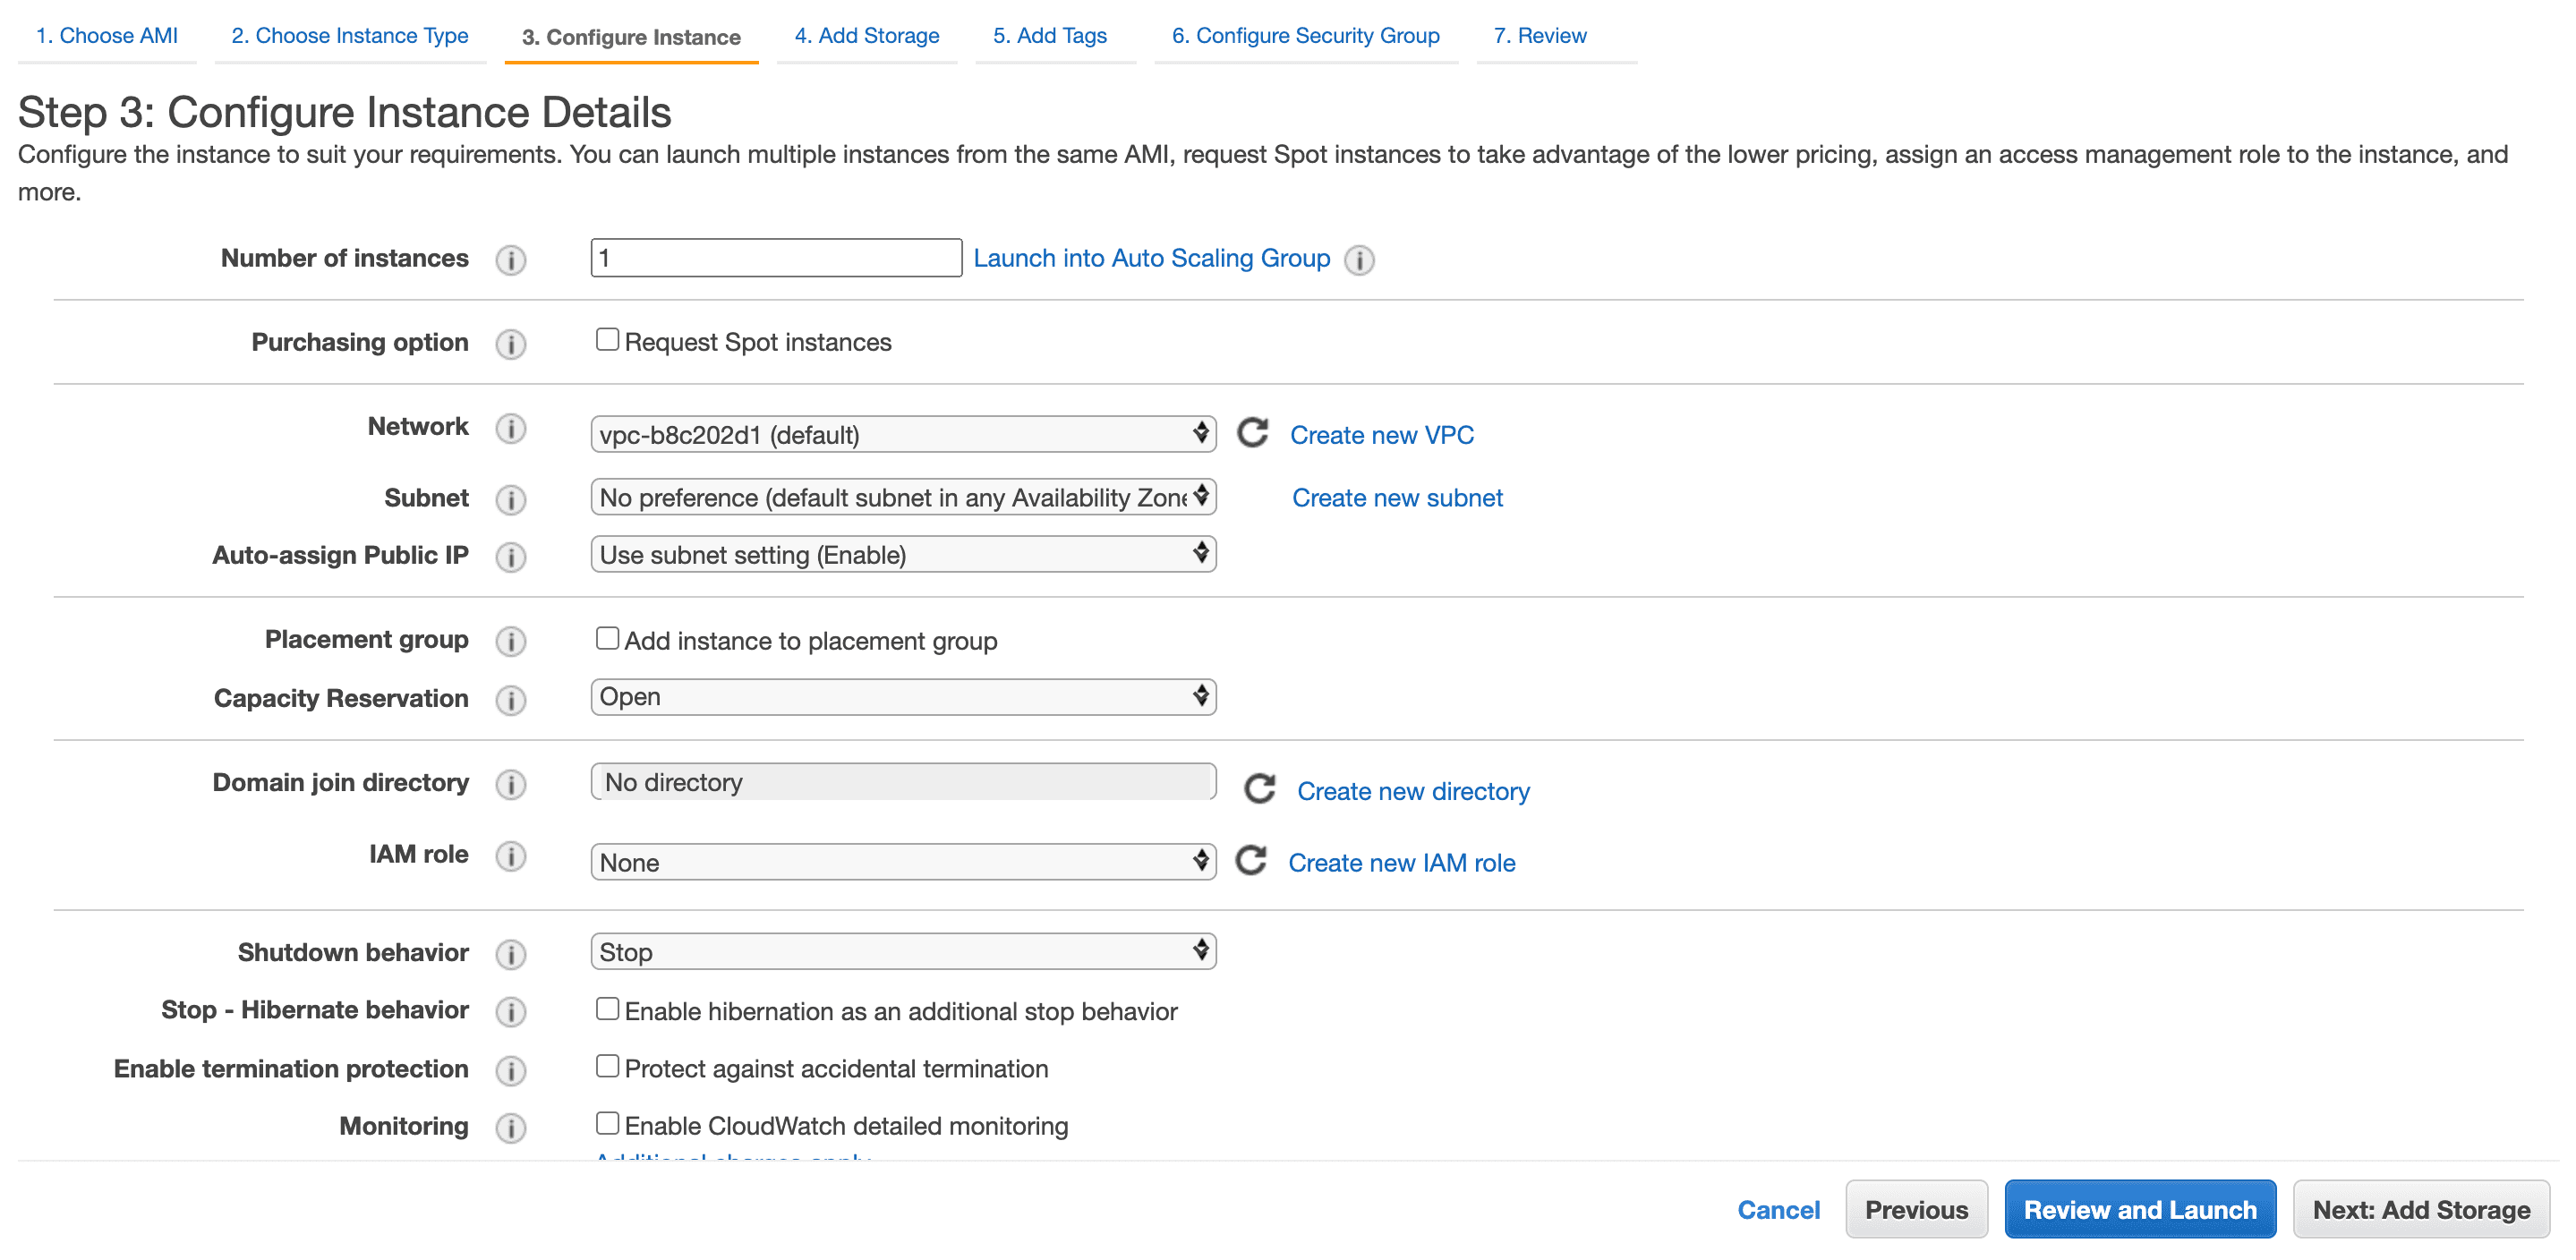
Configuring the Instances Parameters
Enter the Number of instances.
Deselect the Purchasing option. It is not relevant.
Select a Virtual Private Cloud (VPC) Network to host Logpoint AMI. You can create a new VPC or select from the available ones.
Select the Subnet for your instances from the selected VPC. You can use the existing subnet or create a new one.
Select Auto-assign Public IP if you want to make your instances accessible from the Internet.
Select Placement group to launch the instances in a placement group. The placement group determines how instances are placed on the underlying hardware. All the placement groups function under one of the following strategies:
Cluster — clusters the instances into a low-latency group in a single Availability Zone.
Spread — spreads the instances across the underlying hardware. You can either add the instance to an existing placement group by selecting Add to existing placement group or create a new placement group by selecting Add to a new placement group.
If you select Add to existing placement group, choose one of the available placement groups from the drop-down.
If you select Add to a new placement group, add a new placement group by specifying a Name and Placement group strategy.
Choose a Capacity Reservation option. You can choose either Open, Target by group, Target by ID, or None.
Select a Domain join directory to join the Logpoint instance to a directory defined in the AWS Directory Service.
Specify the IAM role for the instances if required. Identity and Access Management (IAM) lets you specify permissions granted to each AWS resource.
Select an appropriate Shutdown behavior for the instances. If you select Stop, the instances stop running, whereas, if you select Terminate, the instances are permanently deleted.
Select Stop - Hibernate behavior to enable hibernation in the instance.
Enable termination protection to receive a confirmation message before terminating the instances.
Select Monitoring to analyze instance metrics in detail using Amazon CloudWatch.
By default, you have access to basic monitoring, which allows you to view metrics every five minutes. The CloudWatch detailed monitoring allows you to view the metrics in the one-minute interval.
Select a Tenancy infrastructure to run your instances.
Select Add an Elastic Inference accelerator to enable cost-efficient hardware acceleration.
Select Unlimited credit specification to allow the Logpoint instances to exceed the CPU utilization baseline whenever required.
Specify Amazon EFS File systems to mount to the Logpoint instance.
Leave the Network interfaces and Advanced Details settings as they are.
Click Next: Add Storage.
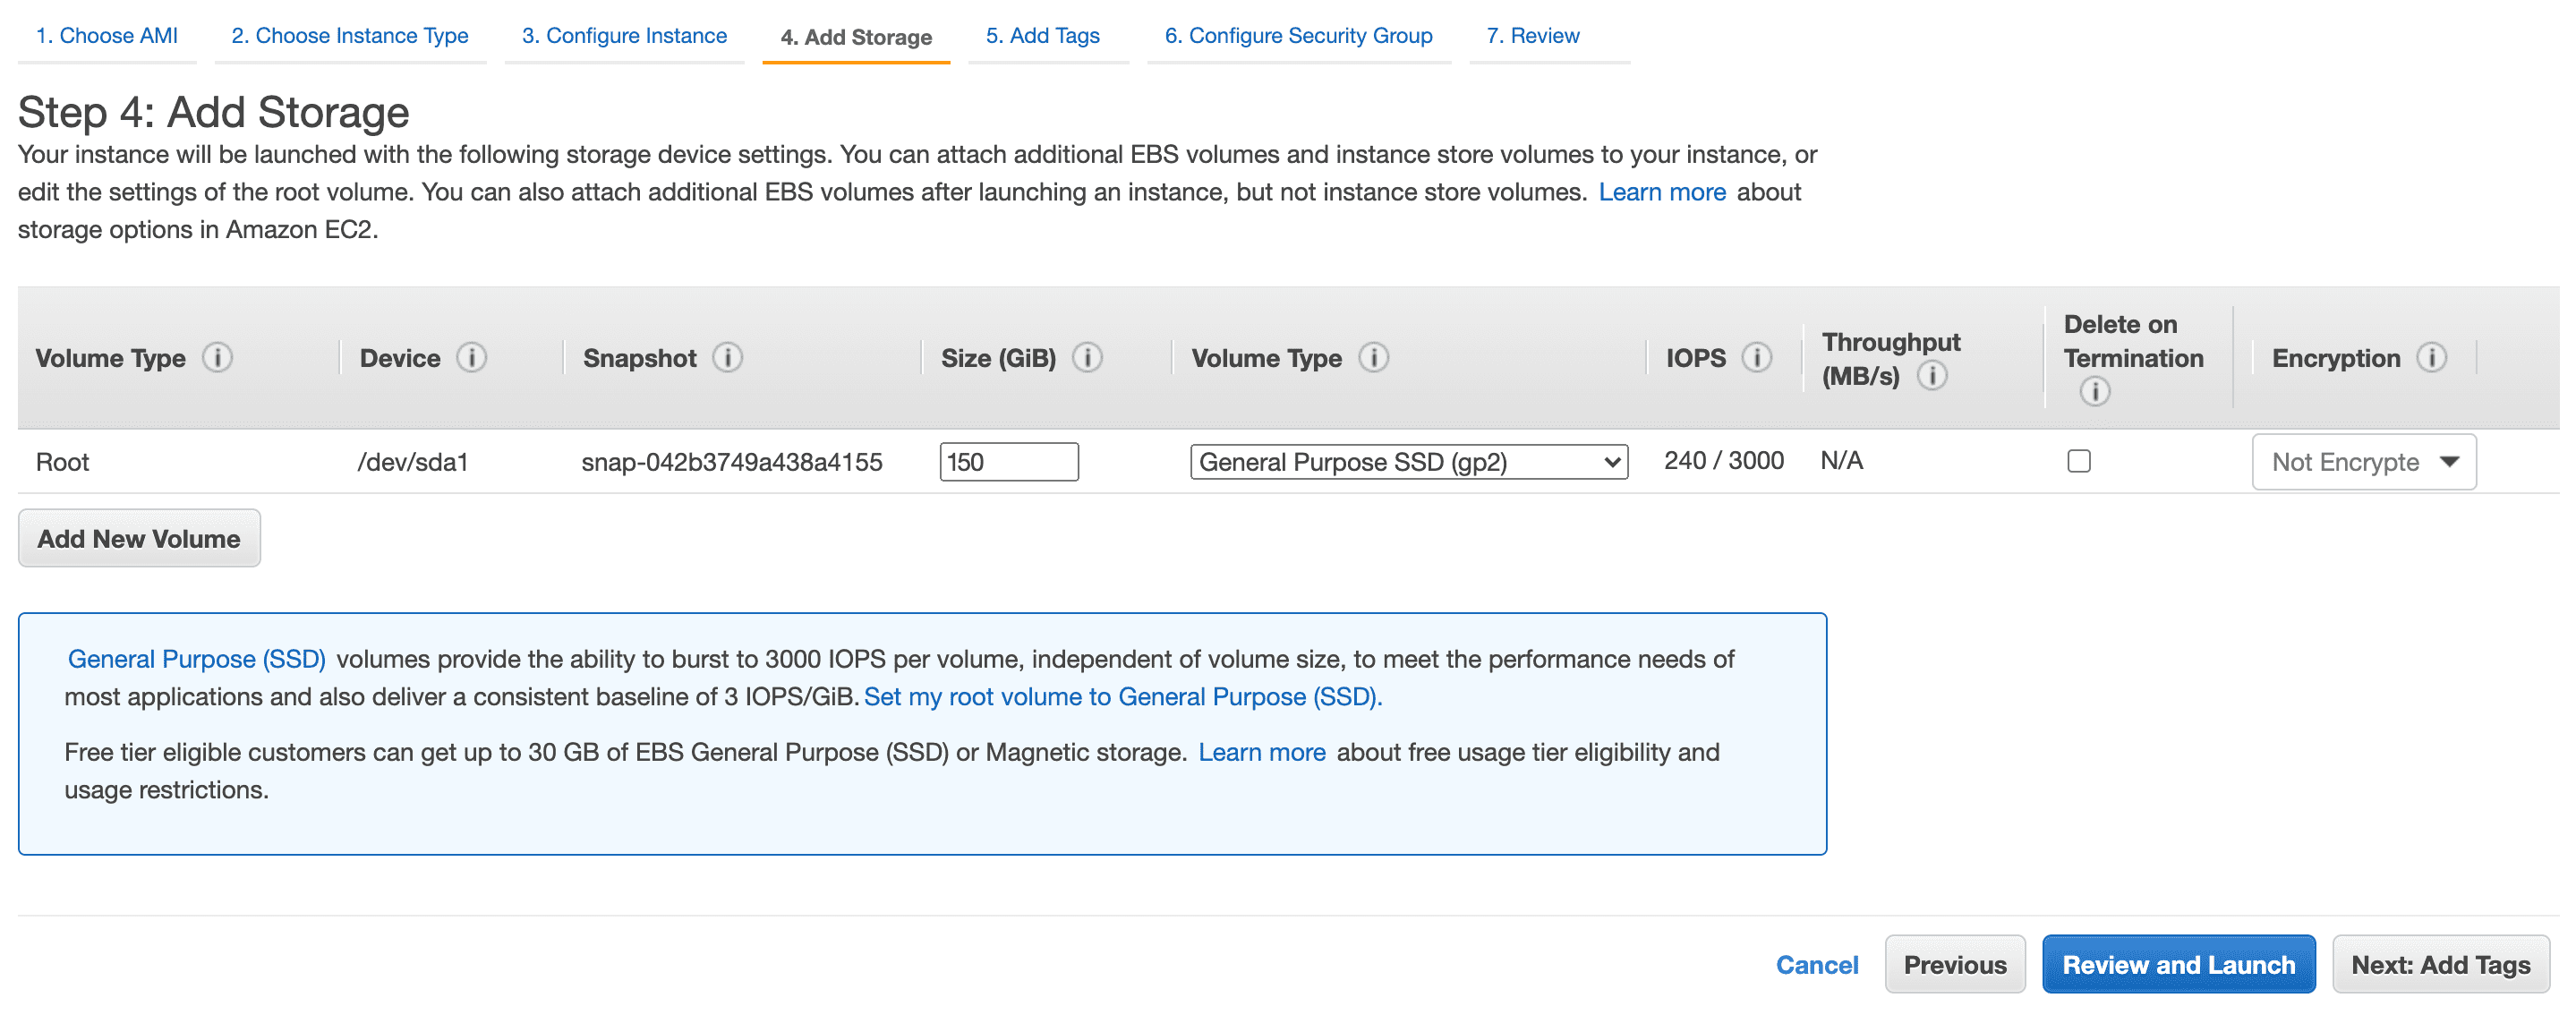
Adding Storage to Instances
Specify the storage device settings to launch the instance. Enter 150 GiB volume to install and run a Logpoint instance.
Click Next: Add Tags.
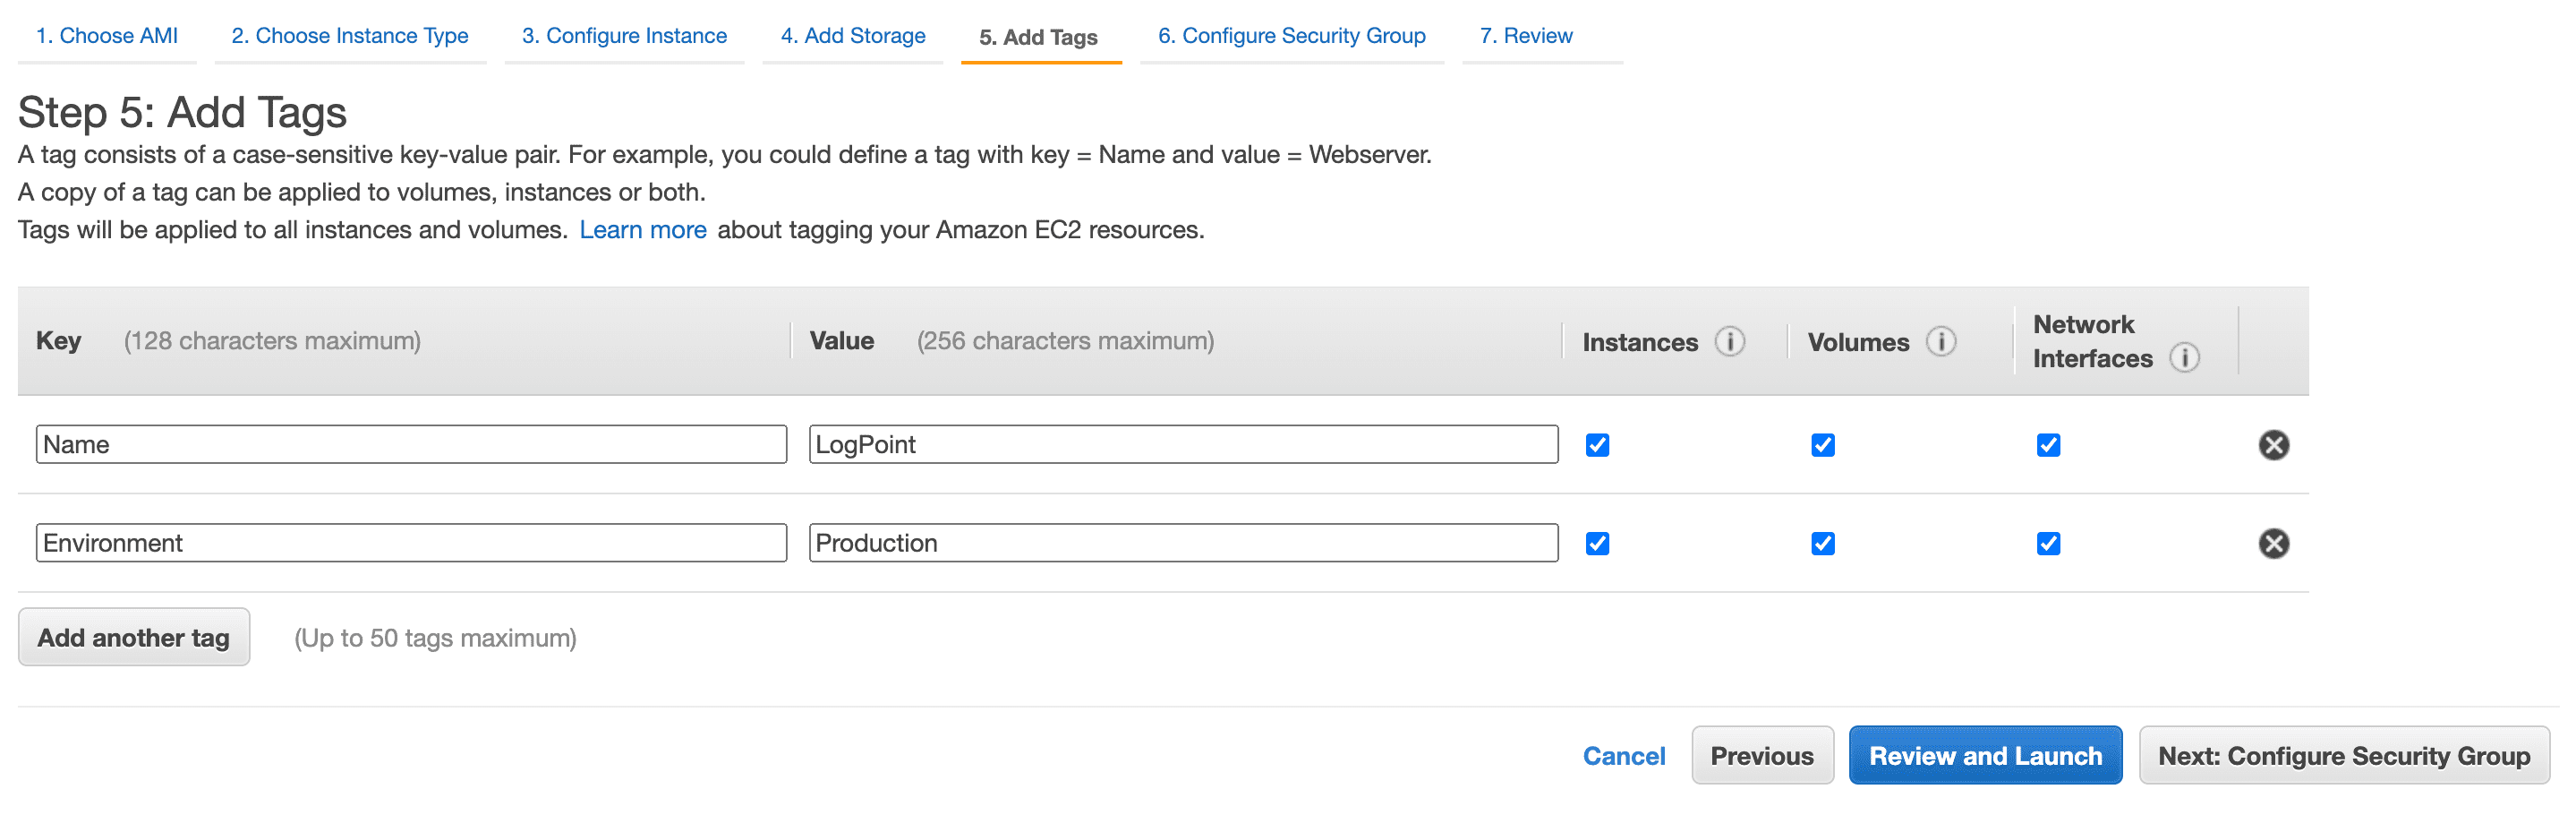
Adding Tags to Instances
Enter the tags to be applied to the instance. The tags help you distinguish the instances and volumes when required.
Click Next: Configure Security Group.
We recommend opening the required ports in the network Access Control List (ACL) and configure security groups to launch Logpoint instances securely.
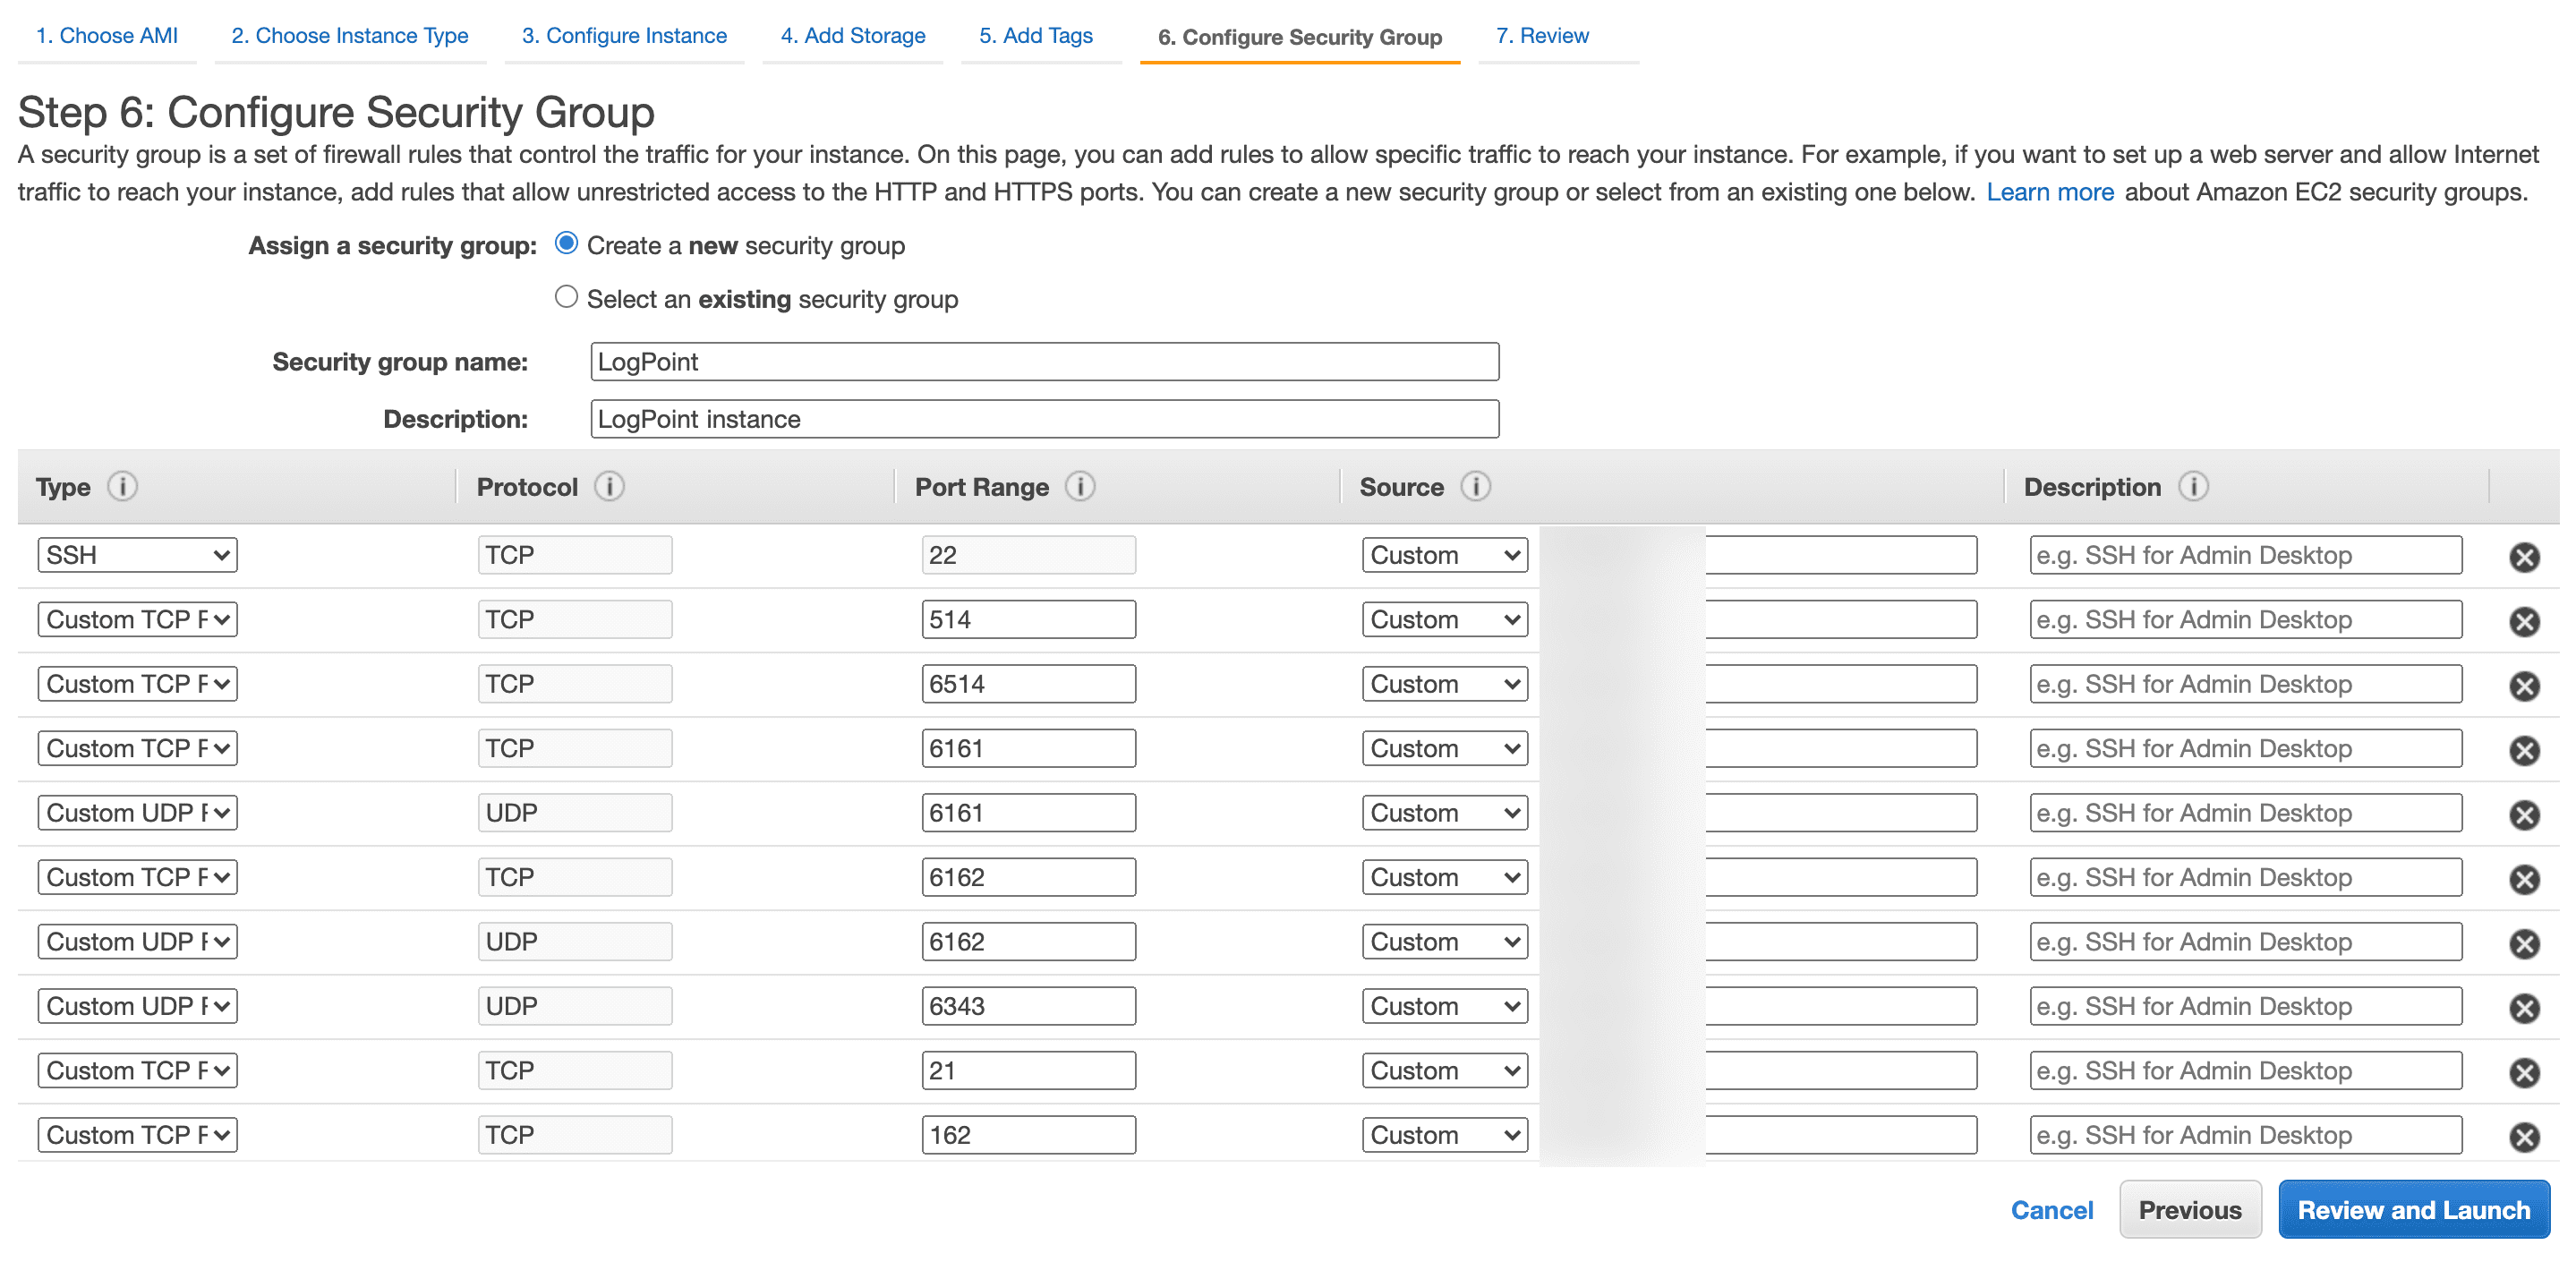
Configuring Security Groups
In the Configure Security Group, select Create a new security group to set all the firewall rules that control the traffic for your Logpoint instances.
Port |
Protocol |
Service |
|---|---|---|
514 |
TCP |
Syslog Collector |
6514 |
TCP |
Syslog Collector SSL |
6161 |
TCP/UDP |
Snare Collector |
6162 |
TCP/UDP |
Snare Collector |
6343 |
UDP |
SFlow Collector |
21 |
TCP |
FTP |
162 |
TCP |
SNMP Trap Collector |
443 |
TCP |
Web Service |
9001 |
UDP |
EMC Collector |
7996/7997/7998/7999 |
TCP |
Logpoint Agent Collector |
Click Review and Launch.
After you click Launch, a key pair is required to establish an SSH connection with Logpoint. To obtain a key pair, you can either Choose an existing key pair or Create a new key pair from the drop-down menu.
If you choose to Create a new key pair,
Enter a Key pair name.
Click Download Key Pair.
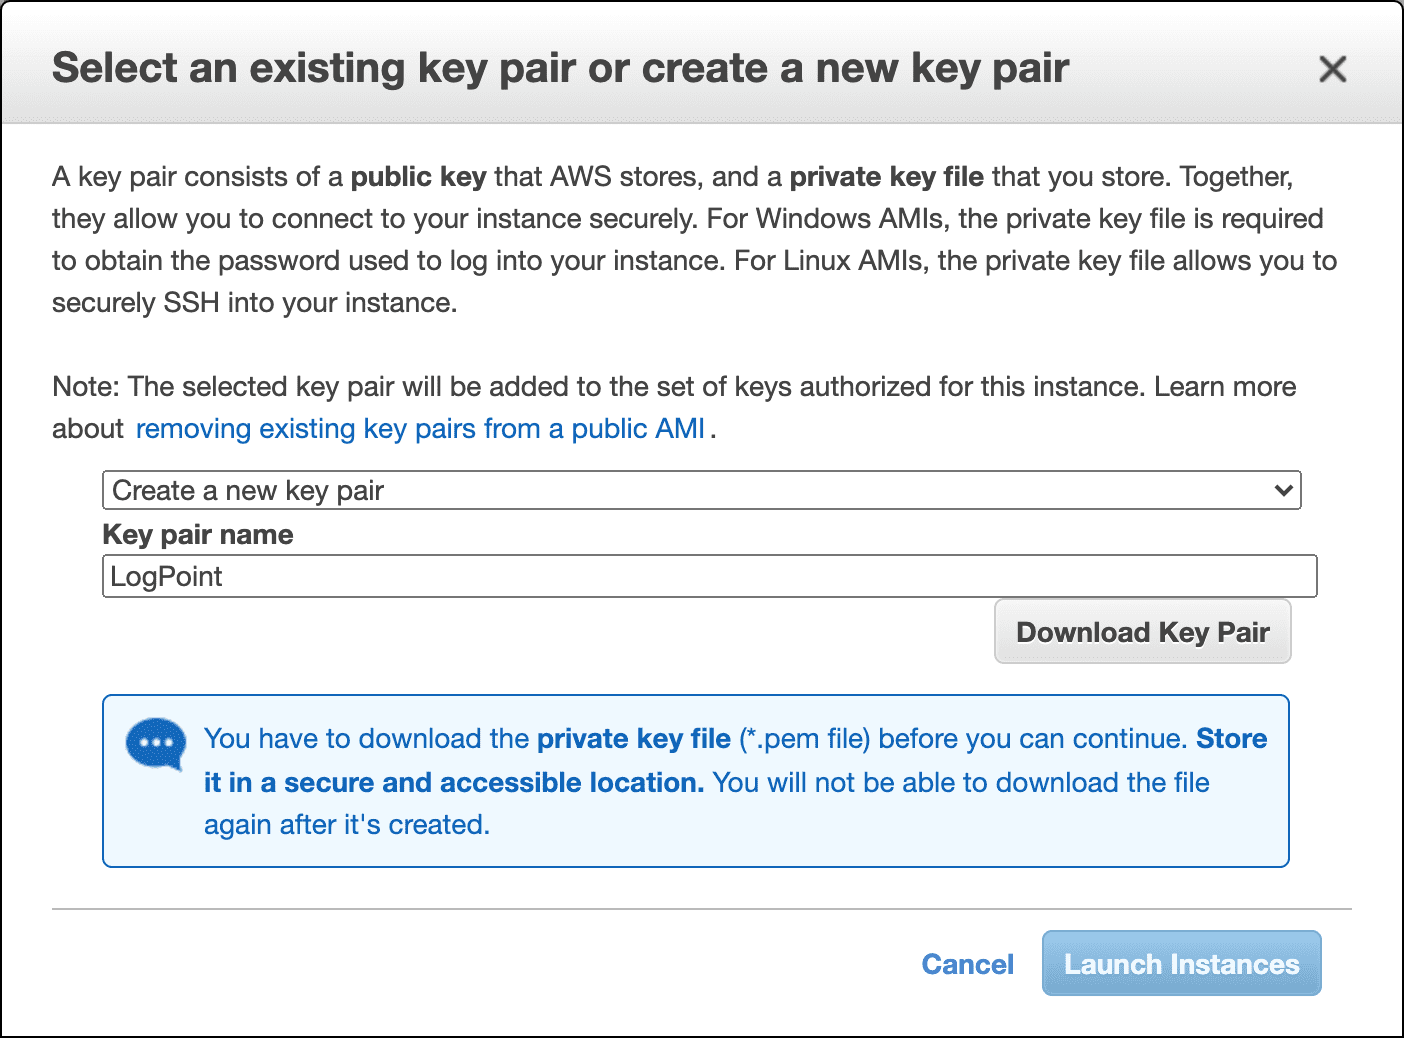
Creating a new key pair
Click Launch Instances.
If you Choose an existing key pair,
Select a key pair from the list of the available key pairs.
Read the confirmation message and agree with the terms.

Choosing an existing key pair
Click Launch Instances.