Enables connection to external data and systems so you can add specific features and functionality to your Logpoint platform. Termed ”Plugins” in the Logpoint UI, they are a synonymous with Authentication, Process Commands, Collectors, Fetchers and Enrichment integrations.
Currently, there are three out-of-the-box authentication integrations for Director LPSM:
LDAP Authentication
Plugins
You can request new features from Logpoint Customer Service. When the feature is developed, the .pak file of the new integration is uploaded in Integrations of the Logpoint Service desk. You can then download the latest version of the integration and import the .pak file from Settings >> System >> Applications in LPSM.
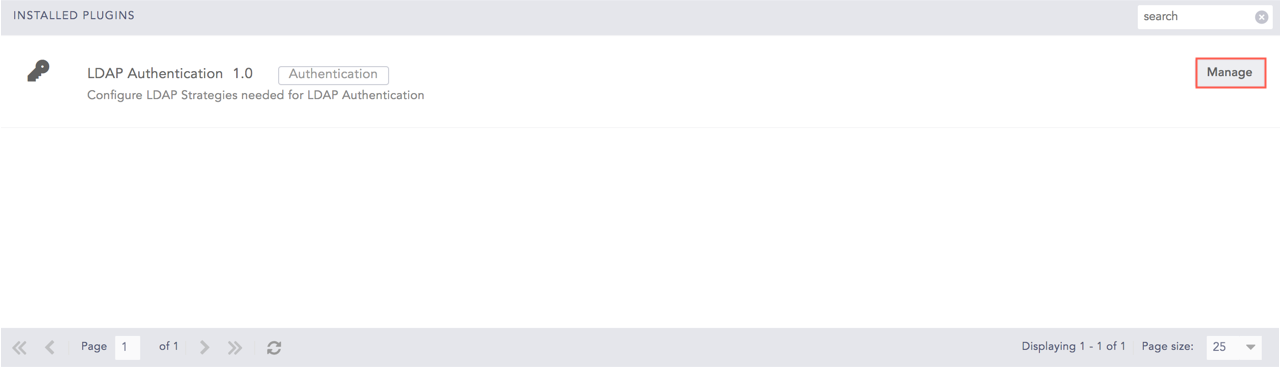
To install, import the .pak file. After installation it is listed in INSTALLED PLUGINS in Settings >> System >> Plugins.
LDAP (Lightweight Directory Access Protocol) integration in LPSM offers User Authentication, User Management, Role-Based Access Control, and Centralized Data Management.
You can use LDAP for LPSM login authentication and configure it to pull user authentication and role-based access control rules from your LDAP directory. LPSM users are already defined in LDAP so you don’t need to recreate them.
By default, LDAP Authentication is automatically installed in LPSM and cannot be deleted. Configure the LDAP Strategy in LPSM to use LDAP. LDAP strategy is the rules and configurations for deploying and maintaining LDAP services for your organization. LDAP strategy can vary depending on what your needs and objectives are.
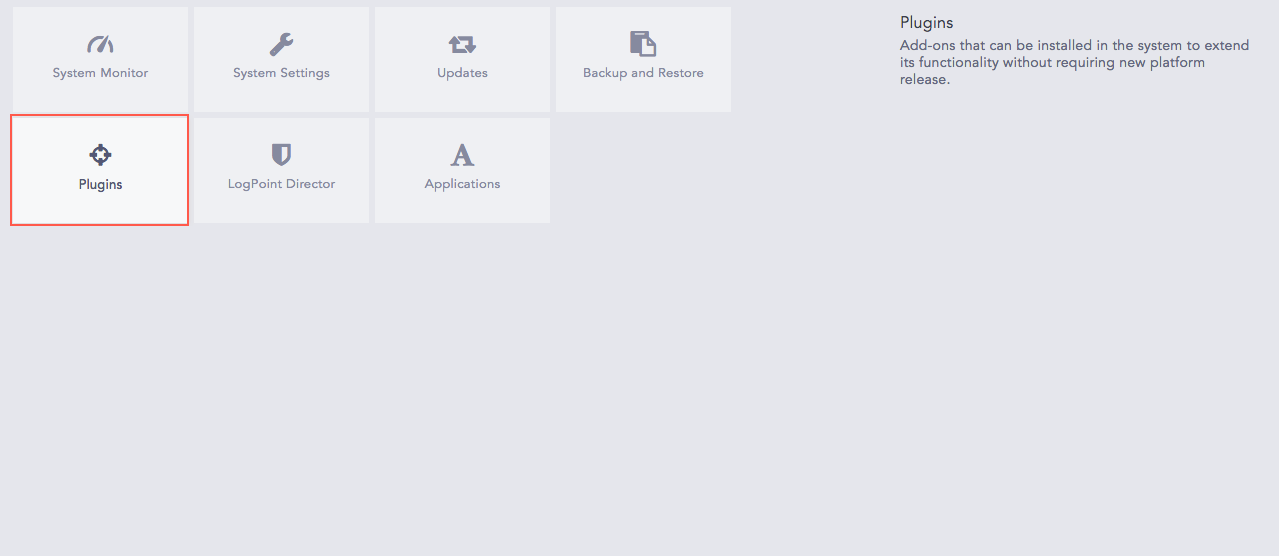
Go to Settings >> System >> Plugins.
LDAP Authentication Plugin
Click Manage for the LDAP Authentication.

Add LDAP Strategy
Click Add,
LDAP Strategy
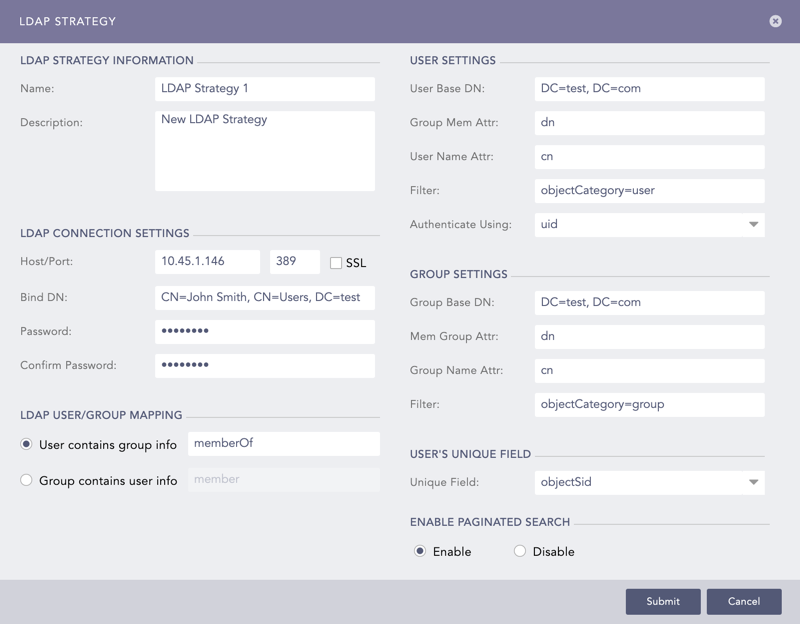
Enter a Name and its Description for the LDAP strategy.
Enter the Host/Port address for the LDAP server that authenticates the user.
Enable the SSL (Secure Sockets Layer) option to establish an encrypted link.
Enter a Bind DN which is a distinguished name for the LDAP server.
Enter and confirm the Password to authenticate the user.
For the User contains group info, enter the memberOf information.
For the Group contains user info, enter the member information.
Note
The fields in User Settings and Group Settings are automatically populated according to the values entered in the LDAP Connection Settings.
In User Settings:
The User Base DN is the node under which the LDAP users are present.
The Group Mem Attr and the User Name Attr are attributes of the group member and the user provided in the database respectively.
The Filter is the string that filters the user results.
Select the Authenticate Using parameter from the drop-down which is required for login.
Select dn to use standard DN format for login.
Select uid to use uid for login (uid for Linux system).
Select SAM Account Name to use SAM Account Name for login (SAM Account Name for Windows).
In Group Settings:
Group Base DN is the node under which the LDAP groups are present.
Mem Group Attr contains group members.
Group Name Attr is the group name attribute from the database.
Select Enable or Disable the Enable Paginated Search option. You can choose to paginate the search if the remote server offers a paginated search.
Enter the Username Template and the Fullname Template in the jinja format.
For example: If the user attributes inside the Active Directory are displayName, FirstName and LastName, then:
Username Template = {{displayName}}
Fullname Template = {{FirstName}}{{LastName}}
Click Submit.
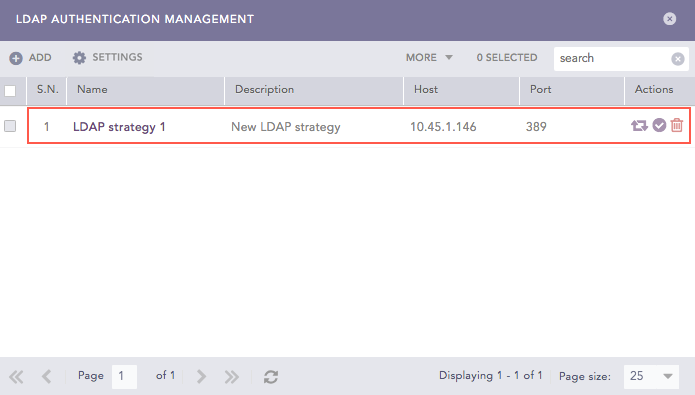
LDAP Strategy Created
After configuring an LDAP Strategy, LDAP groups can be mapped to LPSM User Groups. There is a particular scenario called LDAP concatenation of Users and Permission Groups, which maps multiple LDAP User Groups to LPSM User Groups. This scenario is described below in LDAP Concatenation of Users and Permission Groups.
Click the Map LDAP Groups to LogPoint User Groups ( ) icon from the Actions column of an existing LDAP Strategy.
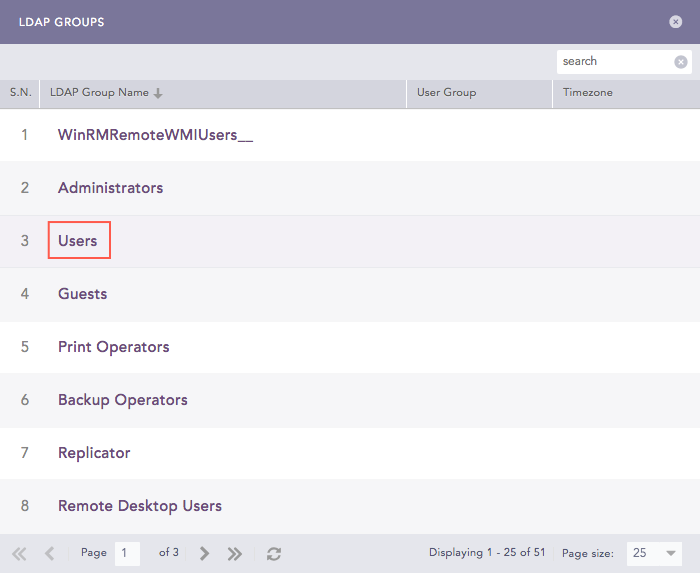
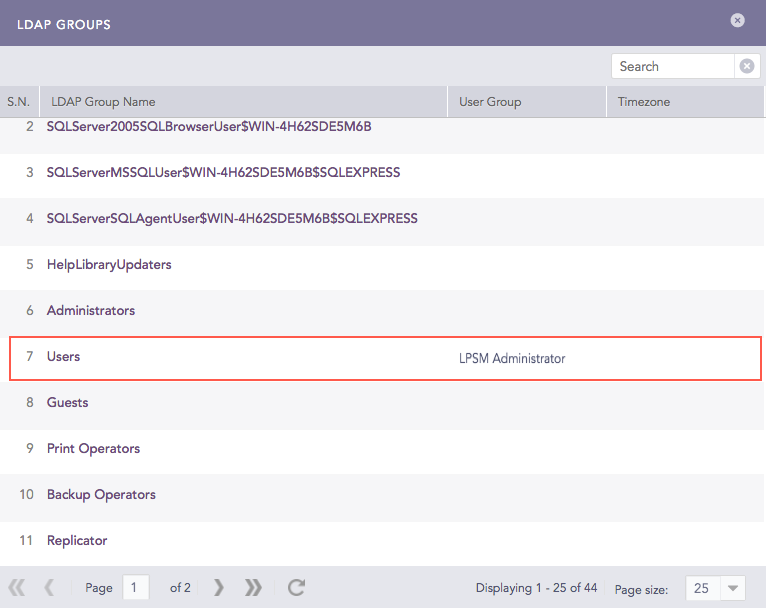
LDAP Groups
Click the LDAP Group Name.
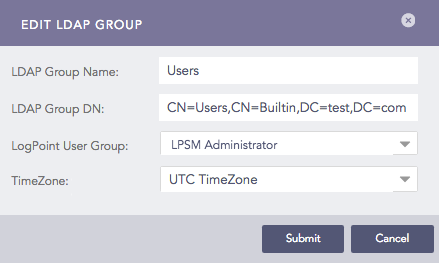
Edit LDAP Group
Select LogPoint User Group and TimeZone from the drop-down. The LDAP Group Name and LDAP Group DN are populated by default.
Click Submit.
LDAP Groups Mapped to LPSM User Groups
The LDAP user “LDAP User 1” belongs to LDAP Groups “LDAPG-1” and “LDAPG-2” in the LDAP directory.
There are two Permission Groups PG1 (with Read Site Permission only) and PG2 (with Read, Create, and Delete Site Permissions) created in Logpoint.
PG1 is mapped to User Group UG1, and PG2 is mapped to UG2.
UG1 has the Object Permission of Device-1 and Repo-1, and UG2 has the Object Permission of Device-2 and Repo-2.
If you map the LDAPG-1 to UG1 and LDAPG-2 to UG2, the LDAP User 1 has the concatenated Site and Object Permissions of UG1 and UG2. In this case, the Site Permission is Read, Create, and Delete and the Object Permission is of Device-1, Repo-1, Device-2, and Repo-2.
You can now use LDAP Authentication to log in to LPSM.
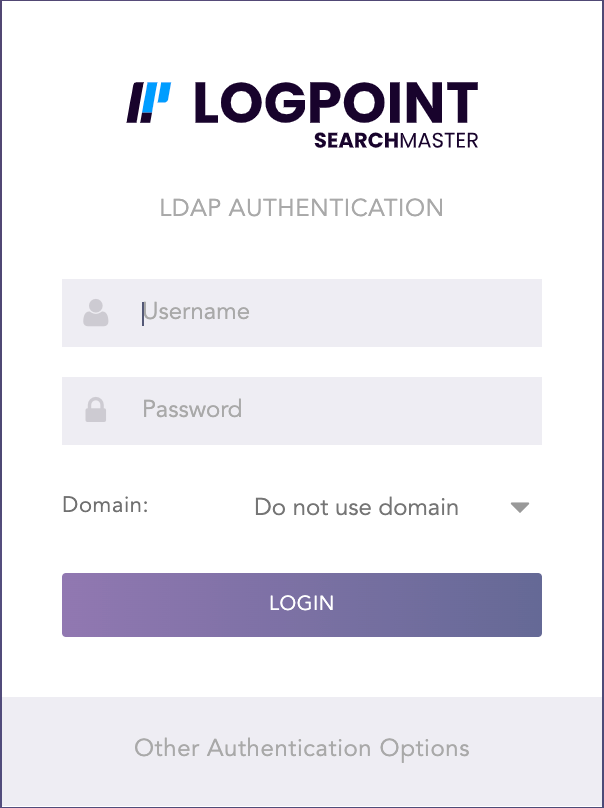
LDAP Authentication
LDAP server data is connected with LPSM and stored in the database. First, the connection is made with the LDAP server using data from the LDAP strategy. Once the connection is established, the data (LDAP group) from the server is obtained. After the LDAP groups are obtained, they are listed in the User Group Mapping. Here, the user must select the required LDAP group to map to the LPSM user group. Once the mapping is established, the content: LDAP group, user group, and the DN associated with it are stored in the database. Any update to user group mapping is reflected every time the user logs in to Logpoint.
Go to Settings >> System >> Plugins.
Click Manage from the LDAP Authentication plugin.
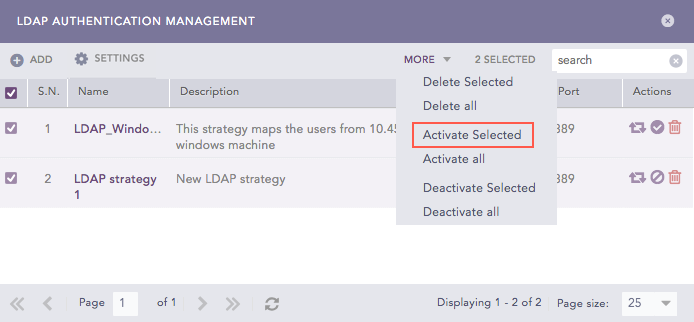
Click the Activate LDAP Strategy ( ) icon from the Actions column of the LDAP Strategy.
To deactivate the LDAP Strategy, follow the same procedure.
Go to Settings >> System >> Plugins.
Click Manage from the LDAP Authentication plugin.
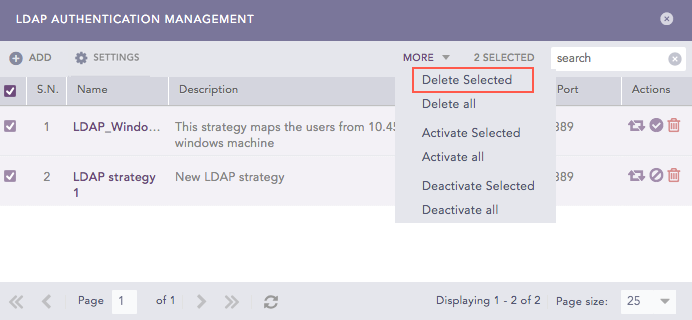
Click the Delete (![]() ) icon from the Actions column of the LDAP Strategy.
) icon from the Actions column of the LDAP Strategy.
Click Yes.
Configuring a default domain for LDAP Authentication automates the domain selection process during login. LPSM automatically uses the configured default domain when you login using LDAP Authentication.
To configure a default domain:
Go to Settings >> System Settings from the navigation bar and click Plugins.
Search for LDAP Authentication.
Click Manage.
Click Settings.
Select your domain from the Default Domain drop-down.
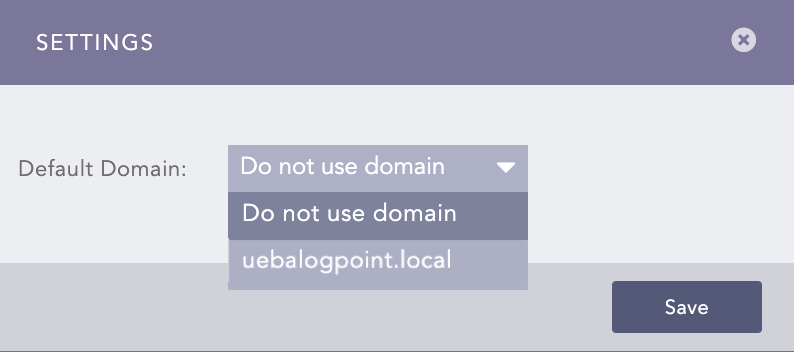
LDAP Authentication Default Settings
Click Save.
The following three parameters can be used to log in via LDAP.
Using DN
standard DN format, eg. CN=john, OU=people, DC=example, DC=com
Using sAMAccountName
sAMAccountName@domain eg: john@example.com
domain\sAMAccountName eg: example.com\john
Using uid
uid@domain eg: john@example.com
domain\uid eg: example.com\john
The parameters used for communication are:
Host
Port
Bind DN
Bind DN password
SSL enabled or not
There are two ways to communicate:
Simple communication
Communication using SSL
For simple communication, the Python-LDAP library is used. The host and the 389 port are used to connect to the LDAP server. Once the connection is established, Bind DN and Bind Password are used to bind to the required user.
For SSL communication, the first step is to set the certificate for the SSL connection. After the certificate is set, the process is similar to simple communication. Here, the port used is 636.