To fetch Microsoft Graph logs, you must configure a log source using the MicrosoftGraph log source template. The template has certain predefined settings and configurations. However, some settings need to be manually configured. For the MicrosoftGraphCompiledNormalizer, you must configure a date format using CompiledNormalizer Date Preference (CNDP).
Before configuring Microsoft Graph in Logpoint, you need to configure and get details from Microsoft Entra ID.
Log in to Azure portal.
Click on Microsoft Entra ID.
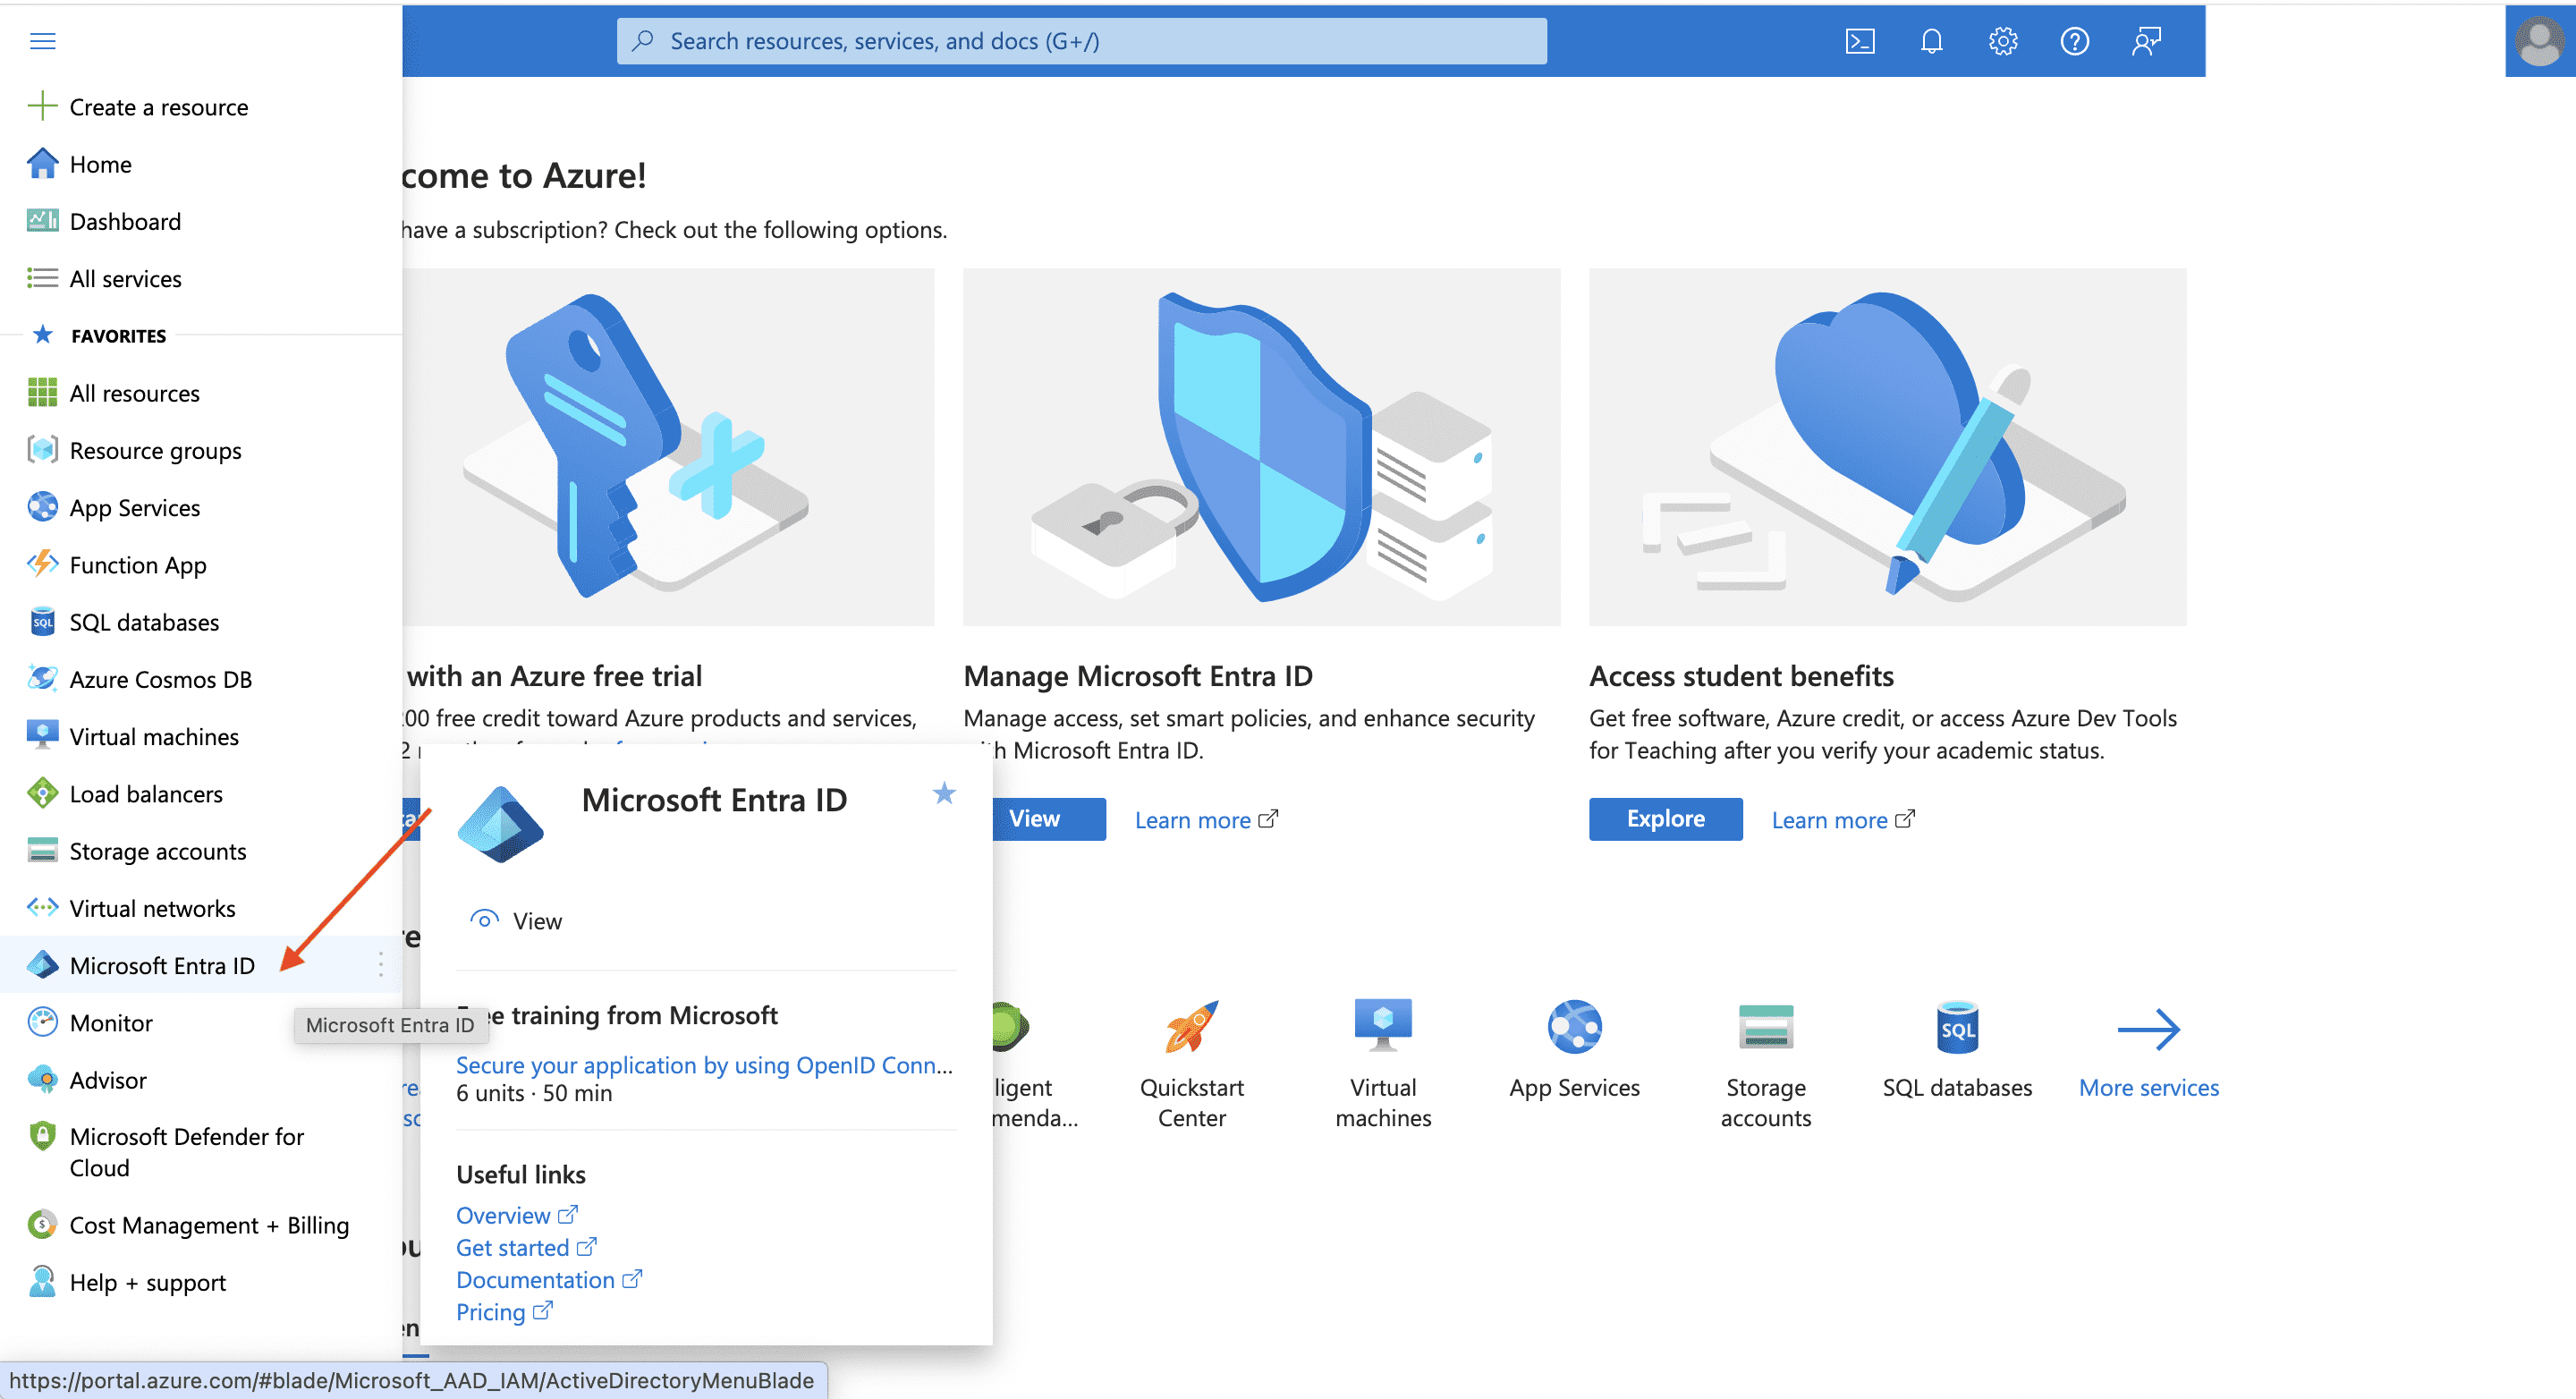
Microsoft Entra ID
Click on App registrations.
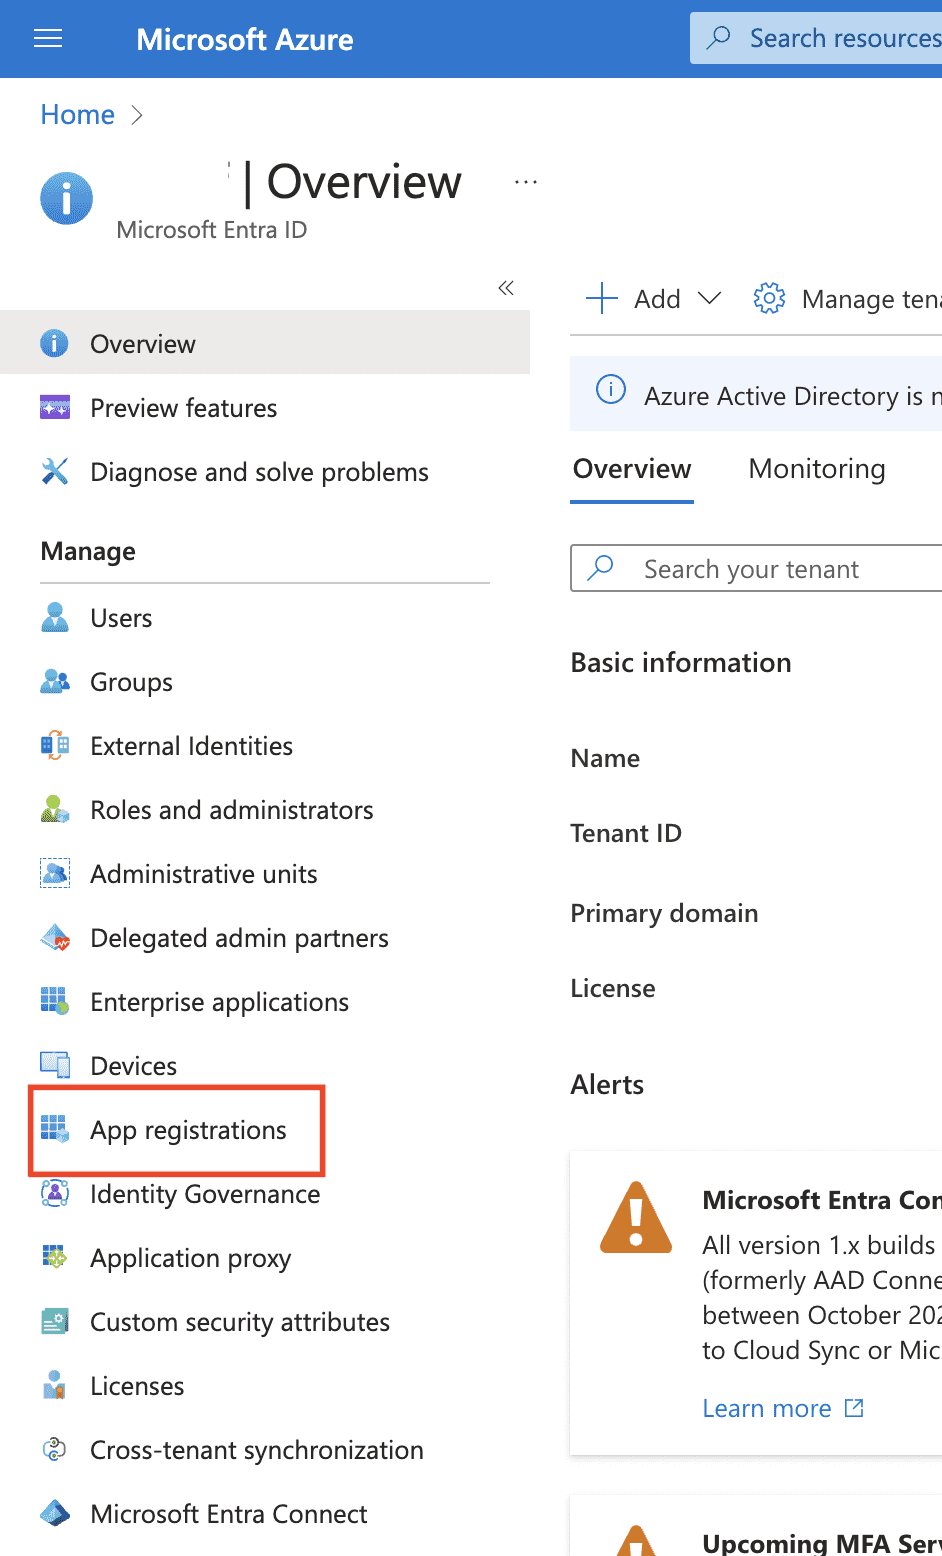
App Registration
Click on New registration and register an application. By giving certain permissions to the application, it acts as an interface to send logs from Microsoft services to Logpoint.
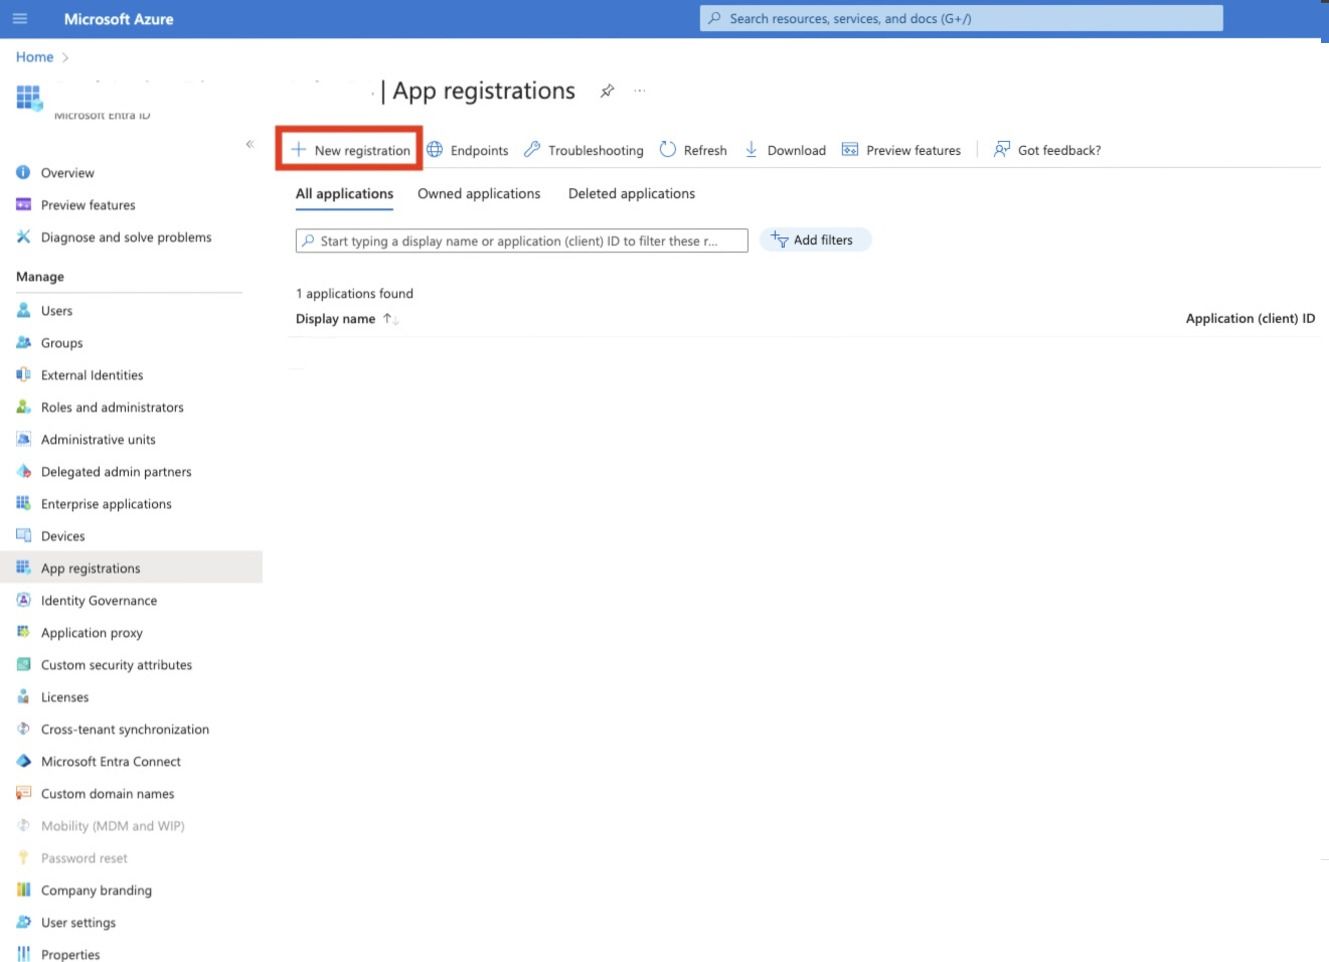
New registration
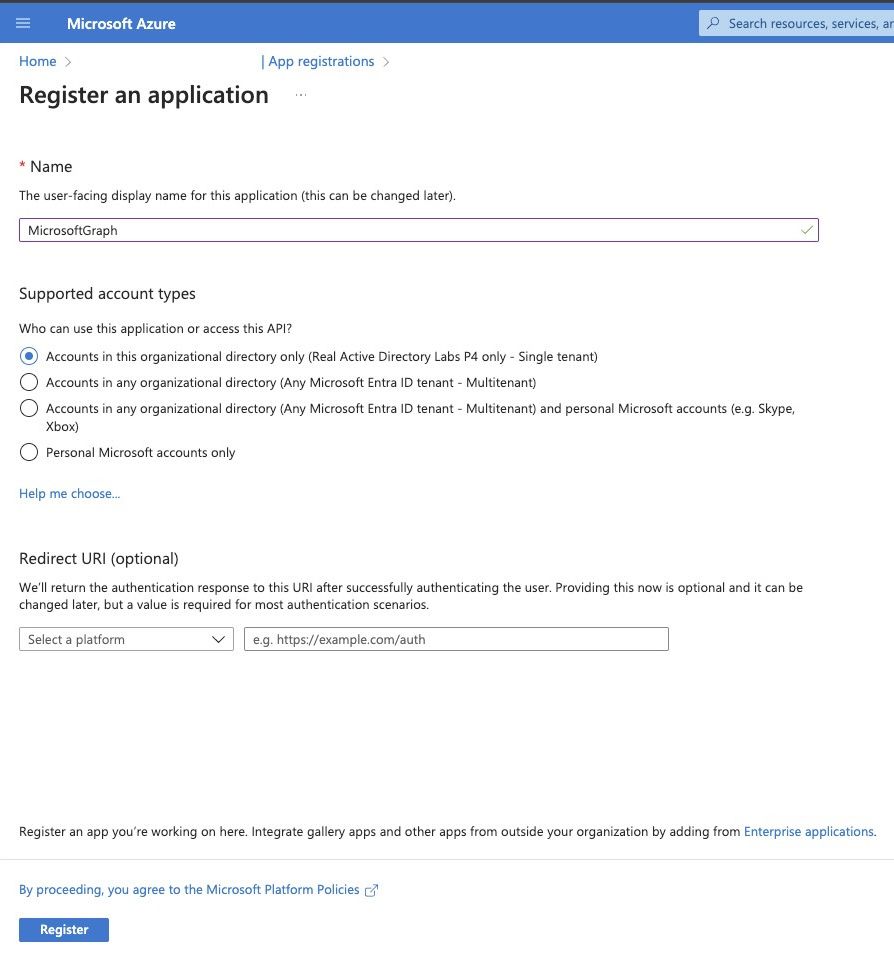
Register an application
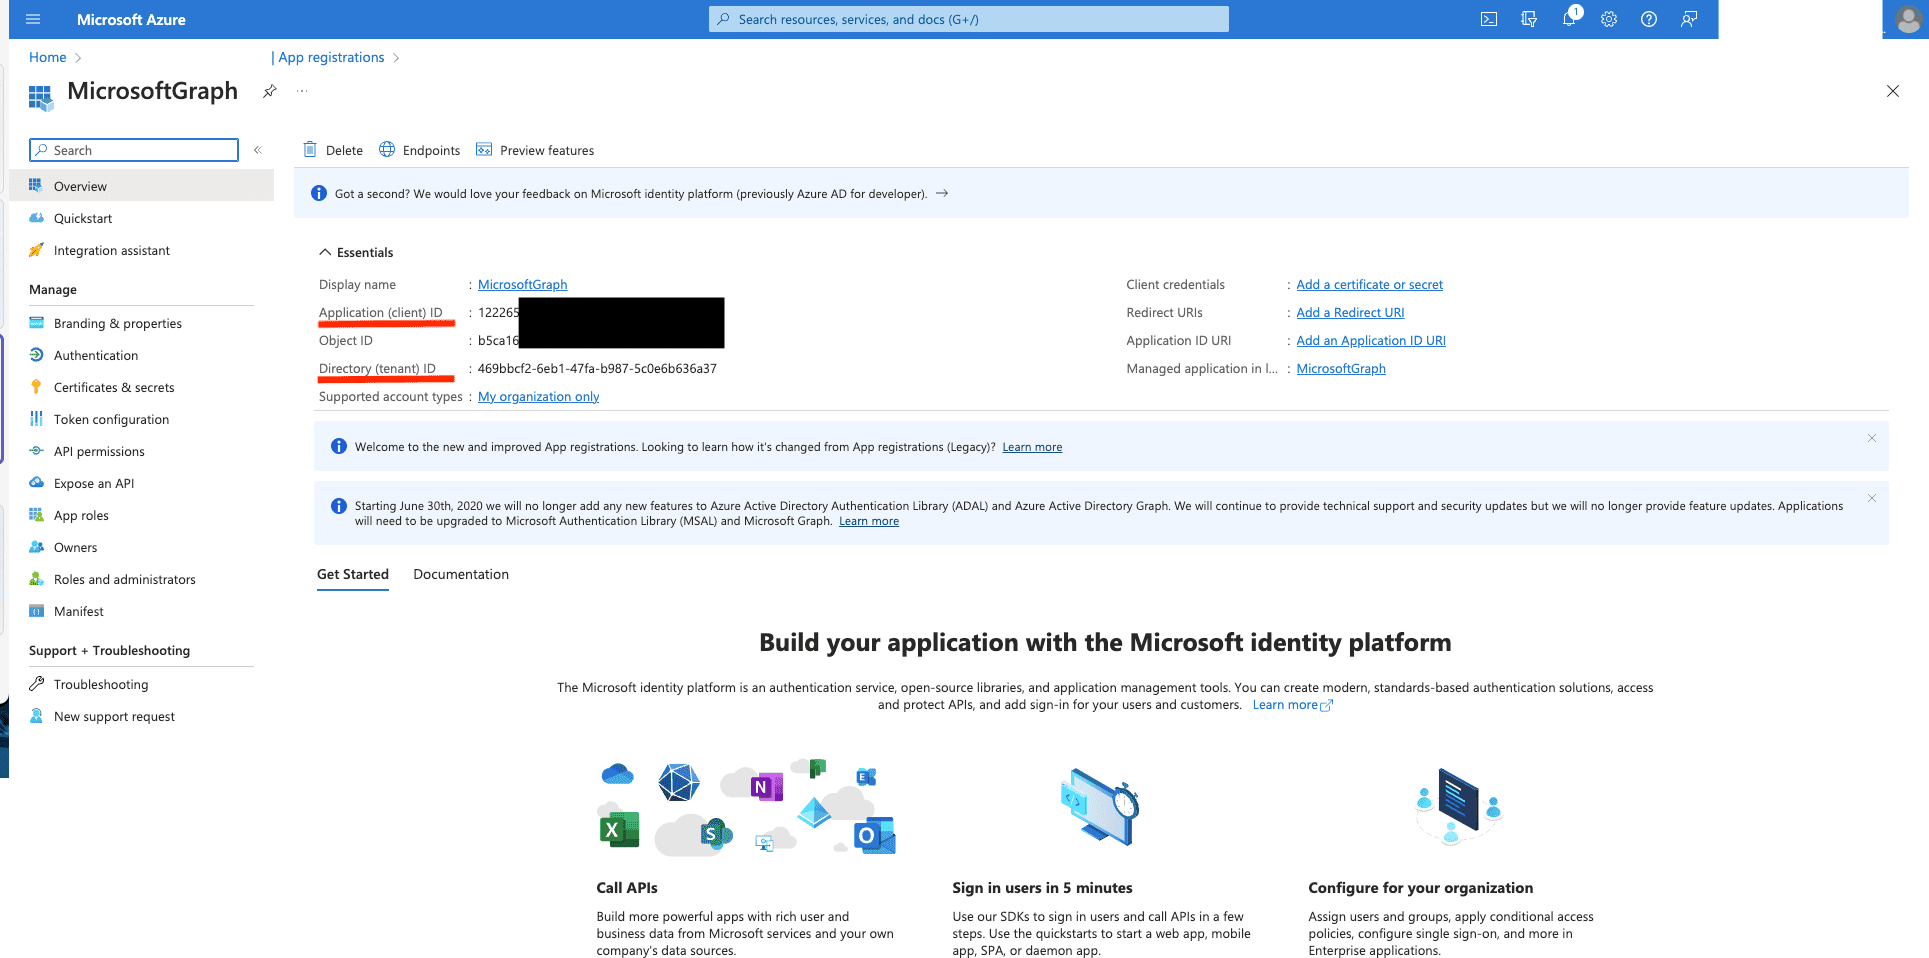
After the application is registered, copy the Application ID and Directory ID. This will be used as Client ID and tenant_id in Logpoint respectively.
Register an application
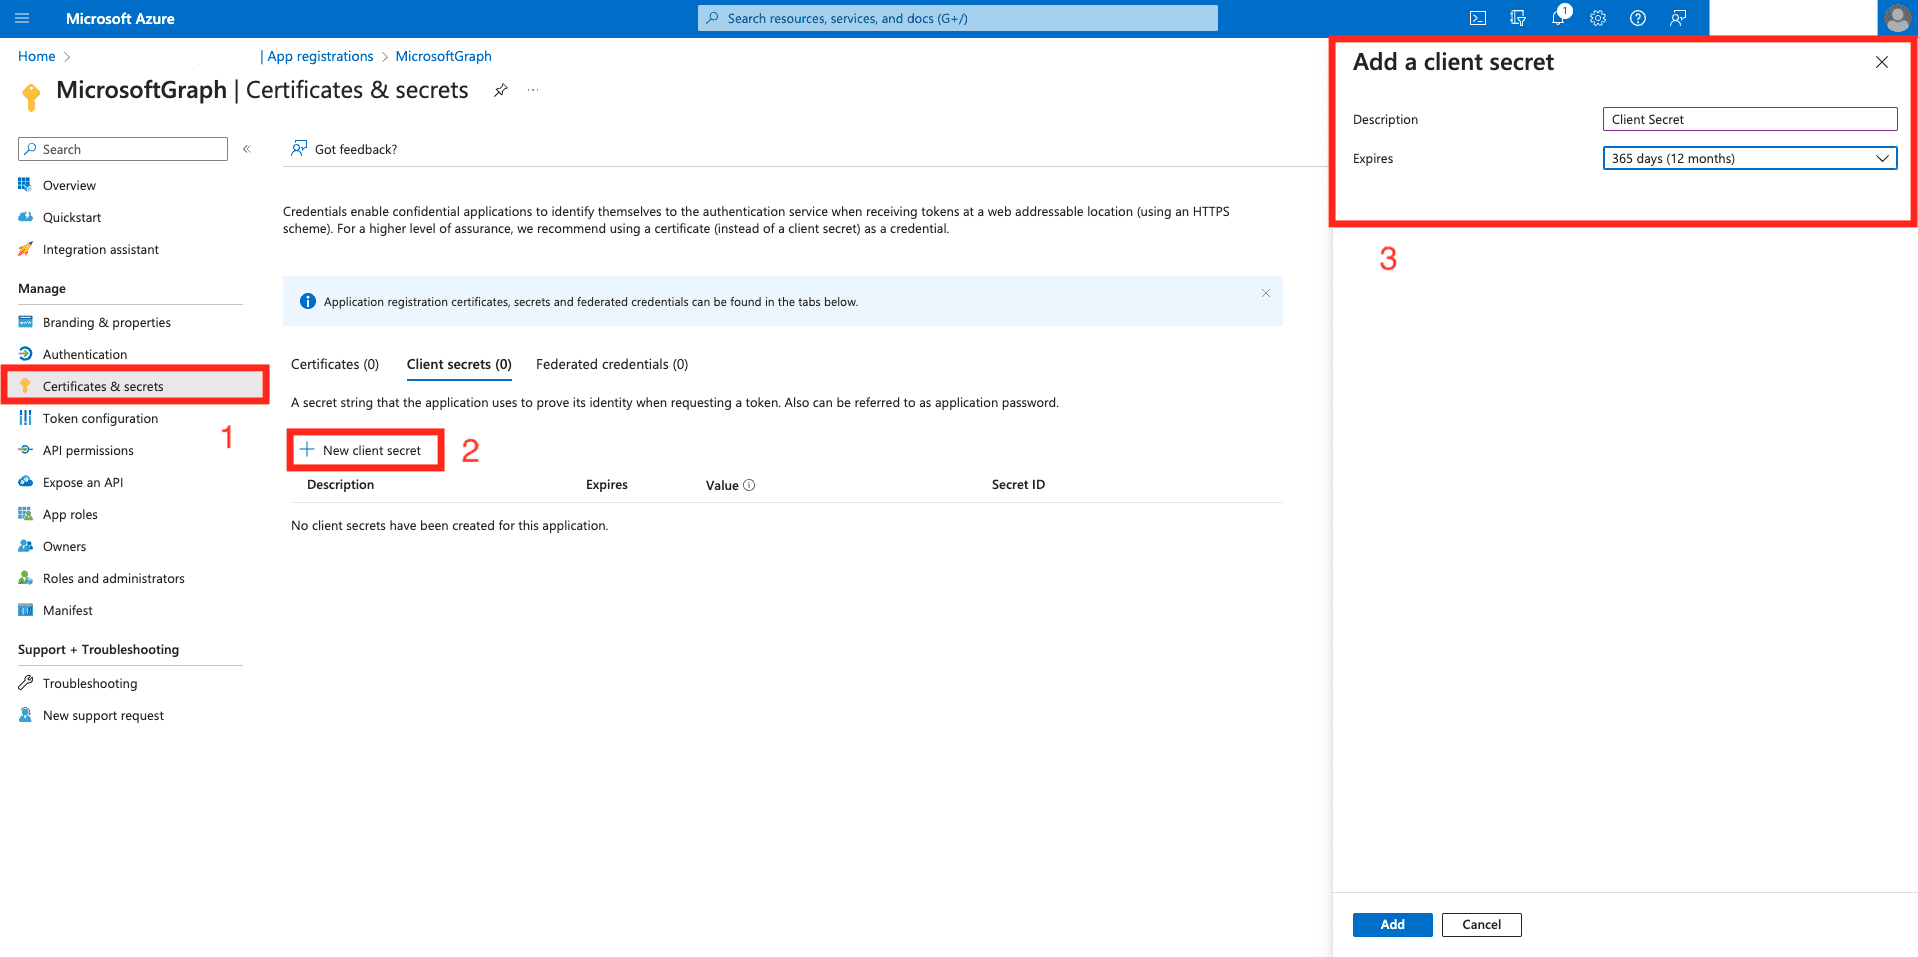
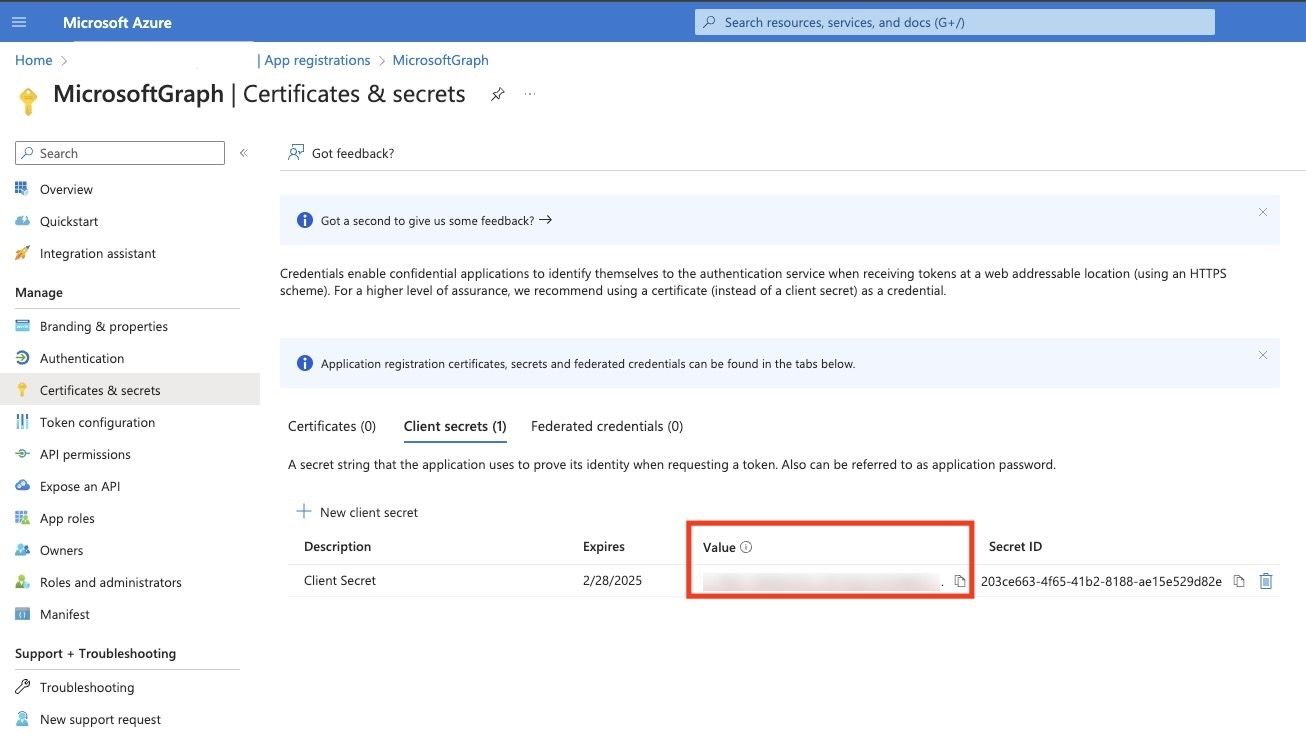
Go to Certificates and Secrets and generate a Client Secret for the application. Copy the Client Secret and keep it in a safe place. This is only generated once.
Client Secret
Client Secret
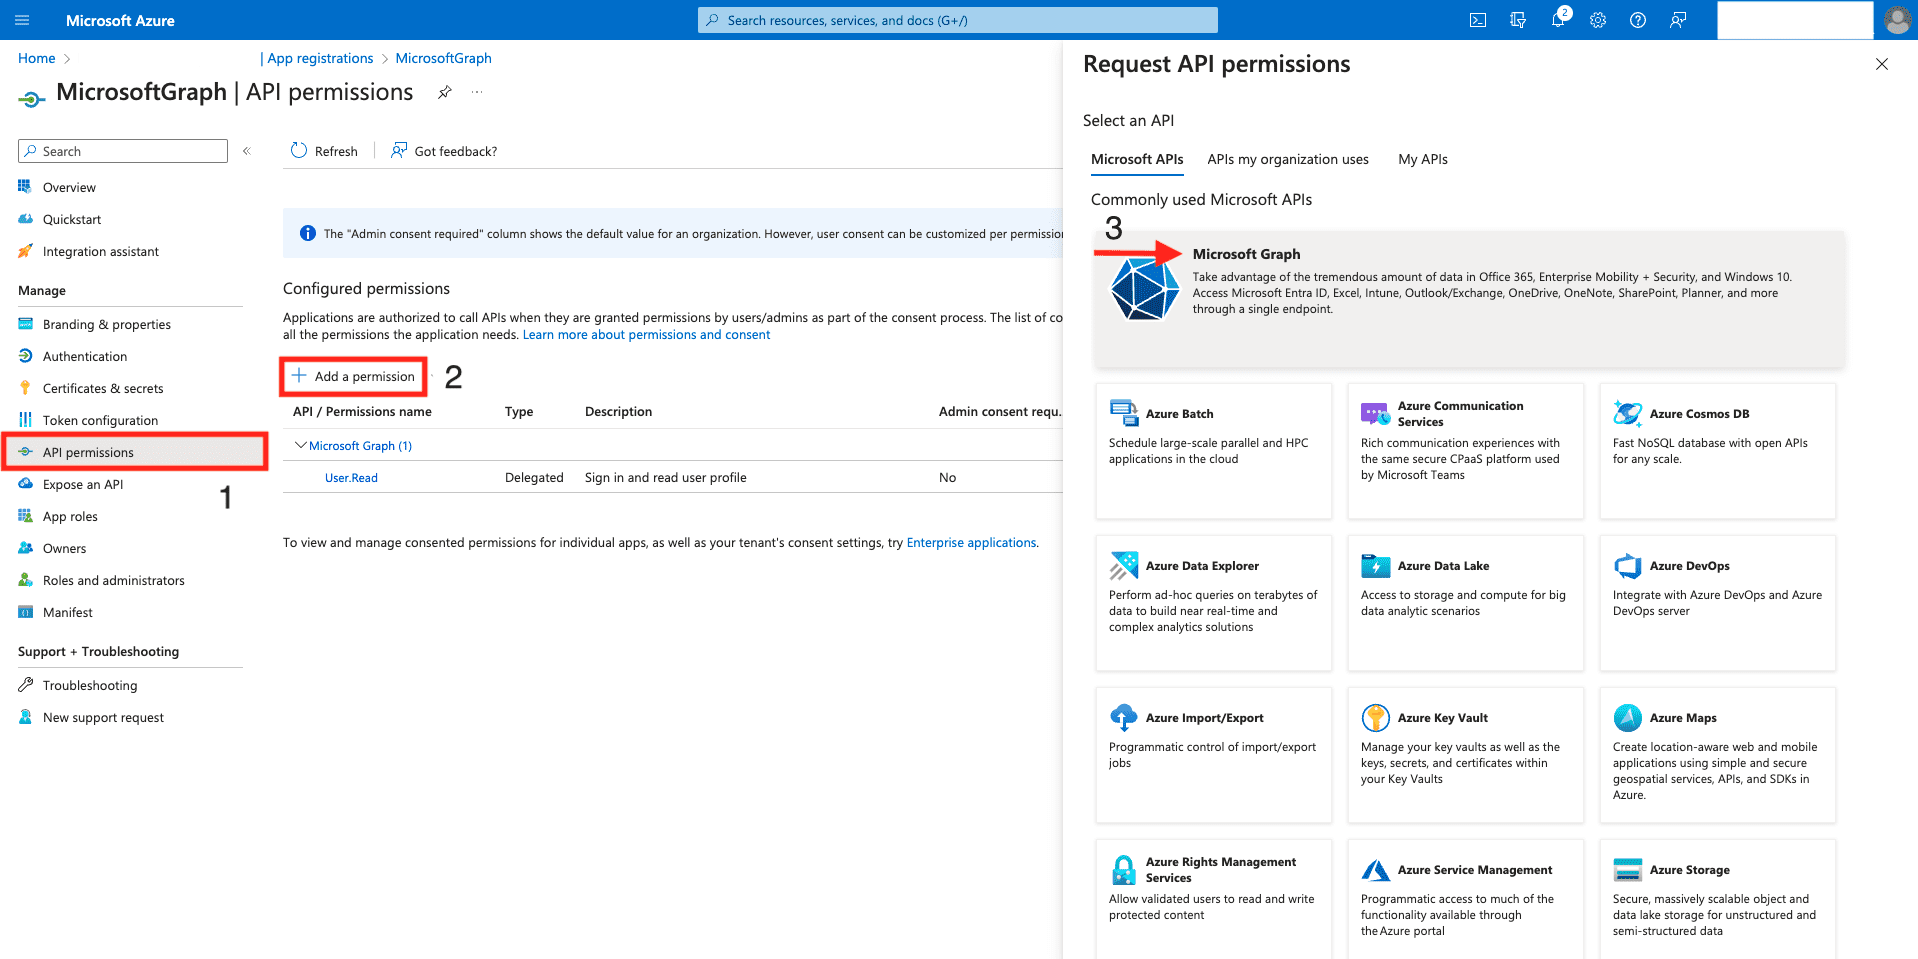
Go to API permissions >> Add a permission and select Microsoft Graph. Under Application permissions, select the following permissions for the following endpoints.
7.1. SecurityAlert.Read.All permission for security_alerts_v2.
7.2. SecurityIncident.Read.All permission for security_incidents.
7.3. AuditLog.Read.All permission for signIns and directoryAudit.
7.4. IdentityRiskEvent.Read.All permission for riskDetections.
Client Secret
To configure Microsoft Graph in Logpoint:
Go to Settings >> Log Sources from the navigation bar and click Browse Log Source Templates.
Click MicrosoftGraph.
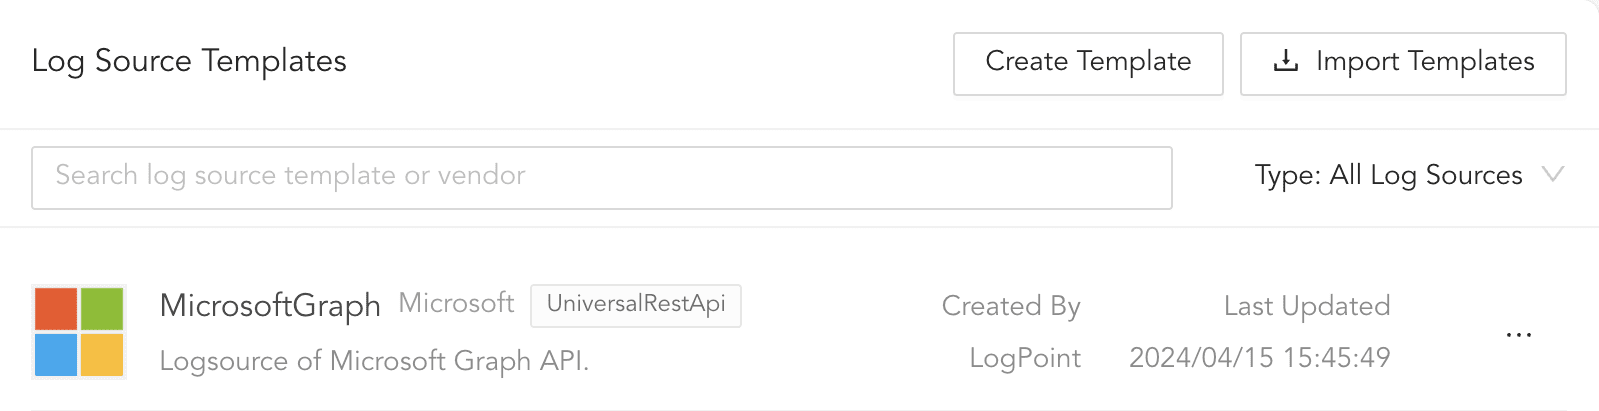
Log Source Templates
Click Connector.
In OAUTH 2.0 BASIC INFORMATION,
4.1. In Token URL, enter tentant_id. This is the Application ID of the Azure application.
4.2. In Grant Type, select Client Credentials.
4.3. Enter the Client ID. This is Directory ID of the Azure application.
4.4. Enter the Client Secret. This is the Client Secret of the Azure application.
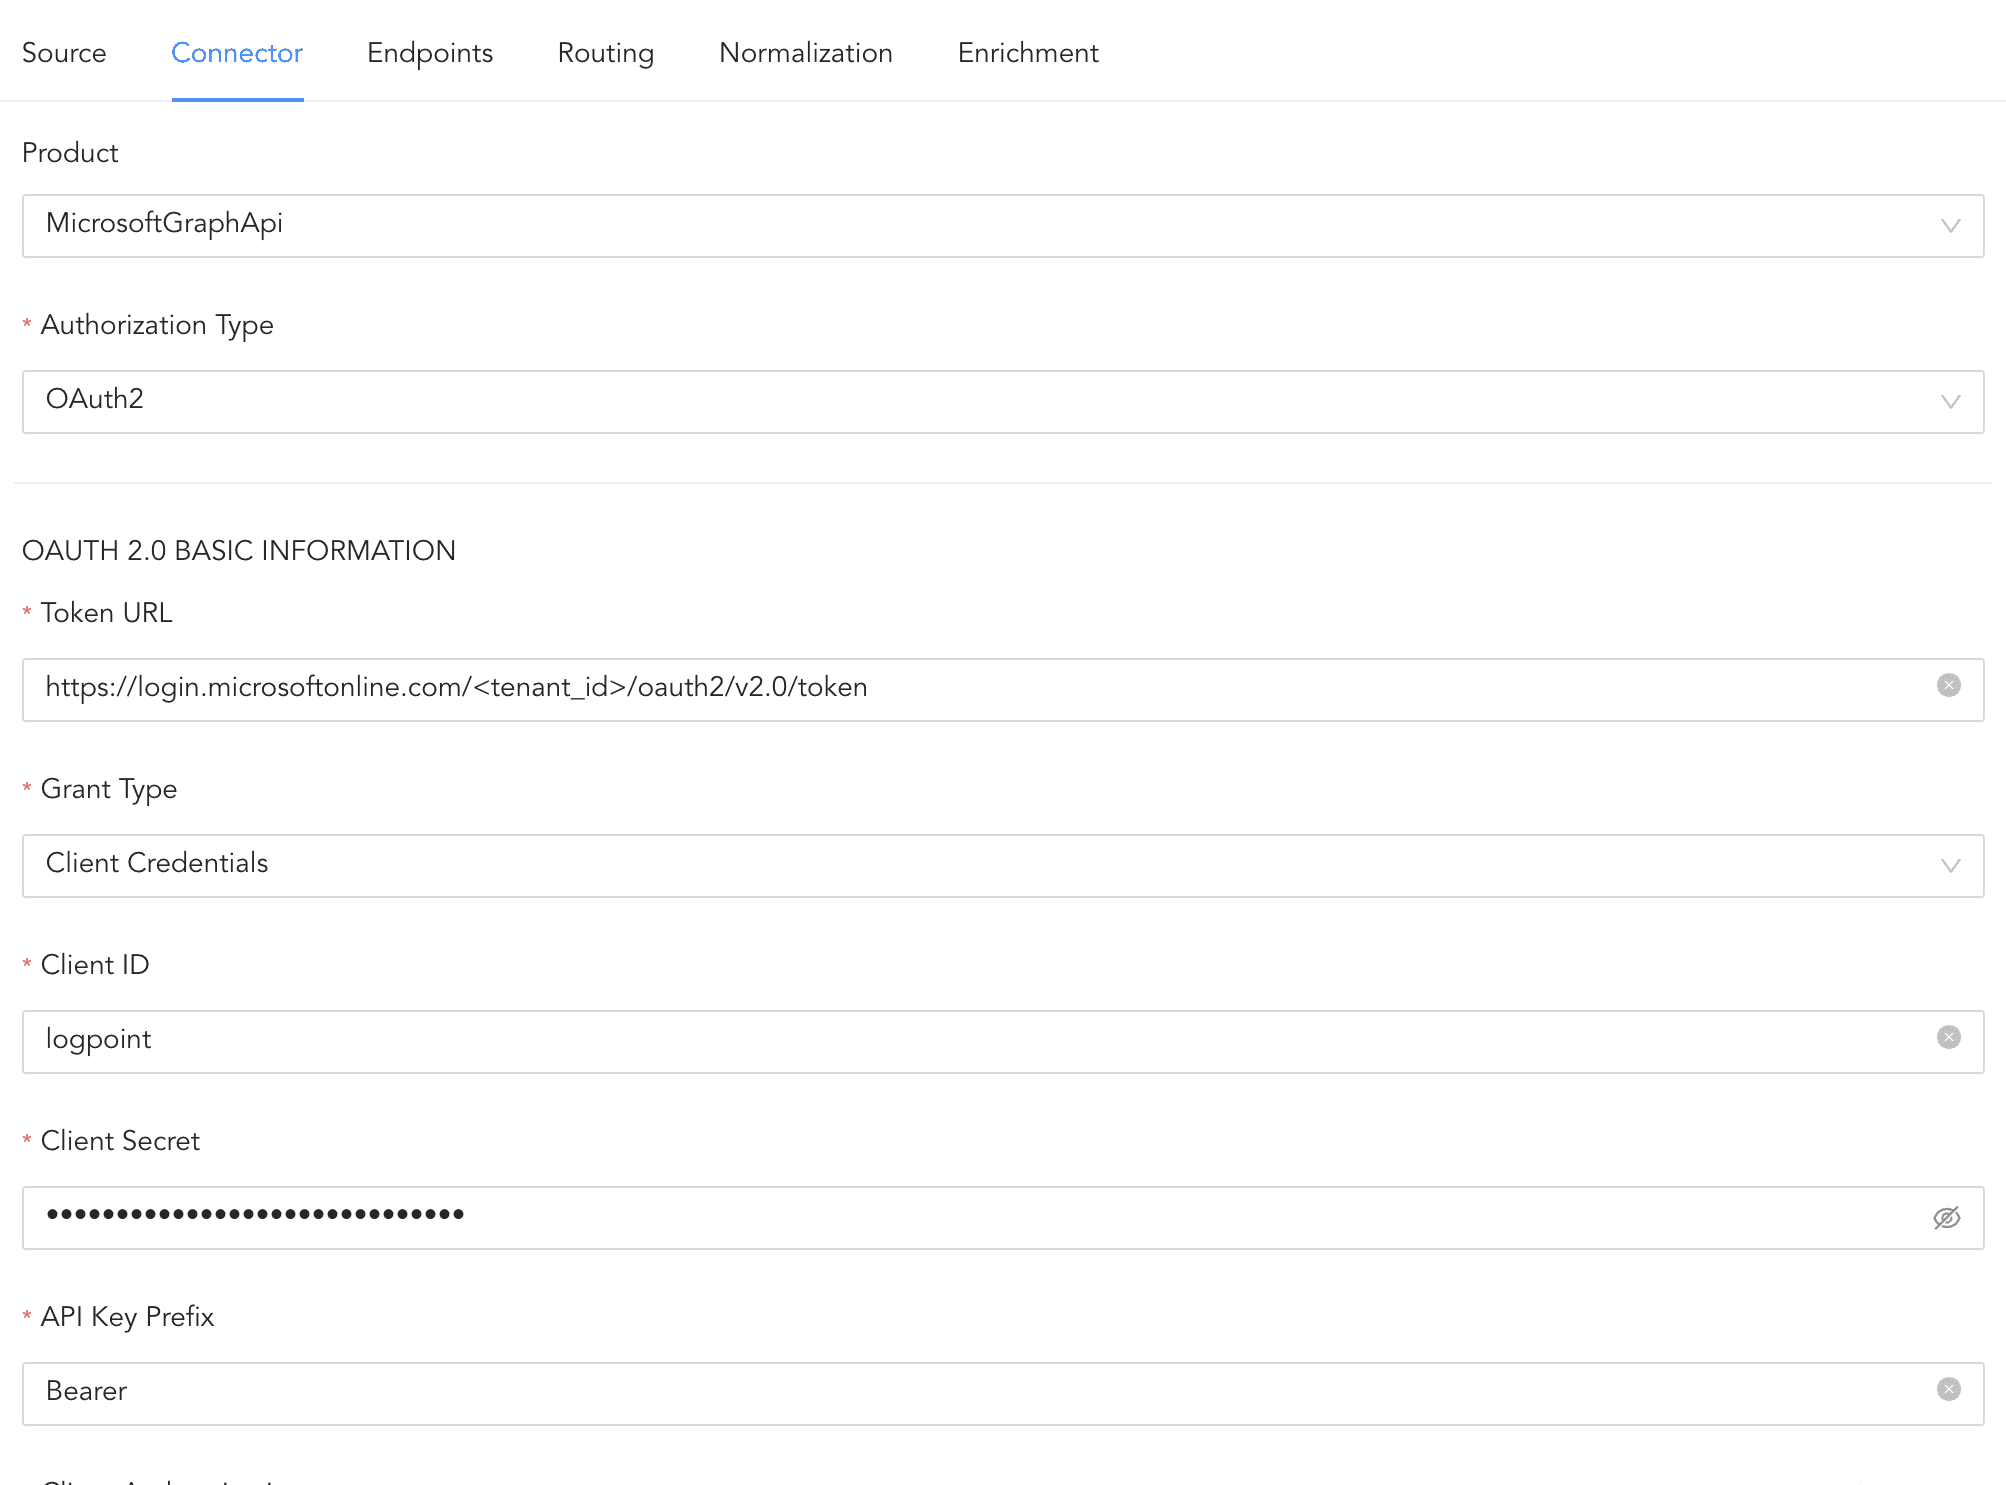
Configuring Connector
In Endpoints, five endpoints are configured by default. When Endpoints fetch multiple pages of logs, pagination is required. To enable pagination, use @odata\\.nextLink as the Pagination key.

Pagination key
Click Routing to create repos and routing criteria.
6.1. Click Routing and + Create Repo.
6.2. Enter a Repo name.
6.3. In Path, enter the location to store incoming logs.
6.4. In Retention (Days), enter the number of days logs are kept in a repository before they are automatically deleted.
6.5. In Availability, select the Remote logpoint and Retention (Days).
6.6. Click Create Repo.
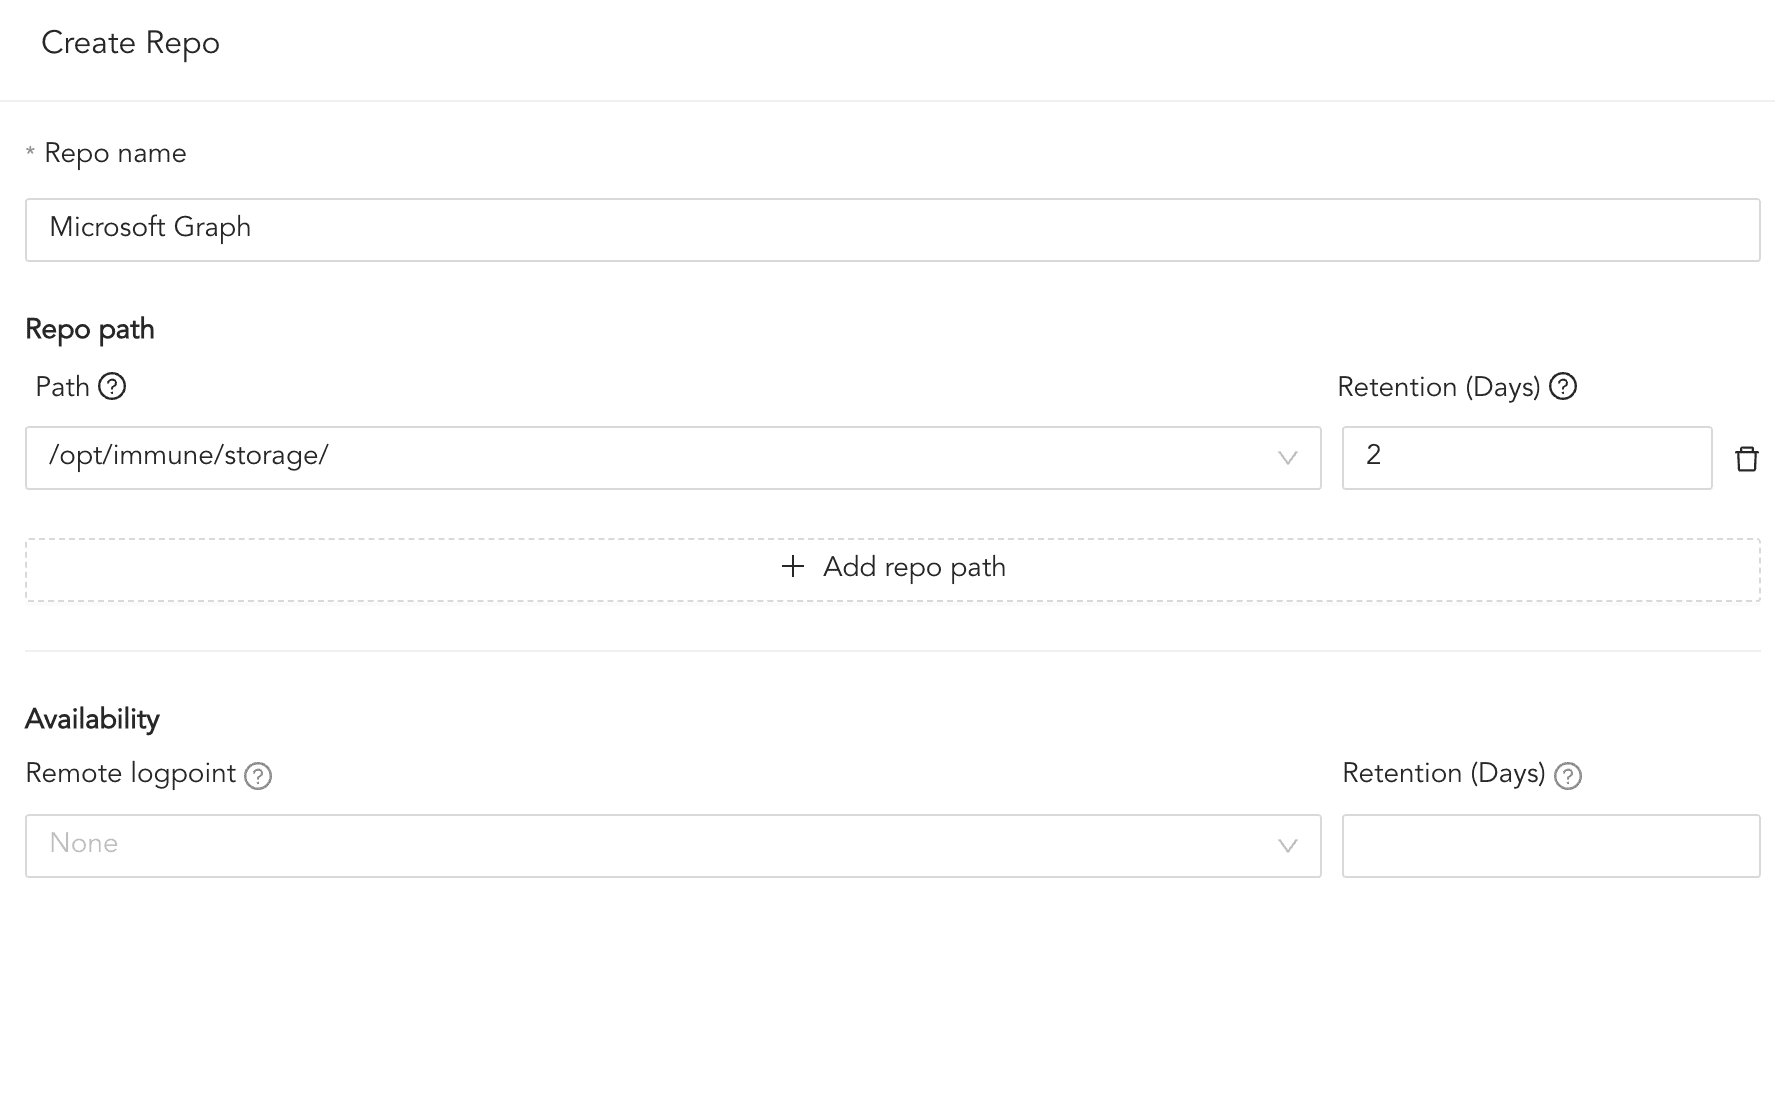
Creating a Repo
6.7. In Repo, select the created repo to store the Microsoft Graph logs.
6.8. Click + Add row.
6.9. Enter a Key and Value. The routing criteria are only applied to logs with this key value pair.
6.10. Select an Operation for logs that have this key value pair.
6.10.1. Select Store raw message to store both the incoming and the normalized logs in the selected repo.
6.10.2. Select Discard raw message to discard the incoming logs and store the normalized ones.
6.10.3. Select Discard entire event to discard both the incoming and the normalized logs.
6.11. In Repository, select a repo to store logs.
Note
Click the ( ) icon under Action to delete the created routing criteria.
Click Enrichment and select an enrichment policy for the incoming logs. This step is optional.
Click Save Changes.