To collect and analyze NetFlow statistics logs from Cisco routers and switches, you must add details about Netflow Collector devices in Logpoint. This includes entering the device names and IP addresses and selecting relevant device groups. You must also specify how the logs will be managed, processed, and stored. This ensures effective log management by facilitating accurate log collection, proper formatting, and timely analysis, which are crucial for identifying security incidents and maintaining compliance. All these are done in Configuring Netflow Collector.
Note
While we provide Windows-specific instructions in this guide, it’s important to be aware that the Windows interface may change over time. To ensure you have the most up-to-date information and to navigate any potential changes in the Windows interface, we recommend going to the official Windows documentation .
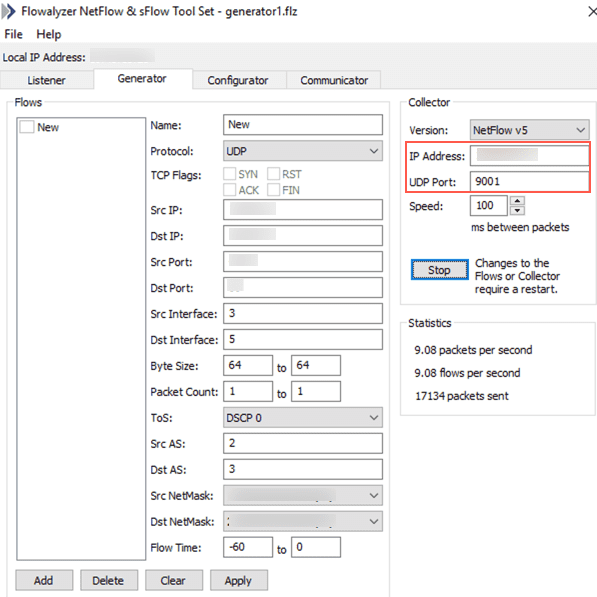
Go to Flowalyzer on Windows.
Enter 9001 in UDP Port.
Enter Logpoint IP in IP Address.
Click Apply.
Adding Logpoint as Device in Windows
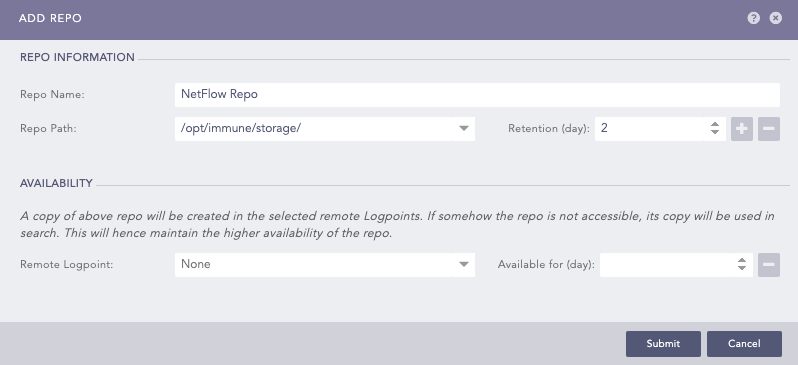
Go to Settings >> Configuration from the navigation bar and click Repos.
Click Add.
Enter a Repo Name.
Select a Repo Path to store incoming logs.
Set a Retention Day to keep logs in a repository before they are automatically deleted. You can add and remove multiple Repo Paths and Retention Days.
Adding a Repo
Click Submit.
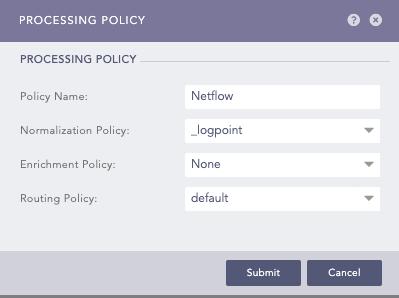
A Processing Poliicy combines normalization, enrichment and routing policies into a single policy that is then assigned to a NetFlow device.
Go to Settings >> Configuration from the navigation bar and click Processing Policies.
Click ADD.
Enter a Policy Name.
Select the Normalization Policy. This is optional for NetFlow Collector.
Select the Enrichment Policy and Routing Policy.
Adding a Processing Policy
Click Submit.
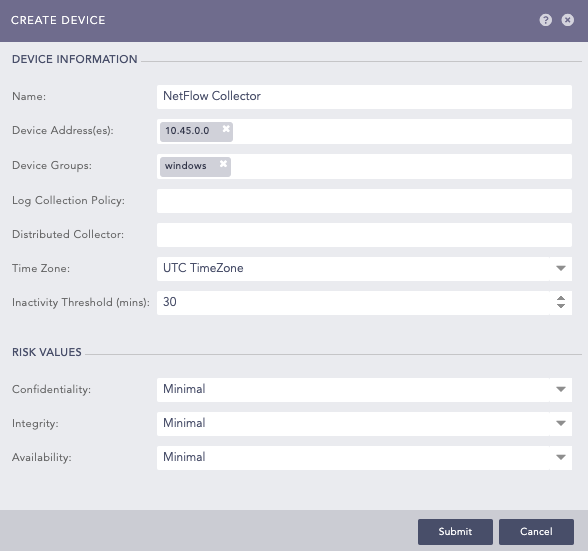
Go to Settings >> Configuration >> Devices.
Click Add.
Enter a device Name.
Enter the IP address(es) of the Windows server.
Select the Device Groups.
Select a Log Collection Policy.
If you use a distributed Logpoint, select a collector from the Distributed Collector dropdown.
Select a Time Zone. The timezone must be same as of NetFlow.
Enter the Inactivity Threshold in minutes. It specifies the time after which to mark the device as inactive in Last Log Received under device lists if logs are not received. You can enter a value from 5 to 525600.
Configure the Risk Values for Confidentiality, Integrity and Availability used to calculate the risk levels of the alerts generated from the device.
Creating a Device
Click Save.
Go to Settings >> Configuration from the navigation bar and click Devices.
Click the Add icon from Actions of the previously added device.
Click NetFlow Collector.

Available Collectors Fetchers
Select the previously created Processing Policy.
Click Submit.
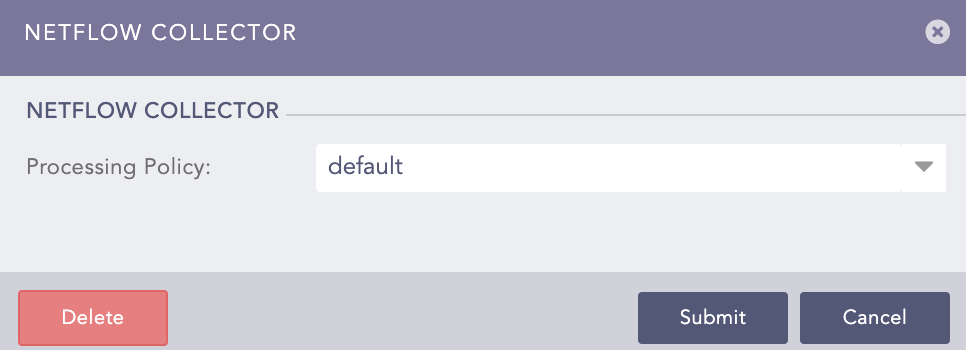
NetFlow Collector
Go to Settings >> Log Sources from the navigation bar and click Add Log Source.
From the list of templates, select NetFlow Collector.
In source, you can add details about the log source from where Netflow collects logs.
Click Source.
Enter the Log Source’s Name.
Enter the Device Addresses.
Select the Device Groups.
Select a Time Zone. The timezone must be same as of NetFlow.
Enter the Inactivity Threshold in minutes. It specifies the time after which to mark a log source as inactive in Last Log Received under Settings >> Log Source if logs are not received. You can enter a value from 5 to 525600.
Configure the Risk Values for Confidentiality, Integrity and Availability used to calculate the risk levels of the alerts generated from the device.
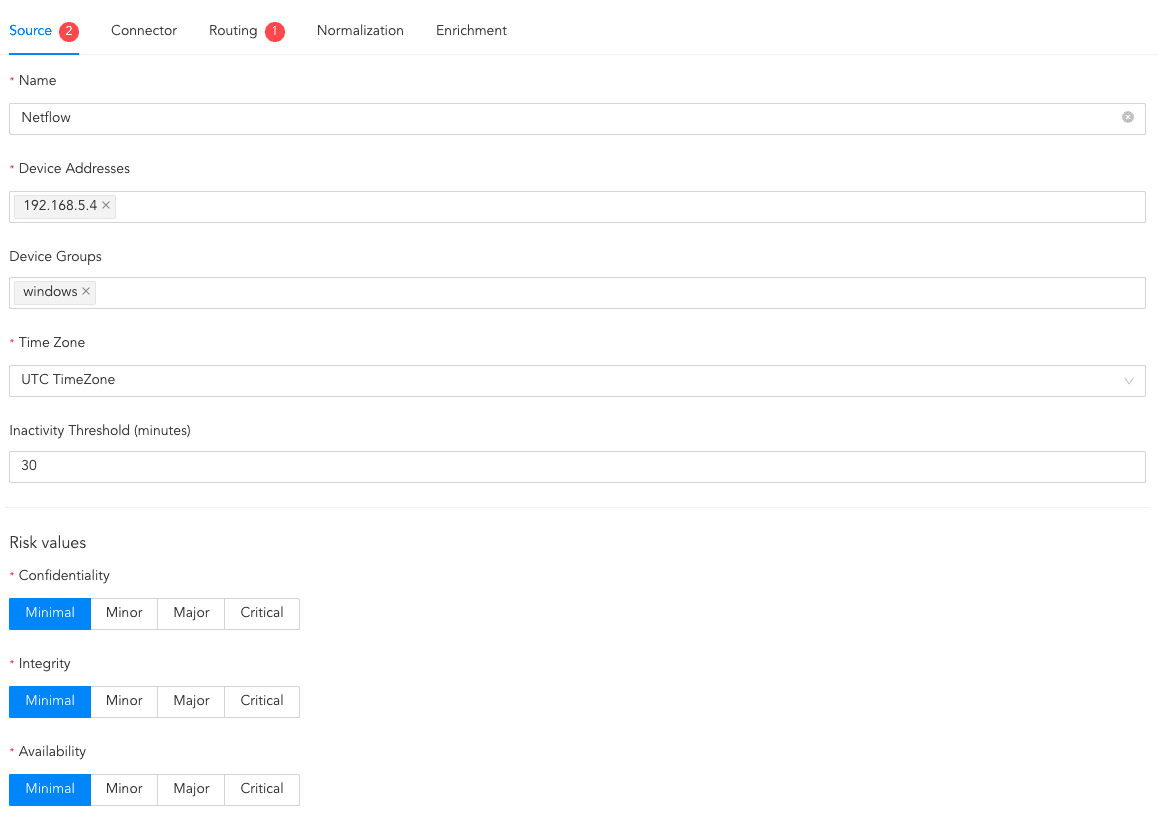
Configuring Source
A connector transmits logs from Cisco to Logpoint. You use a connector to configure how NetFlow Collector and Cisco communicate with each other. If you use a distributed Logpoint, select a collector from the Distributed Collector dropdown.

Configuring Connector
In routing, you can create repos and routing criteria for NetFlow Collector. Repos are locations where incoming logs are stored and routing criteria is created to determine the conditions under which these logs are sent to repos.
To create a repo:
Click Routing and + Create Repo.
Enter a Repo name.
In Path, enter the location to store incoming logs.
In Retention (Days), enter the number of days logs are kept in a repository before they are automatically deleted.
In Availability, select the Remote logpoint and Retention (Days).
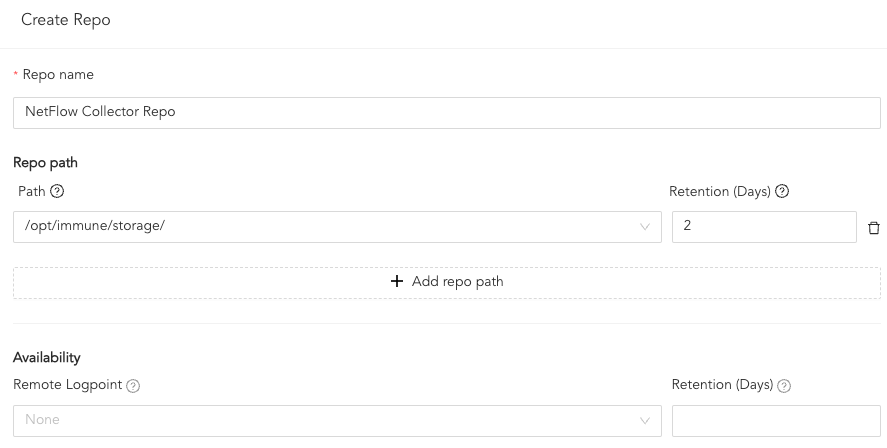
Creating a Repo
Click Create Repo.
In Repo, select the created repo to store logs.
To create Routing Criteria:
Click + Add row.
Enter a Key and Value. The routing criteria is only applied to those logs which have this key-value pair.
Select an Operation for logs that have this key-value pair.
3.1. Select Store raw message to store both the incoming and the normalized logs in the selected repo.
3.2. Select Discard raw message to discard the incoming logs and store the normalized ones.
3.3. Select Discard entire event to discard both the incoming and the normalized logs.
In Repository, select a repo to store logs.

Creating a Routing Criteria
Click the ( ) icon under Action to delete the created routing criteria.
In normalization, you can select normalizers for the incoming logs. Normalizers translate a raw log message into Logpoint taxonomy. This step is optional for NetFlow Collector.
Click Normalization.
You can either select a previously created normalization policy from the Select Normalization Policy dropdown or select a Normalizer from the list and click the swap( ) icon.
In enrichment, you can select an enrichment policy for the incoming logs. Enrichment policies are used to add additional information to a log, such as user information, device type or geolocation, before analyzing it. This step is optional for NetFlow Collector.
Click Enrichment.
Select an Enrichment Policy.
Click Create Log Source to save the configurations of Source, Connector, Routing, Normalization, and Enrichment.