Click Playbooks in the navigation bar.
Click +Create Playbook.
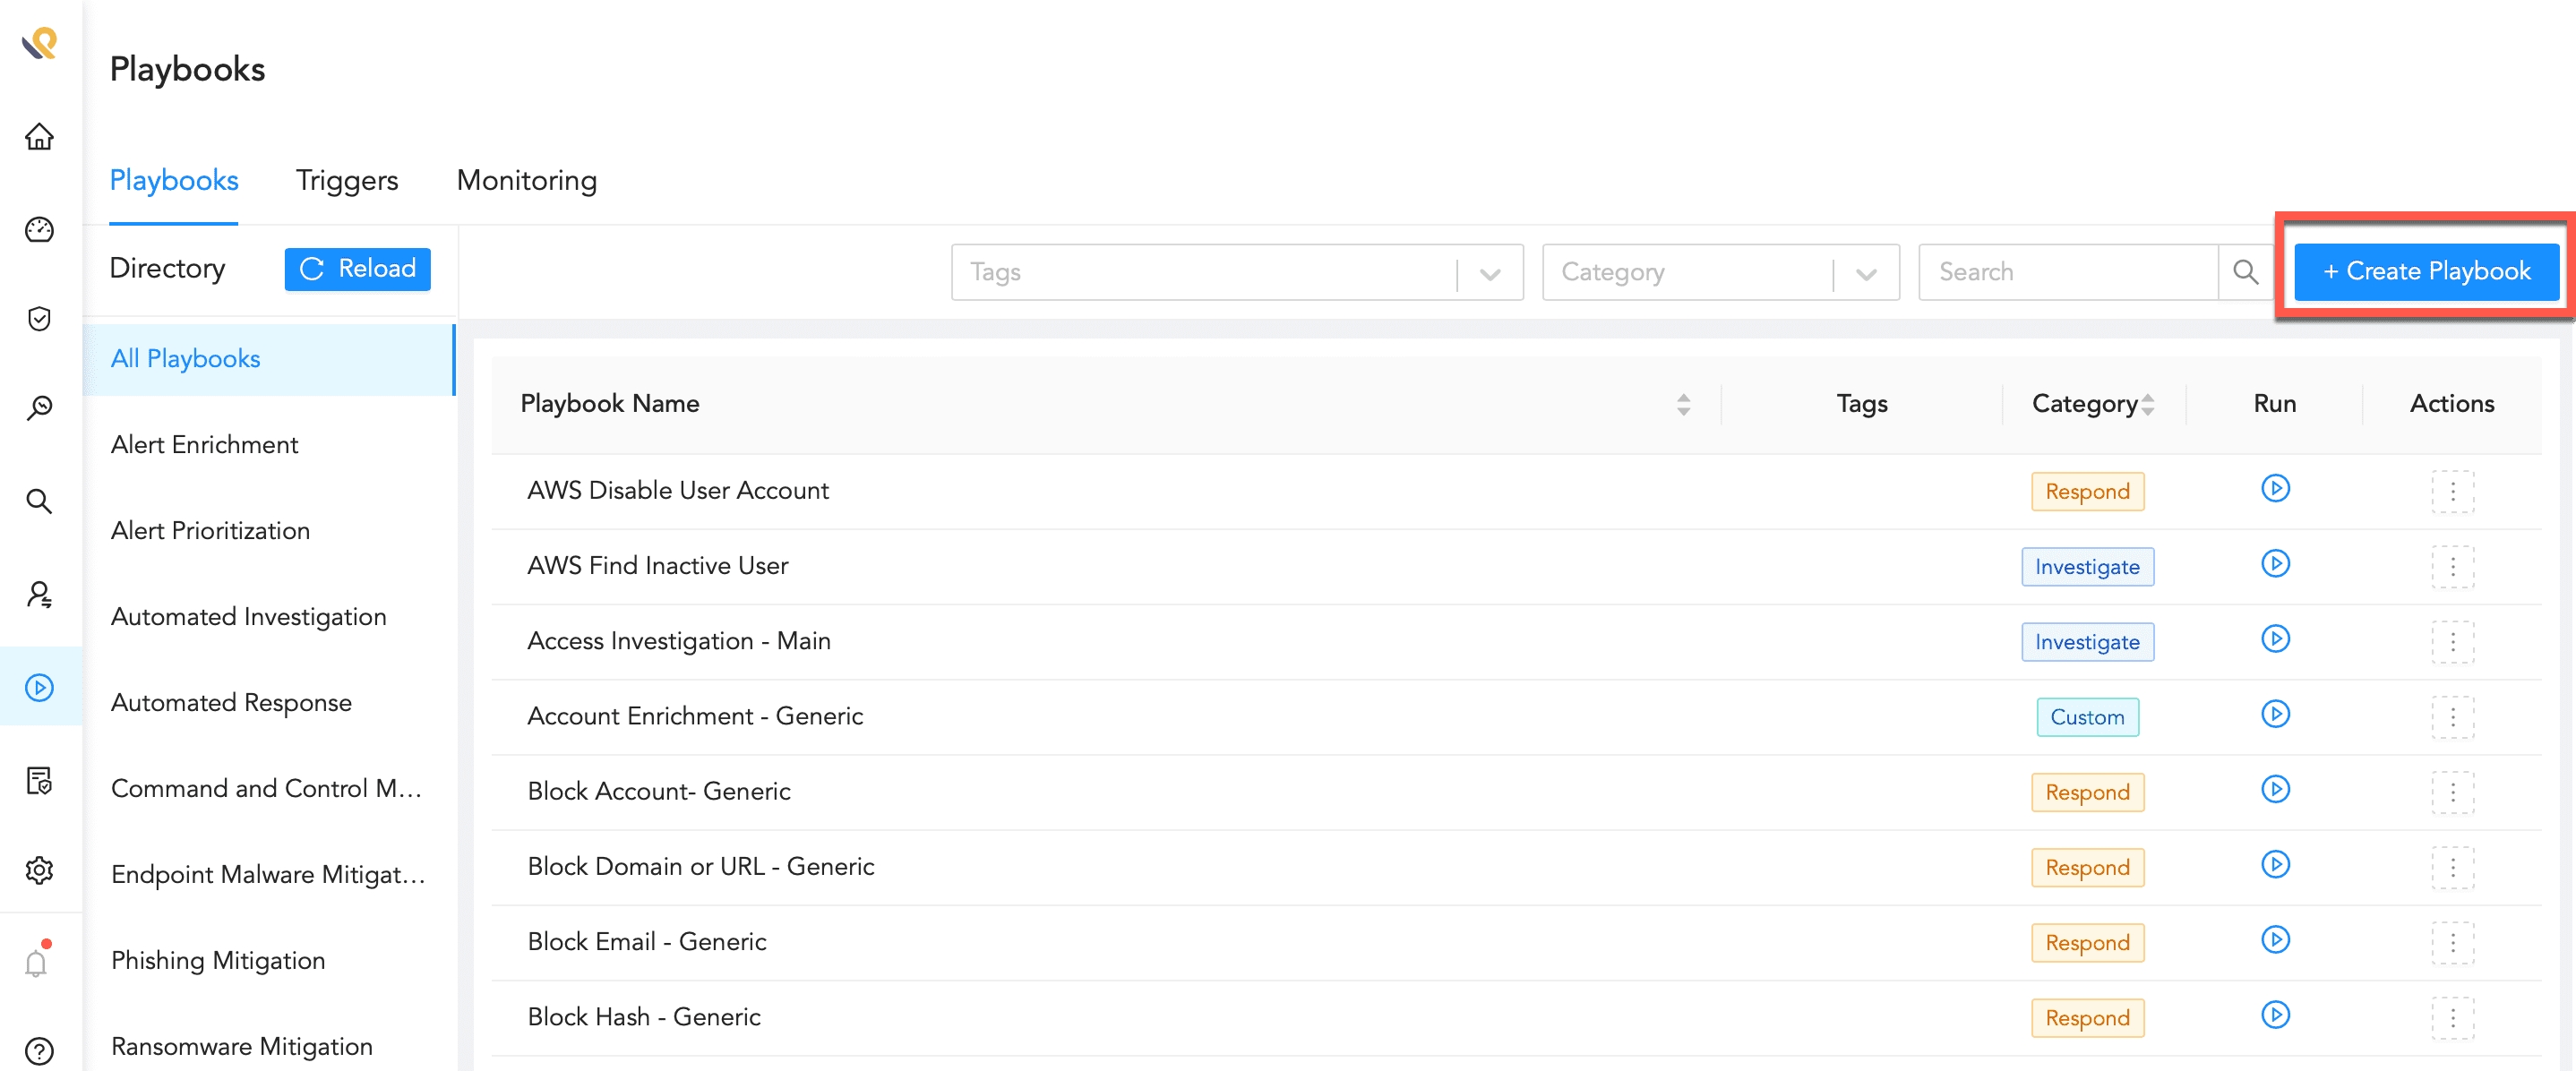
Add New Playbook Button
Click the Configure icon of the trigger block.
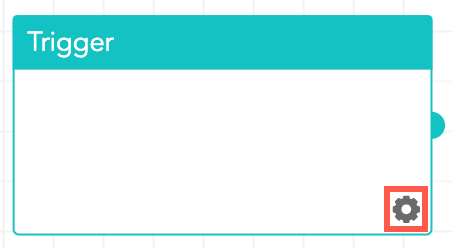
Configuring Settings
Enter an Action Name and a Description.
Select a Trigger Type.
If you select Playbook or LogPoint SIEM Incident, enter a list of Input Parameters.
If you select Schedule, select a Run Playbook time.
For At a Specific Time, select a Time and whether you want the playbook to repeat every Day or Week.
For Every X Hours, enter the Hours.
For Every X Minutes, enter the Minutes.
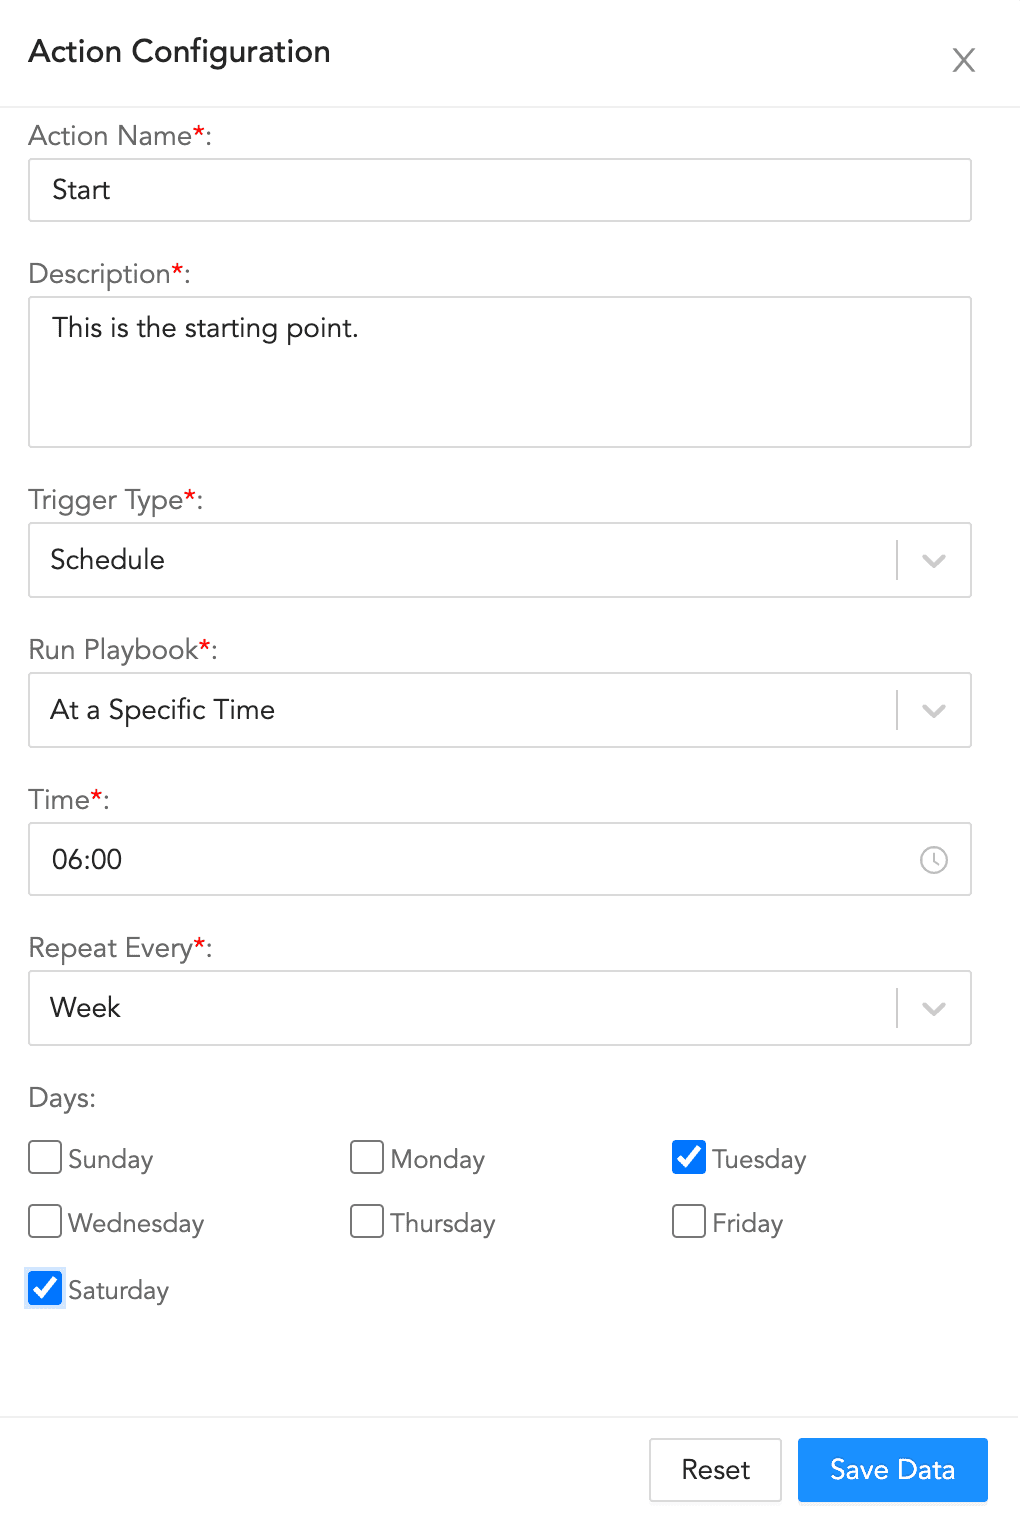
Configuring the Trigger
Click Save Data.
In Save Playbook, enter the Playbook Name, select the Category and the Path, and click Save.
You can choose to save the playbook after you have finalized the playbook by clicking Save on the Adding a Playbook page.
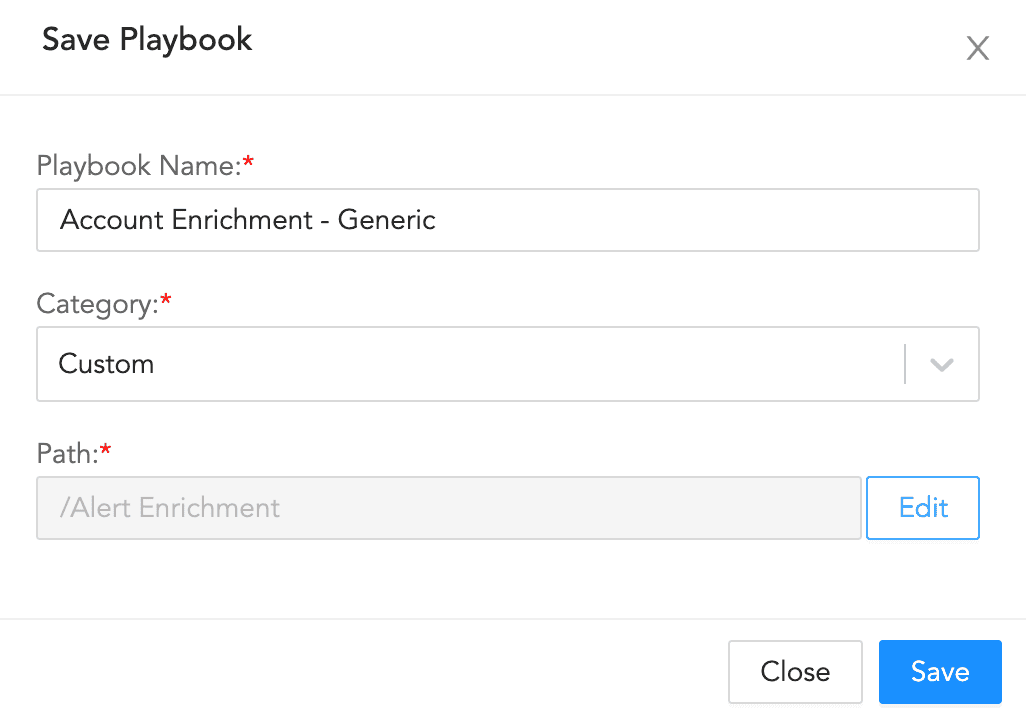
Saving Playbook
Click Add Action +.
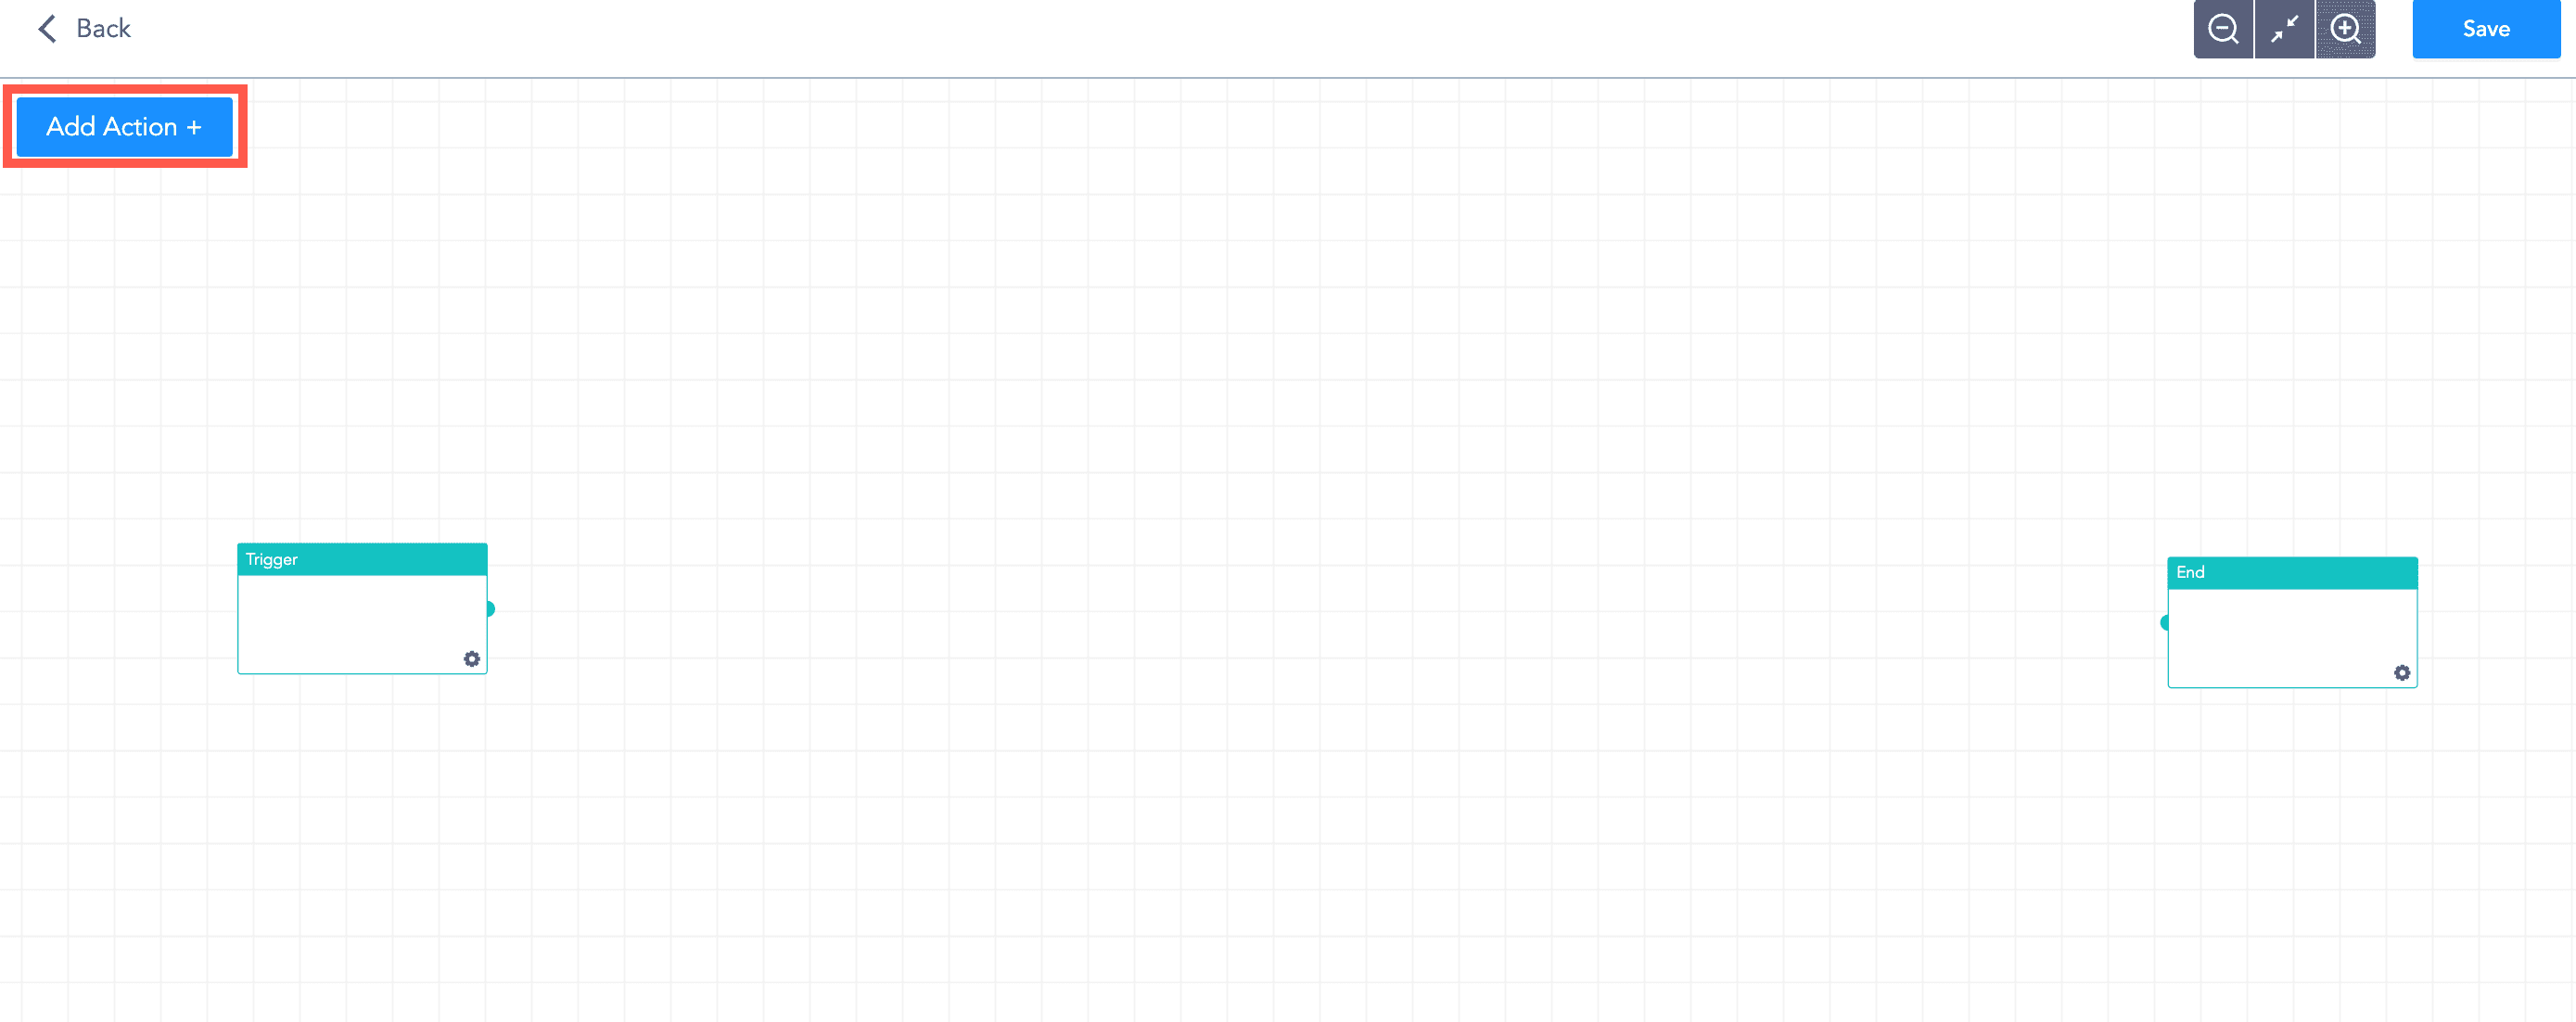
Add Action Button
Drag and drop a playbook action type.
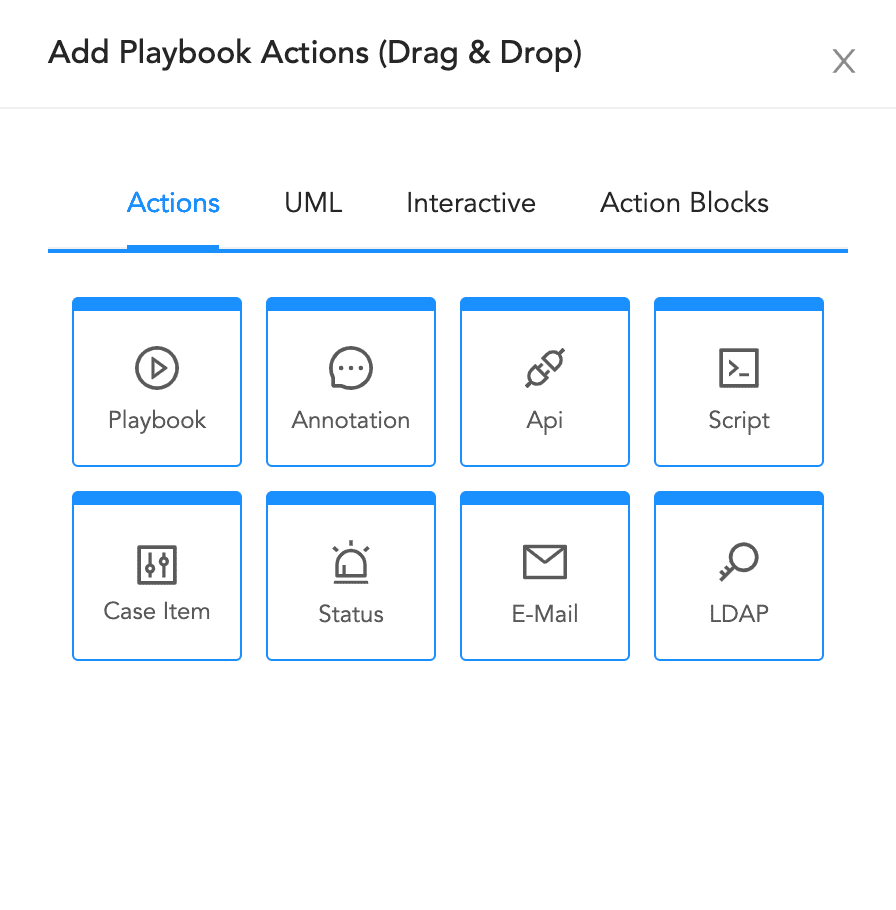
Drag and Drop a Playbook Action Type
Click the Configure icon of the block and enter the details.
To learn more, go to the Types of blocks section.
Click Save Data.
Follow steps 8, 9, 10, and 11 to add multiple number of blocks.
Warning
Make sure you click Save Data every time you update the configurations of a block. Otherwise, the updated data may be lost.
Connect a node from a block to a node of another block to connect two blocks.
Once you finalize the playbook, connect the final block with the End block.
Click Save.
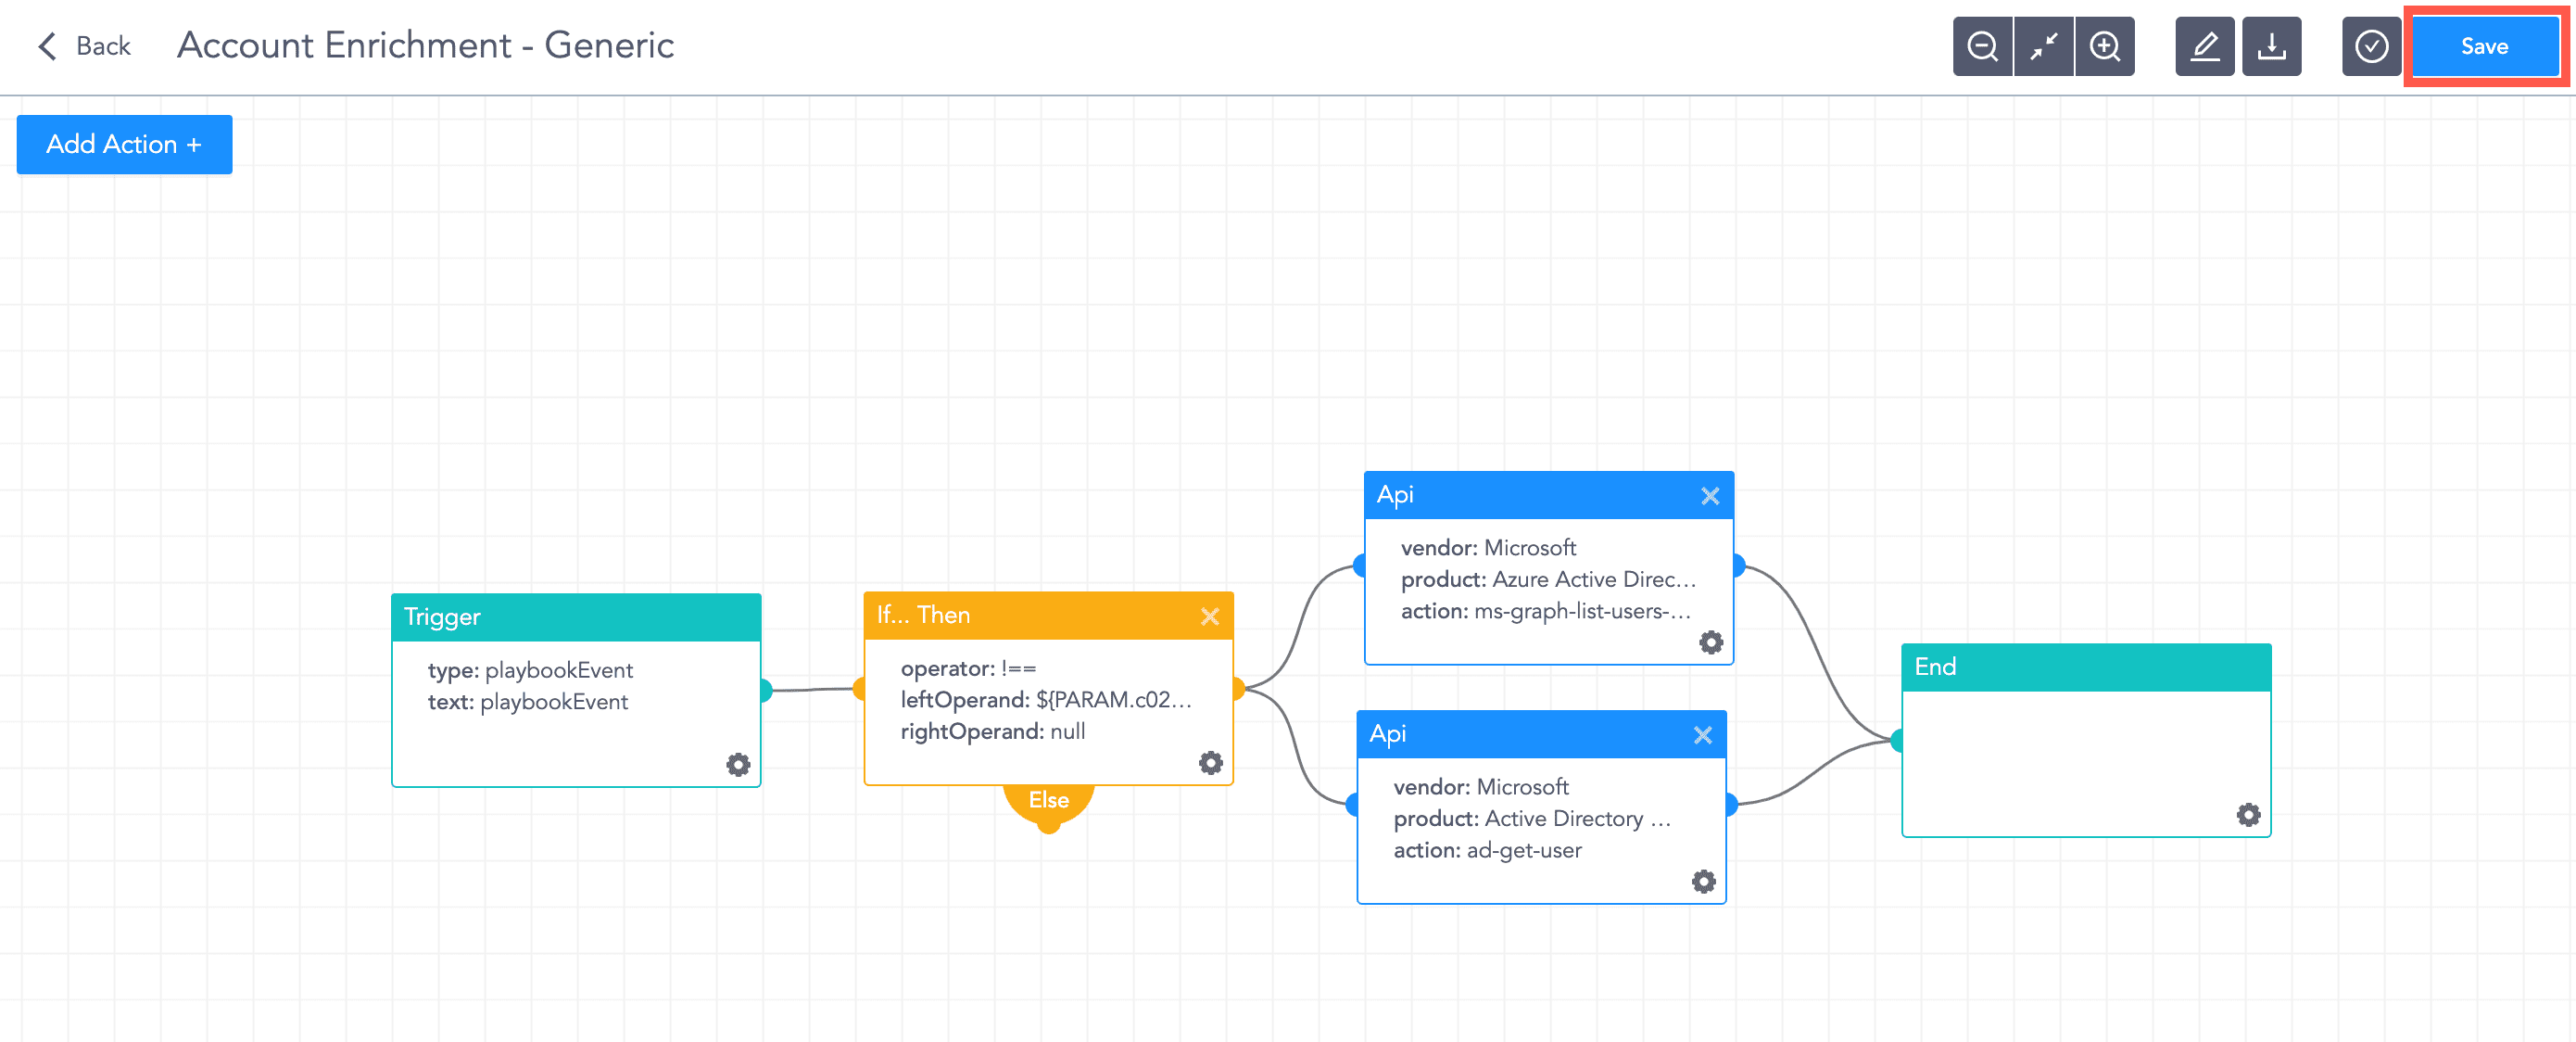
Saving the Playbook
You can enable SLA support and generate SLA reports by editing playbook configurations. Enabling SLA support allows you to handle the cases created based on the playbook in a time period defined in the SLA configuration.
For example, if you add SLA Timer Value as 01:00:00, the case should be handled within one hour. If the first trigger % is 80%, then the selected playbook for the trigger % runs after 48 minutes. If the second trigger % is 100%, then the selected playbook for the second trigger runs after an hour.
To enable SLA support:
Click Playbooks in the navigation bar.
Click Add New Playbook +, and add and save the configuration.
Or, select a playbook from the list in the Playbooks page.
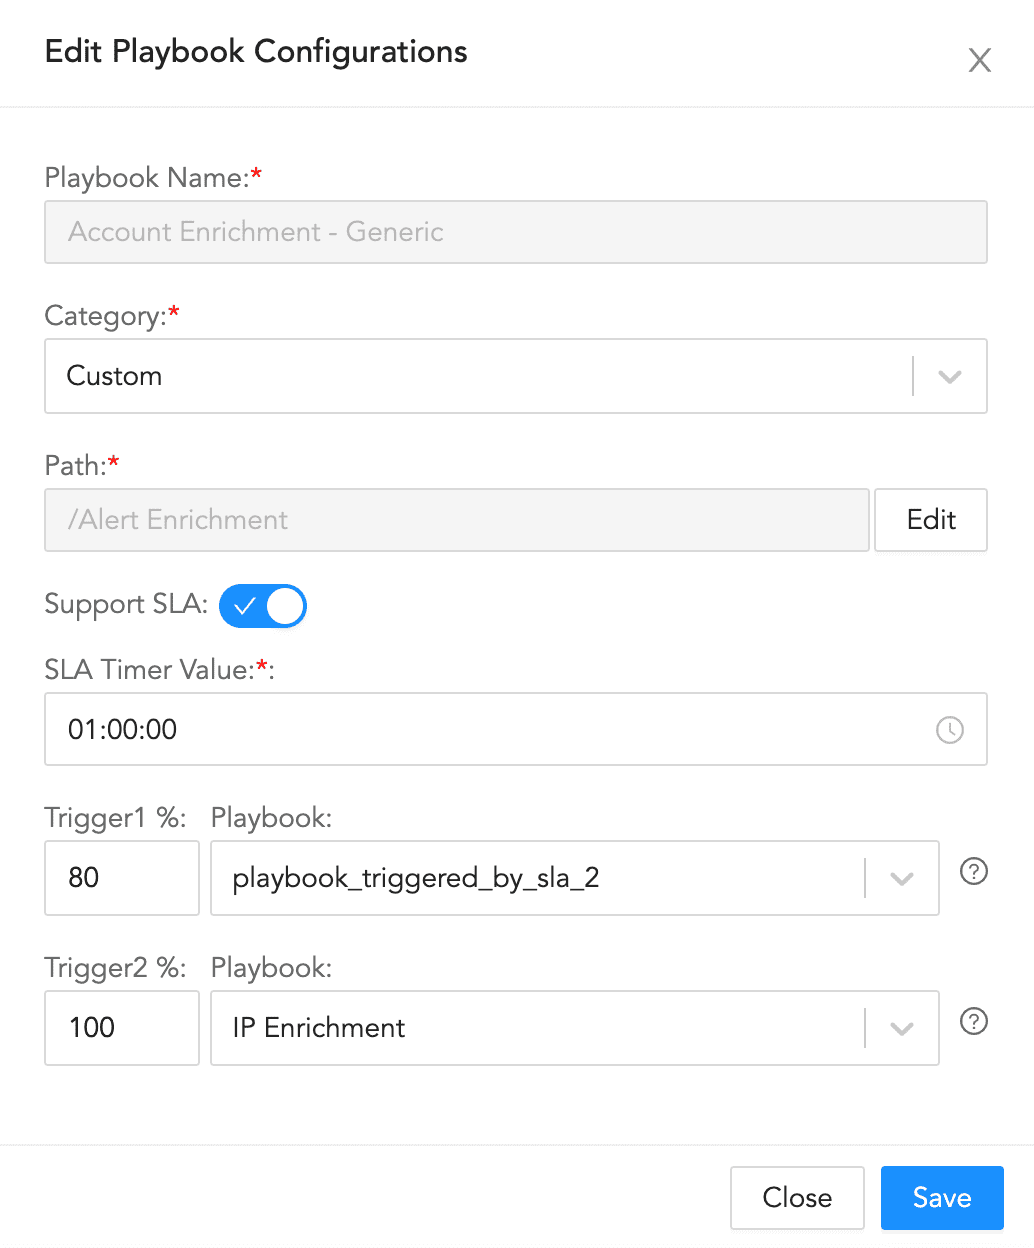
Click Edit Playbook Configurations.

Edit Playbook Configurations
Enable Support SLA.
Enable Support SLA
Select SLA Timer Value.
Select a Playbook and enter its Trigger %. You can add another playbook and its trigger %.
When the SLA time period defined in the SLA Timer Value reaches the trigger %, the selected playbook runs.
Click Save.

