Click Playbooks in the navigation bar.
Click +Create Playbook.
Click the Configure ( ) icon of the trigger block.
Enter an Action Name and a Description.
Select a Trigger Type.
If you select Playbook or Logpoint SIEM Incident, enter a list of Input Parameters.
If you select Schedule, select a Run Playbook time.
For At a Specific Time, select a Time and whether you want the playbook to repeat every Day or Week.
For Every X Hours, enter the Hours.
For Every X Minutes, enter the Minutes.
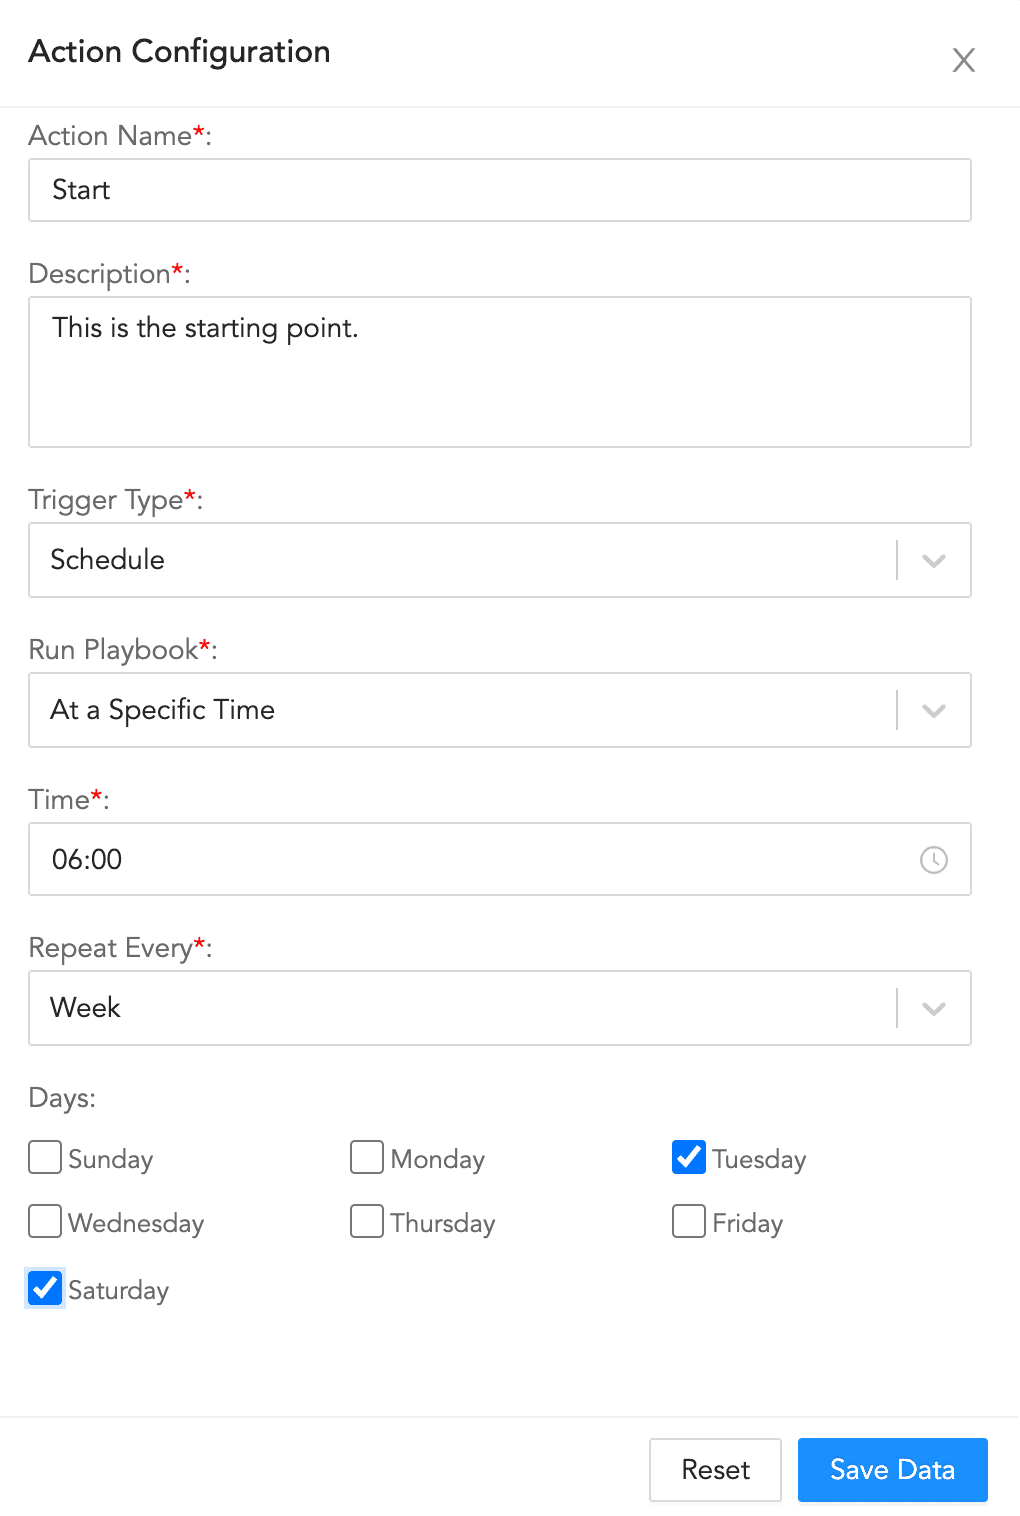
Configuring the Trigger
Click Save Data.
In Save Playbook, enter the Playbook Name, select the Category, enter the Tags, select the Path, enter the Description and click Save.
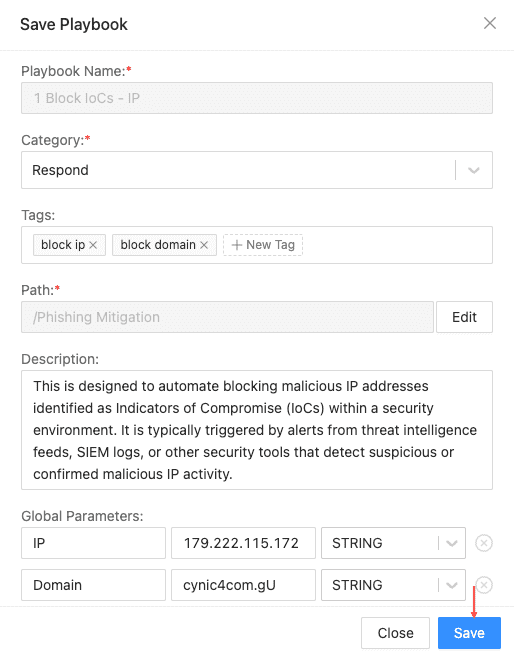
Saving Playbook
Click + Add Action.

Add Action Button
Drag and drop a playbook action type.
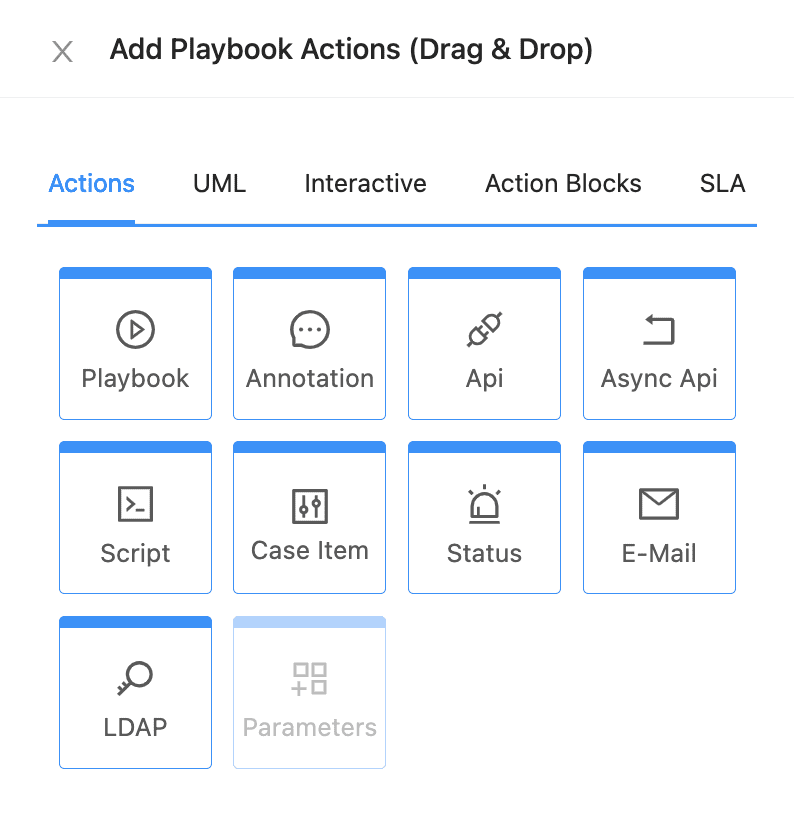
Drag and Drop a Playbook Action Type
Click the Configure () icon of the block and enter the details. Go to Action Block Types to learn more.
Click Save Data.
Follow steps 8, 9, 10, and 11 to add multiple number of blocks.
Warning
Make sure you click Save Data every time you update the configurations of a block. Otherwise, the updated data may be lost.
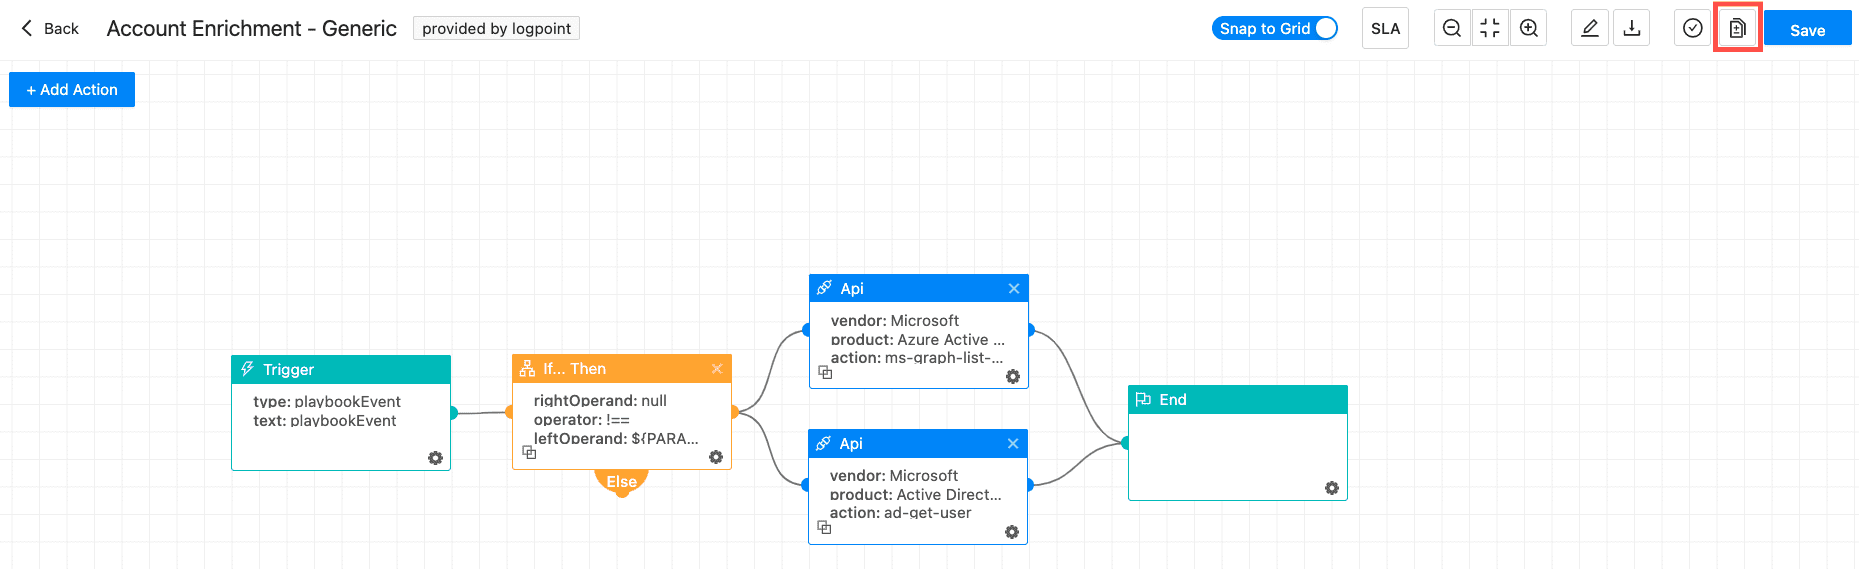
Connect a node from a block to a node of another block to connect two blocks.
Once you finalize the playbook, connect the final block with the End block.
Click Save.
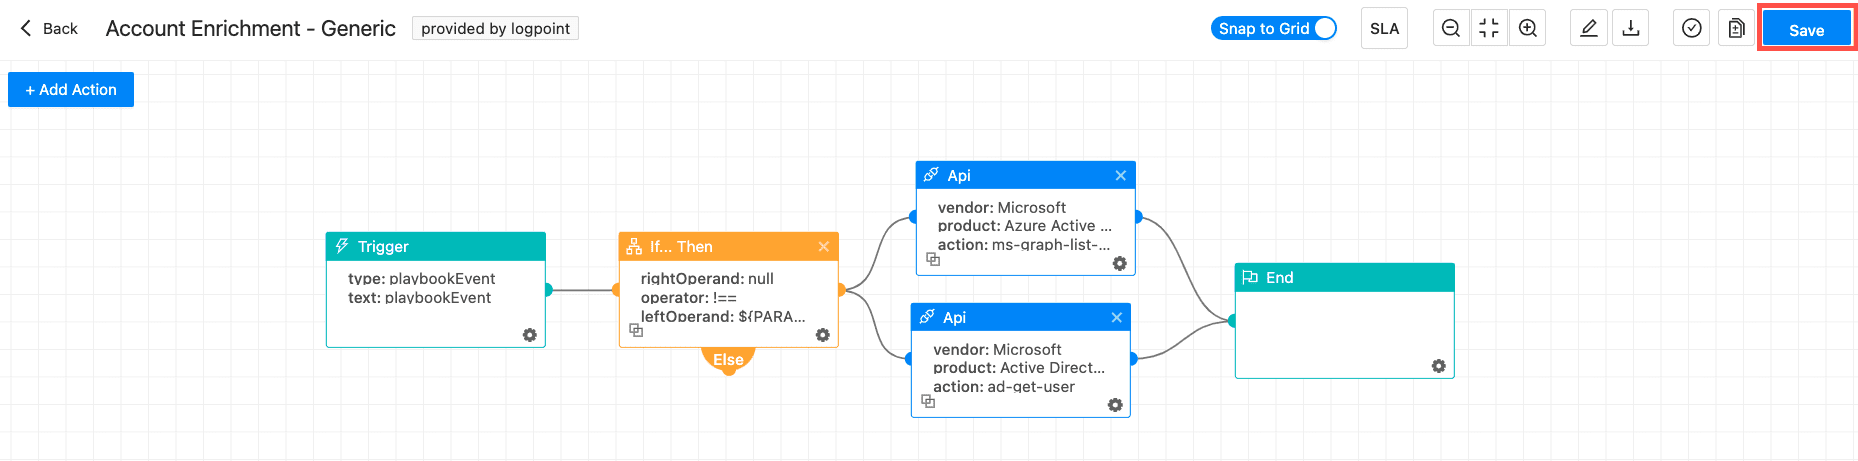
Saving the Playbook
Note
You can clone an action block by clicking the ( ) icon.
You can align an action block to the nearest grid line by enabling Snap to Grid.
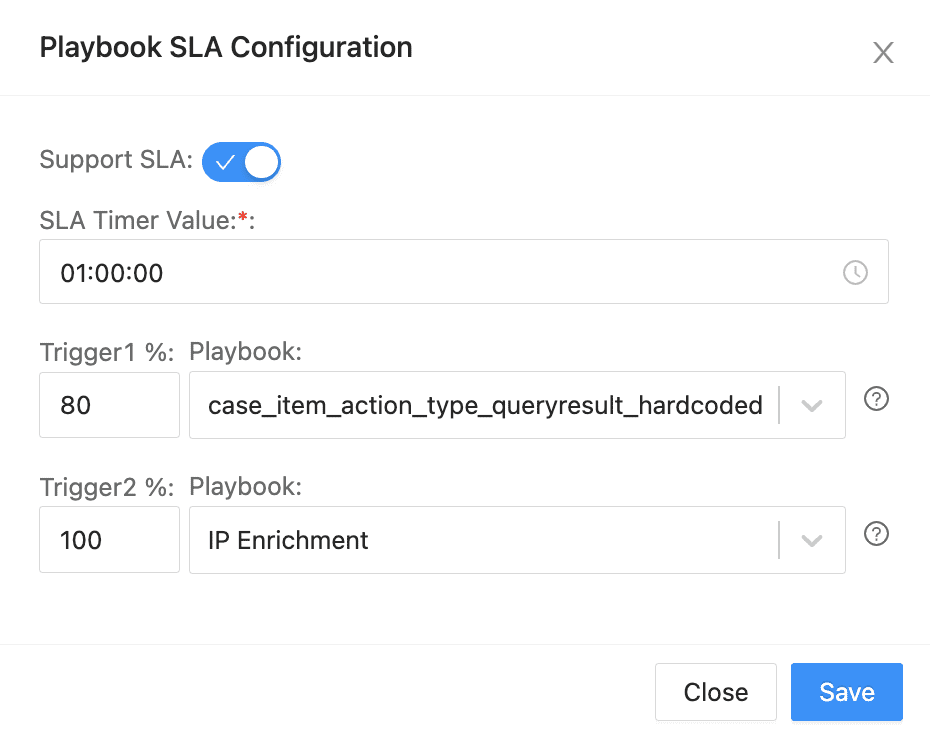
Service Level Agreements (SLAs) are the predefined timeframes within which specific actions or responses must be completed. These agreements set the expected time for handling security incidents or tasks, ensuring that the playbook meets your standards for response times.
Editing playbook configurations allows you to enable SLA support and generate SLA reports. Enabling SLA support allows you to handle cases created based on the playbook within a time period defined in the SLA configuration.
For example, if you add the SLA Timer Value as 01:00:00, the case should be handled within one hour. If the first trigger % is 80%, then the selected playbook for the trigger % runs after 48 minutes. If the second trigger % is 100%, then the selected playbook for the second trigger runs after an hour.
To enable SLA support:
Click Playbooks in the navigation bar.
Click Add New Playbook +, and add and save the configuration.
Or, select a playbook from the list in the Playbooks page.
Once you create a playbook, you can test it by clicking Test Playbook.

Test Playbook
You can also export the playbook by clicking Export Playbook.
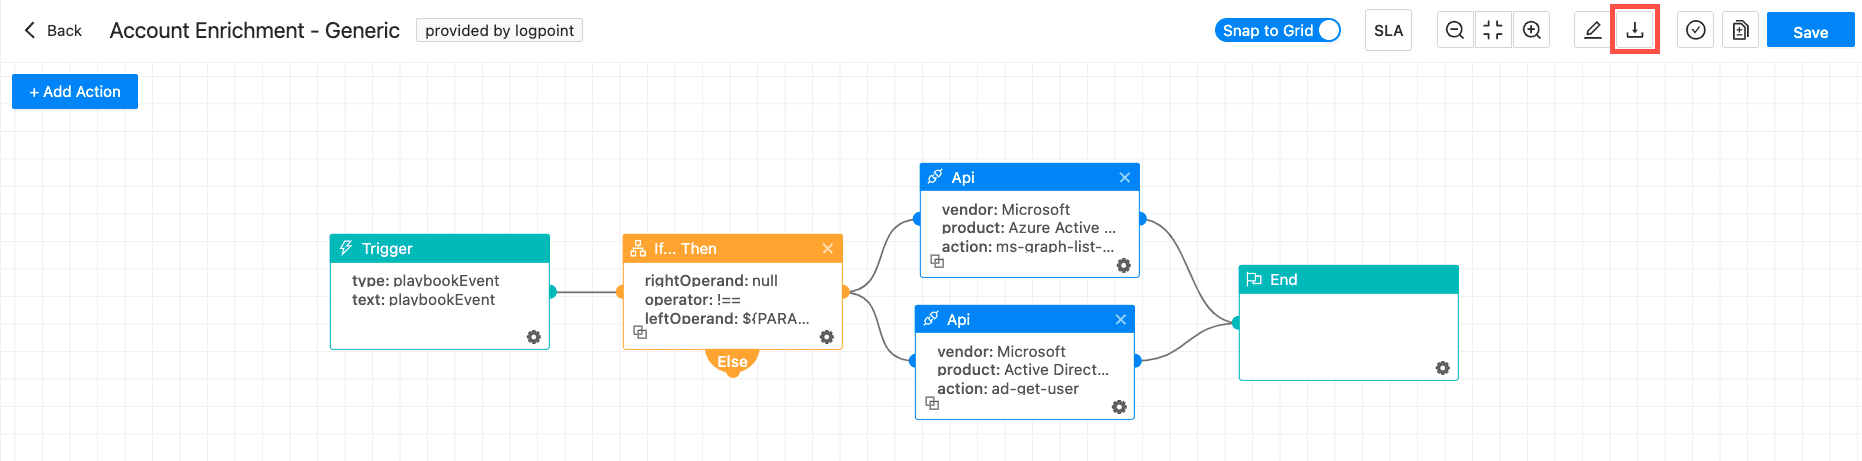
Export Playbook
You can modify and customize the settings and workflows of automated playbooks within a SOAR platform. But you can’t rename or change the name of existing playbooks.
Click Playbooks in the navigation bar.
Search for a playbook by filtering the list according to playbook Category or search for one by entering its Playbook Name.
In the playbook, click Edit Configurations.
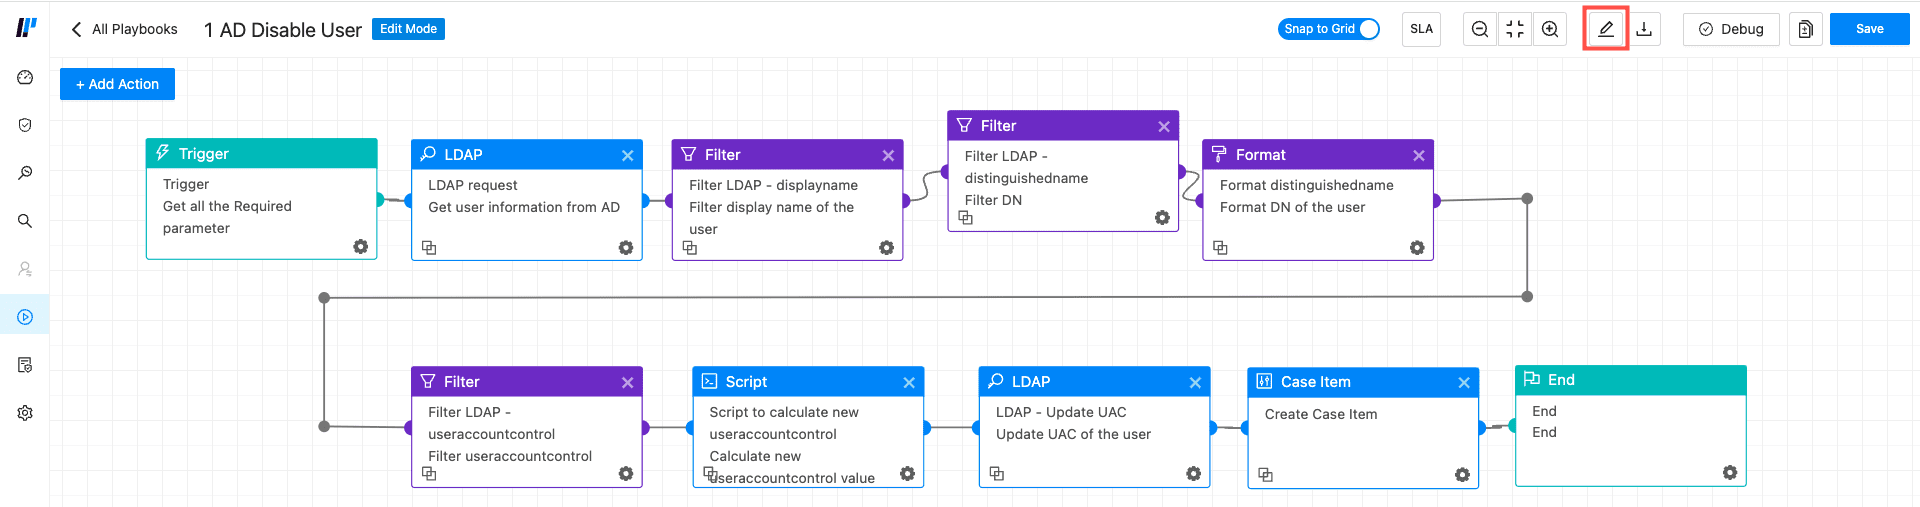
Editing Playbook Configurations
Edit the Category, the Tags, the Path, the Description and the Global Parameters.
Click Save.
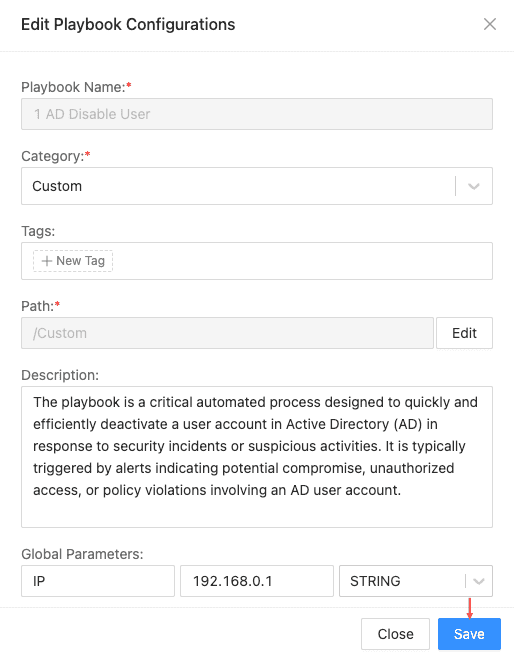
Saving Playbook Configurations

 ) icon.