To implement Azure Active Directory using SAML, first do the following configurations in Microsoft Azure Portal and then configure SAML Authentication in Logpoint.
Go to the Microsoft Azure Portal and log in with your credentials.
Go to Azure Active Directory from the navigation bar and click Enterprise applications.
Click All applications and + New application.
Search and click Azure AD SAML Toolkit.
Click Create.
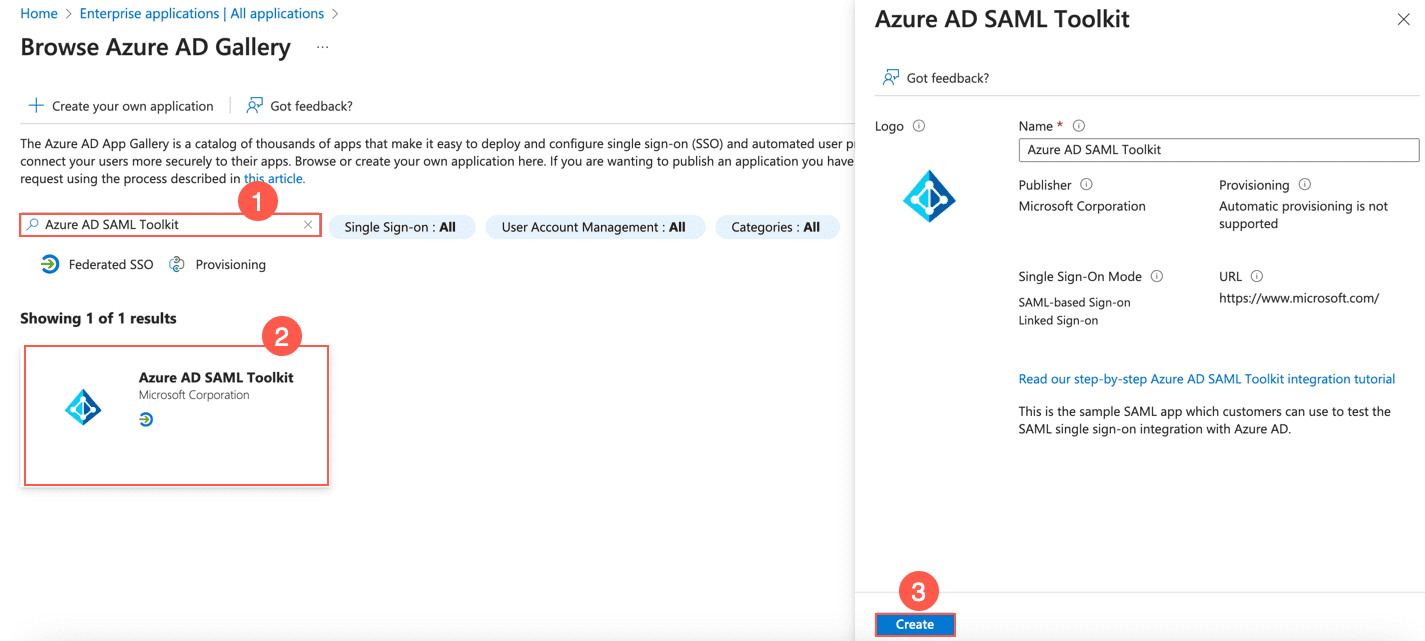
Adding Azure AD SAML Toolkit
Go to Azure Active Directory from the navigation bar of Microsoft Azure Portal and click Users.
Click the + New user drop-down and click Create a new user.
Enter the users information and click Review + create.
Click Create.
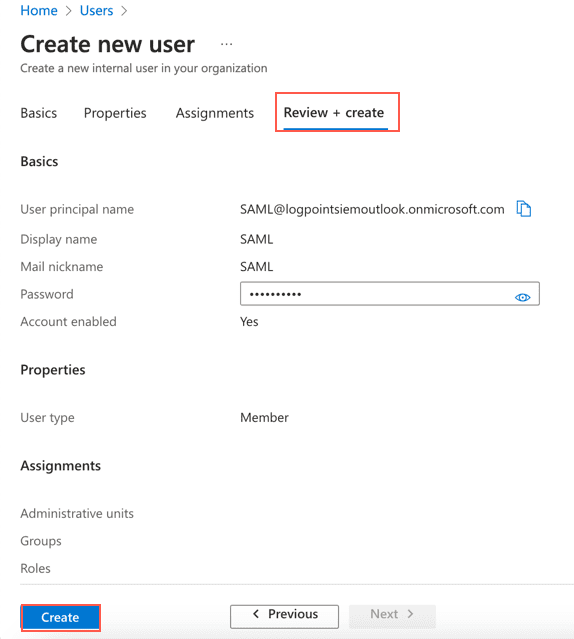
Creating a New User
Go to Azure Active Directory from the navigation bar of Microsoft Azure Portal and click Enterprise applications.
Click the previously added Azure AD SAML Toolkit.
Go to Users and groups from the navigation bar and click + Add user/group.
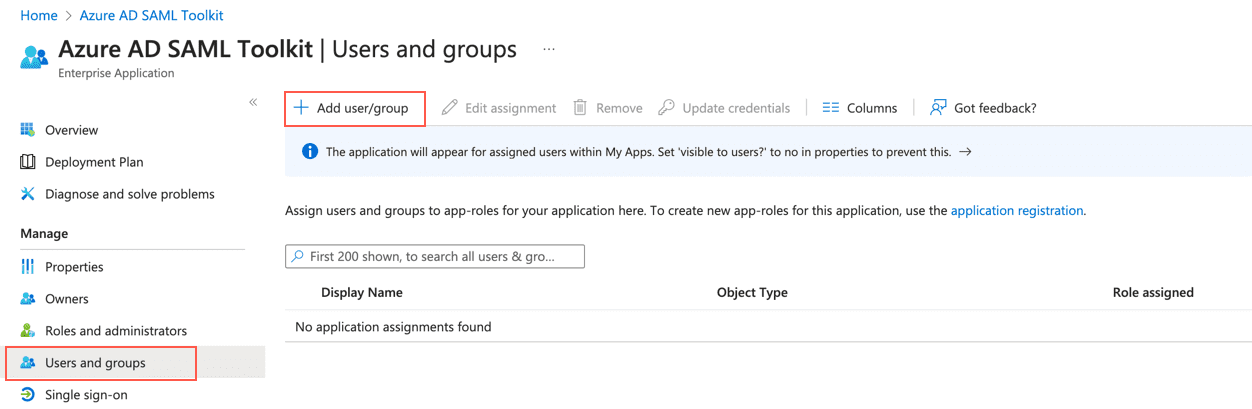
Adding User/Group
Click None selected of under Users and groups.
Search for the user or group to assign to the application and select it.
Click Select and then Assign.
Go to Azure Active Directory from the navigation bar of Microsoft Azure Portal and click Enterprise applications.
Click the previously added Azure AD SAML Toolkit.
Go to Single sign-on from the navigation bar and click SAML.
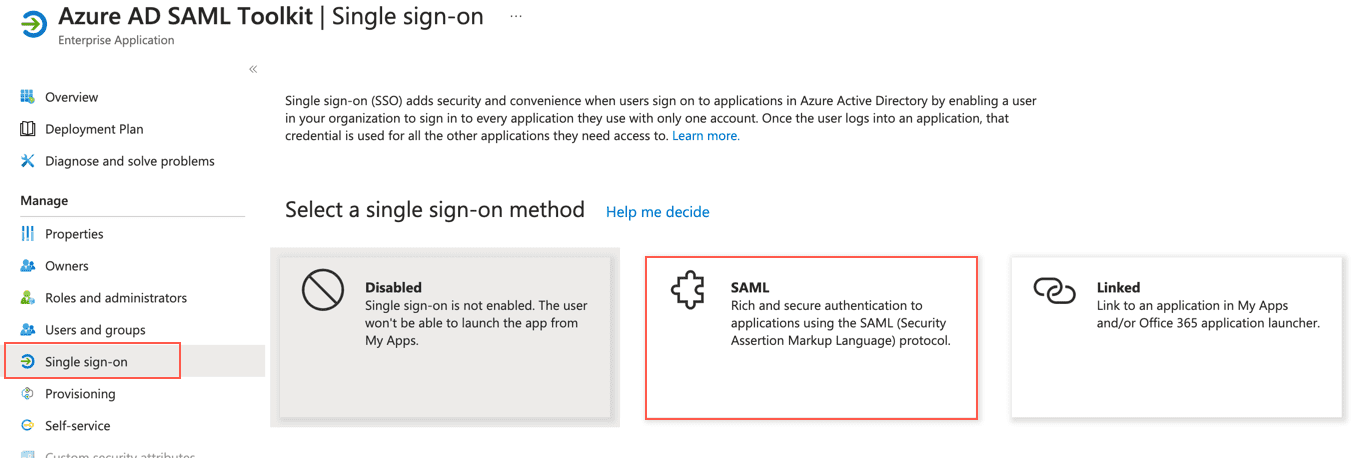
Enabling SAML
Click the edit icon of Basic SAML Configuration.
Click Add reply URL and enter https://samltoolkit.azurewebsites.net/SAML/Consume.
In Sign on URL, enter https://samltoolkit.azurewebsites.net/.
Click Save.
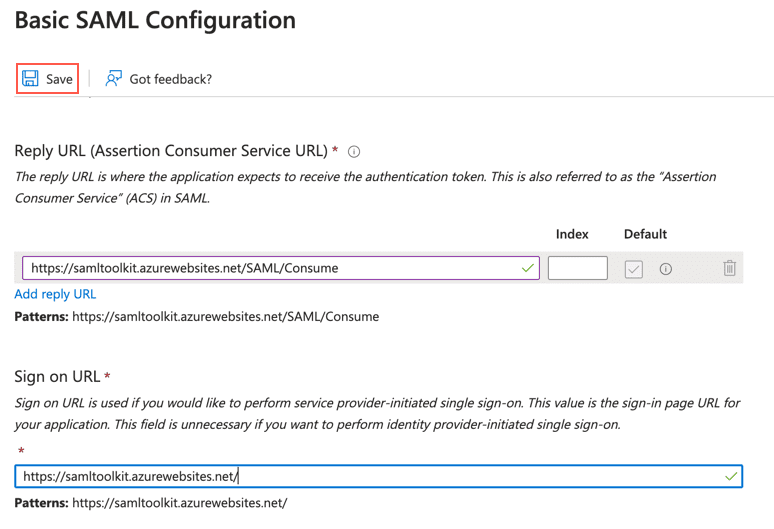
Adding URL
Note down the value of Identifier (Entity ID) of Basic SAML Configuration. You must enter it as Issuer (EntityID) while configuring SAML Authentication in Logpoint.
Search and Download the Certificate (Base64) of SAML Signing Certificate. You must enter it as X.509 Certificate while configuring SAML Authentication in Logpoint.
Note down the Login URL and Azure AD Identifier of Set up Azure AD SAML Toolkit. You must enter Login URL as SSO EndPoint URL and Azure AD Identifier as EntityID while configuring SAML Authentication in Logpoint.