An SNMP trap collector collects logs from the SNMP enabled devices. SNMP traps are alert messages sent by the devices to the SNMP manager with information about the occurrence of any significant event.
Go to Configure >> Built-in Collectors/Fetchers >> SNMP Trap Collectors.
Select the LogPoint instances where you want to configure the SNMP trap collector.
Click Next.
Configuring the SNMP Trap Collector V_3
Configuring the SNMP Trap Collector V_12
Select an SNMP Version:
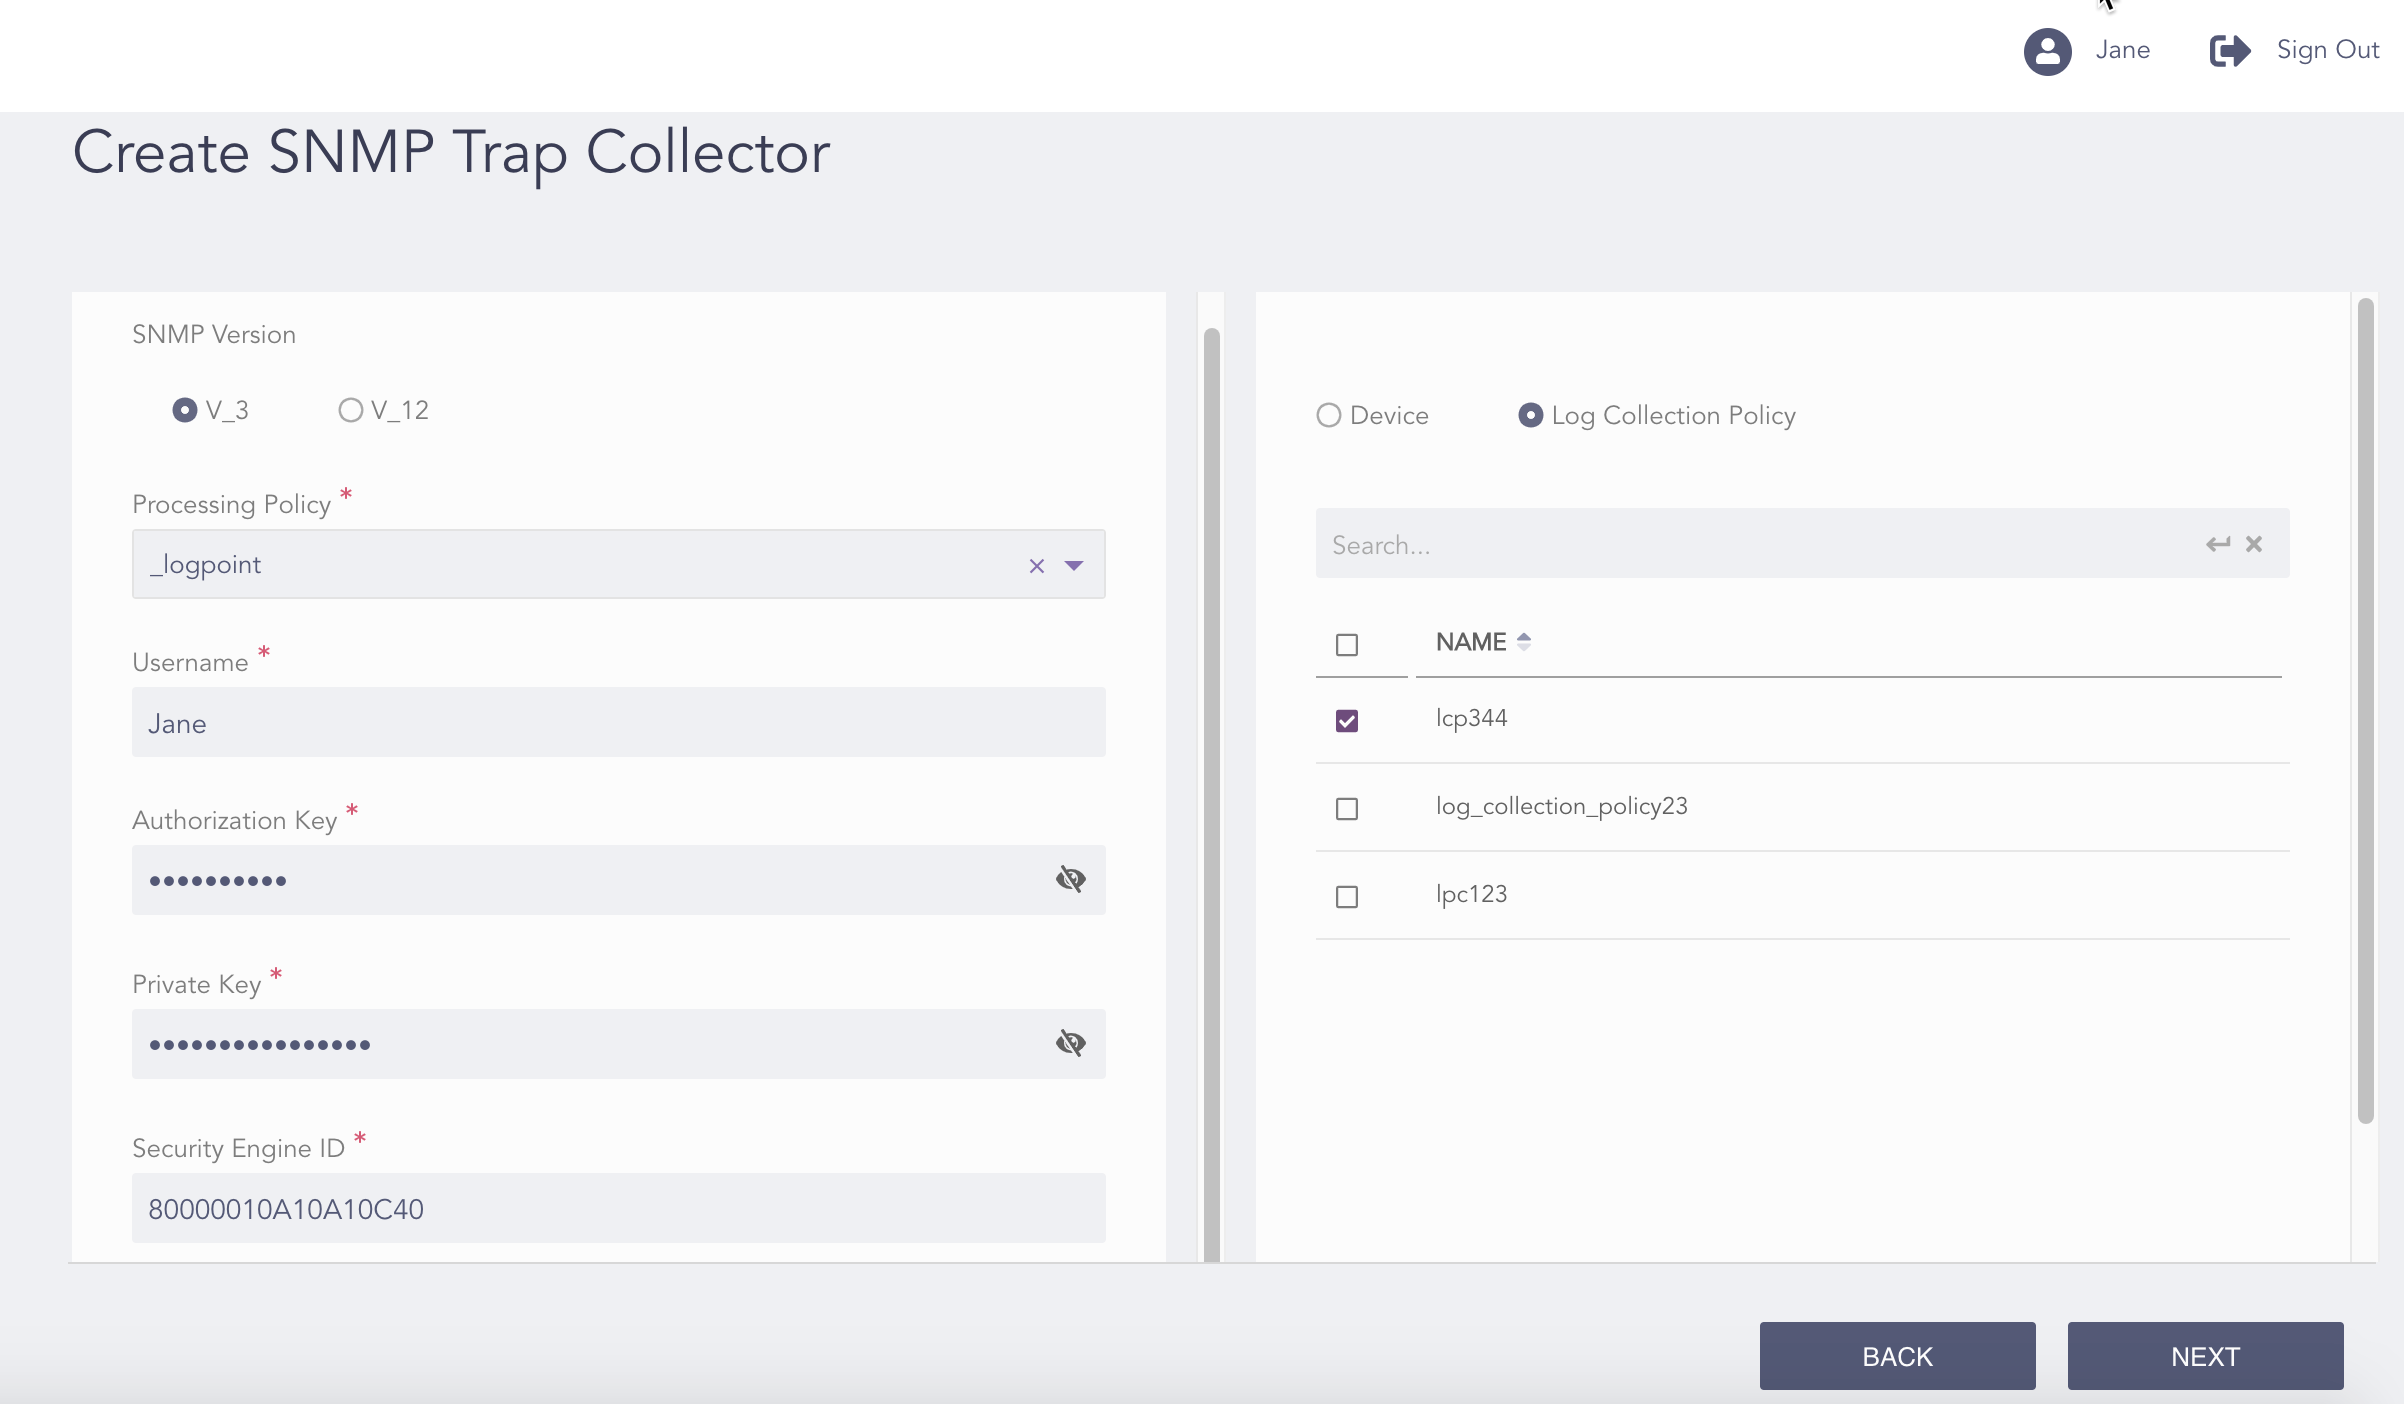
If you select V_3:
Select a Processing Policy.
Enter the Username of the user forwarding the logs to the server.
Enter the Authorization Key and Private Key used for Authentication of SNMP users, Privacy of communication, and Integrity of messages.
Note
Click the View ( ) icon to view the authorization key and the private key.
Enter the Security Engine ID.
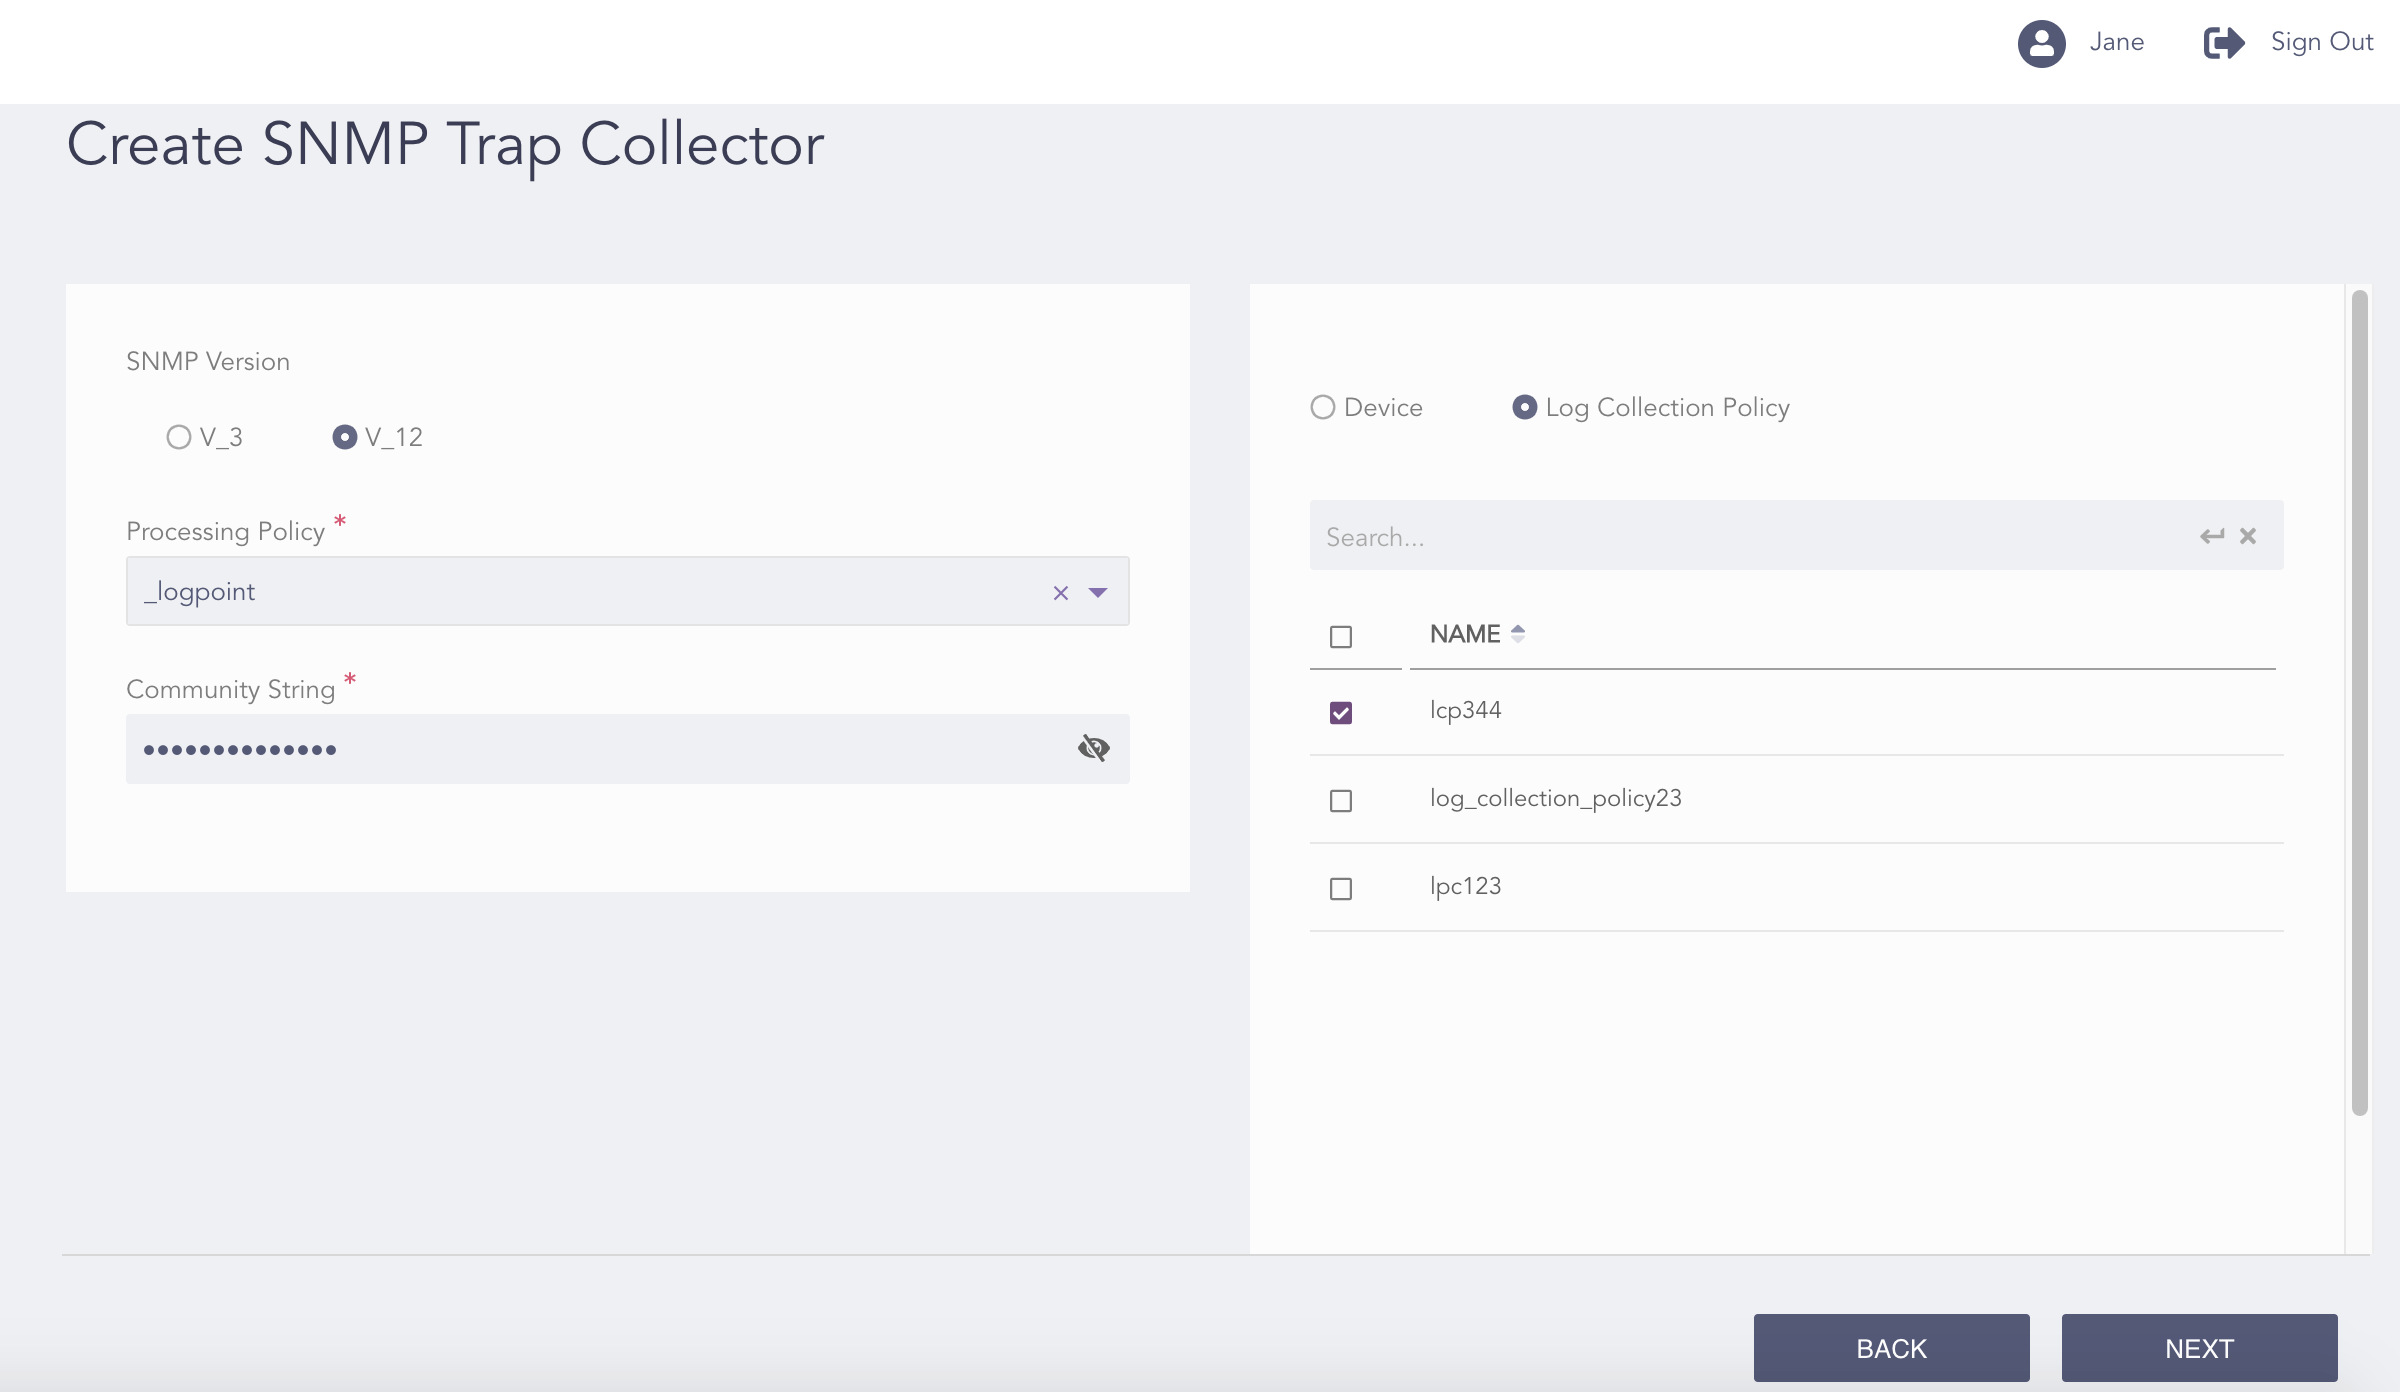
If you select V_12:
Select a Processing Policy.
Enter the Community String authentication of messages.
Note
Click the View () icon to view the community string.
Note
The Authorization Key must contain at least eight characters.
You can either configure the SNMP trap collector to a device or a log collection policy.
If you select Device, select all the devices where you want to configure the collector.
Note
For multiple LogPoint instances, you can select the devices common to the selected LogPoint instances only.
If you select Log Collection Policy, select all the log collection policies where you want to configure the collector.
Click Next.
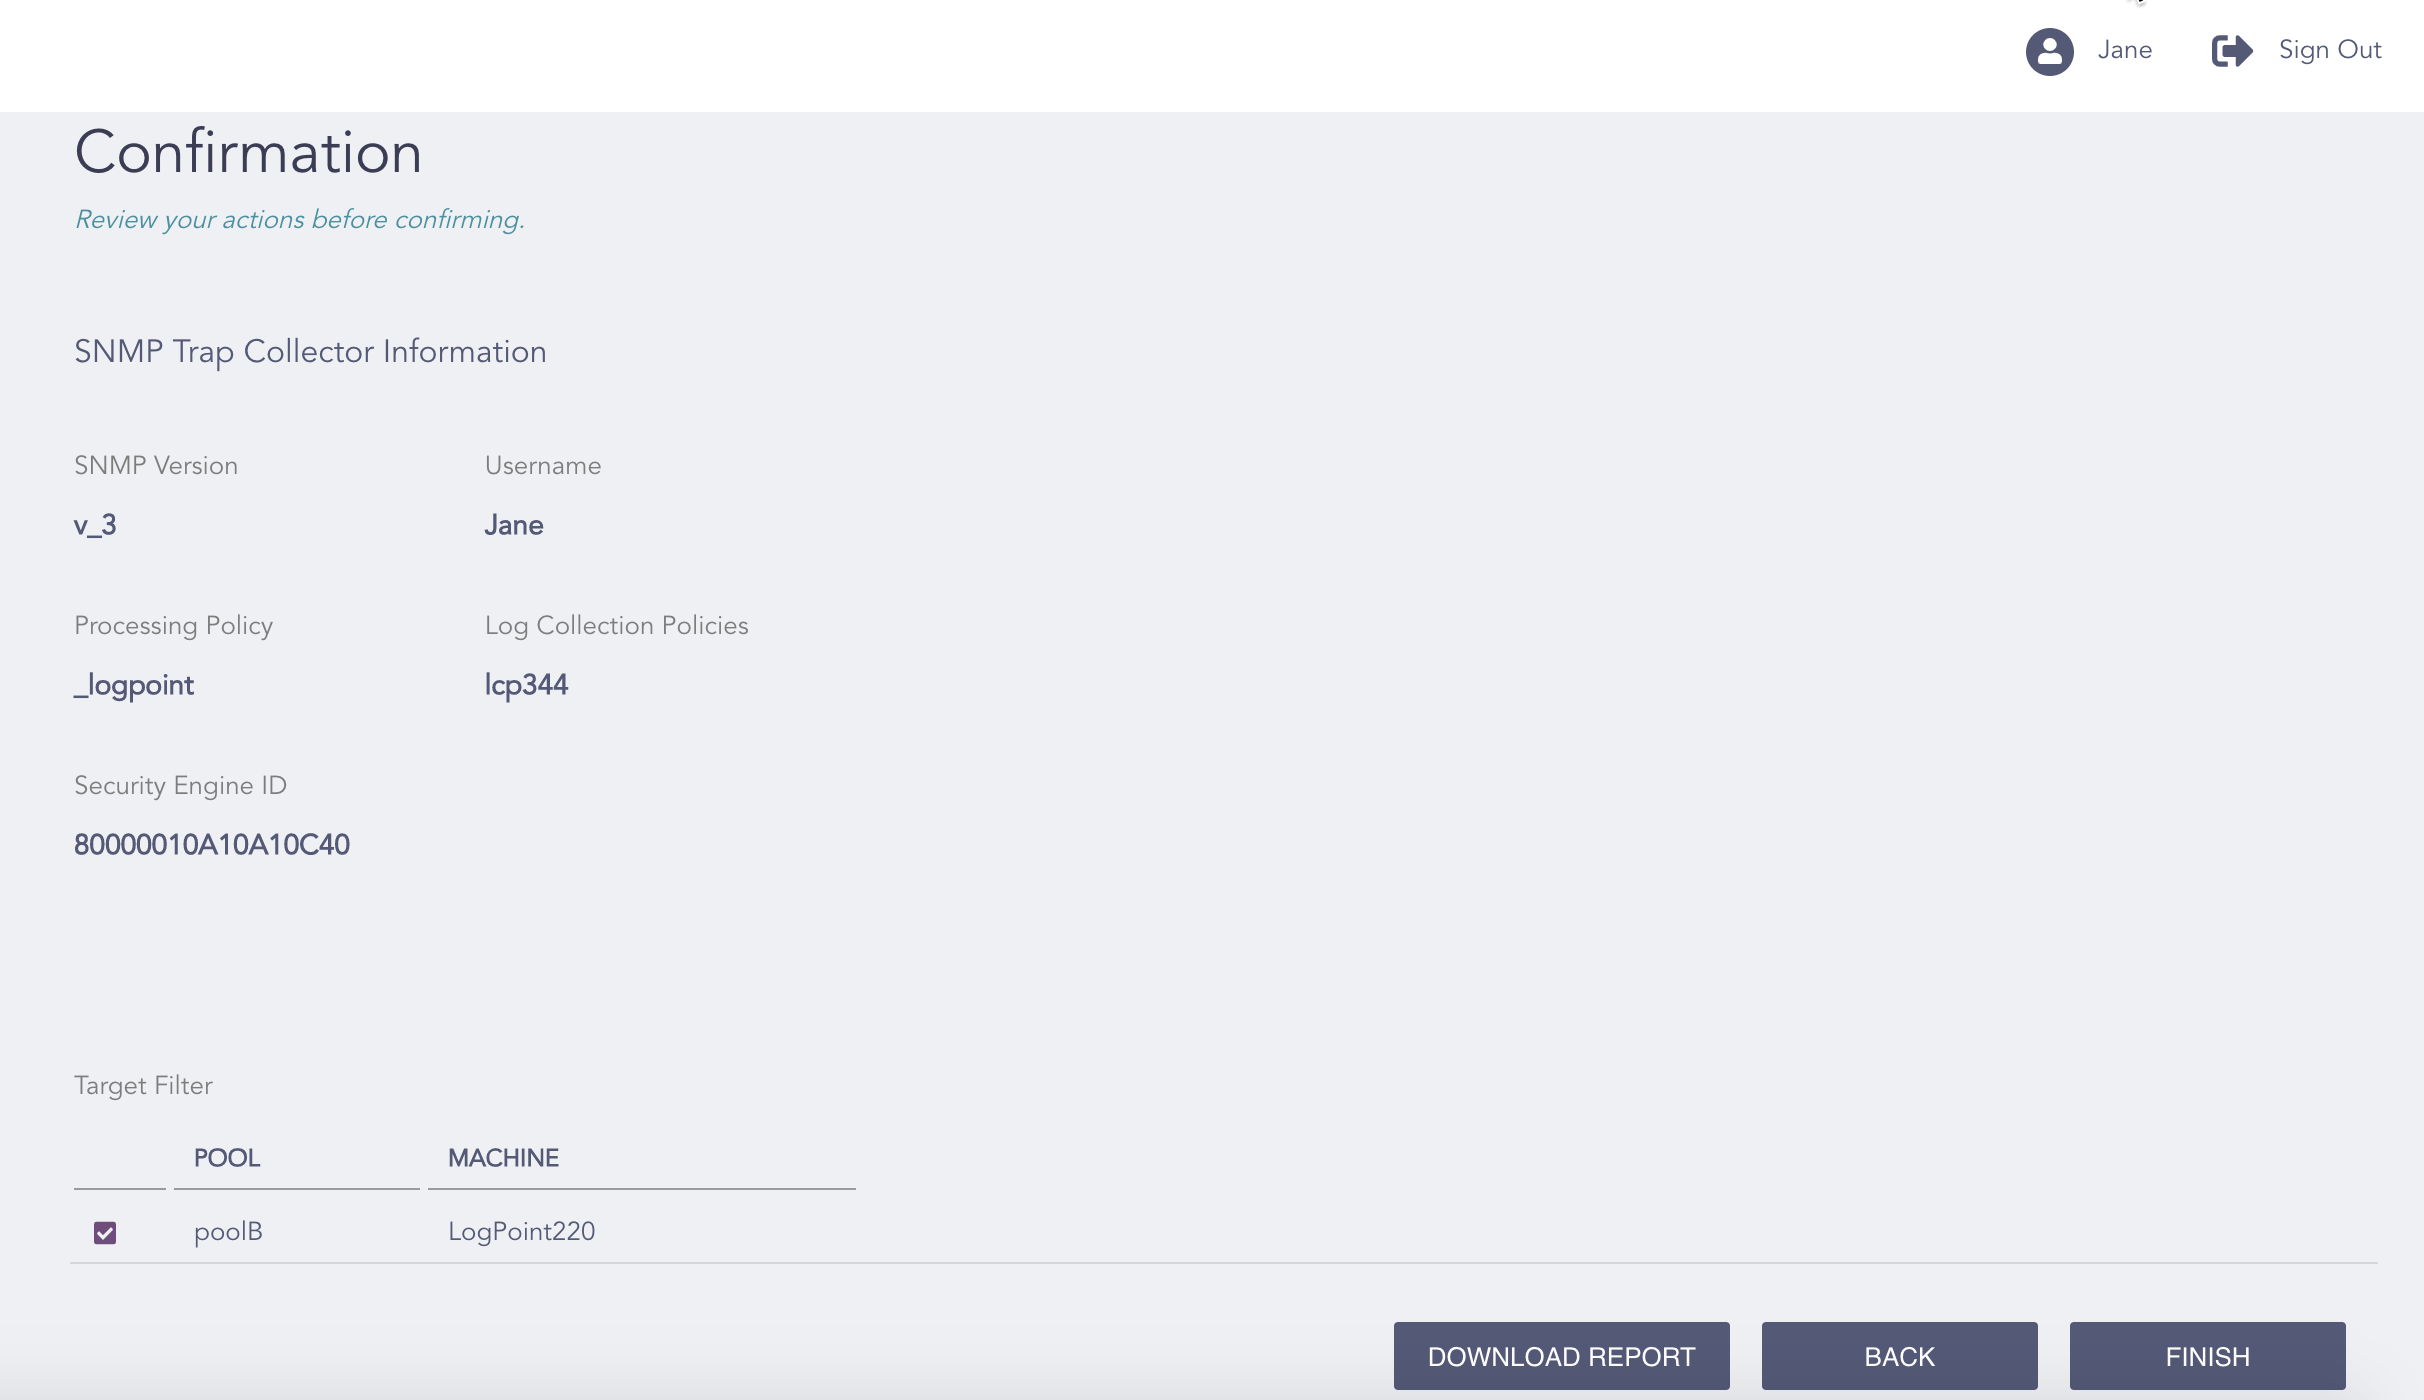
Confirming the Changes
Review your changes. You can go Back to make any changes if necessary.
Note
Click Download Report to save the summary of the task in PDF.
Click Finish.
Click OK.