Logpoint Authentication is the basic user authentication mechanism in Logpoint. In this method of authentication, you enter your credentials to the system. Logpoint then verifies the username and password combination from the database and authenticates the login based on the result.
In case you forget your password, follow the steps to reset it.
Click Forgot Password?.
Provide a valid Username.
Click Send.
A password reset link is sent to the e-mail address associated with the provided username.
Warning
The link expires in an hour.
You can use LDAP Authentication to authenticate your users if your organization uses LDAP. You can configure your machine to pull the user credentials and role-based access control rules from the existing LDAP Directory.
LDAP Authentication is automatically installed in Logpoint as a plugin in the LP_Default application. You need to configure the LDAP Strategy in Logpoint to use the LDAP service.
Go to Settings >> System Settings from the navigation bar and click Plugins.
Search for LDAP Authentication.
Click Manage.
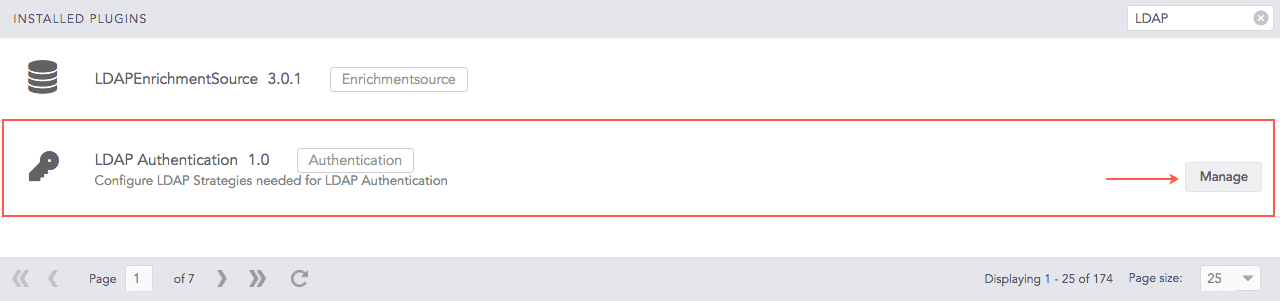
LDAP Authentication Plugin
Click Add.
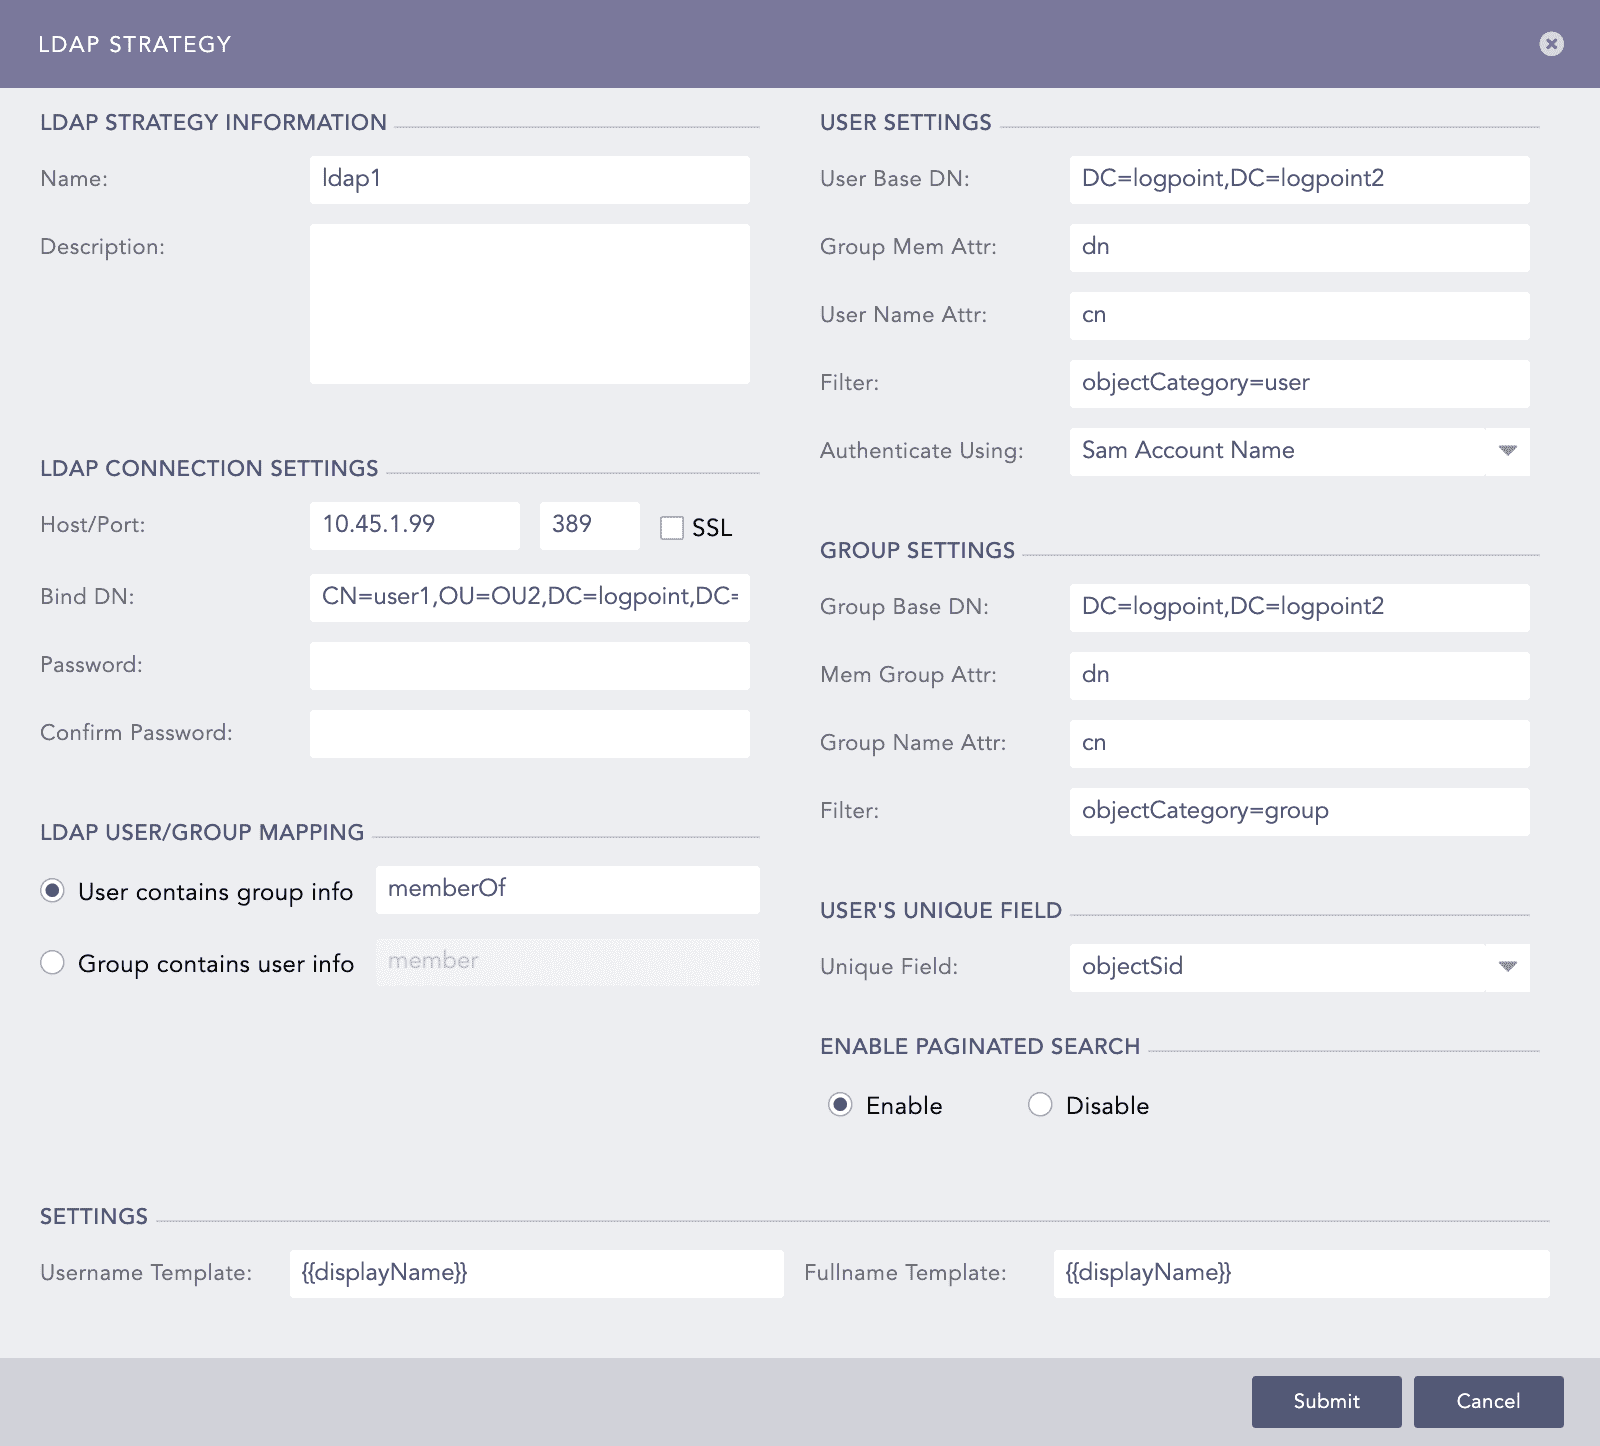
LDAP Strategy Pop-up Panel
In the LDAP Strategy Information section, provide the Name and Description of the LDAP strategy.
In the LDAP Connection Settings section:
Provide the Host/Port address of the LDAP server that authenticates the user.
Enable SSL (Secure Sockets Layer) to establish an encrypted link.
Provide a Bind DN which is a distinguished name for the LDAP server.
Enter and confirm the Password to authenticate the user.
In the LDAP User/Group Mapping section, select either a User or a Group. For the User, enter the memberOf and for the Group, enter the member information.
The fields in User Settings and Group Settings gets populated according to the values entered in the LDAP Connection Settings.
The User Base DN is the node in which the LDAP users are present.
The Group Mem Attr and the User Name Attr are attributes of the group member and the user provided in the database respectively.
The Filter is the string that filters in the user results.
Select Authenticate Using parameter from the drop-down menu. It is required during login.
Note
Choose dn to use standard DN format for login; uid to use uid for login (uid for Linux system) and SAM Account Name to use SAM Account Name for login (SAM Account Name for Windows).
Group Base DN is the node in which the LDAP groups are present.
Mem Group Attr contains the members belonging to a group.
Group Name Attr is the attribute of group name provided in the database.
Select a Unique Field for the user. Logpoint uses the value of the selected field to uniquely identify each LDAP user.
Choose to either Enable or Disable the paginated search. You can choose to paginate the search if the remote server offers paginated search service.
In the Settings section, provide the Username Template and the Fullname Template in the jinja format.
For example: If the user attributes inside Active Directory is displayName, FirstName and LastName then:
Username Template = {{displayName}}
Fullname Template = {{FirstName}} {{LastName}}
Click Submit.
Note
Once you create an LDAP strategy, it gets populated in the LDAP Authentication Management feed.
Make sure that the Unique ID Field has been configured in an LDAP strategy so that the corresponding users can be uniquely mapped in Logpoint. As a result, new users won’t be created in Logpoint when they are moved to a new Organizational Unit in the LDAP server.
If you have any duplicate LDAP users in the system, make sure to delete them manually.
Warning
Deleting a previously configured LDAP strategy deletes all the associated LDAP users & their personalized content.
After configuring an LDAP Strategy, you can map the LDAP groups to Logpoint User Groups.
For an existing LDAP Strategy, click the icon of Map LDAP Groups to Logpoint User Groups in the Actions column in the *LDAP
The LDAP Groups panel lists all the LDAP Group Names. Click the LDAP Group name for the desired group.
In the Edit LDAP Group pop-up panel, the LDAP Group Name and LDAP Group DN gets populated by default.
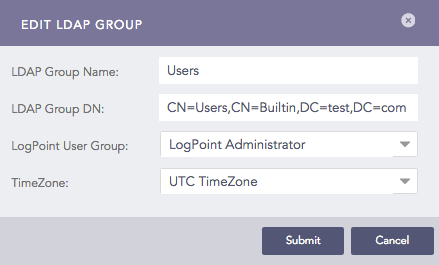
Edit LDAP Groups
Select a Logpoint User Group and TimeZone from their respective drop-down menus.
Click Submit.
The LDAP Groups pop-up panel now displays the User Group and Timezone information for the edited group.

LDAP Groups
Note
While mapping multiple LDAP User Groups to Logpoint User Groups, there is a particular scenario called LDAP concatenation of Users and Permission Groups.
Consider an LDAP user “LDAP User 1” that belongs to LDAP Group “LDAPG-1” and “LDAPG-2” in the LDAP directory. To illustrate; there are two Permission Groups PG1 (which has READ Site Permission only) and PG2 (which has READ, CREATE and DELETE Site Permissions only) created in Logpoint. You map PG1 to User Group UG1 and, PG2 to UG2. Also, UG1 has the Object Permission of Device-1 and Repo-1, and UG2 has the Object Permission of Device-2 and Repo-2.
If you map LDAPG-1 to UG1 and LDAPG-2 to UG2, then the “LDAP User 1” has the concatenated Site, and Object Permissions of UG1 and UG2, i.e., the Site Permission takes READ, CREATE and DELETE and, the Object Permission of Device-1, Repo-1, Device-2, and Repo-2.
Now, you can log into Logpoint via LDAP Authentication.
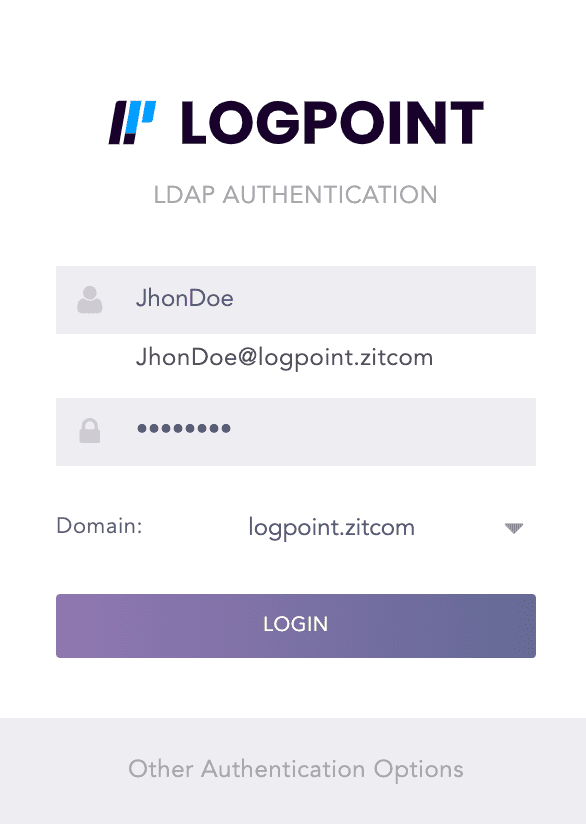
LDAP Authentication
Enter the URL for the Logpoint system and press Enter.
Click the Other Authentication Options link at the bottom of the panel.
Select LDAP Authentication.
Enter a Username and a matching Password.
Select a Domain.
Click Login.
Configuring a default domain for LDAP Authentication automates the domain selection process during login. Logpoint automatically uses the configured default domain when you open the LDAP Authentication login page.
To configure a default domain:
Go to Settings >> System Settings from the navigation bar and click Plugins.
Search LDAP Authentication.
Click Manage.
Click Settings.
Select your domain from the Default Domain drop-down.

LDAP Authentication Default Settings
Click Save.
You can use the following parameters to login via LDAP:
Using DN
standard DN format eg. CN=john, OU=people, DC=example, DC=com
Using sAMAccountName
sAMAccountName@domain eg: john@example.com
domain\sAMAccountName eg: example.com\john
Using uid
uid@domain eg: john@example.com
domain\uid eg: example.com\john
The following parameters are used for communication:
Host
Port
Bind DN
Bind DN password
SSL enabled or not
There are two ways to communicate:
Simple communication
Communication using SSL
For simple communication, Python-LDAP library is used. It uses the host and port 389 to connect to the LDAP server. Once the connection is established, Bind DN and Bind Password are used to bind the required user.
For SSL communication, set the certificate for SSL connection and repeat the process similar to simple communication. The port used for SSL communication is 636.
The LDAP server data connects with Logpoint and stores data in the database. First, Logpoint makes the connection with the LDAP server using the data from LDAP strategy. Once the connection is established, Logpoint obtains the data (LDAP group) from the server. After Logpoint receives LDAP groups, the User Group Mapping window enlists them. You have to select the required LDAP group to map to the Logpoint user group. Once you establish the mapping, the database stores the content -LDAP group, user group and the DN associated with it. Any update to user group mapping gets reflected every time you log into the system.