Go to Settings >> Configuration >> Normalization Policies.
At the top left, click Add.
Enter a Policy Name.
In Compiled Normalizers, select Deny All WAF.
Click Submit.
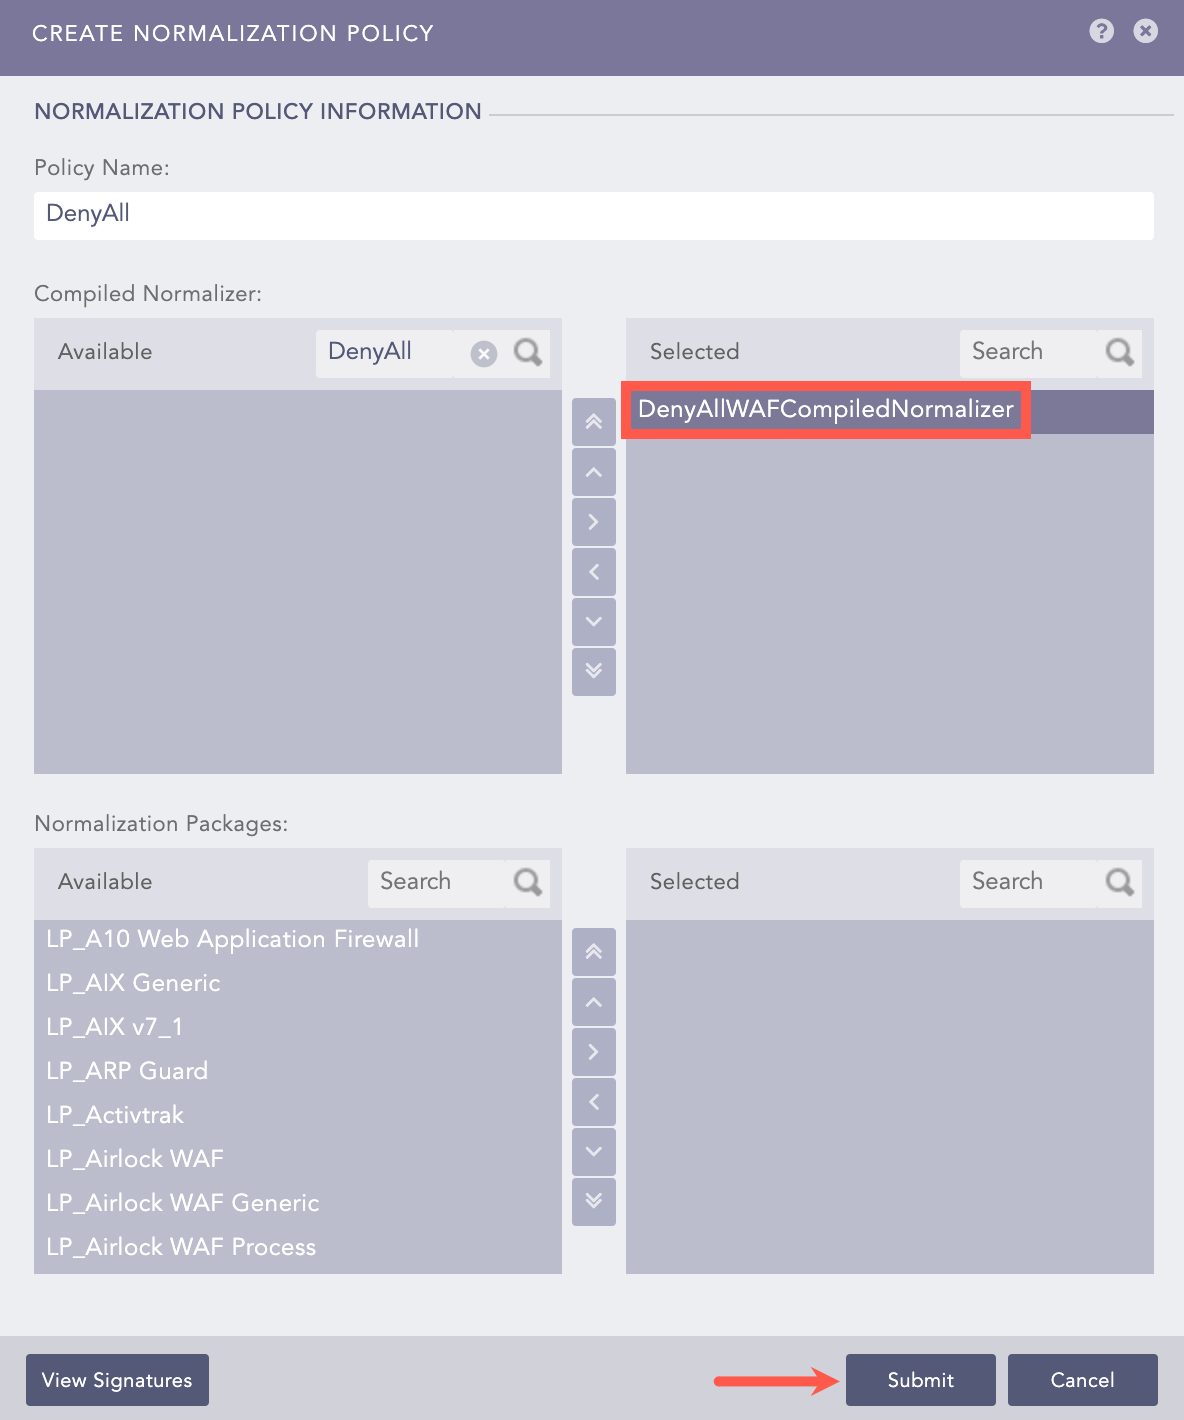
Adding a Normalization Policy
Go to Settings >> Configuration >> Devices.
At the top left, click Add.
Enter a device Name.
Enter the IP address(es) of the Deny All WAF server.
Select the Device Groups.
Select an appropriate Log Collection Policy for the logs.
Select a collector or a forwarder from the Distributed Collector drop-down menu.
Note
It is optional to select the Device Groups, the Log Collection Policy, and the Distributed Collector.
Select a Time Zone.
Note
The timezone of the device must be the same as its log source.
Configure the Risk Values for Confidentiality, Integrity, and Availability used to calculate the risk levels of the alerts generated from the device.
Click Submit.
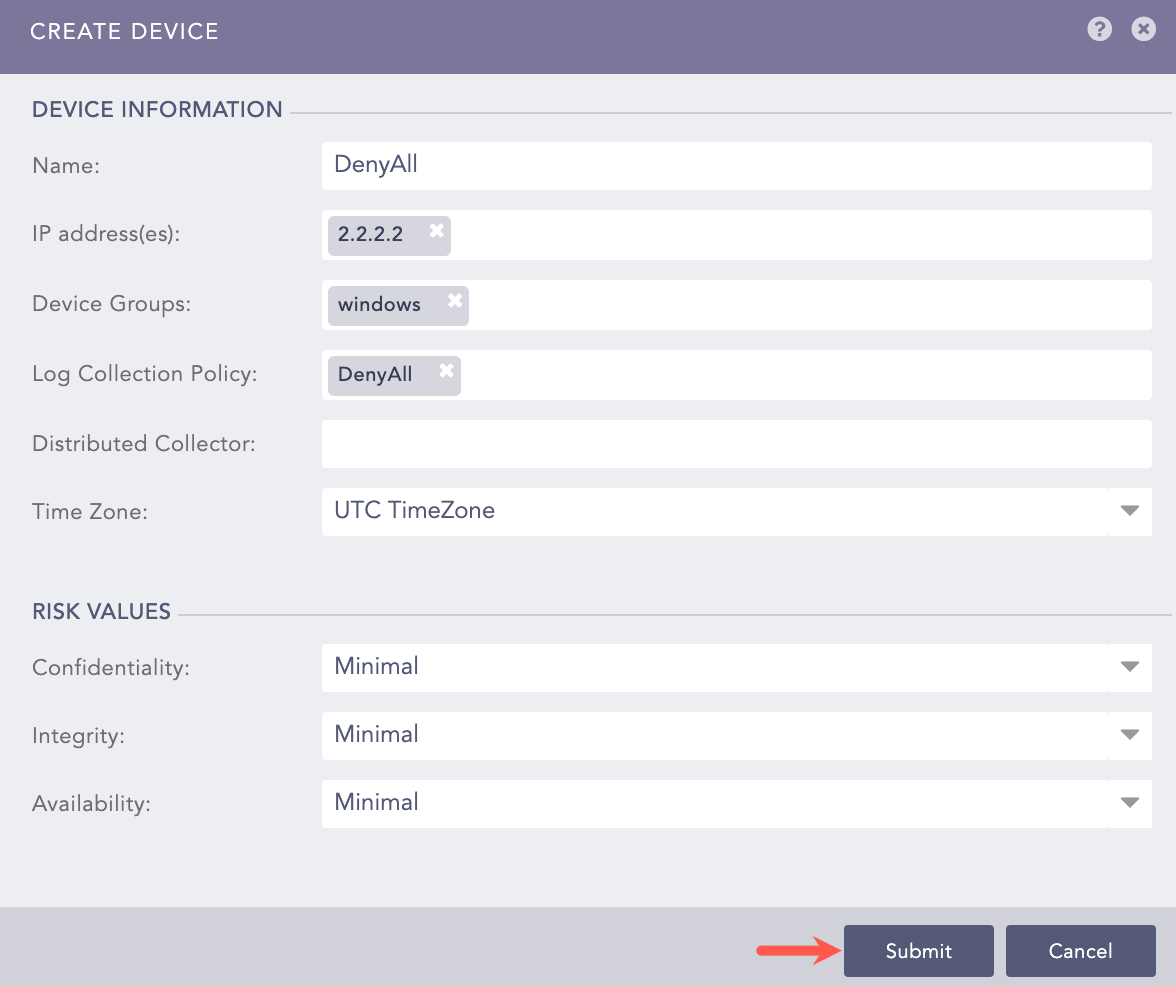
Adding Deny All WAF as a Device
Click the Add icon from Actions.
Click Syslog Collector on AVAILABLE COLLECTORS FETCHERS.
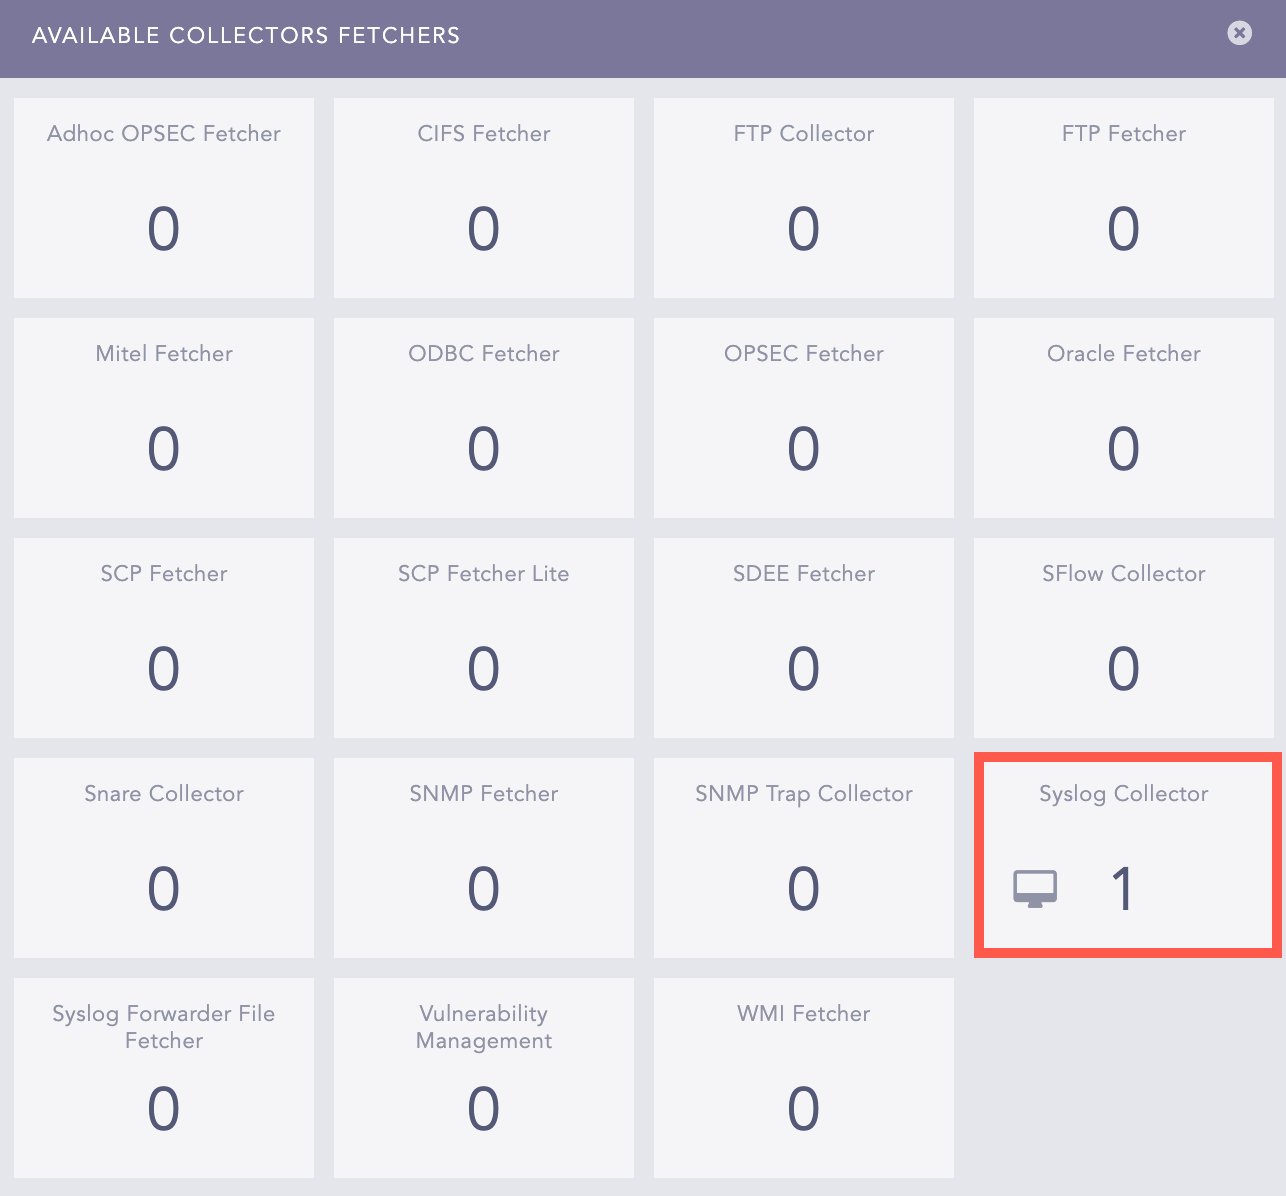
Configuring Syslog Collector
In Parser, select Syslog Parser.
Select the Processing Policy which contains the normalization policy you added previously.
Select the Charset. The default value is utf_8.
In PROXY SERVER, select None.
Click Submit.
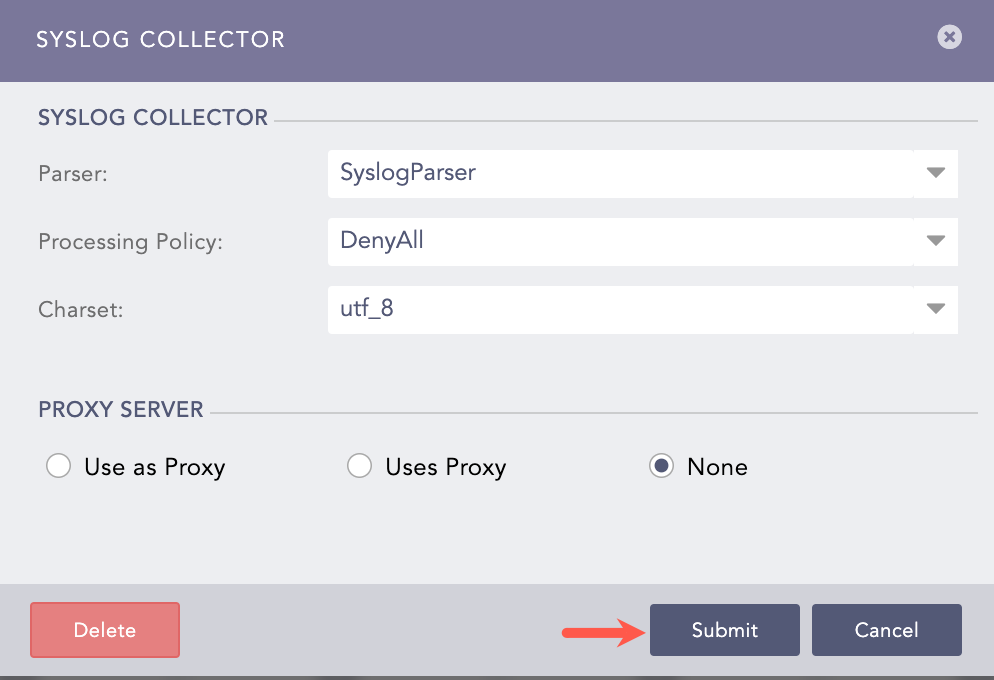
Configuring Syslog Collector