Page Contents
- Configuring Trend Micro
- Using Log Source Templates
- Using Devices
Log sources for Trend Micro can be configured using Log Source Templates or Devices. We recommend using the log source templates to minimize setup requirements and eliminate normalization issues.
Log source templates include predefined settings and configurations to receive the normalized Trend Micro logs, but some configurations must be done manually.
If you have configured your Trend Micro to send its Syslog messages via port UDP 514 or TCP, use the Syslog Collector based Trend Micro log source template. Go to Creating Log Source via a Template to learn more.
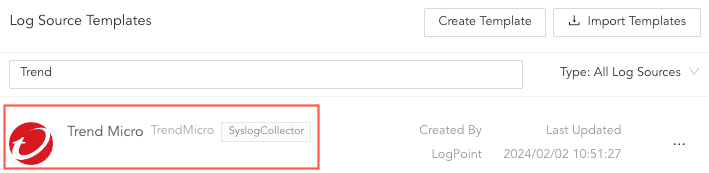
Selecting Trend Micro Log Source Template
If you have set up authentication, made HTTP requests, and implemented specific API endpoints required by Trend Micro’s services, use the Universal REST API Fetcher based TrendVisionOne log source template. You must configure Source, Connector and Routing, while other are optional.
To configure:
Go to Settings >> Log Sources from the navigation bar and click Browse Log Source Templates.
Search and click TrendVisionOne.
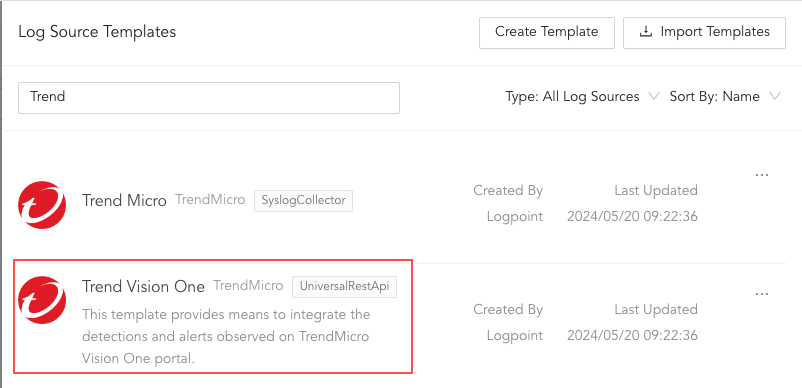
Log Source Templates
You must add the root address from where the TrendVisionOne fetches logs. The base URL provides a consistent entry point for the log collection system to interact with the Trend Micro’s API or service. The specific endpoints or paths added to the base URL would allow you to collect different types of logs or interact with different aspects of the log source, such as to get application logs, error logs or get performance metrics.
In Base URL, enter the endpoint URL and port number using the https://<your server>:port number format. For example, http://1.1.1.1:50.
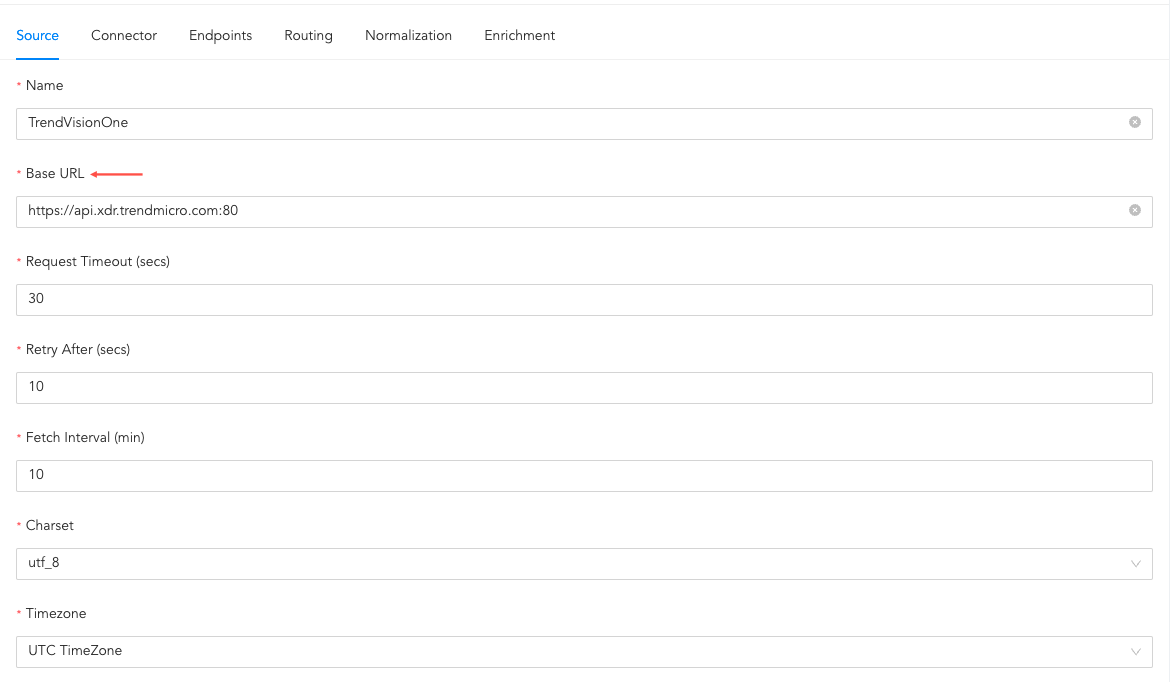
Configuring Source
Connector is a pathway for transmitting logs from various sources to Logpoint. You must authenticate TrendVisionOne to retrieve or interact with Trend Micro via providing the API Key. You do not need to select the Product and ensure No Auth is selected as Authorization Type.
Click Connector.
In Custom headers,
2.1. In Authorization Value, replace {{token}} with the generated API key.
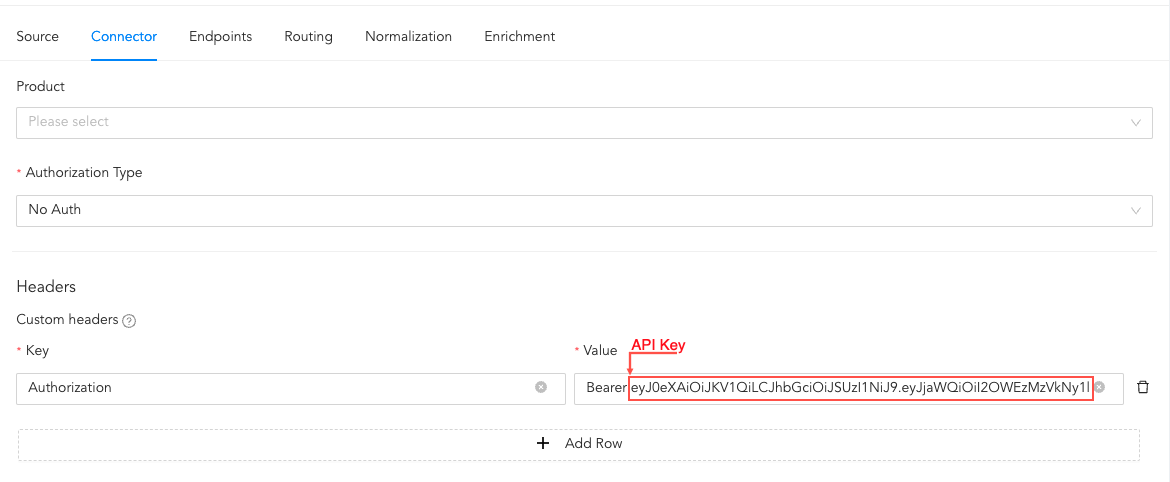
Configuring Connector
These are specific points within a system, application, or network from which logs are collected. These endpoints generate or provide access to log data that can be used for monitoring, analysis, troubleshooting, and security purposes. Go to Endpoints to configure details about the Trend Micro endpoints.
In routing, you can create repos and routing criteria for Trend Micro. Repos are locations where incoming logs are stored and routing criteria is created to determine the conditions under which these logs are sent to repos.
Click Routing to create repos and routing criteria.
1.1. Click + Create Repo.
1.2. Enter a Repo name.
1.3. In Path, enter the location to store incoming logs.
1.4. In Retention (Days), enter the number of days logs are kept in a repository before they are automatically deleted.
1.5. In Availability, select the Remote logpoint and Retention (Days).
1.6. Click Create Repo.
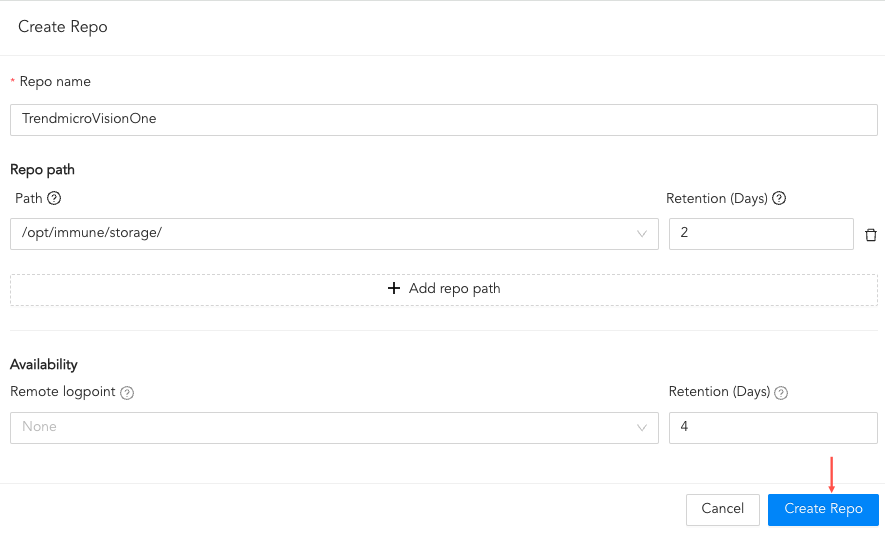
Creating a Repo
1.7. In Repo, click the drop-down and select the just created repo’s name. This is where Trend Micro logs will be stored.
1.8. Click + Add row.
1.9. Enter a Key and Value. The routing criteria are only applied to those logs which have this key value pair.
1.10. Select an Operation for logs that have this key value pair.
1.10.1. Select Store raw message to store both the incoming and the normalized logs in the selected repo.
1.10.2. Select Discard raw message to discard the incoming logs and store the normalized ones.
1.10.3. Select Discard entire event to discard both the incoming and the normalized logs.
1.11. In Repository, select a repo to store logs.
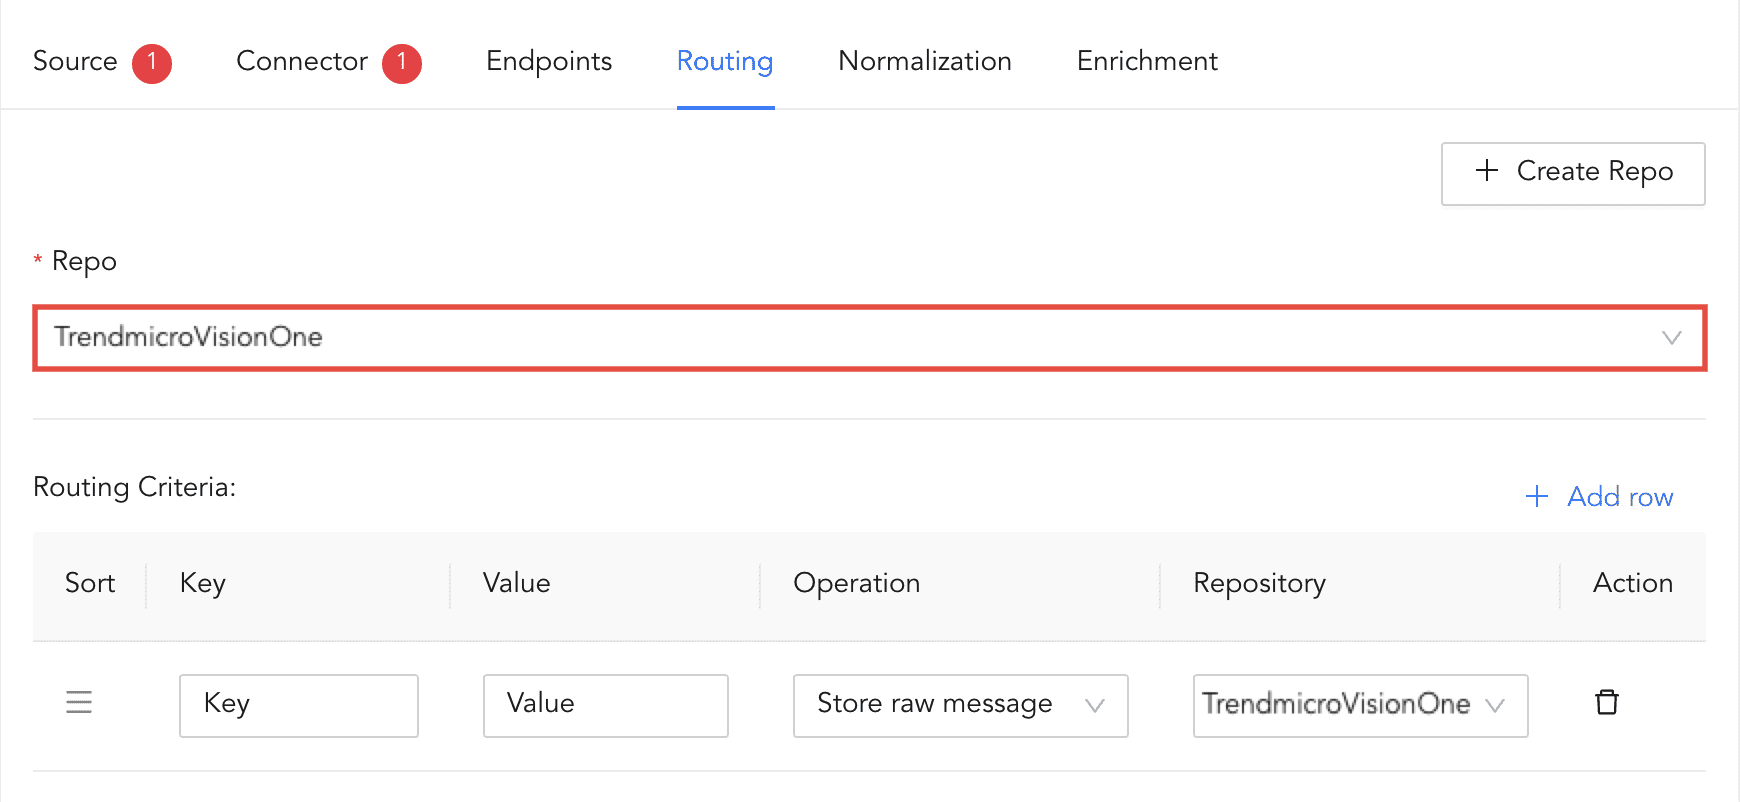
Creating a Routing Criteria
Note
Click the ( ) icon under Action to delete the created routing criteria.
Normalizers transform incoming logs into a standardized format for consistent and efficient analysis. You can select normalizers for the incoming Trend Micro logs.
Click Normalization.
You can either select a previously created normalization policy from the Select Normalization Policy drop-down or select a Normalizer from the list and click the swap( ) icon.
Enrichment policies are used to add additional information to a log, such as user information, device type or geolocation, before analyzing it. You can select an enrichment policy for the incoming Trend Micro logs. Go to Enrichment to select normalizers for the incoming Trend Micro logs.
Click Enrichment.
Select an enrichment policy for the incoming logs.
Click Save Configuration to save all the above configurations.
Go to Settings >> Configuration from the navigation bar and click Repos.
Click Add.
Enter a Repo Name.
Select a Repo Path to store incoming logs.
Set a Retention Day to keep logs in a repository before they are automatically deleted.
Note
You can add and remove multiple Repo Path and Retention Day.
Select a Remote Logpoint. This will create a copy of the repo in the Remote Logpoint. If the configured repo is not accessible, the copy will be used in Search.
Set an Available for (day) to specify the days you want the repo copy to remain highly available.
Click Submit.
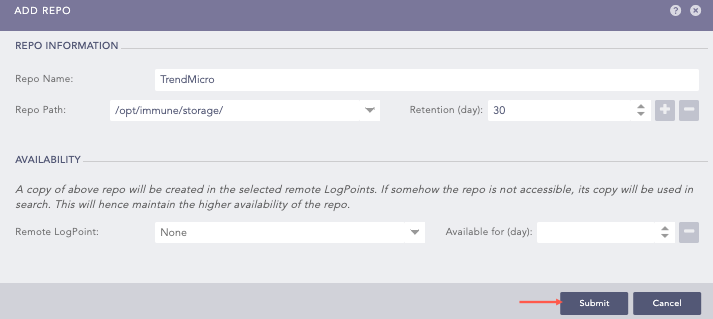
Adding a Repo
Go to Settings >> Configuration from the navigation bar and click Normalization Policies.
Click Add .
Enter a Policy Name.
Select the Compiled Normalizer and Normalization Packages for Trend Micro.
Click Submit.
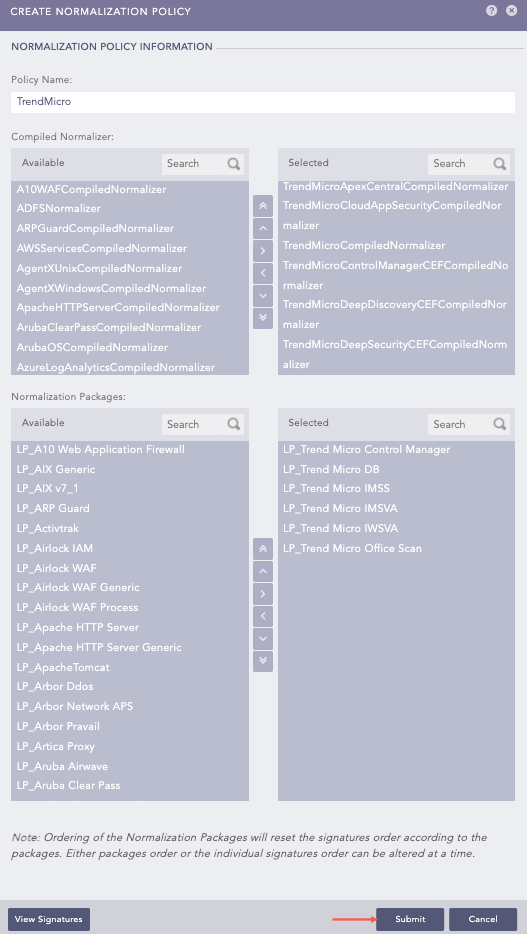
Adding a Normalization Policy
Go to Settings >> Configuration from the navigation bar and click Processing Policies.
Click Add .
Enter a Policy Name.
Select the previously created Normalization Policy.
Select the Enrichment Policy and Routing Policy.
Click Submit.
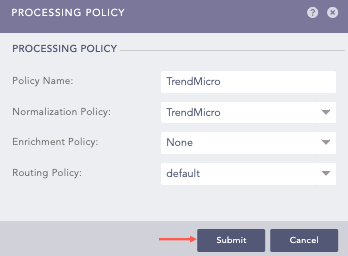
Adding a Processing Policy
Go to Settings >> Configuration from the navigation bar and click Devices.
Click Add.
Enter a device Name.
Enter the Trend Micro server IP address(es).
Select the Device Groups.
Select an appropriate Log Collection Policy for the logs.
Select a collector or a forwarder from the Distributed Collector drop-down.
Note
It is optional to select the Device Groups, the Log Collection Policy and the Distributed Collector.
Select a Time Zone. The timezone of the device must be same as its log source.
Configure the Risk Values for Confidentiality, Integrity and Availability used to calculate the risk levels of the alerts generated from the device.
Click Submit.
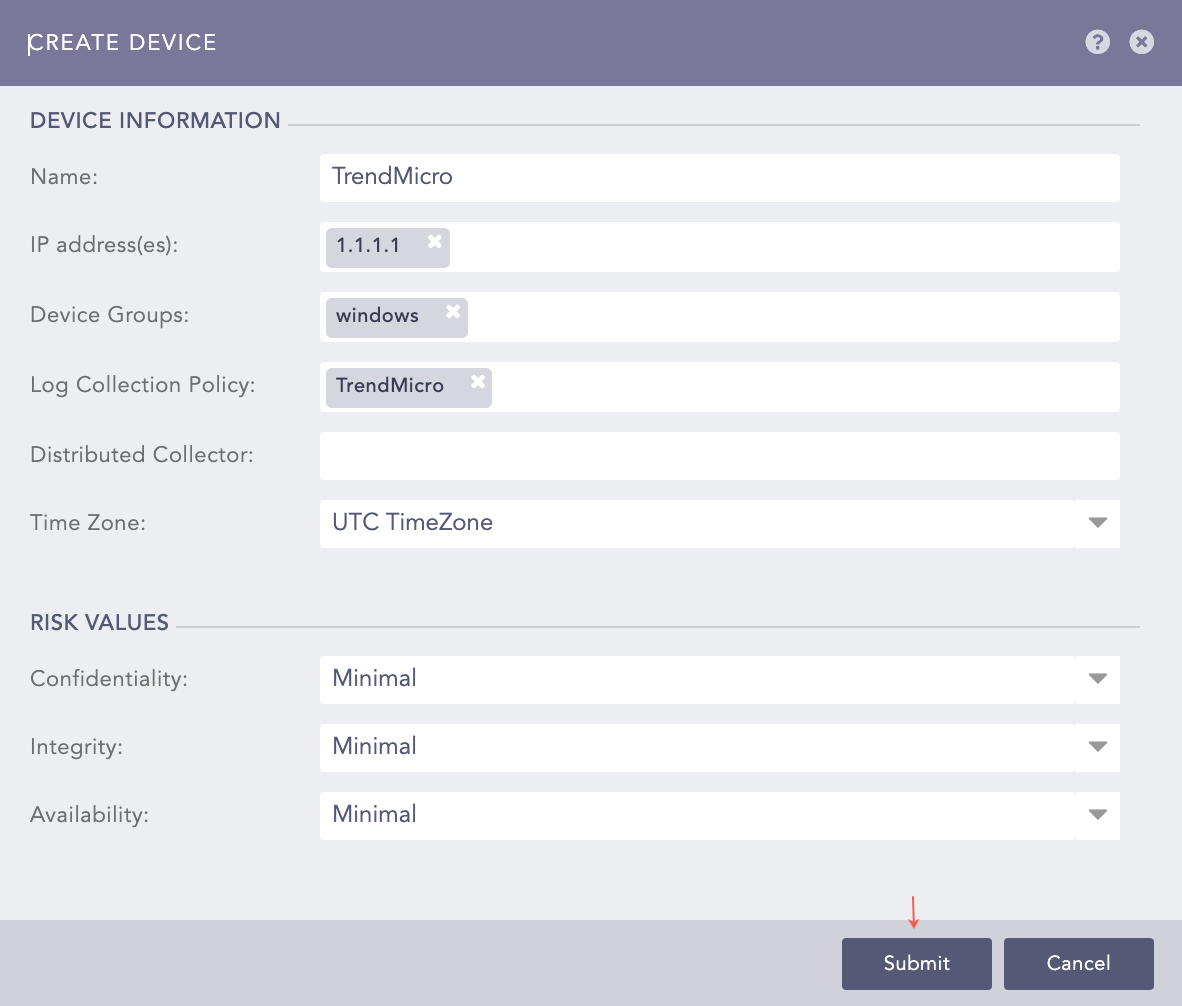
Create Device Panel
Go to Settings >> Configuration from the navigation bar and click Devices.
Click the Add icon from Actions of the previously added device.
Click Syslog Collector.
Note
You can select a different collector depending on your requirements and added device. To learn more about available collectors, go to collectors. If you require assistance, contact our support team.
Select Syslog Parser as Parser.
Select the previously created Processing Policy.
Select the Charset. The default value is utf_8.
In Proxy Server, select None
Click Submit.
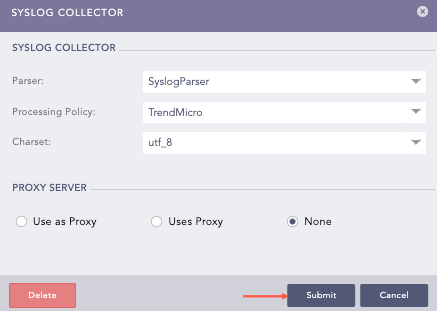
Configuring the Syslog Collector
Go to Settings >> Configuration from the navigation bar and click Devices.
Click the Add Collectors/Fetchers icon from Actions of the previously added device.
Click ODBC Fetcher.
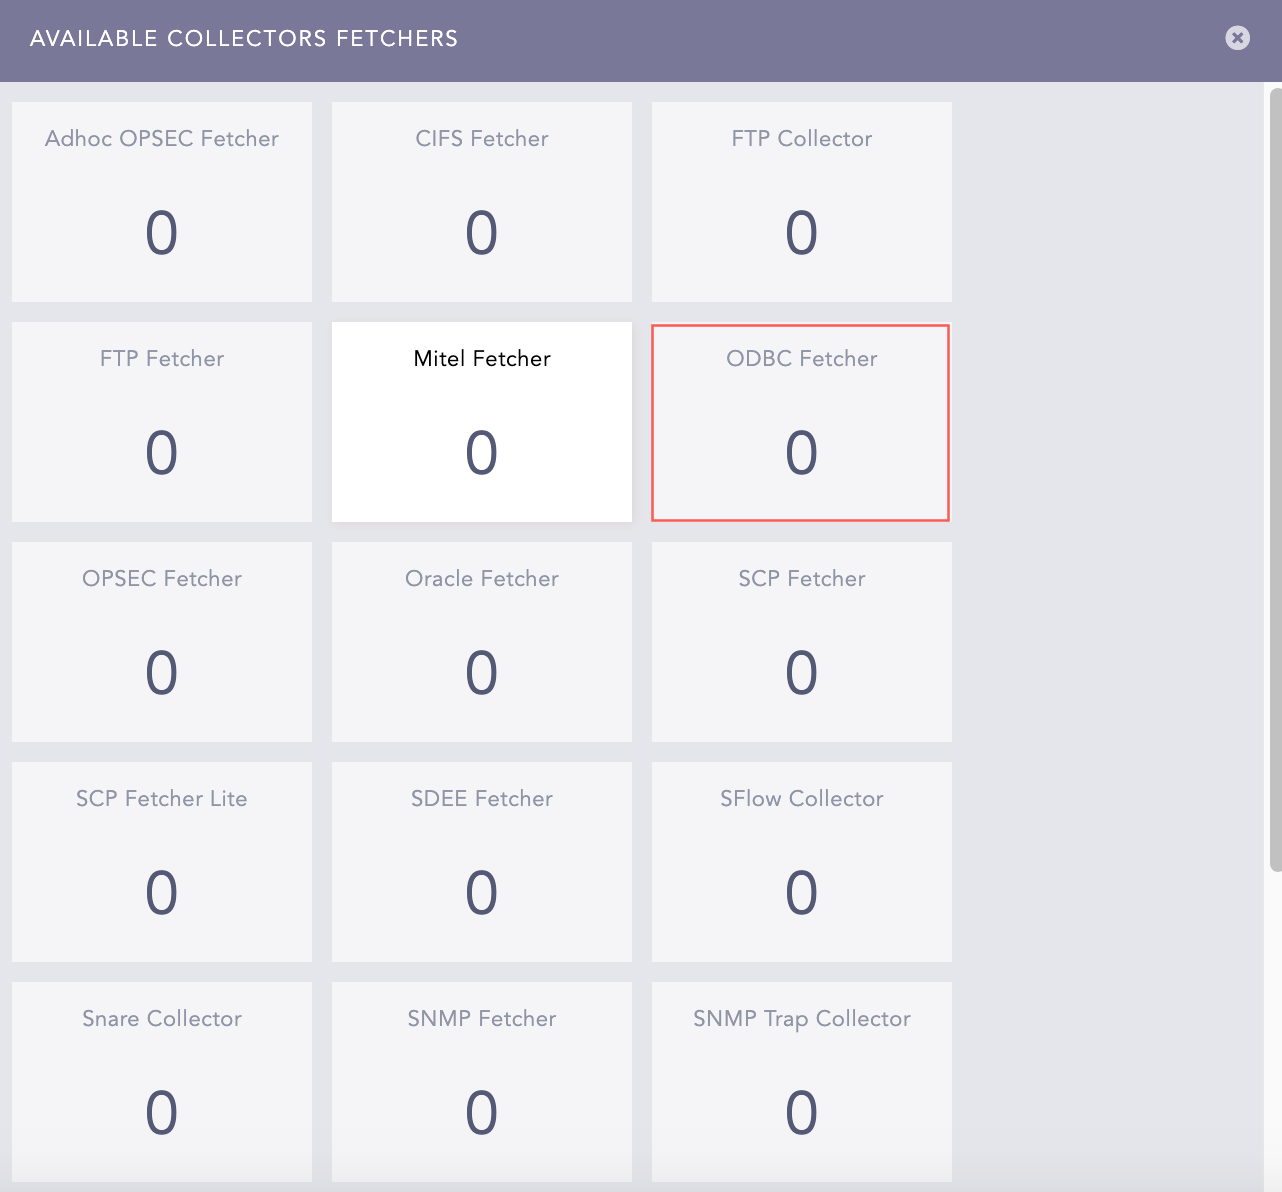
AVAILABLE COLLECTORS FETCHERS Panel
Click ADD.
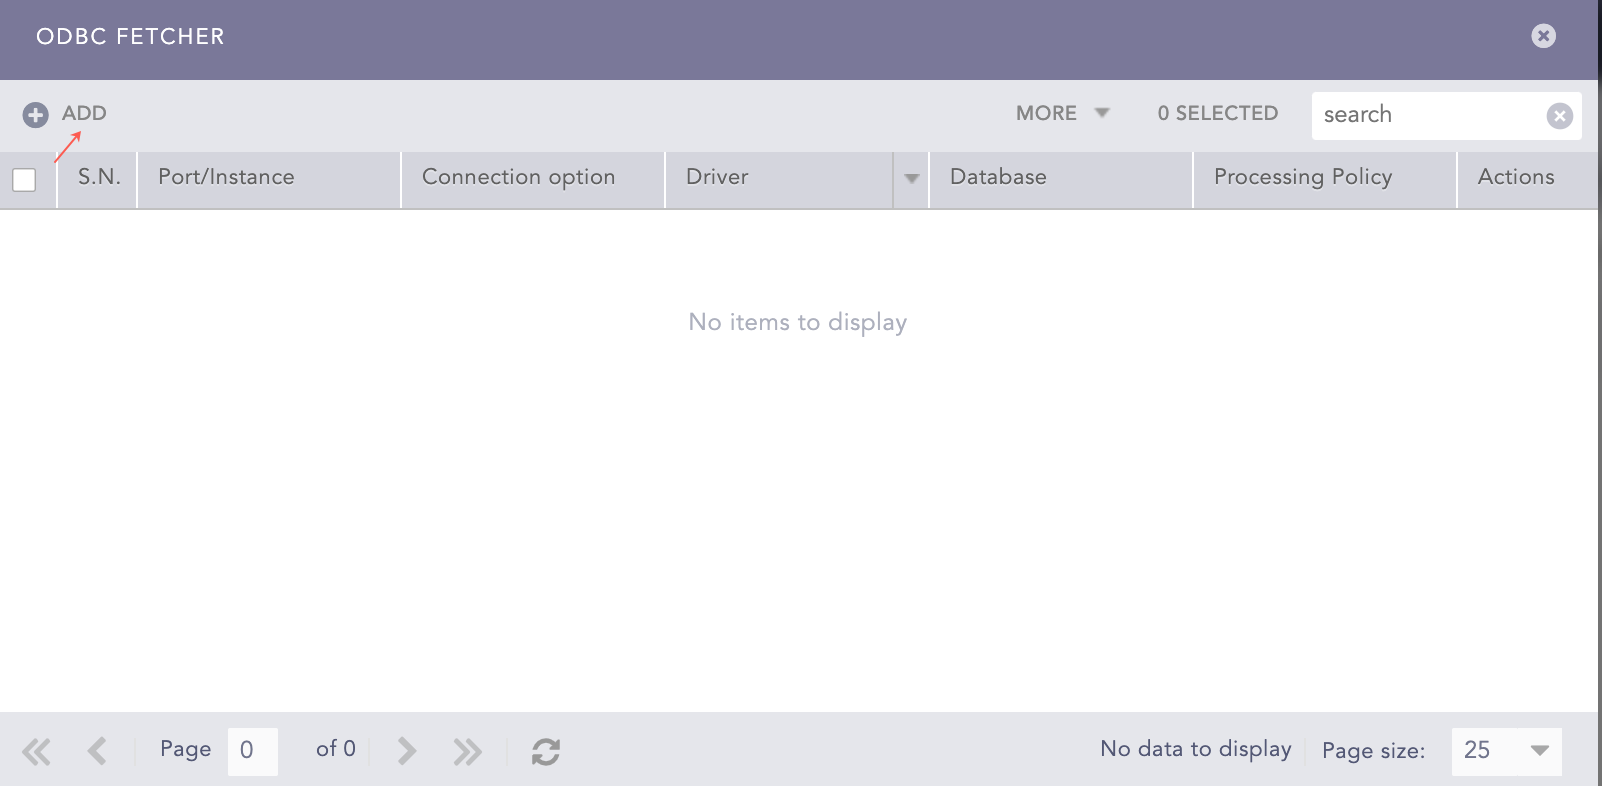
ODBC Fetcher Panel
Select a Mode. The ODBC Fetcher has General and Advanced modes of configuration. The Advanced mode allows you to define the incremental key value. But, in the General mode, the incremental key value is 0.
In General mode, you can select the Trend Micro Office Scan v11.0 or None template. The Trend Micro Office Scan v11.0 template has predefined configurations. But you must perform some configurations manually.
In Driver, enter MSSQL.
Select the Port option and enter 1433.
In Database, enter db_ControlManager.
Enter the Username and Password.
Enter the Fetch Interval.
Enter the following Query to retrieve the logs:
For  TrendMicro DB v11:
SELECT * FROM v_Virus_HostDetail
For TrendMicro DB v12: SELECT * FROM tb_AVVirusLog
In Incremental Key, enter the following:
Note
If you are using the Advanced mode, provide the initial Incremental Key Value. The default value is 0.
If you are using the General mode, you cannot set the value of the Incremental Key Value. The application sets the value to 0 automatically.
In Incremental Key Table, enter the given key table:
For  TrendMicro DB v11:
v_Virus_HostDetail
For  TrendMicro DB v12:
tb_AVVirusLog
Note
If you are using the Advanced Mode, you do not have to provide the Incremental Key Table.
Enter a New Line Separator to replace the newline characters in the ODBC data. For example, if you provide the New Line Separator as “_”, the application displays the ODBC data as “data1_data2_data3”.
Select the previously created Processing Policy.
Enter the Charset. The default value is utf_8.
Click Test to validate the configuration.
Click Submit.
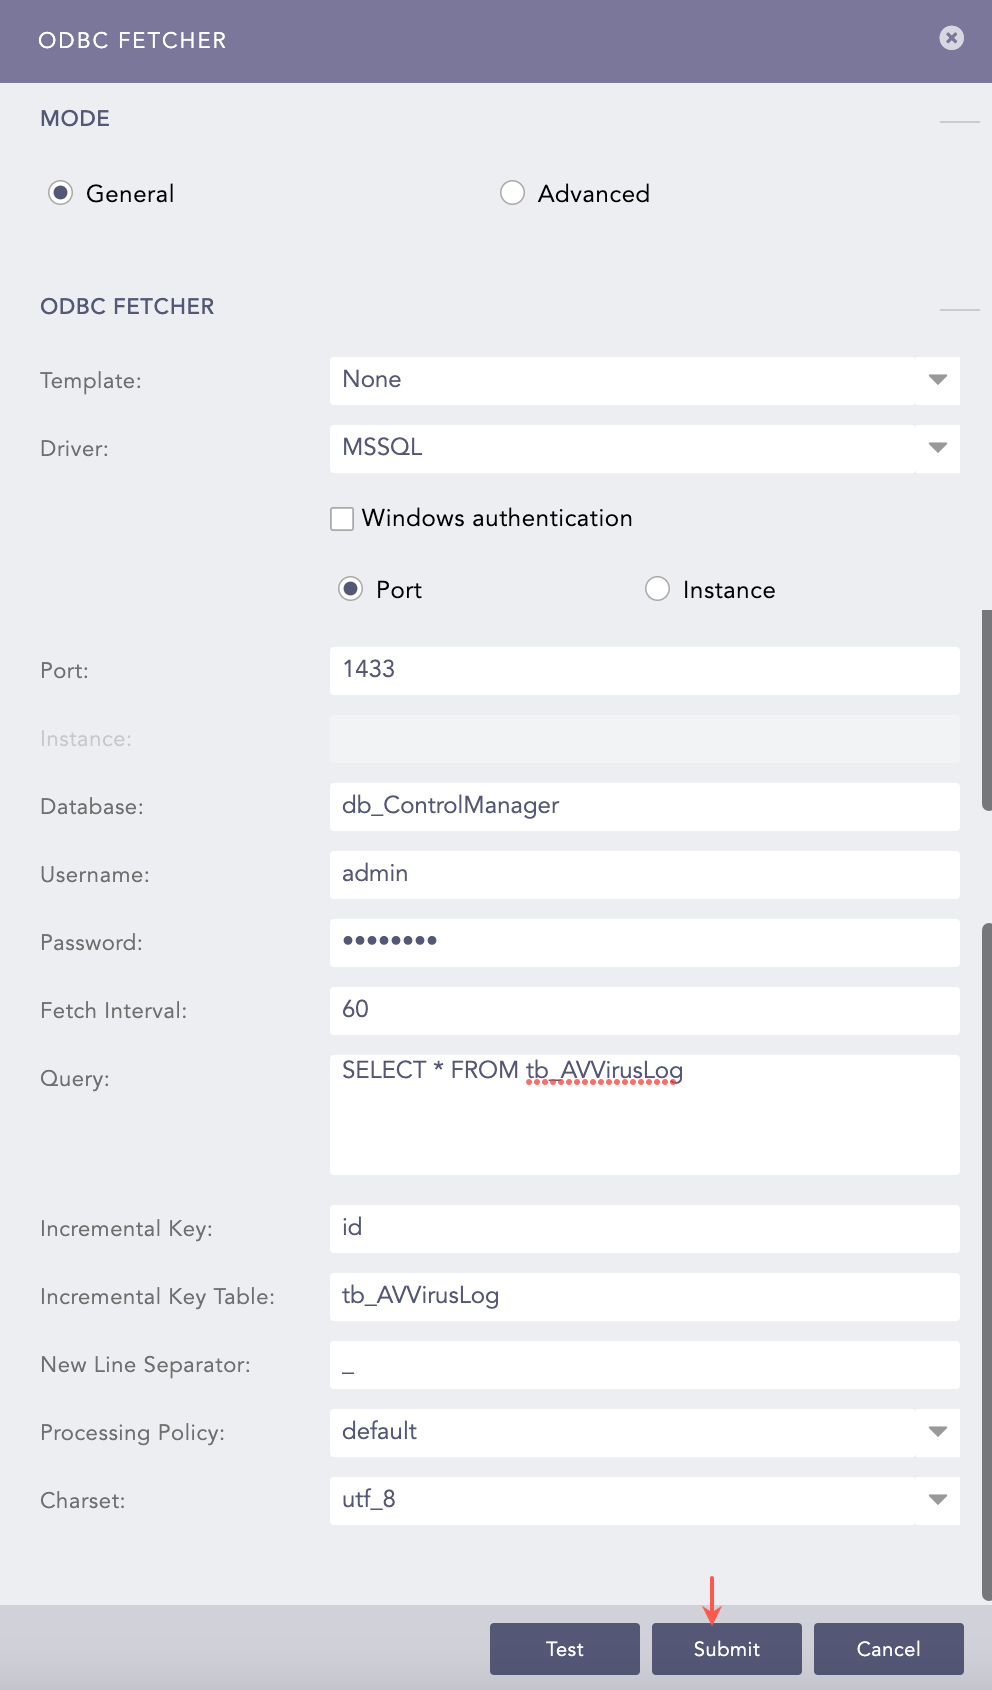
Configuring in General Mode with None Template
The template has predefined values for Driver, Database, Query, Incremental Key, Incremental Key Table and New Line Separator.
Select the Port option and enter 1433.
Enter the Username and Password.
Enter the Fetch Interval.
Select the previously created Processing Policy.
Click Test to validate the configuration.
Click Submit.
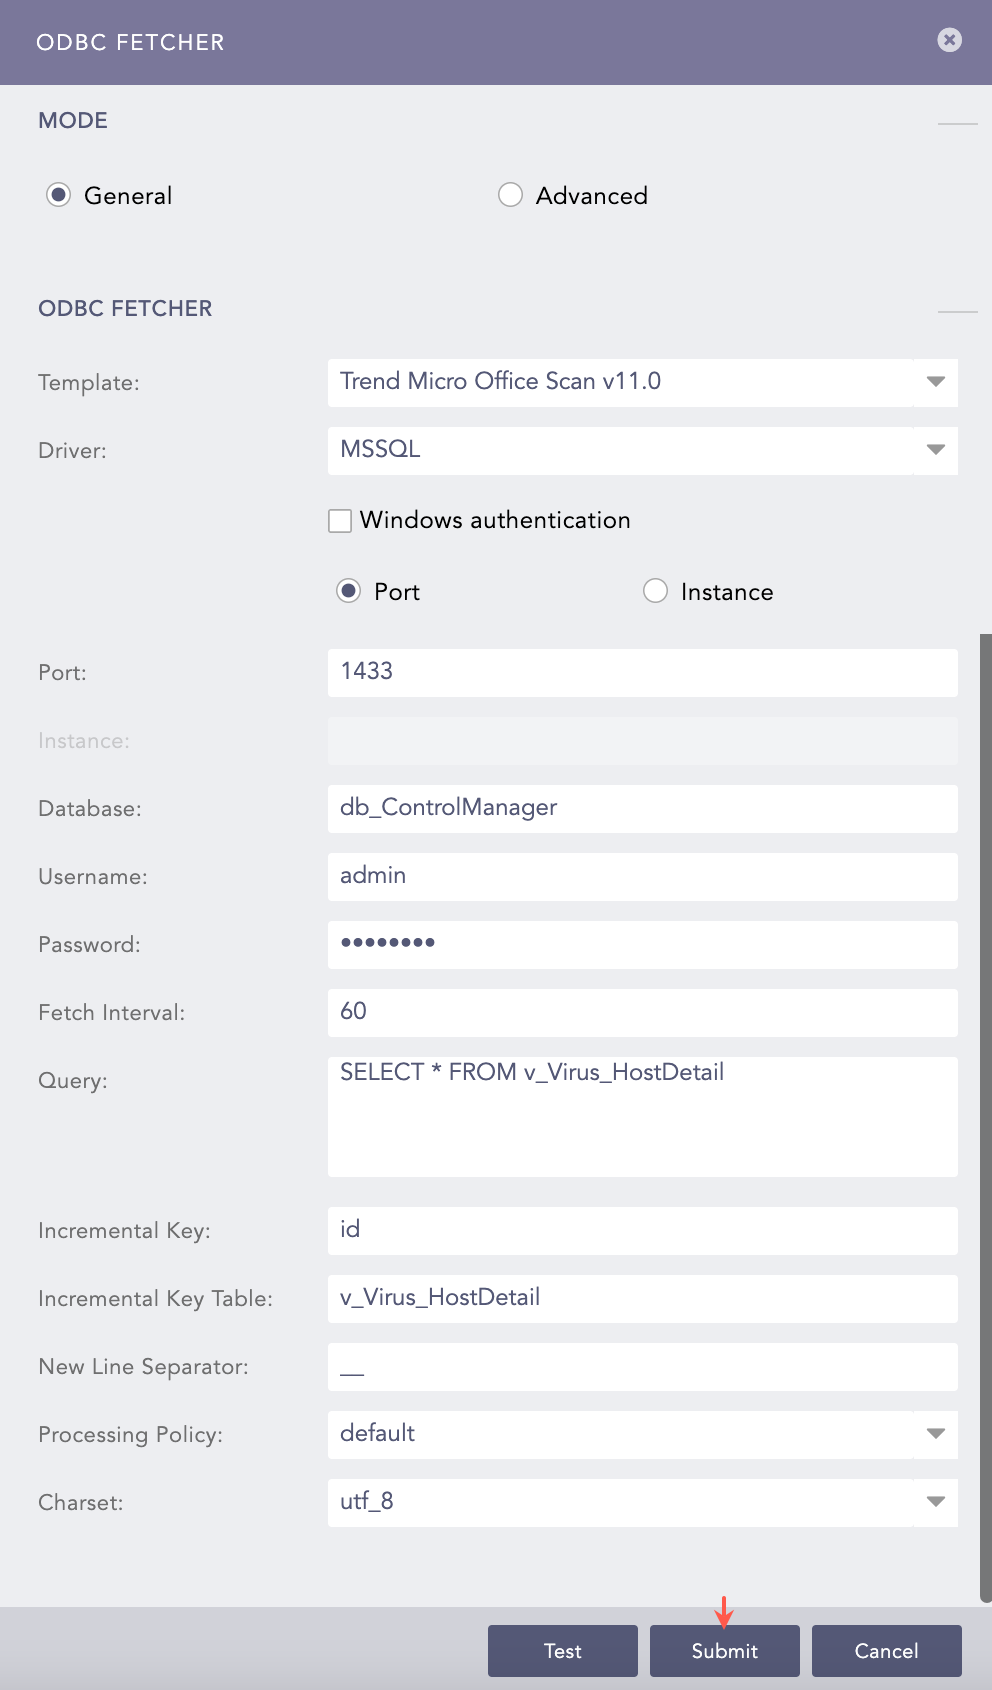
Configuring in General Mode with a Template
Note
The configuration for Advanced mode is similar to above.
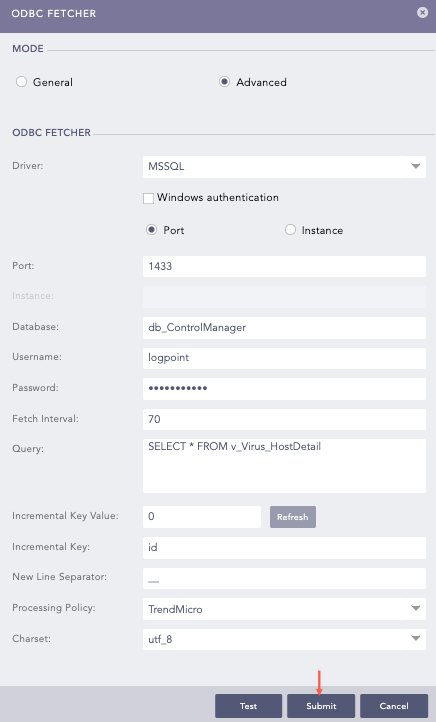
Configuring in Advanced Mode