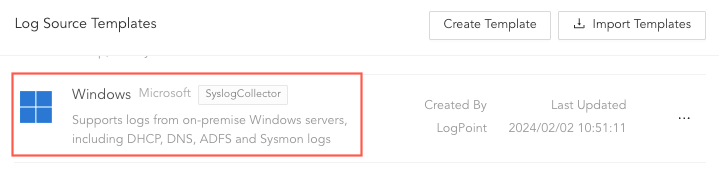
Log sources for Windows can be configured using Log Source Template or Devices. Log Source Template is recommended to minimize setup requirements and eliminate normalization issues.
You must create a log source using the log source template to receive the normalized Windows logs. Go to Creating Log Source via a Template to learn more.
Log Source Template
Go to Settings >> Configuration from the navigation bar and click Repos.
Click Add.
Enter a Repo Name.
Select a Repo Path to store incoming logs.
Set a Retention Day to keep logs in a repository before they are automatically deleted.
Note
You can add and remove multiple Repo Path and Retention Day.
Select a Remote LogPoint and set a Available for (day).
Click Submit.
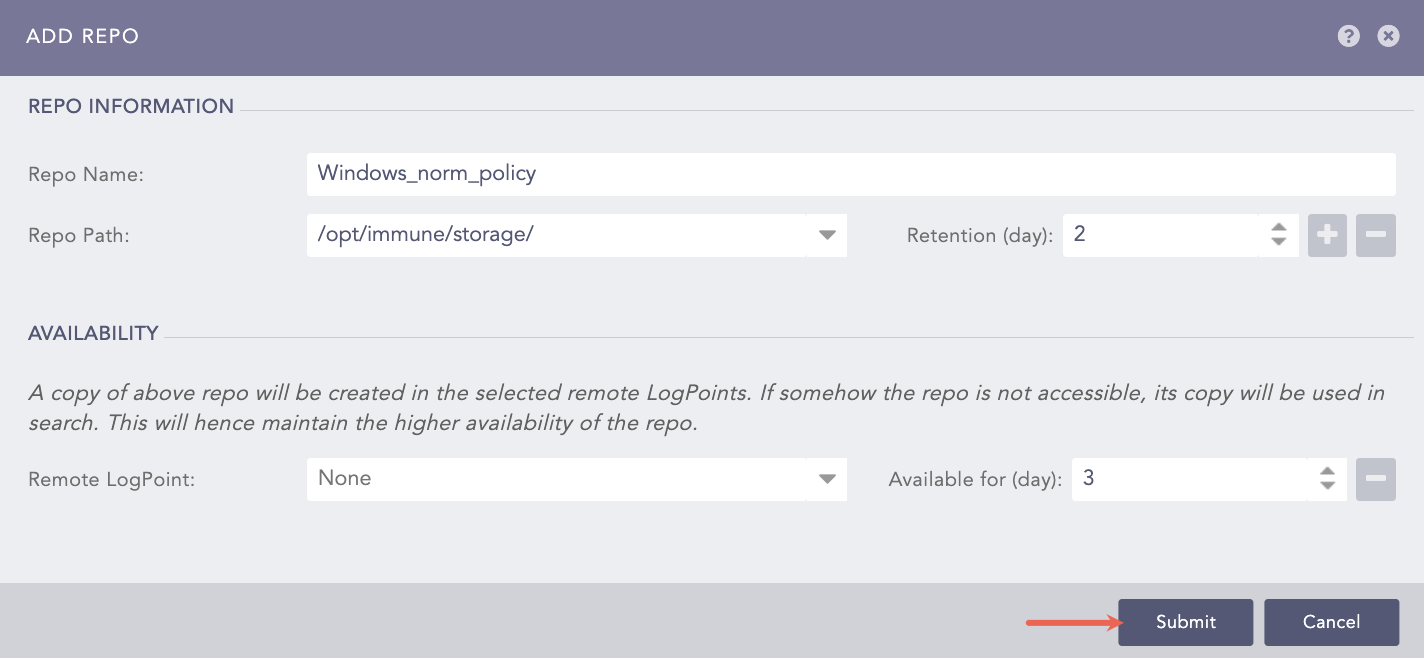
Adding a Repo
You must select the LPA_Windows compiled normalizer at last.
Go to Settings >> Configuration from the navigation bar and click Normalization Policies.
Click Add.
Enter a Policy Name.
Select all the Compiled Normalizers and Normalization Packages applicable for Windows.
For DNSCompiledNormalizer, you must install and configure CNDP to select a date format by saving the configuration. For other selected compiled normalizers, Logpoint interprets the date format. We recommend you select compiled normalizer(s) in the normalization policy based on your requirements.
DNSCompiledNormalizerEU supports DNS logs with:
The ISO date format: YYYY/MM/DD.
The European date format: DD/MM/YYYY.
Click Submit.
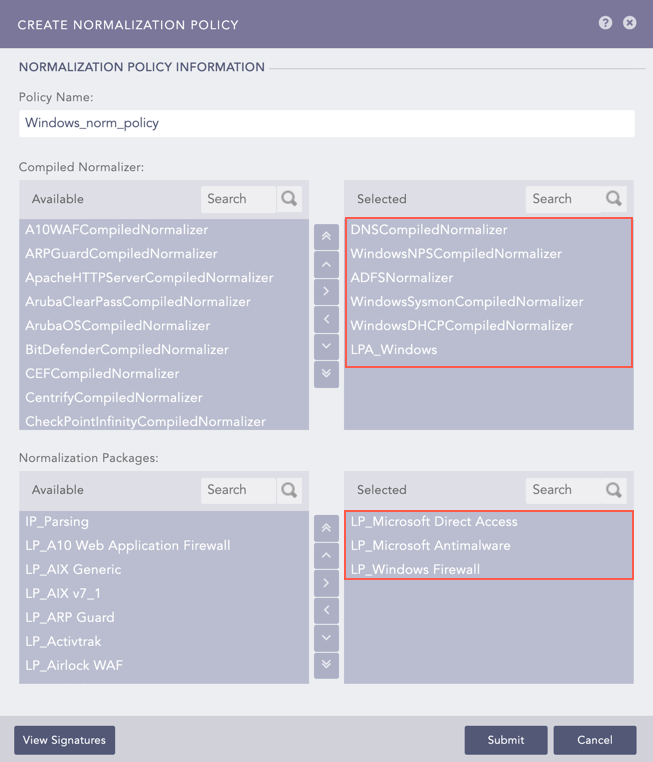
Adding a Normalization Policy
Go to Settings >> Configuration from the navigation bar and click Processing Policies.
Click Add .
Enter a Policy Name.
Select the previously created Normalization Policy.
Select the Enrichment Policy.
Select the Routing Policy.
Click Submit.
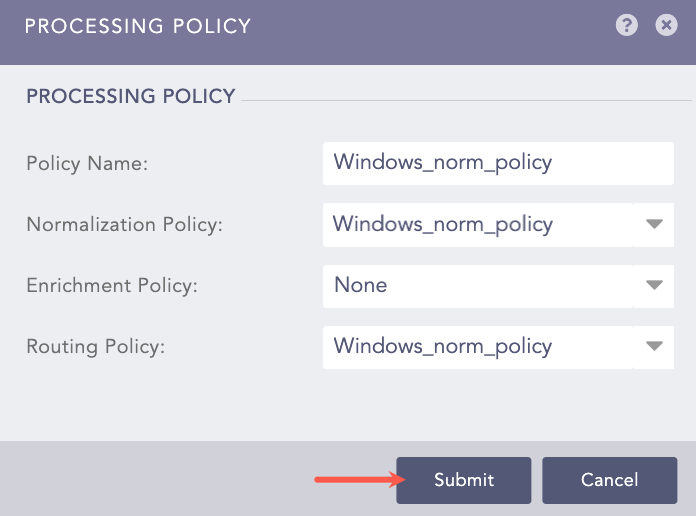
Adding a Processing Policy
Go to Settings >> Configuration from the navigation bar and click Devices.
Click Add.
Enter a device Name.
Enter the Windows server IP address(es).
Select the Device Groups.
Select an appropriate Log Collection Policy for the logs.
Select a collector or a forwarder from the Distributed Collector drop-down.
Note
It is optional to select the Device Groups, the Log Collection Policy and the Distributed Collector.
Select a Time Zone. The timezone of the device must be same as its log source.
Configure the Risk Values for Confidentiality, Integrity and Availability used to calculate the risk levels of the alerts generated from the device.
Click Submit.
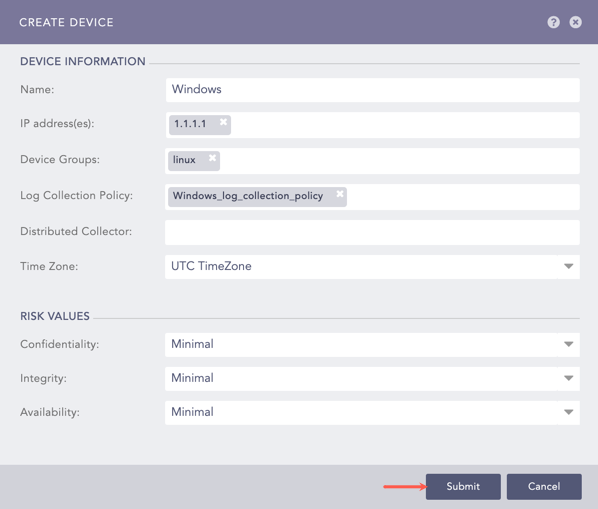
Adding Windows as a Device
Go to Settings >> Configuration from the navigation bar and click Devices.
Click the Add icon from Actions of the previously added device.
Click Syslog Collector.
Note
You can select a different collector depending on your requirements and added device. To learn more about available collectors go to collectors. If you require assistance, contact our support team.
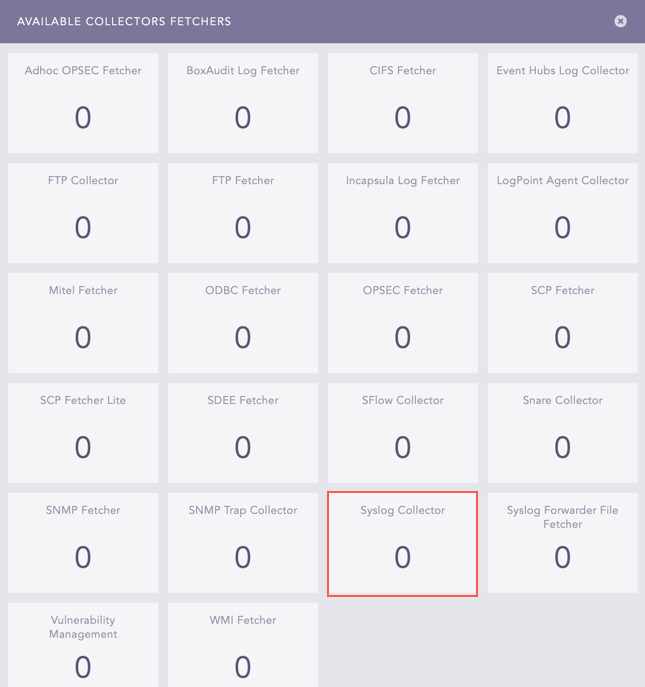
Selecting a Collector
Select Syslog Parser as Parser.
Select the previously created Processing Policy.
Select the Charset.
In Proxy Server, select None
Click Submit.
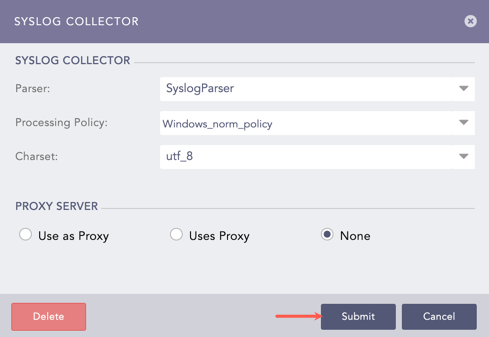
Configuring Syslog Collector
DHCP and DNS Servers record events in the Windows Event Logs under event log channels like DHCP-Server and DNS-Server. You can find these channels in your server’s Event Viewer. Select the required channels in AgentX to define the type of event logs to collect from Windows.

Viewing EventLog Channels
Go to Settings >> Configuration from the navigation bar and click AgentX.
You need to configure a template. Go to Templates to learn how to add a template. You must note the template name for later cofiguration.
Note
It is optional to add the File Collection, the File Integrity Scanner and the Windows Registry Scanner
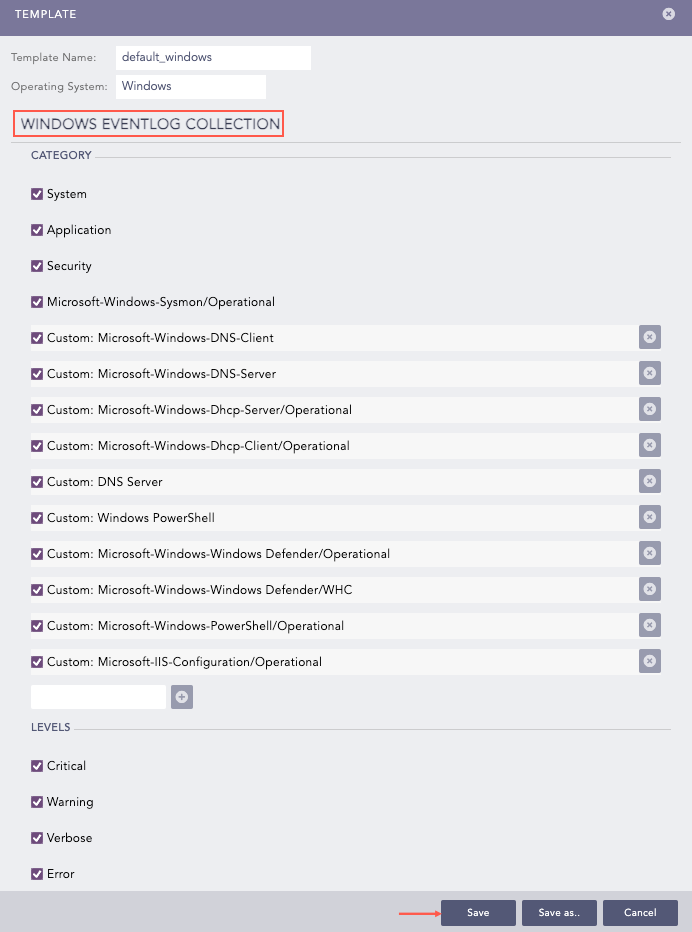
Saving Template
After saving the template,
Go to Settings >> Configuration from the navigation bar and click Devices.
Click Add collectors/fetchers from Actions of the Device for Windows.
Click AgentX.
Select utf_8 as the Charset.
Select the previously created Processing Policy.
Select the recently created Template.
Click Submit.
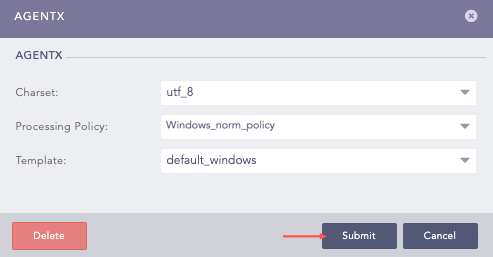
Configuring AgentX
Go to Settings >> System Settings from the navigation bar and click Plugins.
Search for LogPoint Agent Powered by NxLog and click Manage.
You need to configure a template. Go to Templates to learn how to add a template. You must note the template name for later cofiguration.
Note
It is optional to add the File Collection, the File Integrity Scanner and the Windows Registry Scanner.
After saving the template,
Go to Settings >> Configuration from the navigation bar and click Devices.
Click Add collectors/fetchers from Actions of the Device for Windows.
Click LogPoint Agent Powered by NxLog.
Select utf_8 as the Charset.
Select the previously created Processing Policy.
Select the recently created Template.
Click Submit.