Before installing or configuring Windows, you need to select the DHCP and DNS Server channels in Logpoint Agent in order to send Windows DHCP and DNS logs to your Logpoint Agent.
DHCP and DNS Servers record events in Windows Event Logs under event log channels like DHCP-Server and DNS-Server. These channels are in your server’s Event Viewer.
You must configure a static IP address to install DHCP and DNS Servers. Go to Set Static IP Address to learn how to do it.
Disclaimer
The documentation here are just examples and were made on Windows 11. If we mention specific software or operating systems, it’s only to explain things better.
DHCP log records DHCP Server actions, detailing IP address assignments and configurations for client devices. The log provides information about assignment time, IP and MAC addresses and lease duration, which you can analyze through the LP_Windows DHCP dashboard.
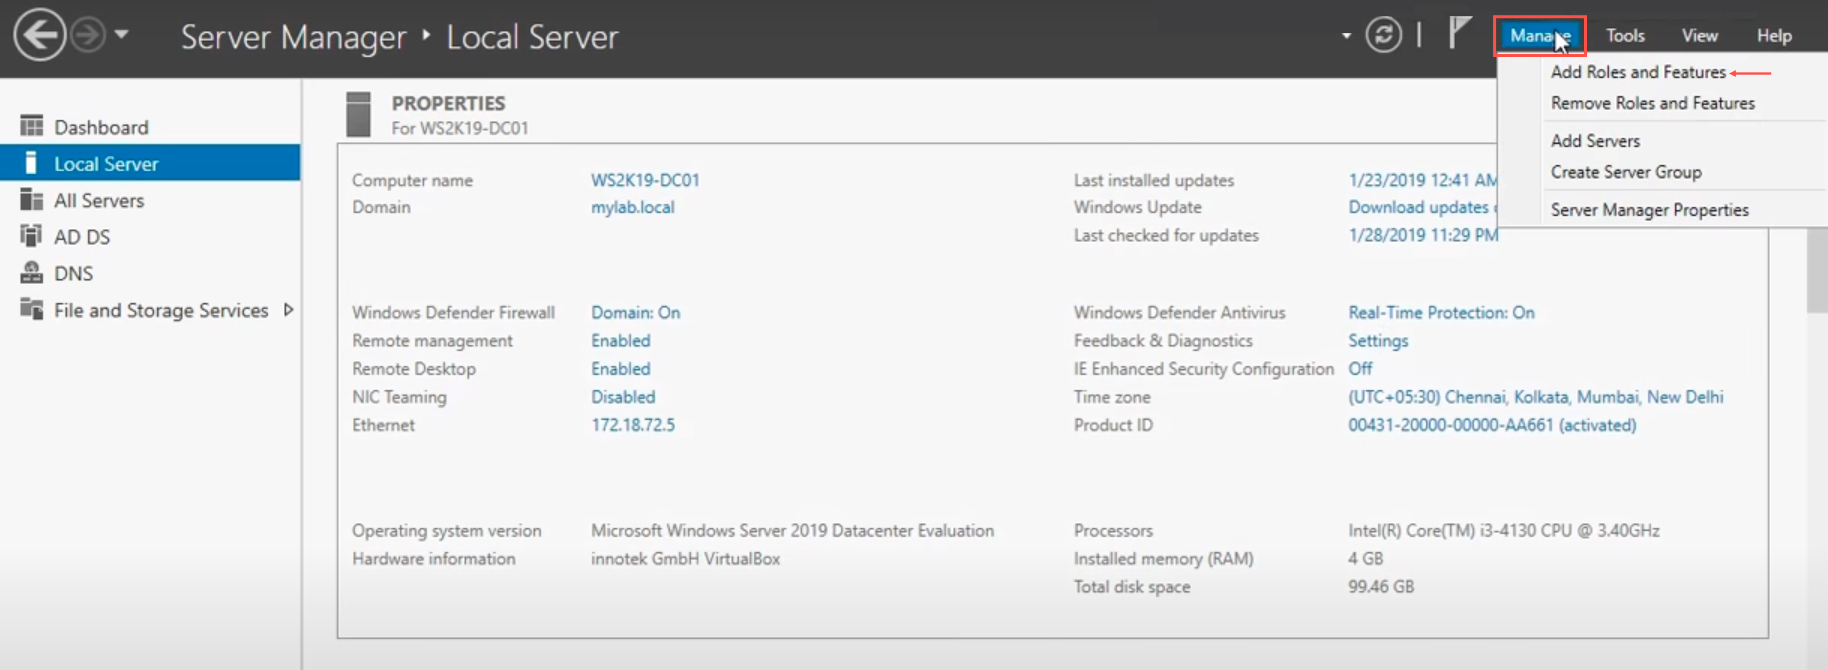
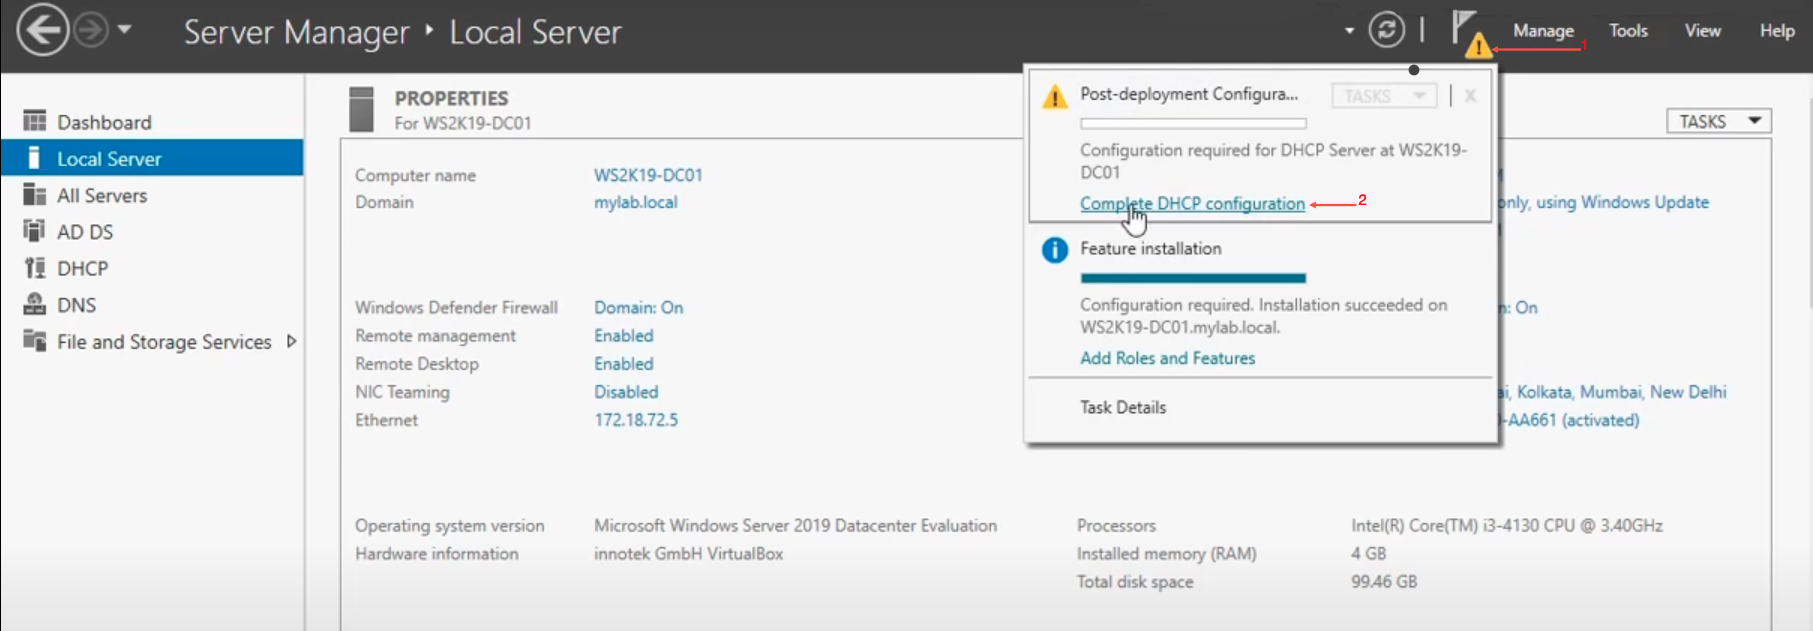
Go to Start >> Server Manager and click Manage.
Click Add Roles and Features.
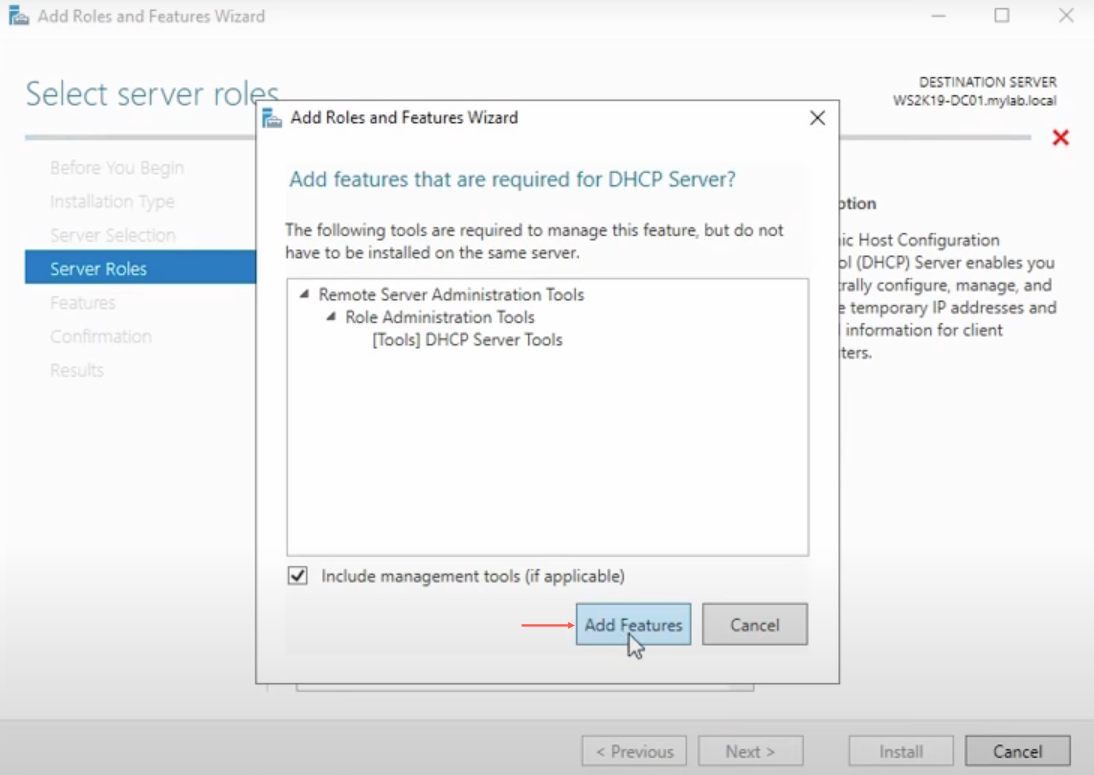
Click Next upto Server Roles and select DHCP Server.

Click Add Features.
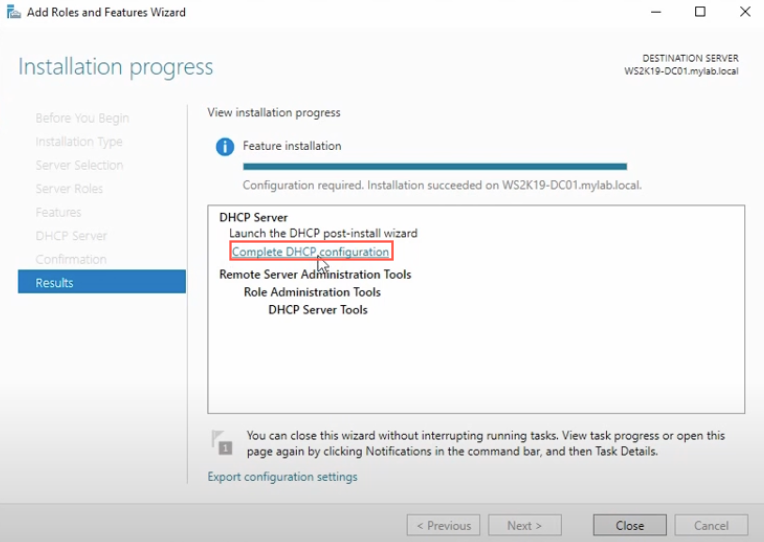
Click Next upto Confirmation and click Install.

Click Complete DHCP configuration.
Note
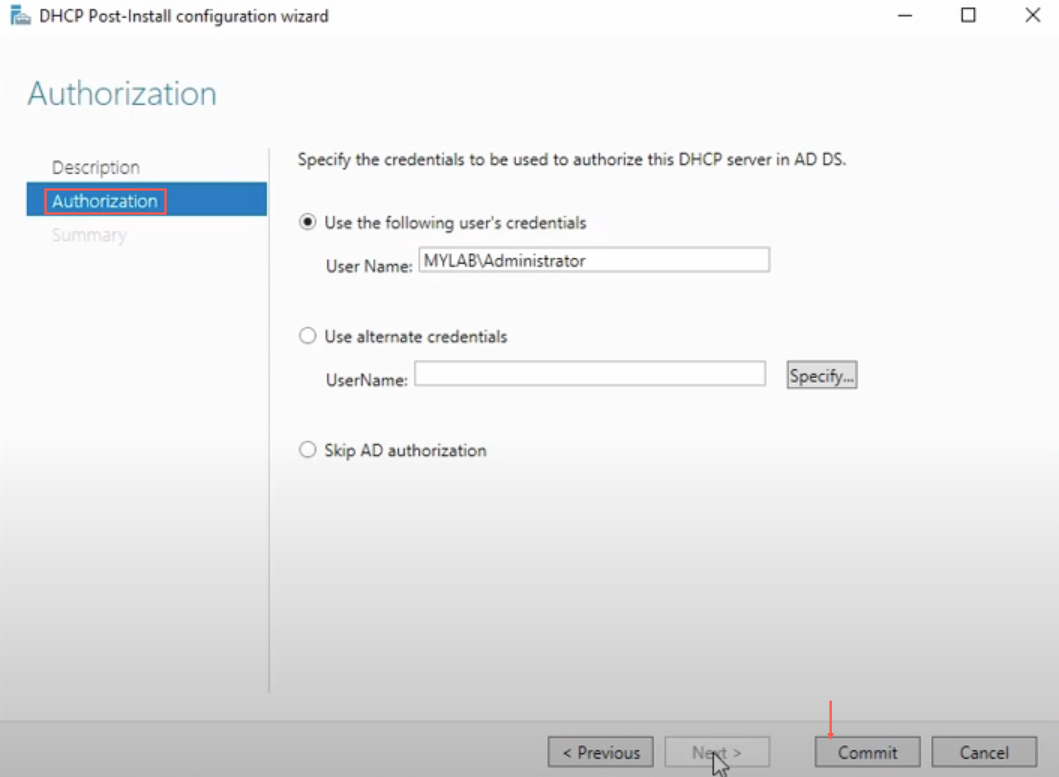
If you click Close by mistake, a notification appears on the left of Manage. Click Notification and Complete DHCP configuration to complete post deployment configuration.
Click Next to select Authorization and click Commit.
Click Close.
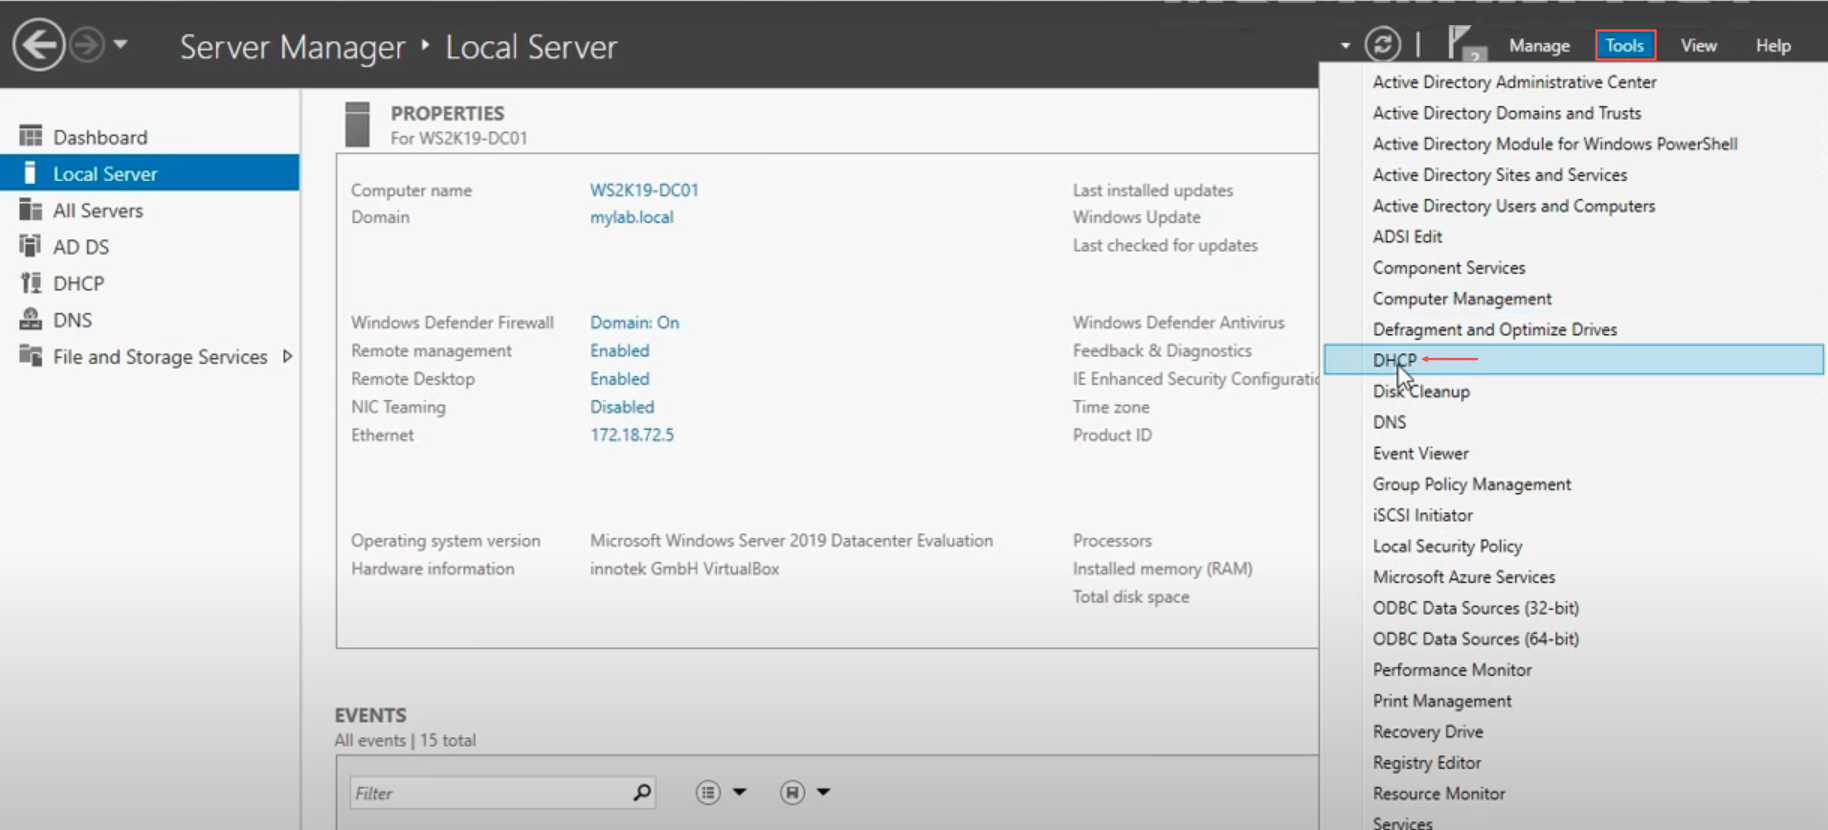
Go to Start >> Server Manager and click Tools.
Click DHCP to open the DHCP management console.
Right click the DHCP server drop-down. Your server is listed here. For example, ws2k19-dc01.mylab.local.
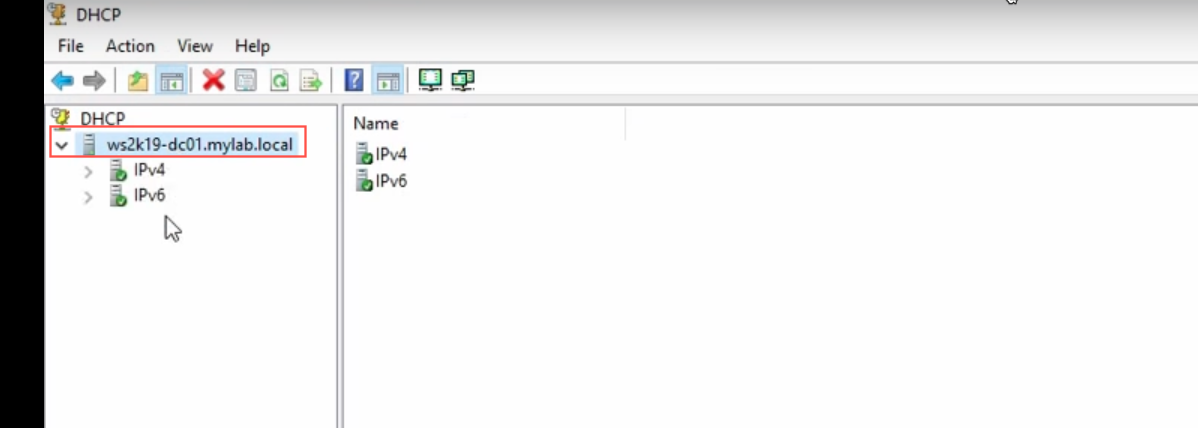
If you don’t have a green check mark on respective protocol name (IPv4 and IPv6).
Right click IPv4 and click Properties.
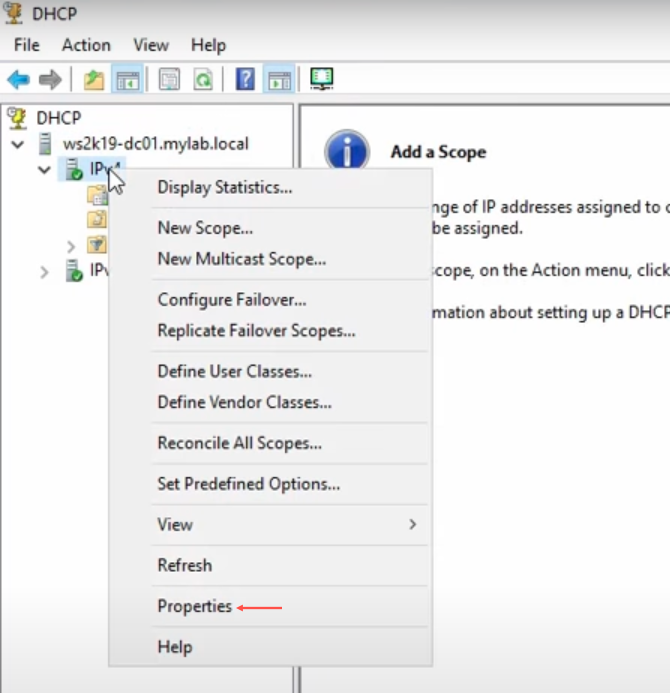
In General, select Enable DHCP audit logging.
Click OK.
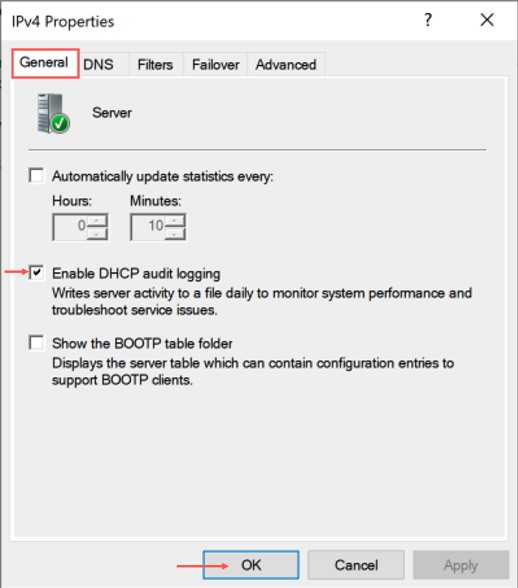
To change the default location path of logs,
Click Advanced.
Browse to your Audit log file path or enter the path. The file path is required for the configuration of Logpoint Agent File Collection in Logpoint.
Click OK.
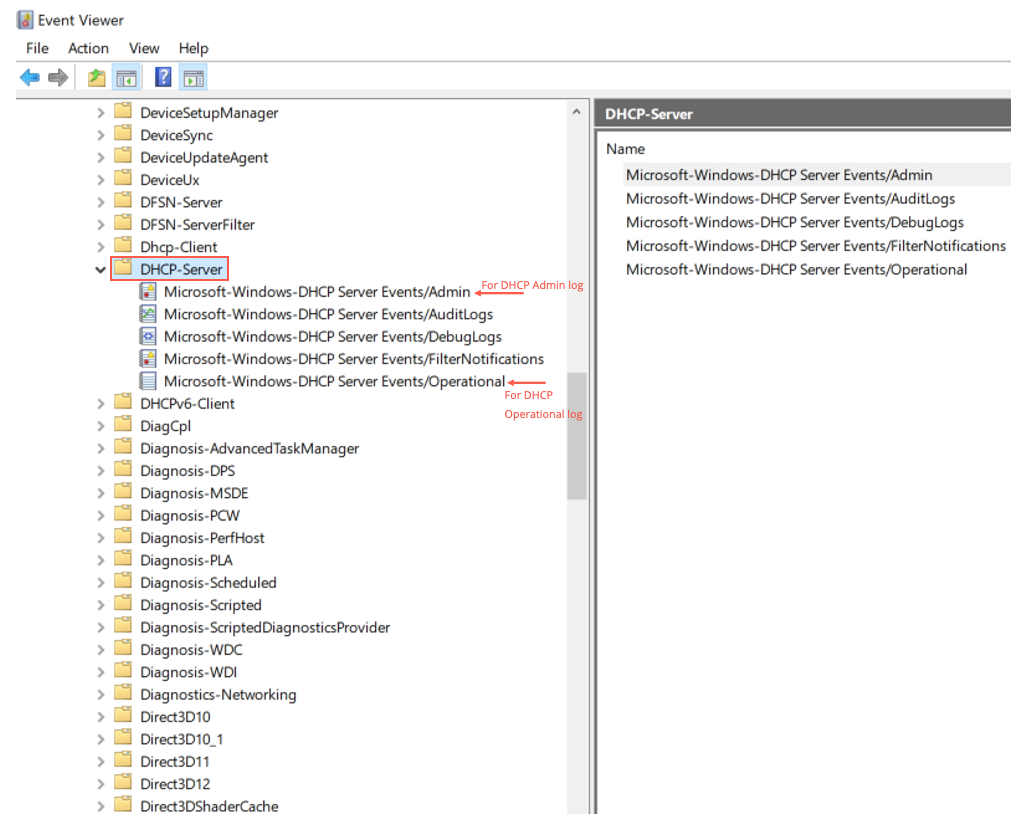
Open Event Viewer.
Go to Applications and Services Logs >> Microsoft >> Windows.
Click DHCP-Server drop-down.
For DHCP Operational logs, right click Microsoft-Windows-DCHP Server Events/Operational.
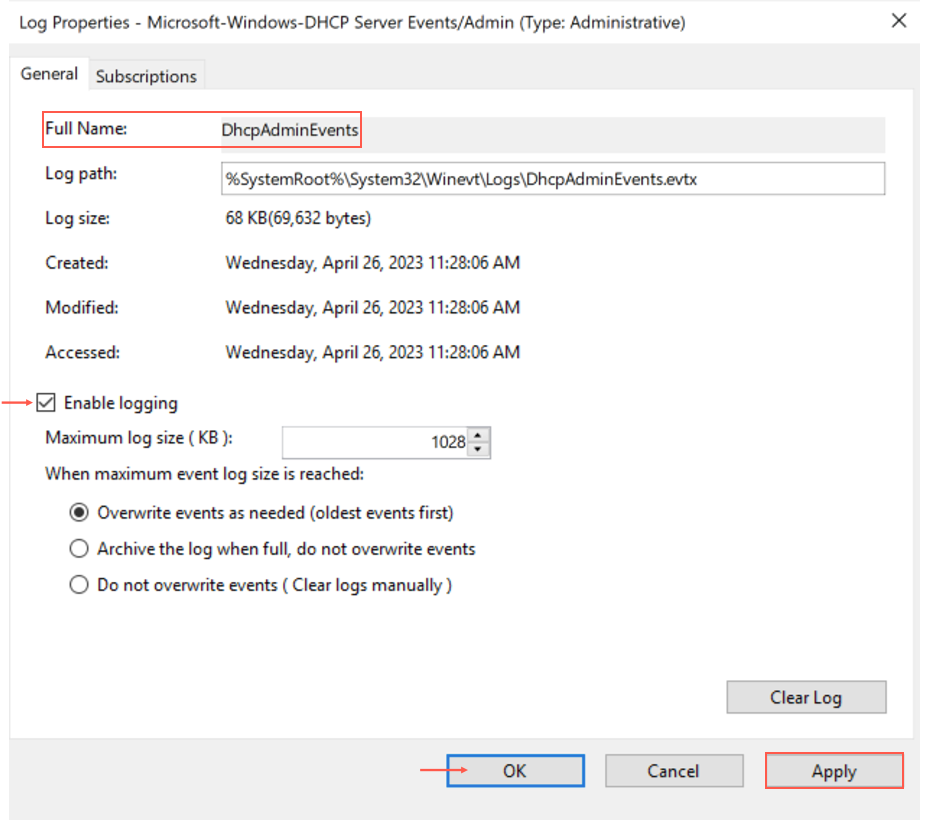
3.2 Click Properties.
3.3 In General, select Enable logging.
Important
You must note the Full Name of the event channel. It is required while you configure Logpoint Agent later.
3.4 Click Apply to save the configuration.
3.5 Click OK.
Enabling DHCP Admin Logging
DNS logs are maintained by DNS (Domain Name System) servers to record server activity, documenting both queries and responses. The logs provide information about the queries made to the DNS server and the responses the server gave, which you can analyze through the LP_Windows DNS dashboard. The logs contain details like query time, the domain name requested and the client’s IP address.
Go to Start >> Server Manager and click Manage.
Click Add Roles and Features.
Click Next upto Server Selection. In Server Pool, make sure correct server is selected.
Click Next to Server Roles and select DNS Server.
Click Add Features.
Click Next upto Confirmation and click Install.
Click Close.
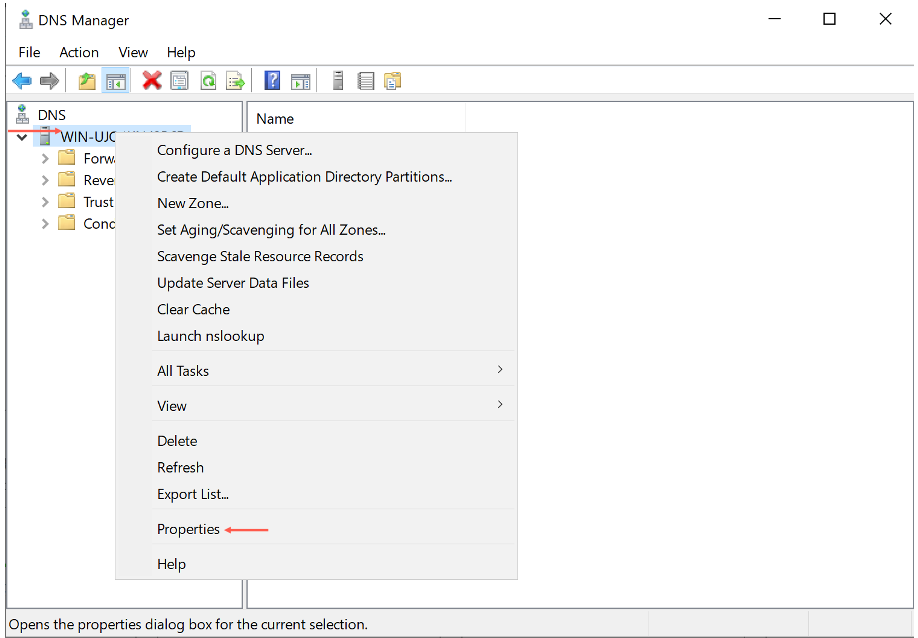
Go to Start >> Server Manager and click Tools.
Click DNS.
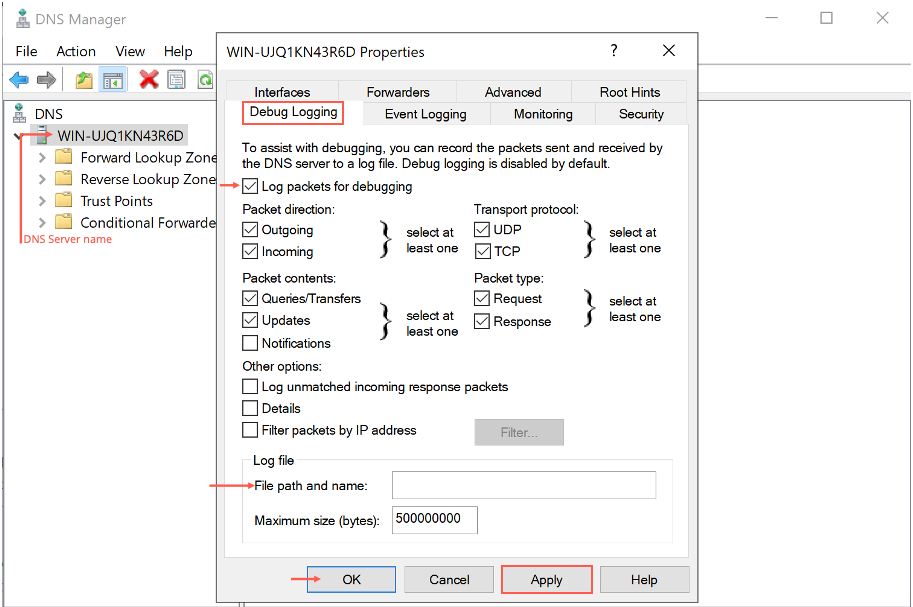
Right click the DNS server name and click Properties.
In Debug Logging, select Log packets for debugging.
Enter your File path and name to save the logs at. For example, C:\logpoint.
Click Apply to save the configuration.
Click OK.
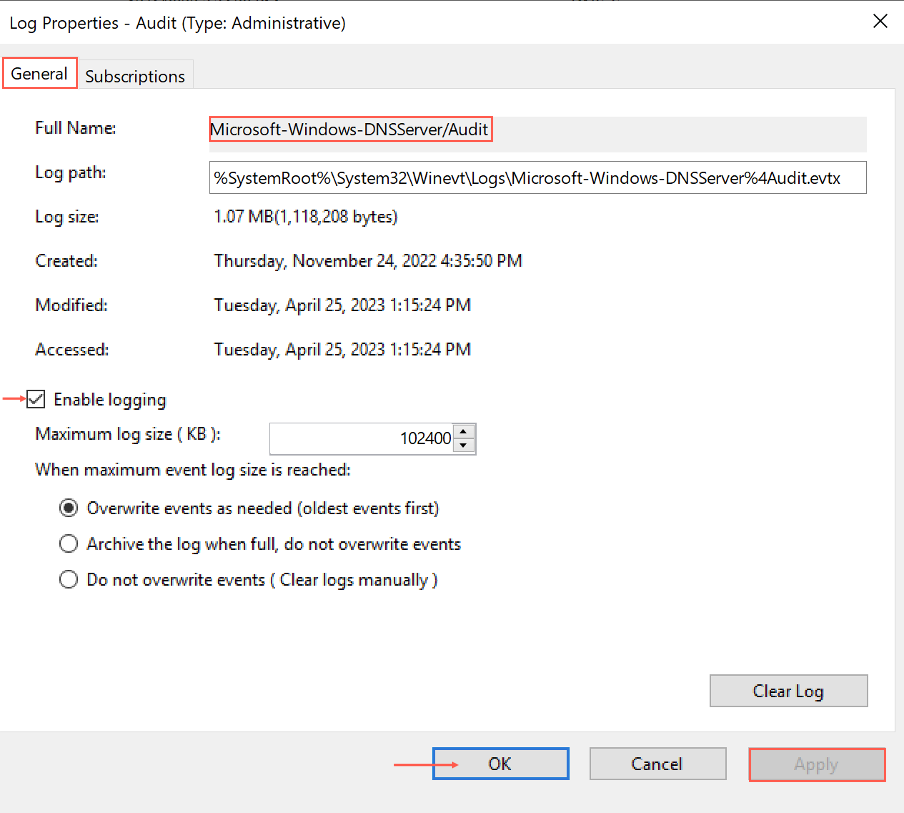
Open Event Viewer.
Go to Applications and Services Logs >> Microsoft >> Windows and click DNS-Server drop-down.
Right click Audit and click Properties.
In General, select Enable logging. You must note the Full Name of the event channel required while configuring Logpoint Agent.
Important
The Log Path is required while configuring NXLog.
Click Apply to save the configuration.
Click OK.
After receiving DHCP and DNS logs in the provided path, you must configure NXLog to forward logs to Logpoint. Go to NXLog Sample Configuration to learn how to configure.