Initial SaaS Setup
Install the Cloud Connector
Before you get started, ensure you have:
Logpoint 7.2.0 or later.
Cloud Connector license. Contact Logpoint sales to receive the license.
A full Logpoint SaaS installation.
Download and install on your main Logpoint server or instance. Do not install it on a collector node.
Download the .pak file from the Marketplace.
Use the Cloud Connector Appliance Sizing Helper to estimate your hardware requirements.
Go to Settings >> System Settings from the navigation bar and click Applications.
Click Import.
Browse to the downloaded .pak file and click Upload.
After installing it, you can find it under Settings >> System Settings >> Plugins.
Upload the license
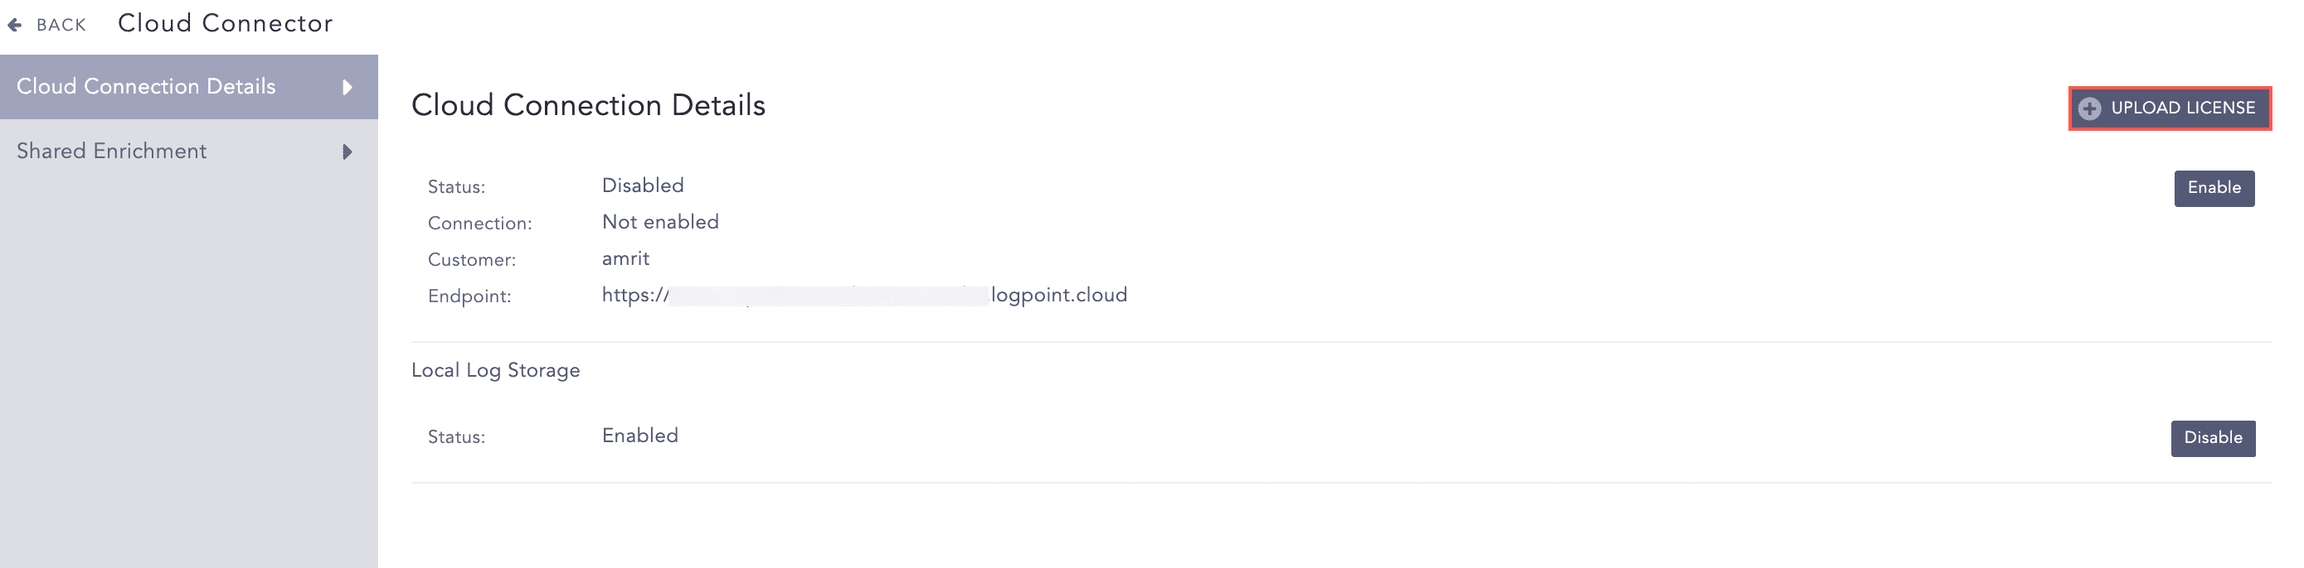
Go to Settings >> Configuration from the navigation bar and click Cloud Connector.
Click Cloud Connection Details.
Click UPLOAD LICENSE.
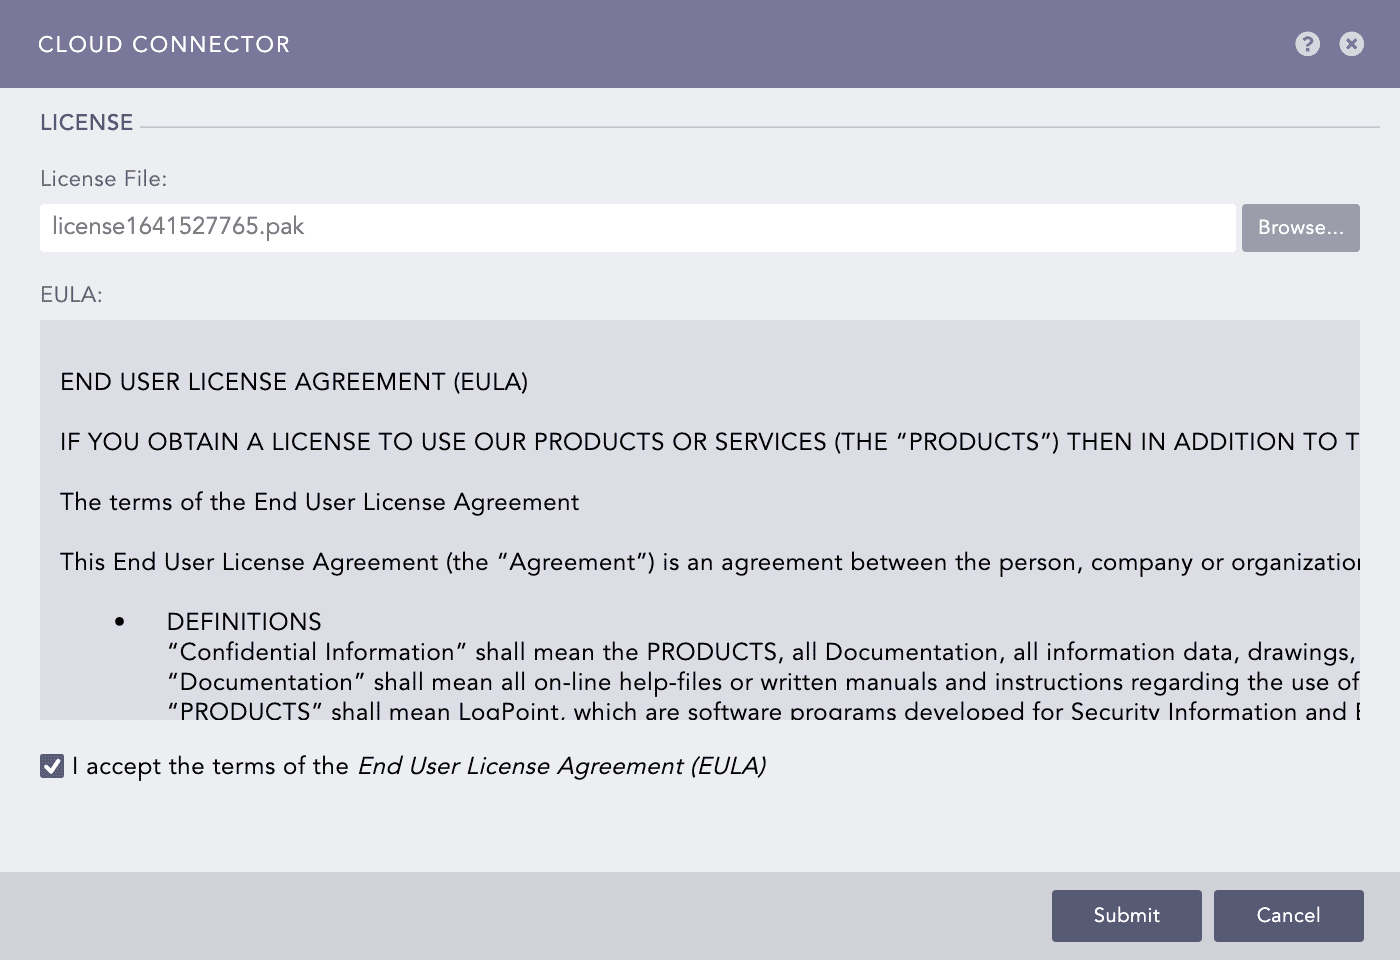
Browse to the location of your license key and click Open.
Accept the terms and conditions of the END USER LICENSE AGREEMENT (EULA).
Click Submit.
Click Enable.
Disable local log storage
Disable local log storage on the instance or server you will install the cloud connector. This is important to make sure the Cloud Connector doesn't run out of disk space. By default, local log storage is enabled.
Go to Settings >> Configuration from the navigation bar and click Cloud Connector.
Click Cloud Connection Details.

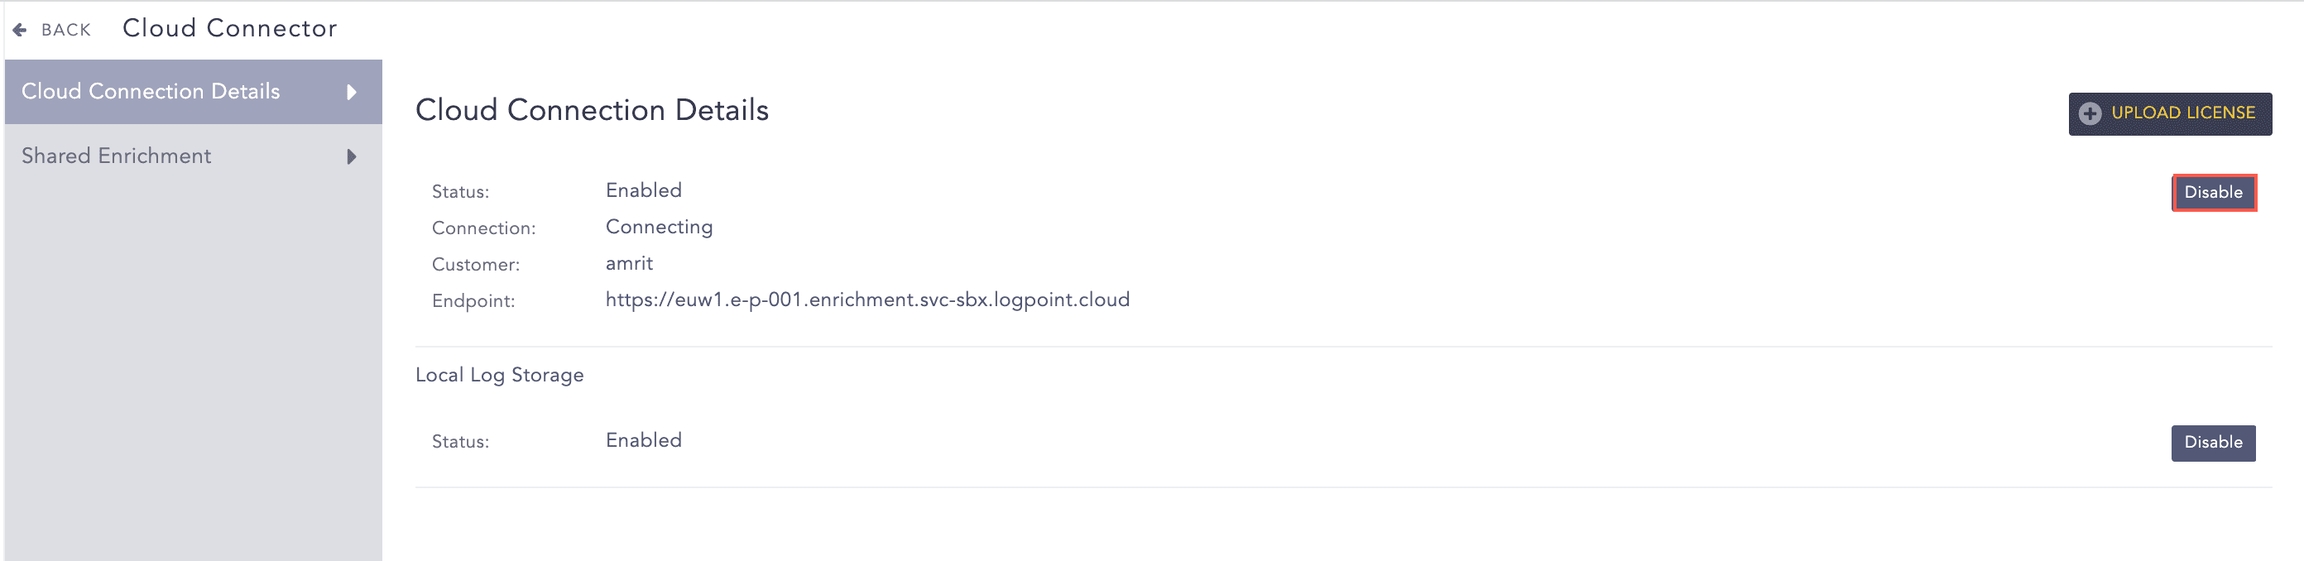
In Local Log Storage, click Disable.
Enable the connection
You must actively enable the connection between your On-prem cloud connector and your SaaS instance.
In your On-prem Logpoint server or instance, go to Settings >> System Settings >> Plugins.
Find or browse to Cloud Connector.
Click Cloud Connection Details.
Click Enable.
Check the connection
Find or browse to Cloud Connector.
Click Cloud Connection Details.
Status meanings:
Connecting: Establishing a connection with Logpoint SaaS’s data ingestion endpoint.
Connected: Successfully connected to Logpoint SaaS’s data ingestion endpoint.
Not Connected: Network errors are preventing a connection to the Logpoint SaaS’s data ingestion endpoint. Possible network errors include:
Cannot reach the server <server name> : Logpoint SaaS’s data ingestion endpoint server is not reachable.
Invalid Certificate: The request could not be authenticated.
Service Unavailable: The server failed to fulfill a request.
Internal Error: Issues with internal network sockets or issues with error codes other than 2xx, 4xx, and 5xx.
<Exception Name>: Any other potential issue.
Configure the repos
A repository or repo is a log storage location where device logs are routed to. When you setup or run a search query, you select which repos to run the search on. You use repo properties to setup how long log data is stored until its automatically deleted, which storage tier to use, where log data is potentially moved to, and whether the data is replicated using Logpoint High Availability. Repos, are different from actual storage volumes. A server can have multiple disks or volumes. These volumes will have the same or different mount points. While repos are logical volumes within Logpoint, a repo can use multiple storage tiers located on one or more of the underlying volumes.
Configure the repositories in the On-prem cloud connector and SaaS. The number of cloud-based SaaS repos and their names must match those configured on your On-premise Logpoint’s cloud connector. You need the same number of repositories with the exact same names. The retention time for the repo in searchable storage is set as per your retention policy in your contract agreement.
If the repositories are not configured this way, logs are discarded and data is lost.
Configure repository storage tiers according to your retention policy agreement. Repositories have two storage tiers for stored log information:
Hot storage tier at /opt/immune/hot-storage
Warm storage tier at /opt/immune/warm-storage
Setup Enrichment
Set up Enrichment between your On-prem Logpoint Enrichment Sources and SaaS to enable sharing enrichment sources between an On-prem and SaaS Logpoint. Currently, CSV, LDAP, and ODBC enrichment source types are supported.
Check Enrichment Source status
Check or confirm the Enrichment Source status to make sure logs are being enriched. See the Enrichment section below for status meanings.
Manage SaaS Users
Manage your SaaS Users through User Access Management (see User Access Management section below).
Adding a Routing Policy
Go to Settings >> Configuration from the navigation bar and click Routing Policies.
Click ADD POLICY.
Click the ? symbol near the top-right corner for context-sensitive help.
Enter a Policy Name.
Select a repo from Catch All. If an incoming log does not match any routing criteria, it gets stored in the Catch All repo.
In Type, use:
KeyPresentValueMatches: routes the log files if they match a Key-Value pair.
KeyPresent: routes the log files if a specific key matches.
Choose an Operation:
Store raw message: to store both the raw message and the normalized data in the target repository.
Discard raw message: to discard the raw message and store the normalized data.
Discard entire event: to discard both the raw message and the normalized data.
In the Routing Criteria dropdown, select the target Repository.
Click Add. When you change a criterion, it is listed in the table below the Routing Criteria. The priority of the routing criteria can be changed by clicking the up and down arrows in Actions.
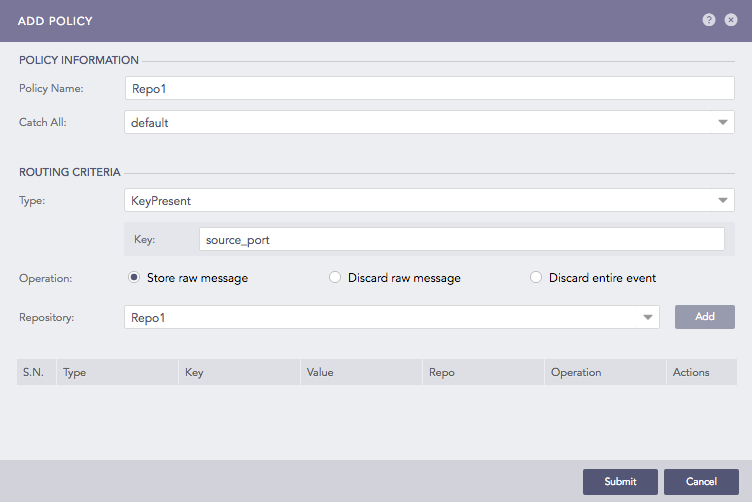
Click Submit.
Enrichment
Forwarding Enrichment Sources to Logpoint SaaS
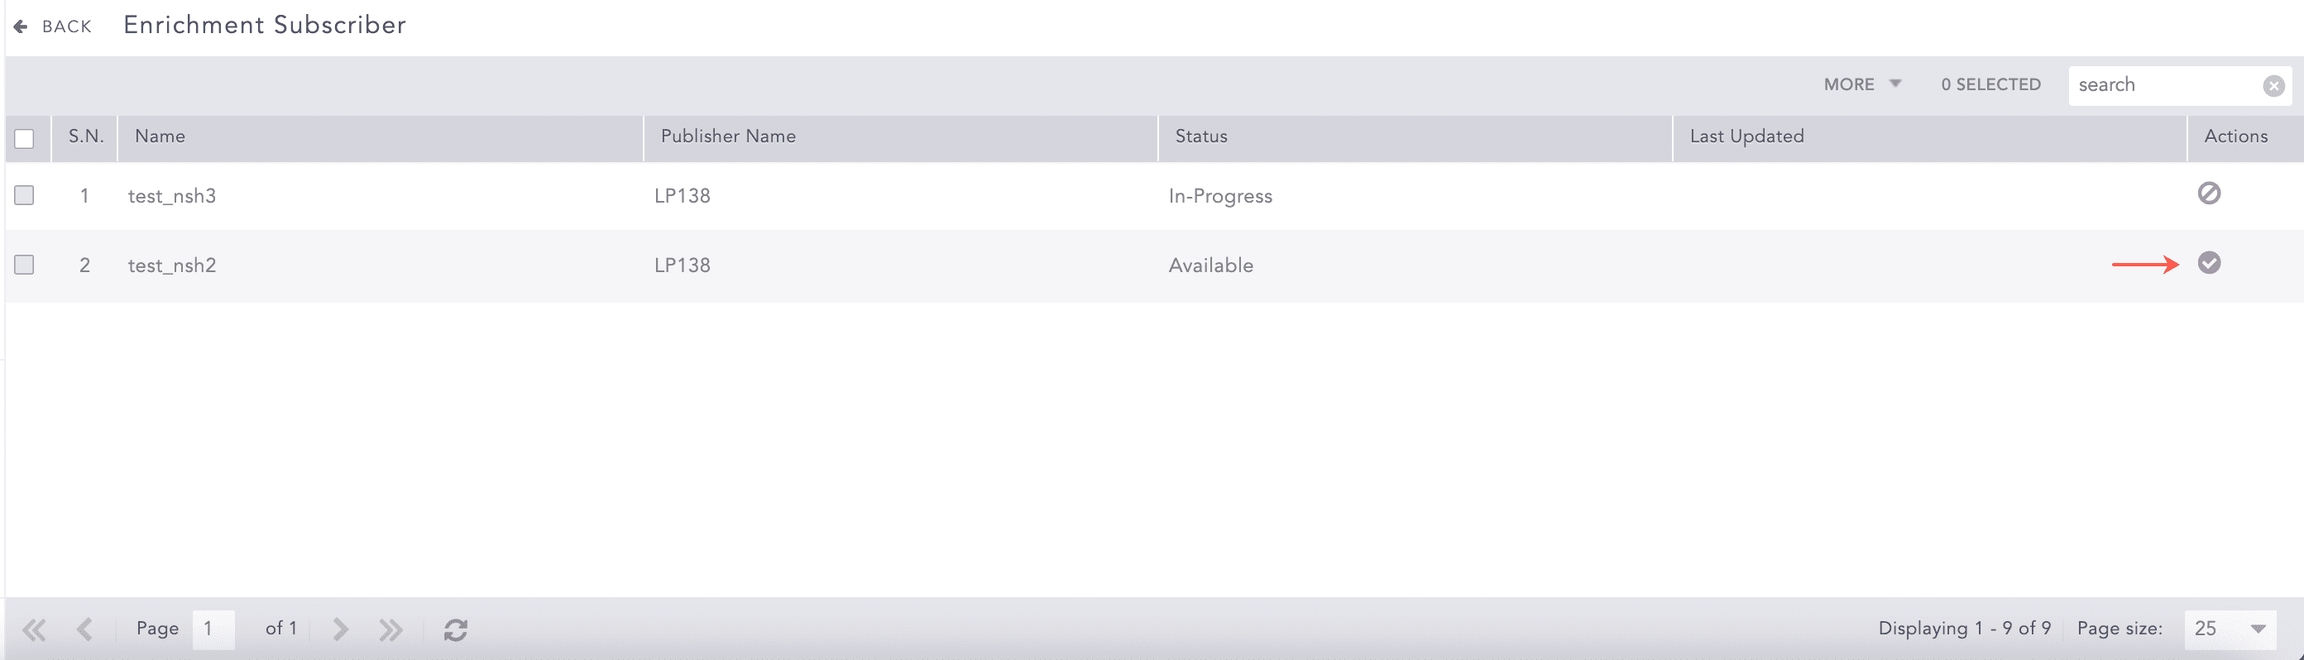
Go to Settings >> Configuration from the navigation bar and click Enrichment Subscriber.
On the page, you will see the list of all the available enrichment sources.
To use a single enrichment source:
Find it in the list and click the Subscribe
 icon under Actions of the enrichment source.
To use multiple enrichment sources:
Select them, click the More dropdown and click Subscribe Selected.
To subscribe all enrichment sources:
Click the More dropdown and select Subscribe All.
Checking Enrichment Source Status
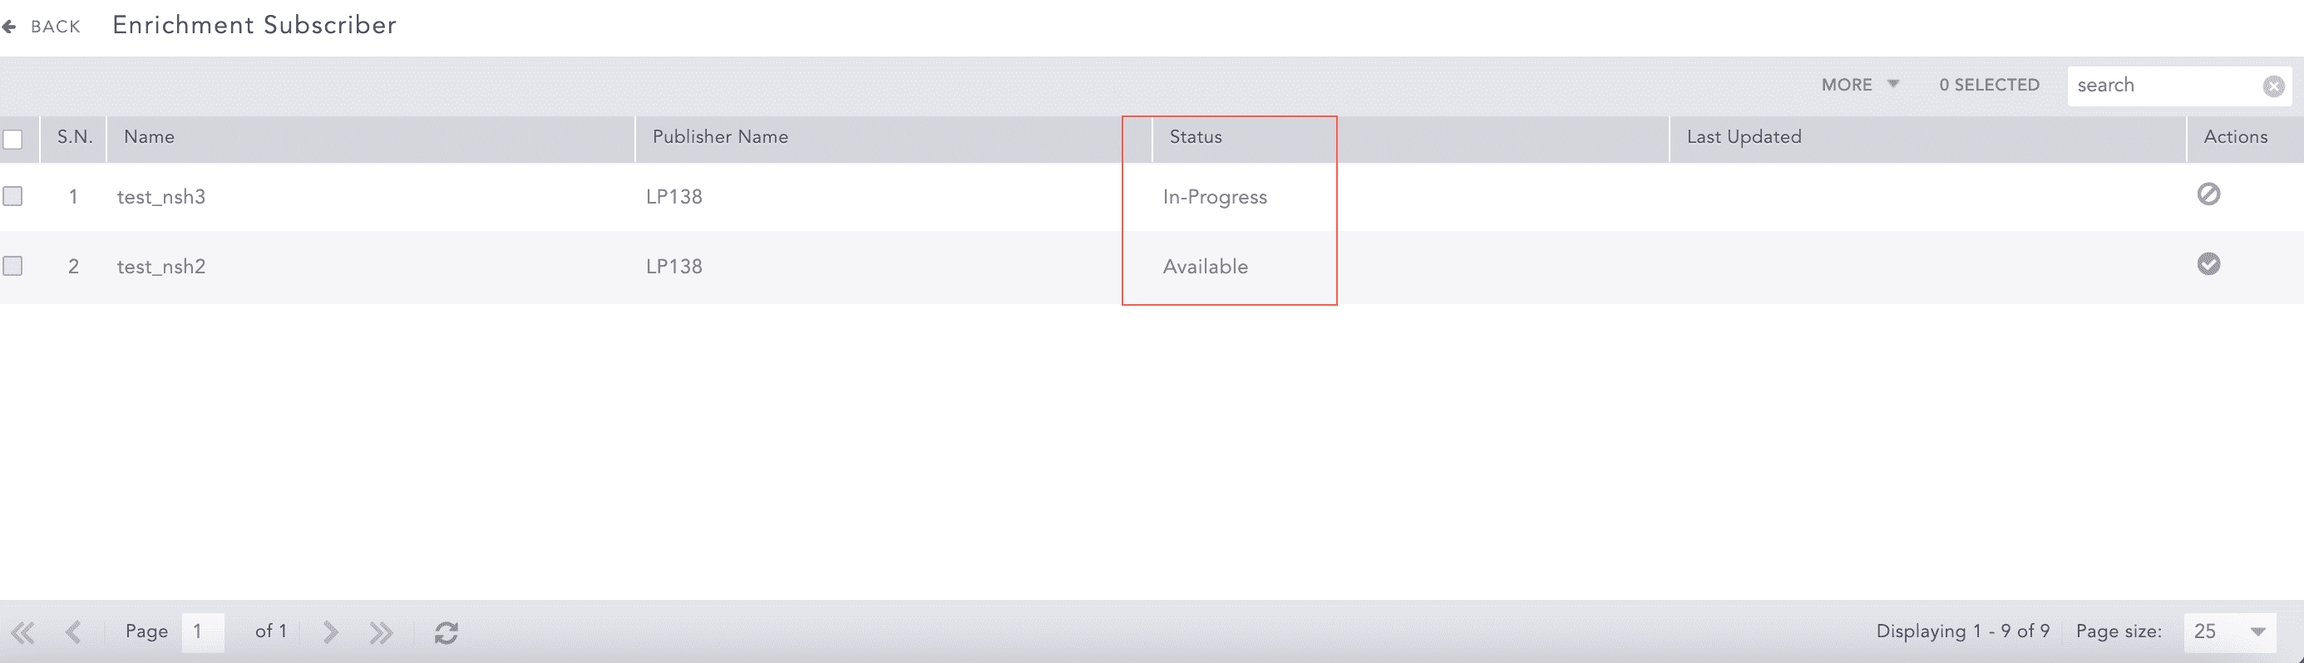
Go to Settings >> Configuration from the navigation bar and click Enrichment Subscriber.
Find the Enrichment Source in the list, and in the Status column the enrichment source is:
Available: The enrichment source is ready to be forwarded to Logpoint SaaS.
In-Progress: Enrichment Subscriber is working on your request to forward or remove the enrichment source.
Subscribed: The enrichment source is forwarded to Logpoint SaaS.
Duplicate: The enrichment source with the same name is already forwarded to Logpoint SaaS.
Failed: The enrichment source forwarding has failed.
Deleted: The enrichment source is subscribed but not available on the Logpoint SaaS.
Removing Enrichment Sources from Logpoint SaaS
Go to Settings >> Configuration from the navigation bar and click Enrichment Subscriber.
Click the Unsubscribe (
 ) icon under Actions of the enrichment source.
The enrichment source is now removed from Logpoint SaaS. You can also select all the enrichment sources and remove them at once by clicking the More dropdown and selecting Unsubscribe All. To remove only the selected enrichment sources, click the More dropdown and select Unsubscribe Selected.
User Access Management
If you are a Logpoint Administrator or a User Account Administrator, you can add a new user, assign them to a user group, update an existing user, and delete a user.
You administer users from the Logpoint Portal. You manage Permission Groups and User Groups inside the SaaS instances.
If you are an MSSP user, you must create the Permission Groups and User Groups within the SaaS instance to create the new user.
Adding a New User
Log in to your SaaS instance.
Click the
 icon on the navigation bar.
Click Add User on the top right.
Enter an E-mail address.
Enter First Name and Last Name.
Select an instance from Instances.
Select user group(s) from User Groups.
Click Save.
Updating a User
Click the
icon on the navigation bar.Click the user to edit and make the changes.
Click Save.
Deleting a User
Click the
icon on the navigation bar.Click the user to delete and click Delete.
Was this helpful?