Data Privacy
Data Privacy ensures that only authorized users can access sensitive information. It encrypts specific values in log results so only users with the right permissions can access the actual data. For example, only users within a specific user group can see a username in the log, while members of another user group see the username encrypted.
An admin user:
Activates Data Privacy
Selects which fields to encrypt. An admin user can manually select the fields or upload a .csv file with the fields. Make sure the file is in .csv format.
Creates the User Groups, or which users can request access and which users can grant access.
Users to view encrypted data:
Are part of a Can Request Access user group.
Send a request.
Check if the request is approved and view the data.
Users who grant access:
Are part of a Can Grant Access user group.
Receive a request notification.
Approve or reject the request.
Activating Data Privacy
You must setup SMTP before activating data encryption or data privacy.
In the navigation bar, go to Settings >> System Settings>> System Settings.
Click Data Privacy Module.
Select Enable Data Privacy Module.
In Encryption Scheme, select:
Simple for encoding less critical fields where speed and low processing overhead are essential. Enter an Encryption Key. After upgrading to Logpoint v7.8.0, users who were using the simple encryption scheme will have an automatically generated encryption key. You can update it from here.
Do not use this if your goal is to encrypt the fields with industry standard encryption, as it only obfuscates the fields in the UI from low-privilege users.
Complex to apply industry standard encryption to the fields. Use this for confidential data. It ensures a higher level of data privacy and requires additional computational power.
Enter an Encryption Key to encrypt the field data.
To encrypt fields,
Enter the names of the fields Add.
Upload a .csv file. The format of the file needs to include the column headers you see in the GUI.
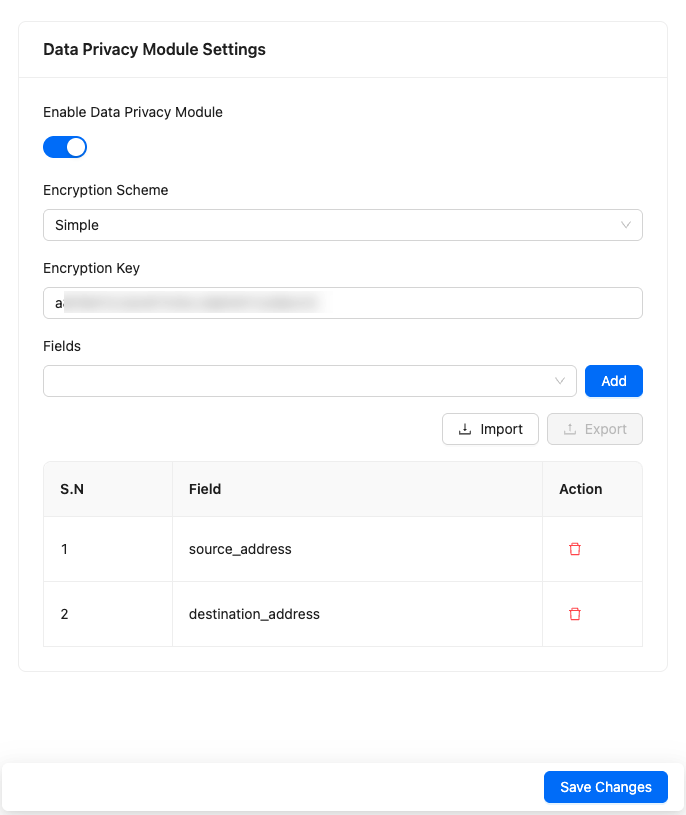
Click Save Changes.
Requesting Access
Go to Settings >> Configuration from the navigation bar and click Data Privacy Module.
In My Request, click Add.
Select the Field Name.
In Value Type, select:
All Value to decrypt the field for all logs (e.g., all
source_addressfields).Encrypted Value to decrypt a specific encrypted field value. Enter it in Value.
Plain Value to decrypt the specific plain value of a selected field.
Click Add. You can change your request later if needed.
In ACCESS TIME INFORMATION:
Select the start date and end date for extracting decrypted data
In Grant Access For, select how long you want to view the decrypted data
Add the Description to the requested field(s)
Click Save. The request is sent and added to the My Request list.
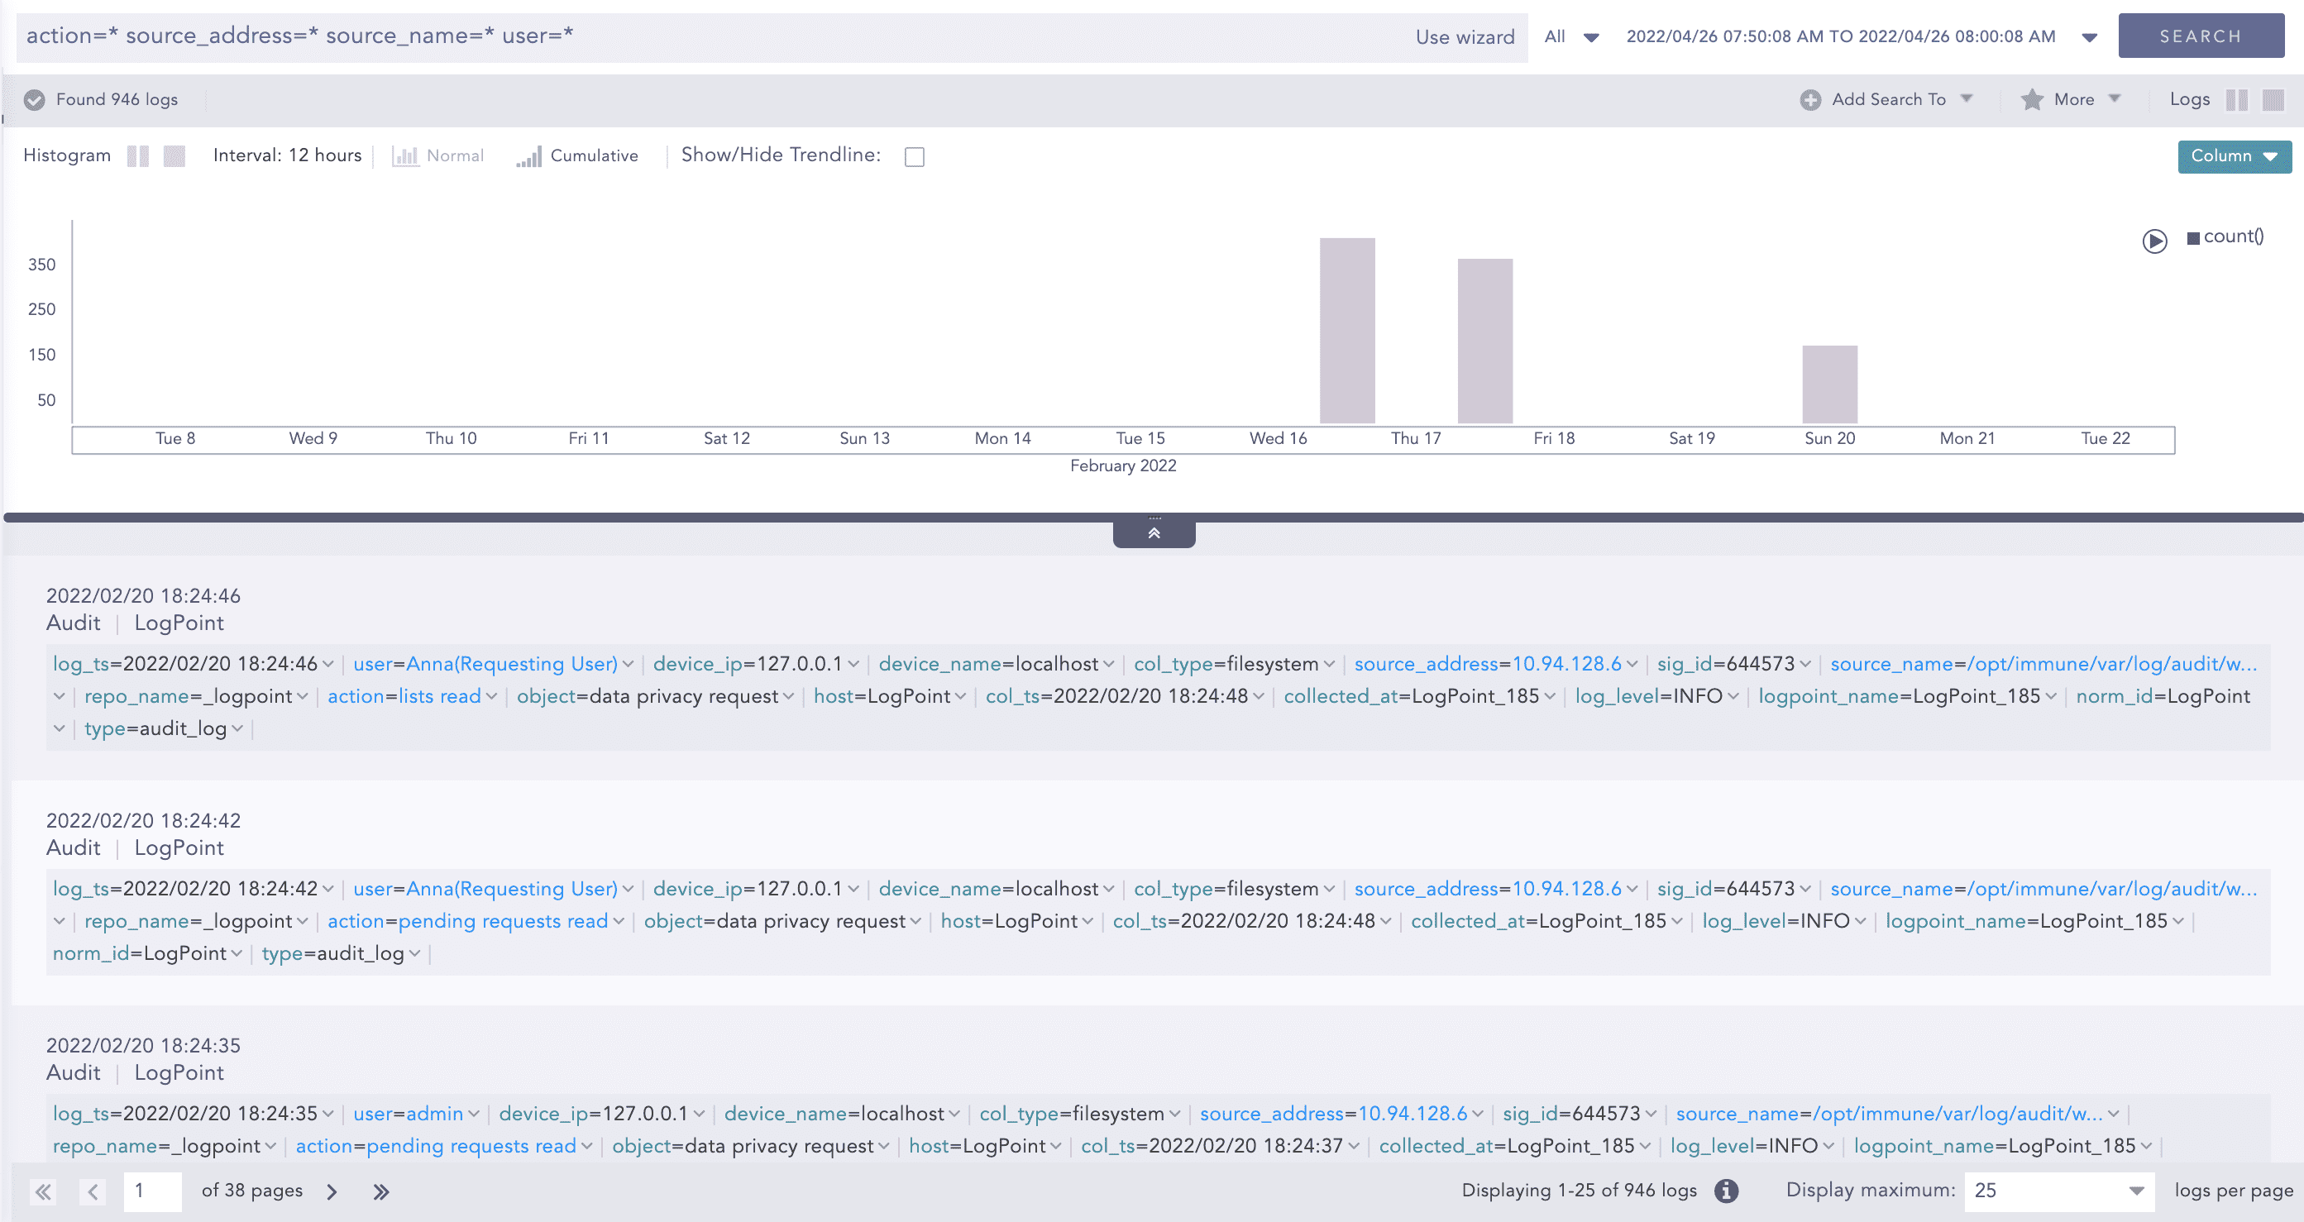
Viewing Decrypted Data
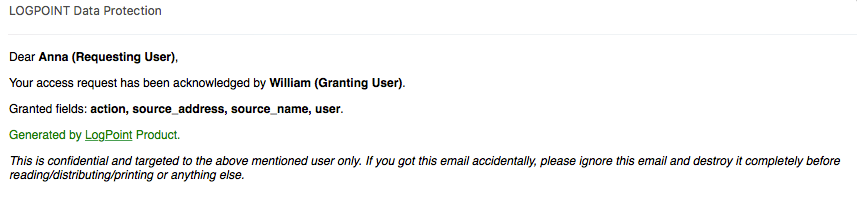
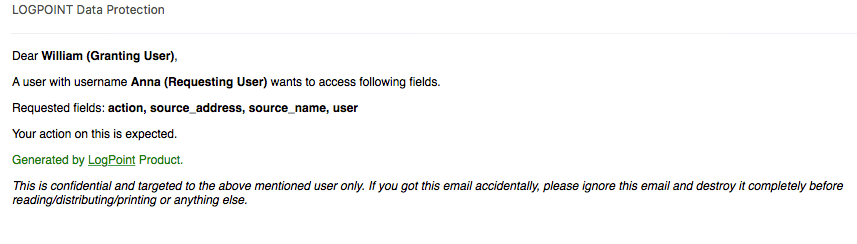
After your request is approved, you receive an email.
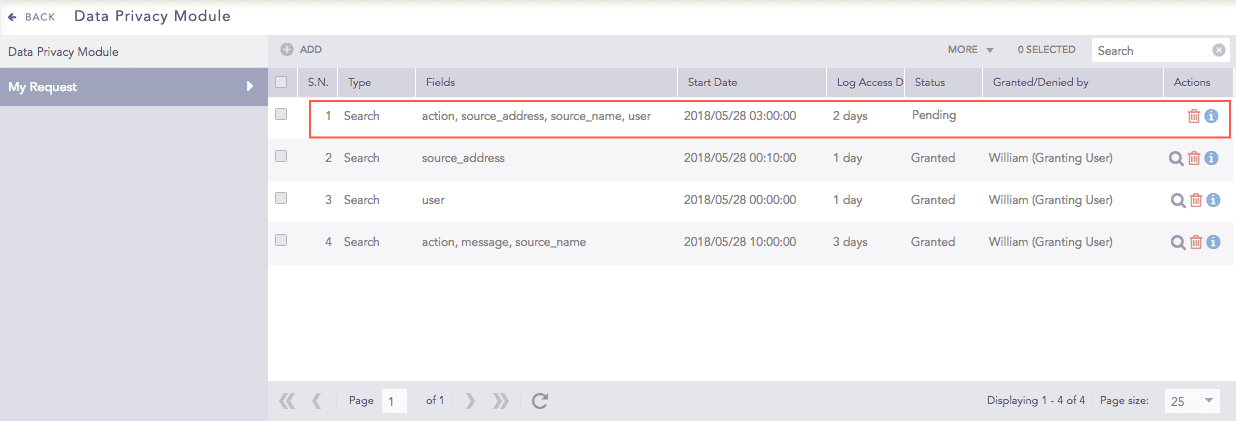
In the navigation bar, go to Settings >> System Settings >> Data Privacy Module.
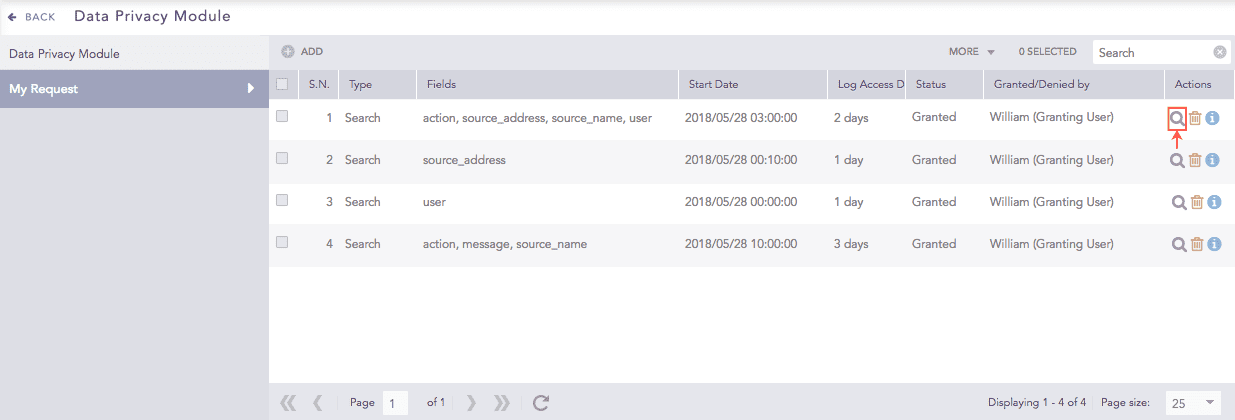
Click My Request.
In Status, look for Granted. The request could also be pending if an approver hasn't acted yet.
Click the Search icon next to the request to view results.
Receiving a Data Decryption Request
You will receive an email notification when there is a decryption request to review.
Accepting / Denying a Request
All requests to retrieve Data Privacy decrypted fields are listed under Pending Request.
Go to Settings >> Configuration from the navigation bar and click Data Privacy Module.
Click Pending Request.
Type: Reason for access (Report-Adhoc, Report-Scheduled, Search).
Fields: Which fields were requested.
Start Date: Timestamp of initial data decryption.
Log Access Duration: Timeframe of access to decrypted logs.
Status: Current request status.
Requested By: Username of the requester.
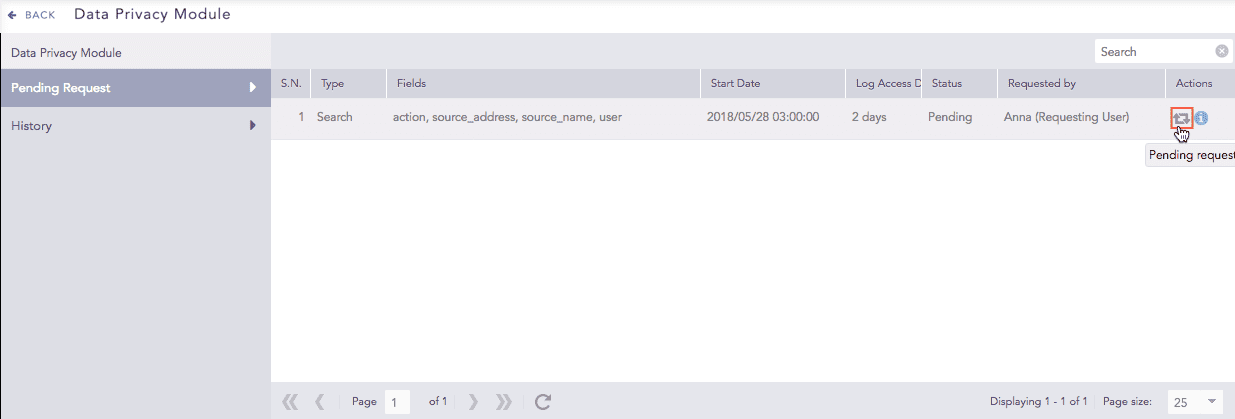
In Actions, click the Pending Request icon.
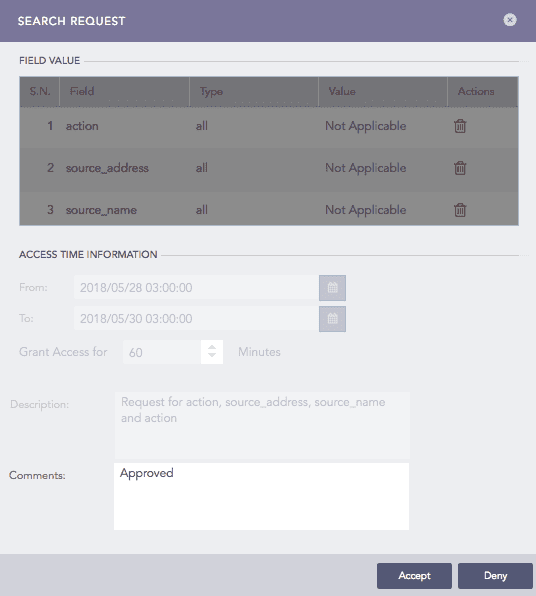
Search Request lists all the details.
Use Comments to add one. If you intend to deny the request, a comment is mandatory.
Click Accept to approve the request or Deny to reject it.
Deleting a Request
Go to Settings >> Configuration from the navigation bar and click Data Privacy Module.
To delete:
a single request, select it in the list and in the Actions column click the Delete icon.
multiple requests, select the ones to delete and click the MORE dropdown. Click Delete Selected.
all the requests groups, click the MORE dropdown and click Delete All.

Click Yes.
Export & Import Requests
You can export and import access requests between different Logpoint instances or servers for the Data Privacy module in .csv format.
Exporting Requests
Go to Settings >> Configuration from the navigation bar and click Data Privacy Module.
Click the Export button.
Choose the fields you want to include in the export.
Click Export to save the request details in a CSV file.
Importing Requests
Go to Settings >> Configuration from the navigation bar and click Data Privacy Module.
Click the Import button.
Select the CSV file containing the request details.
Click Import to load the requests from the file.
Audit Logs for Data Privacy
All actions related to Data Privacy (requests, approvals, denials, deletions) are tracked and recorded in the system's audit logs, providing a complete history of activities for compliance review.
Was this helpful?